Jump to content


Photo
- - - - -

Coachbuilt Oyler Contessa (The Countess)


  • Please log in to reply
300 replies to this topic

#16 spraybeater

spraybeater

    Speeding Along Now

  • Members
  • PipPipPipPipPip
  • 468 posts
  • Location: west yorkshire
  • Local Club: Mcr

Posted 26 January 2017 - 11:16 PM

Thanks again for the comments! I am quite used to sourcing parts done it most of my working life


hopefully will be able to keep dealer sticker on rear window, the rear wiper was fitted by Oyler.


Got to admit the grille is not my favourite am sure it was fitted by Oyler my preference would be

to make it as the one in the brochure! 


Going to Bingley on Sunday armed with a piece of the vinyl from the roof have used Optimise 

for a headliner. I did speak to someone on Newton stand last year won't say on open forum

the reaction on the vinyl roof.


On the progress front got into it with DA on the wing/A panel seam just to see what I am

up against  with usual mini rust areas,


 DSC_0001_zpscjtumrbu.jpg

DSC_0002_zpsg2o2jr5p.jpg

The weld join needs new A/panel and repair to top of wing and the scuttle quite a bit of filler had been used by the

whose ever did the de-seam looks like the original Catalloy bl**dy hard to sand, being coach builders thought they

might have lead filled it!!!! good chance will be when I redo it.


DSC_0003_zps0by0fexe.jpg

DSC_0005_zpsuce8doxx.jpg

DSC_0006_zpsdjylaptn.jpg

DSC_0005_zpsuce8doxx.jpg

started checking usual rust areas trying to assess what the panel bill going to amount to!!!


Thanks for looking and comments 


#17 panky

panky

    Camshaft & Stage Two Head

  • Members
  • PipPipPipPipPipPipPipPip
  • 1,776 posts
  • Location: Cheshire
  • Local Club: Northwest Casual Classics

Posted 26 January 2017 - 11:44 PM

Have you tried these for the vinyl


http://www.martrim.c...yl-hooding.html


I'll be getting some Everflex to re-do my Britax sunroof from them.

Great project by the way.


#18 spraybeater

spraybeater

    Speeding Along Now

  • Members
  • PipPipPipPipPip
  • 468 posts
  • Location: west yorkshire
  • Local Club: Mcr

Posted 26 January 2017 - 11:49 PM

Have you tried these for the vinyl


http://www.martrim.c...yl-hooding.html


I'll be getting some Everflex to re-do my Britax sunroof from them.

Great project by the way.

Thanks for the heads up on them looks quite interesting not so far away will give them a bell


#19 Ben_O

Ben_O

    Mill Road Garage

  • Paint Doctor
  • PipPipPipPipPipPipPipPipPipPip
  • 9,781 posts
  • Location: Isle of Wight

Posted 27 January 2017 - 08:11 AM

It's looking really solid so far.


What a relief.


Oh and you have the same DA as me...  ;D


Ben


#20 spraybeater

spraybeater

    Speeding Along Now

  • Members
  • PipPipPipPipPip
  • 468 posts
  • Location: west yorkshire
  • Local Club: Mcr

Posted 08 February 2017 - 08:07 PM

Thanks for the comments! and views , as said Ben a relief to see as the work continues that

it doesn't seem to bad rust wise , so a minimal panel bill so far looks like 2 A panels and 2 sills,

as the P/O had over sills fitted that he purchased and was charged £450 to fit along with a small

repair to O/S front inner sill in 2013 ??? they were supposed to have removed the old sills and

wax oil inside (will soon find out) . So back to it after a couple of days up in Scotland got all the

seats and other bits of trim removed cleaned up and stored away for the time being,


DSC_0001_zps8wnyci2z.jpg

DSC_0002_zpsycep0kdm.jpg

DSC_0003_zpsfuafbhjb.jpg

DSC_0004_zpsijw08btx.jpg

some shots of N/S inner sill and inside companion box , this should clean up and need a couple o repairs, as said will need

to wait till sill is removed to be sure,


DSC_0005_zpsb2eu4azs.jpg

DSC_0006_zpsx76uptr9.jpg

DSC_0007_zpsj3vgpatm.jpg

DSC_0008_zps0par1sne.jpg

same for O/S will also need to remove bogged up patch on font inner sill,


DSC_0009_zpsxvxtrjsh.jpg

centre cap of steering wheel ,


DSC_0010_zpsbxzcohfc.jpg

how many mini restos have to deal with wood worm as well as tin worm HaHa!!


DSC_0010_zpsbxzcohfc.jpg

some of the coach builders features inside the companion bins,


DSC_0013_zpsyoj1dqkf.jpg

rear arm rest with ash tray,


As for the D/A been a trusty work horse earned its keep over the years, but I recon will need to use some paint stripper on

this as the paint is quite thick and in very poor condition,

DSC_0026_zpsdluhbyca.jpg

one of the bonnet looks to me like someone used some Barcoat on it and its cracked up! seen this happen in the past.


More to follow, and again hope its of some interest , still hoping that an otherwise Contessa will turn up somewhere.


#21 MrBounce

MrBounce

    Up Into Fourth

  • TMF+ Member
  • PipPipPipPipPipPipPipPipPip
  • 2,563 posts
  • Location: The Manroom in Ipswich

Posted 08 February 2017 - 10:22 PM

Am following this! I had never heard of a Contessa until recently. Am amazed how it hasn't deteriorated too much over the years. So much potential!


#22 domdee

domdee

    Formally known as dominicdee

  • Members
  • PipPipPipPipPipPipPip
  • 1,183 posts
  • Location: hull
  • Local Club: hull clubs on FB

Posted 09 February 2017 - 12:43 PM

hope this goes well!


#23 mattmiglia

mattmiglia

    Super Mini Mad

  • Members
  • PipPipPipPipPipPip
  • 515 posts
  • Location: West Midlands

Posted 09 February 2017 - 12:43 PM

Love this! Really special car and can't wait to see it in same condition as the Sprite

#24 mab01uk

mab01uk

    Moved Into The Garage

  • Members
  • PipPipPipPipPipPipPipPipPipPipPip
  • 11,803 posts
  • Local Club: Mini Cooper Register

Posted 13 February 2017 - 11:37 PM

Hi 'spraybeater' great to see you have started the restoration of this very rare surviving Oyler Coachbuilt Mini..........I will be following this thread with great interest. (Have also posted a link update on the Mk1 Forum).

http://mk1-forum.net...php?f=5&t=14209


Edited by mab01uk, 13 February 2017 - 11:42 PM.


#25 JC T ONE

JC T ONE

    Stage One Kit Fitted

  • Noobies
  • PipPipPip
  • 80 posts
  • Local Club: no

Posted 14 February 2017 - 11:28 AM

Hi there :) 


Geezus that car is in good condition - even have its floor assy number :) and no rust around the headlight mounting plates.


Leather looks to be in super good condition too, and I am SOO not envy at that UNIPART tool KIT ;) 


Looking foreward to the finished article. 


Jens Christian


#26 spraybeater

spraybeater

    Speeding Along Now

  • Members
  • PipPipPipPipPip
  • 468 posts
  • Location: west yorkshire
  • Local Club: Mcr

Posted 14 February 2017 - 11:47 PM

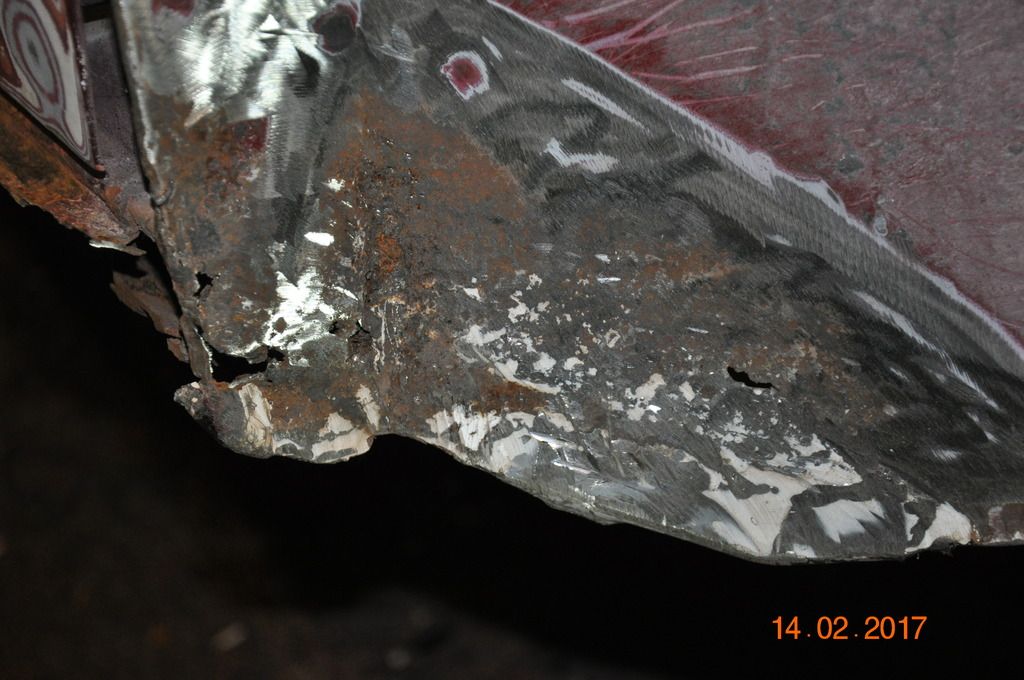
Once again thanks for the comments and views, as can be seen the condition of the body work

never ceases to amaze me! it certainly shows that application of Cadulac underbody treatment

helped + I think the car has been dry stored for some of its life . I used to do a lot of body repair

work for a local BL dealer back in the day whom got the cars he sold done with a similar product

can't remember which! i was always cursing him , for it dripping on me when fitting new panels,

Anyway on with the story,

DSC_0001_zps5mz8gagx.jpg

DSC_0002_zps5vqr8adj.jpg

DSC_0003_zpsex3nd7ox.jpg


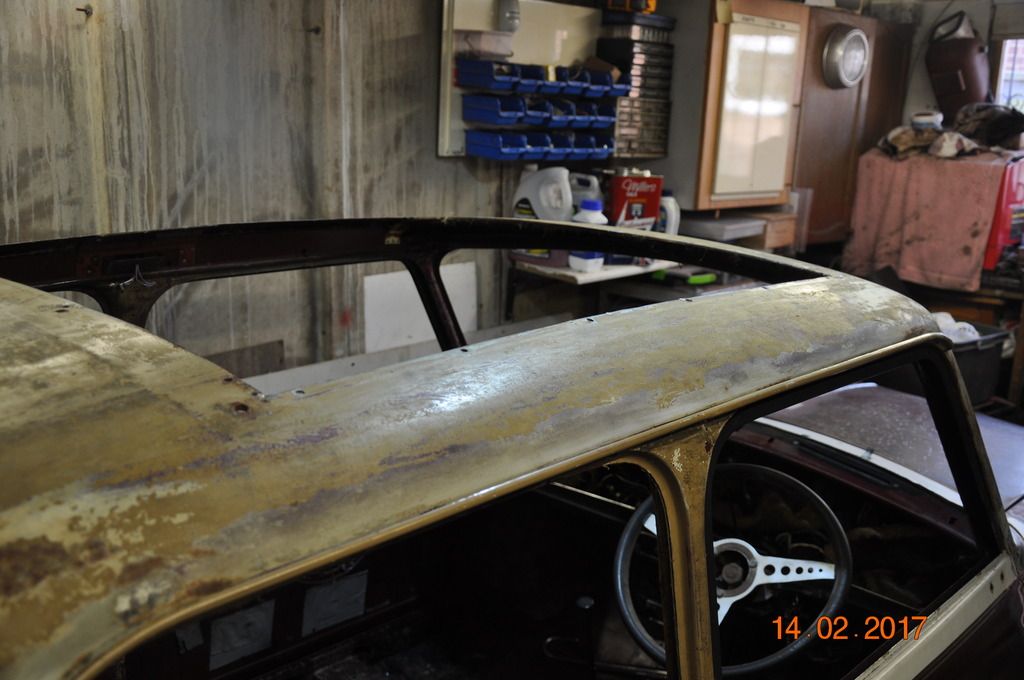
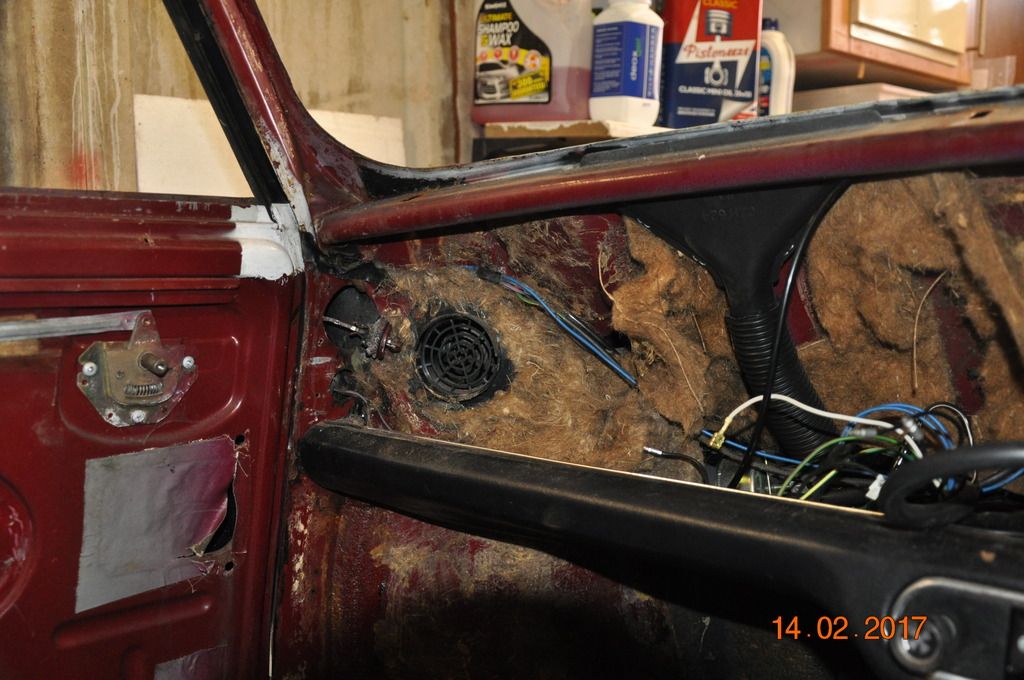
Got it all stripped as far as I can go at the moment! got to keep it mobile as need to move in and out of garage! got to keep

the Sprite inside at night for Insurance.

DSC_0003_zpsex3nd7ox.jpg

DSC_0002_zps5vqr8adj.jpg

DSC_0004_zpsgptf4vst.jpg

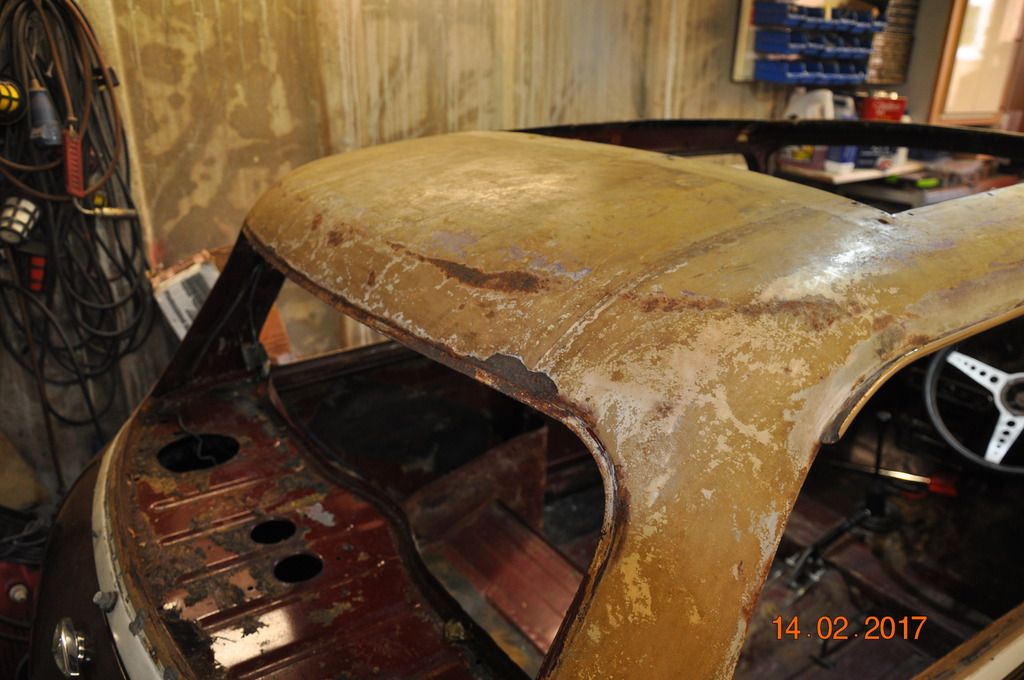
Some mostly surface rust on roof when the venal was removed! I think the coach builders could have used a better primmer

as the final must be a bit porous,

DSC_0005_zpsceiuavk3.jpg

a shot of the position of the coach lines that were brush applied with gold leaf!! will need to find someone to redo when the

time comes ( never did master the technique despite having seen it done many times by an expert) HaHa,

DSC_0006_zps9raakfgi.jpg

DSC_0007_zps5zb13bfp.jpg

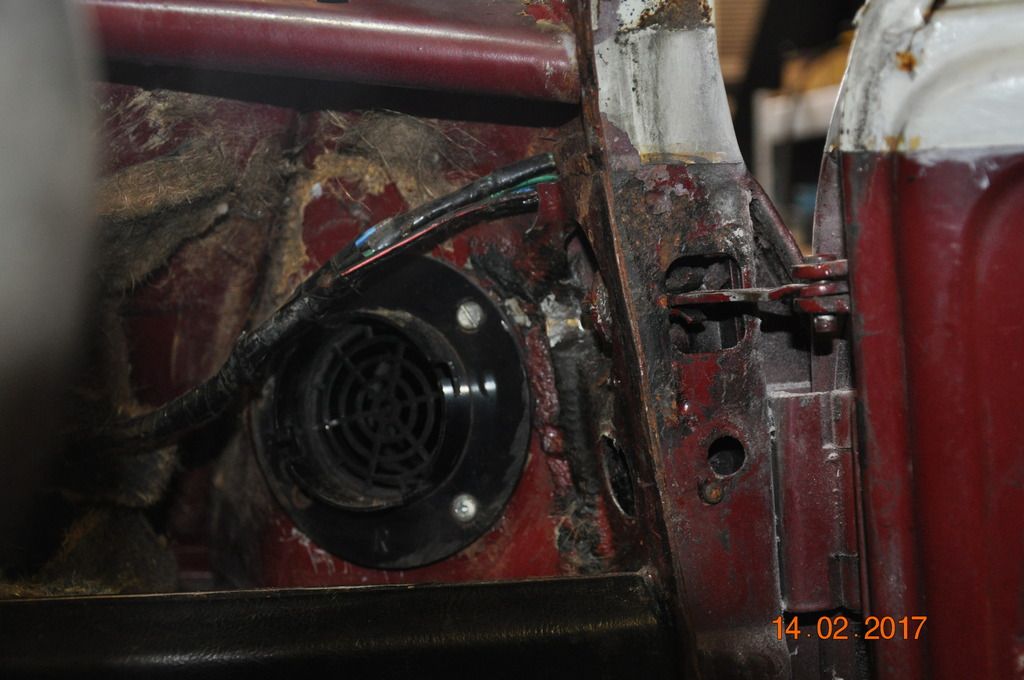
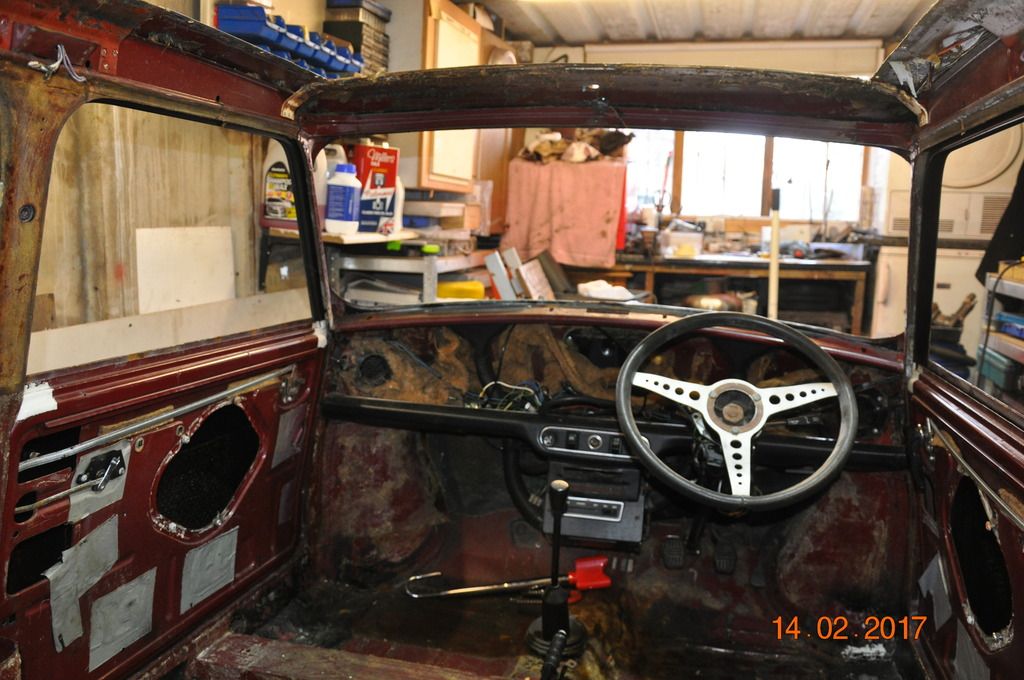
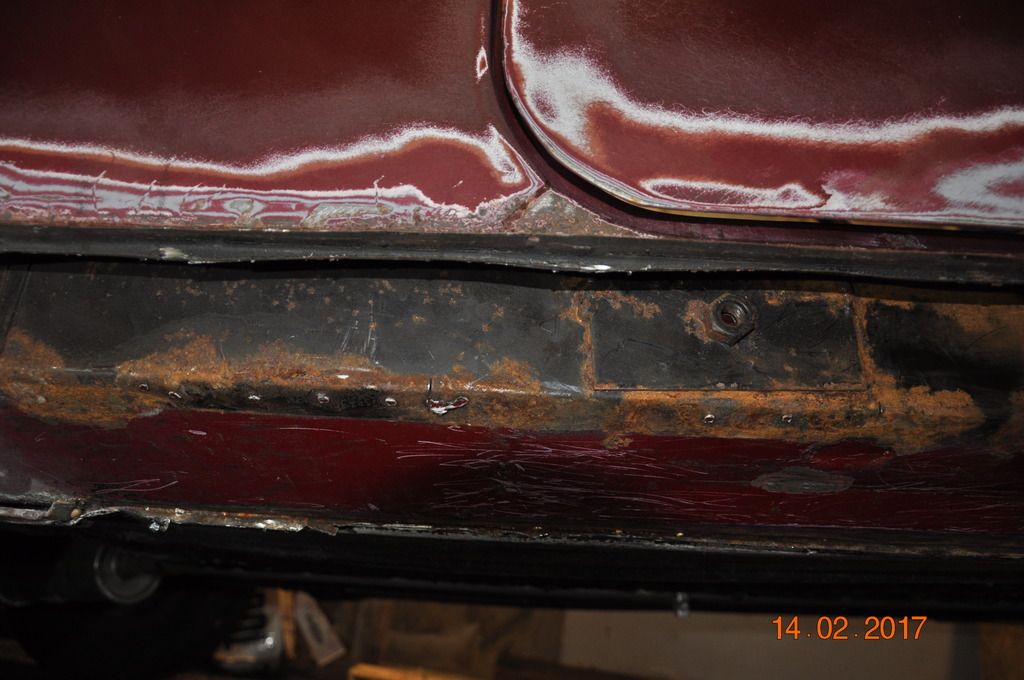
solid looking round the air vents and inner A post,


DSC_0008_zpstwkaharn.jpg

DSC_0009_zpsnsdd0fqx.jpg

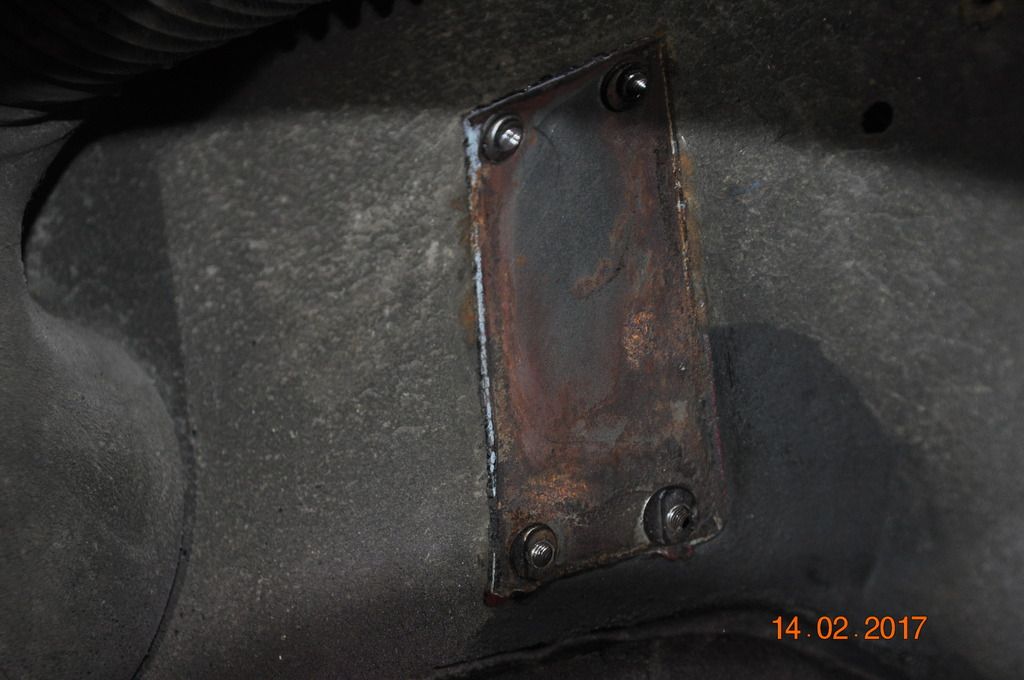
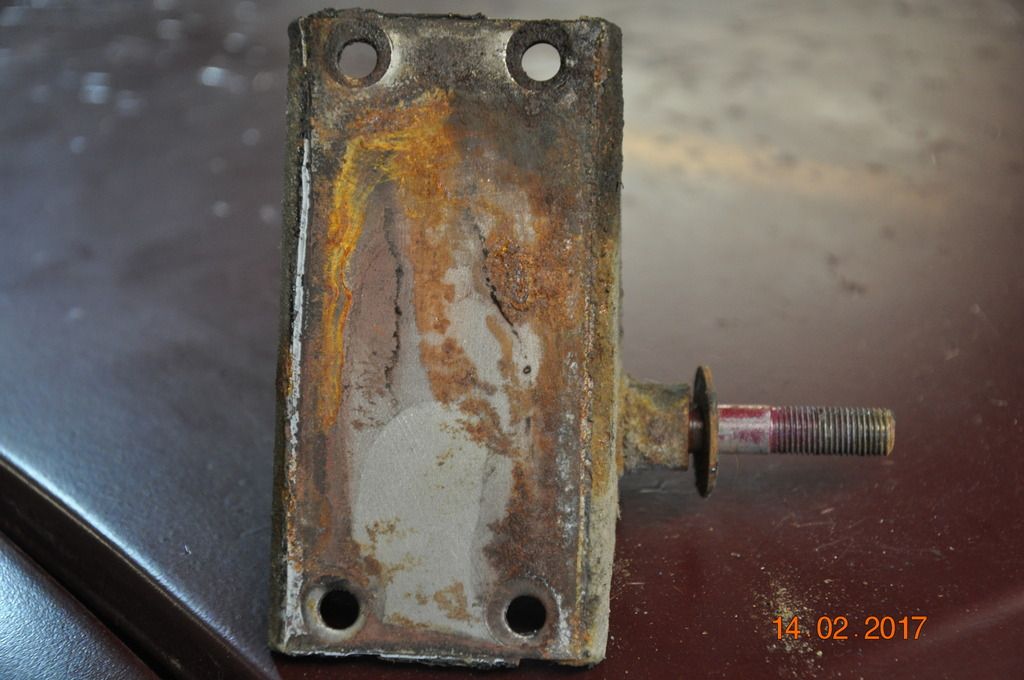
just some surface rust on usual troublesome areas behind shocker mounts, What a pity BL fitted these over bare metal,


DSC_0010_zpspapyhs8w.jpg

DSC_0011_zpspah4o6zz.jpg

DSC_0012_zpsdxkffy3t.jpg

DSC_0013_zpsof4ztnec.jpg

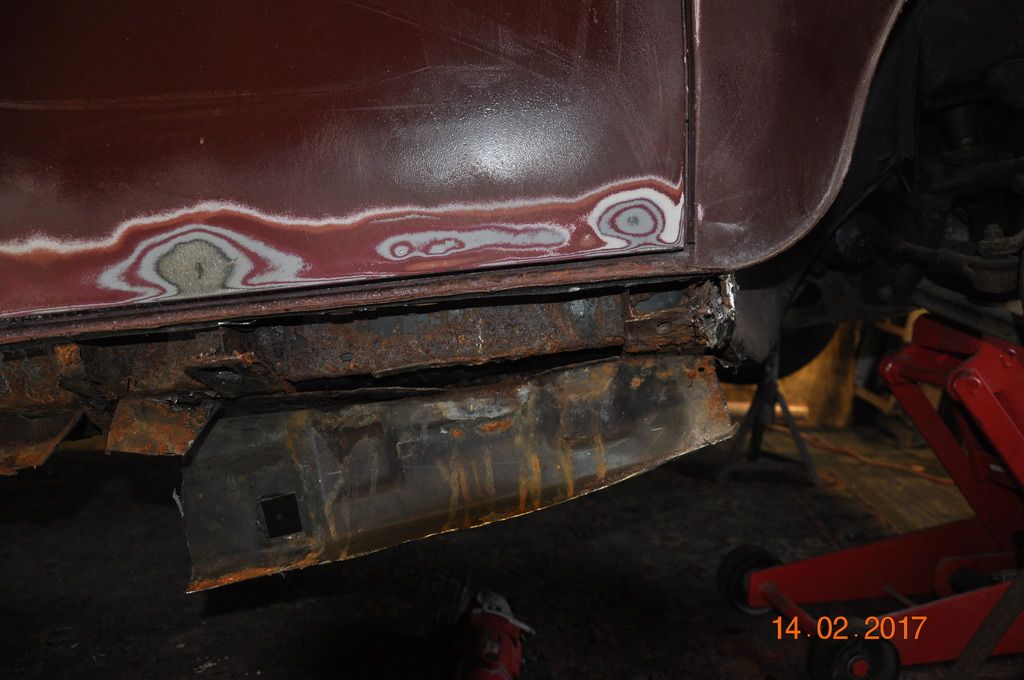
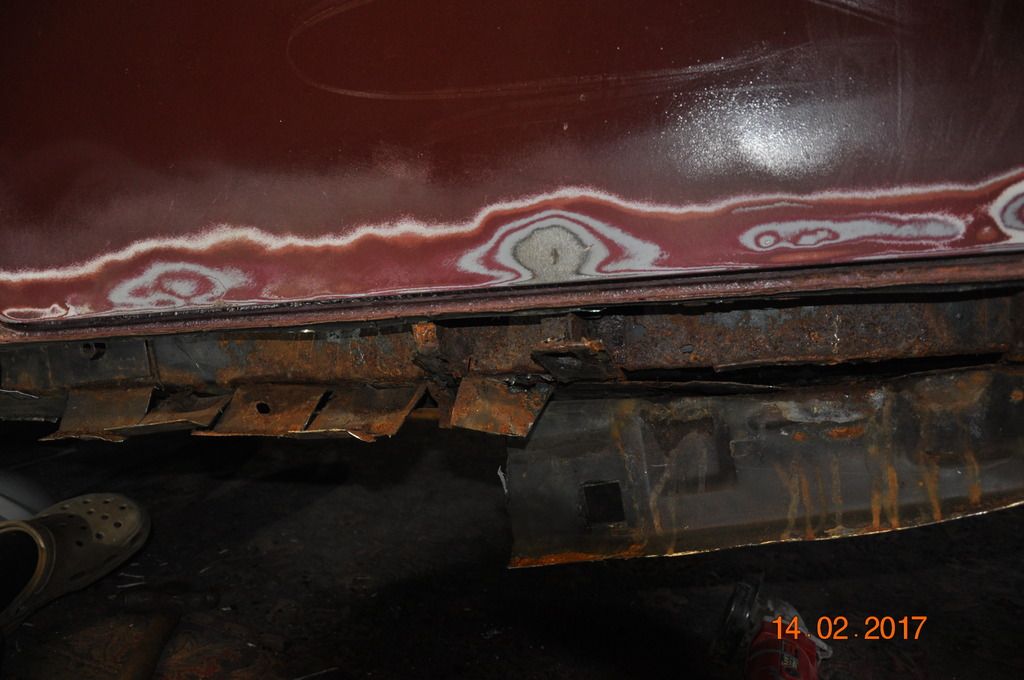
when over sill removed found no wax oil inside, most of the original sill was still intact, and most of inner sill not to bad,

DSC_0014_zpsr26kdgc7.jpg

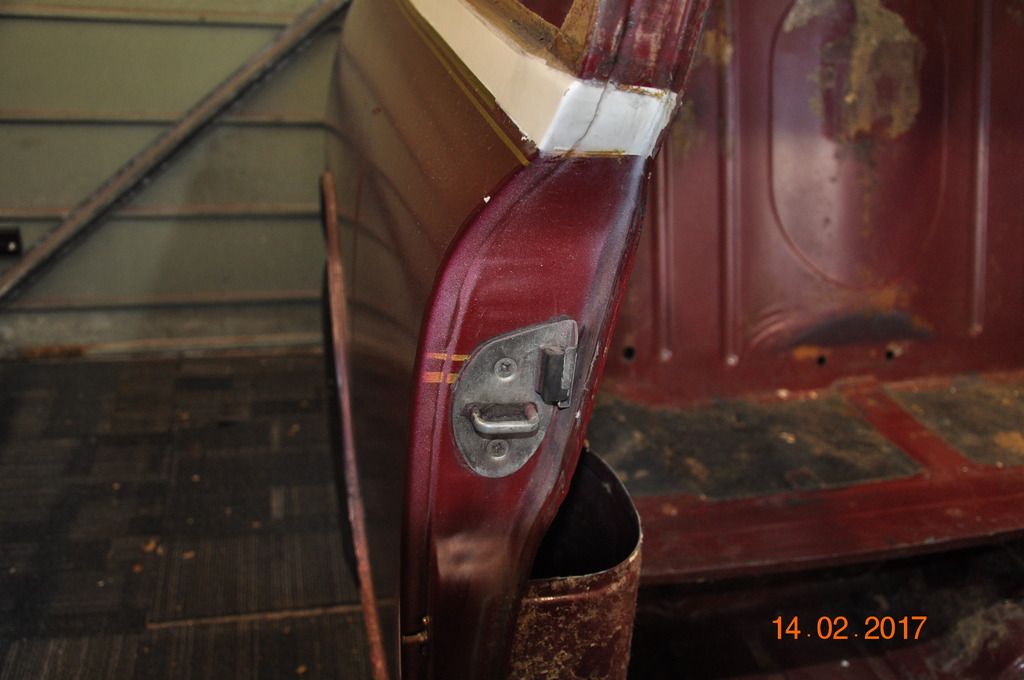
lower flitch will need a repair ,

DSC_0015_zpswpfzejni.jpg

DSC_0016_zpsgdkrll2l.jpg

DSC_0017_zpsq75kgdjc.jpg

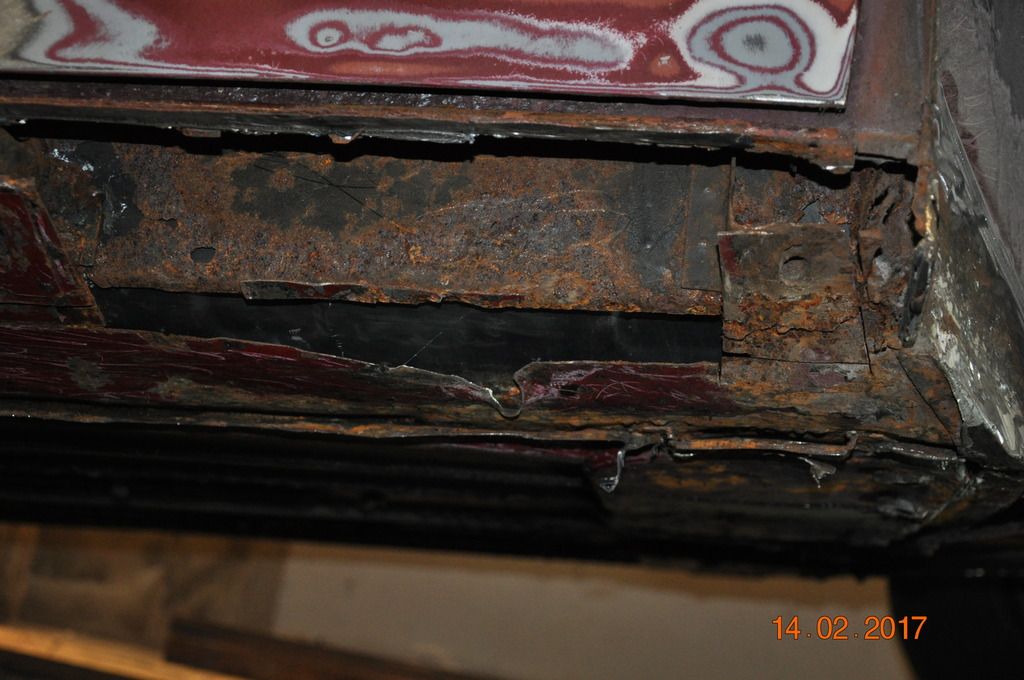
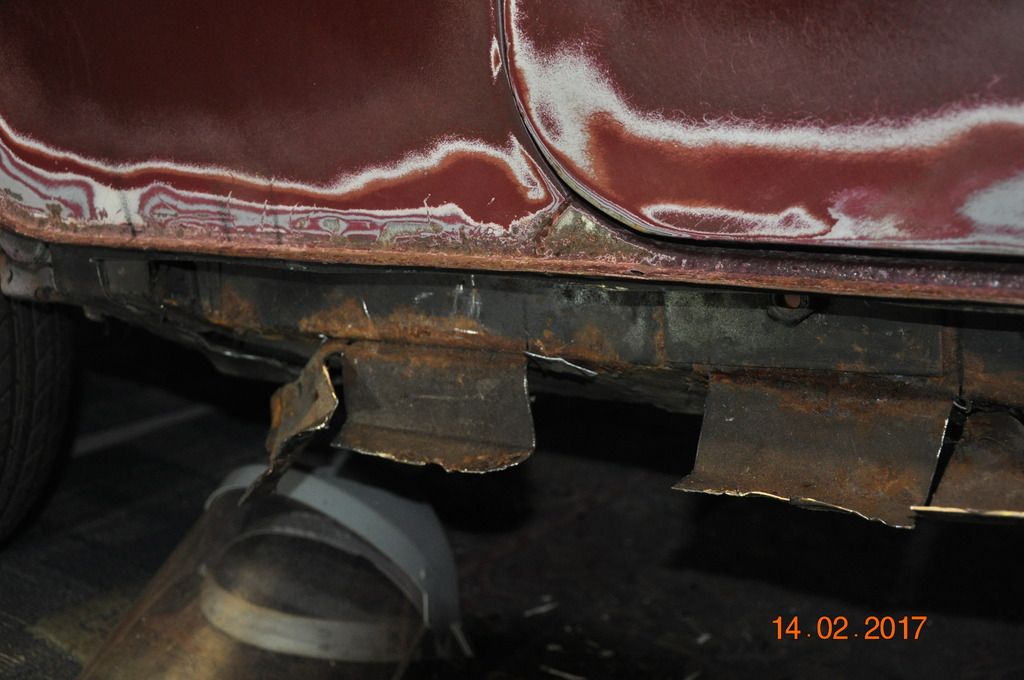
removed the original sill, need to clean up traces o spot welds, even after 50yrs in the trade still hate drilling out spot welds

when I don't need to,

DSC_0018_zps8hvfdwxc.jpg

DSC_0018_zps8hvfdwxc.jpg

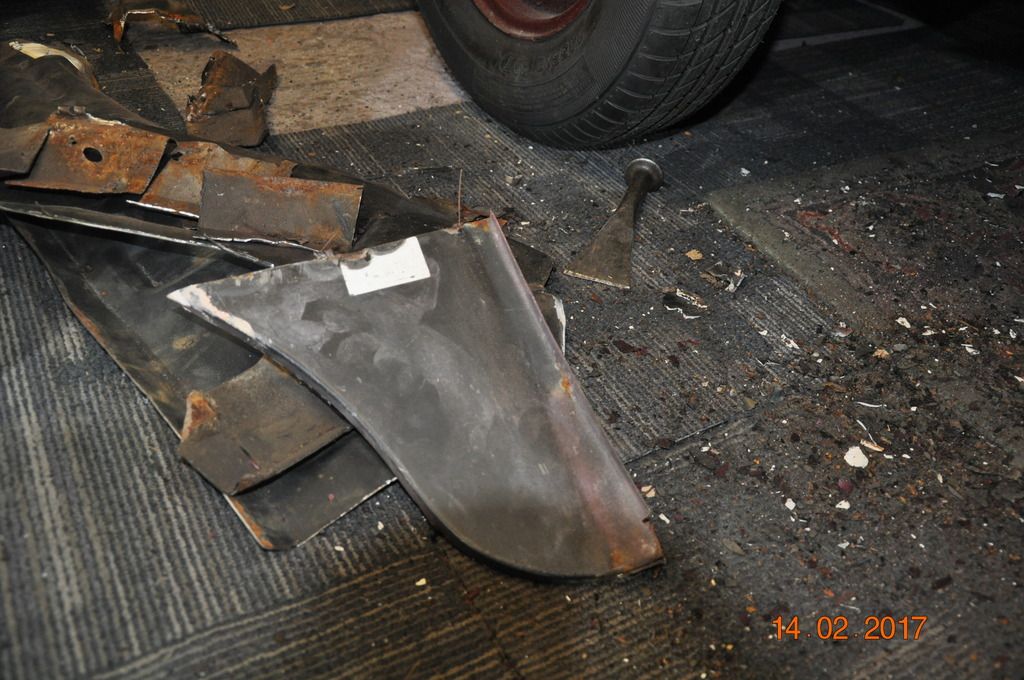
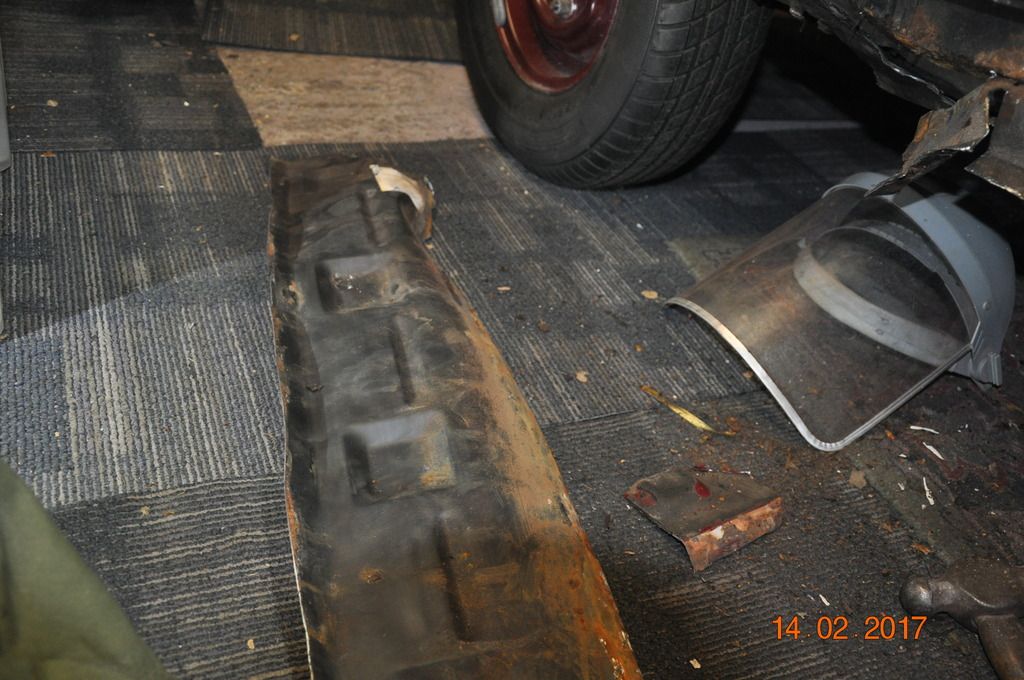
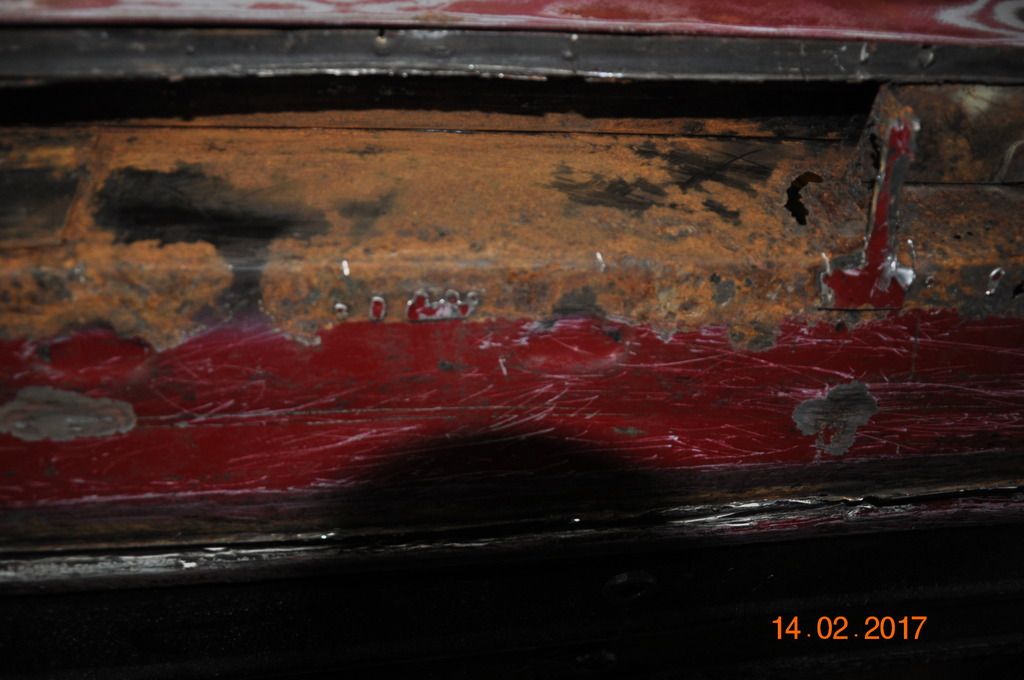
this repair half A panel was held!!! on with 3 1/8th bits of bird poo weld, having said that it would have been a major job to

replace complete A panel.

that it up to date for today, thanks for looking.


Hi 'spraybeater' great to see you have started the restoration of this very rare surviving Oyler Coachbuilt Mini..........I will be following this thread with great interest. (Have also posted a link update on the Mk1 Forum).

http://mk1-forum.net...php?f=5&t=14209


Thanks for that ,mab01uk, and I must thank you for your original response on this ! as that was the reason I 

purchased it, and although its taken a year before starting restoration I certainly don't regret purchasing.


Frank


#27 mab01uk

mab01uk

    Moved Into The Garage

  • Members
  • PipPipPipPipPipPipPipPipPipPipPip
  • 11,803 posts
  • Local Club: Mini Cooper Register

Posted 15 February 2017 - 07:52 AM


Thanks for that ,mab01uk, and I must thank you for your original response on this ! as that was the reason I 

purchased it, and although its taken a year before starting restoration I certainly don't regret purchasing.


Frank


You hear many Mini and classic car enthusiasts with stories and regrets on how they missed out or hesitated to buy a rare or unique vehicle in the past (including me!) at least you can say you actually purchased one! :lol:

As others have said the bodywork seems to have survived well in many of the usually expected Mini rust areas which must be for the reasons you mentioned. If only they had factory rust proofed all Mini's to that standard but of course cost was the main reason on what was supposed to be a cheap to buy car.


In the 1970's I remember a similar aftermarket process to Cadulac of wax injection for new cars was marketed by 'Ziebart'  which mean't that some Mini's which were treated actually went to the scrapyard due to mechanical problems rather than terminal rust!

Ziebart seem to be still going in the USA:-

"Automobile manufactures are making better vehicles and are providing longer warranties…including rust-through warranties. There’s really no need to purchase a rustproofing package unless you plan on keeping your vehicle for 10+ years. Franchises like Ziebart were left in the dust. Or, were they?"

http://www.ziebart.c...rust-protection


Martin


Edited by mab01uk, 15 February 2017 - 07:54 AM.


#28 spraybeater

spraybeater

    Speeding Along Now

  • Members
  • PipPipPipPipPip
  • 468 posts
  • Location: west yorkshire
  • Local Club: Mcr

Posted 24 February 2017 - 10:46 PM

Thanks again for the comments and views! just got back to working on this, had to keep

her indoors happy and redecorate the kitchen, (things we have to do for a quiet life HaHa.

Had a quick visit to Minispares North and picked up some panels , I think more or less  the

only ones that I will need ? 2 sills,2 A/panels O/S front floor section 2 jacking points and

inner slinging brackets Jurys still out on the door steps at the moment!


I cleaned up and repaired the damaged front panel treated with Deox and gave it a coat of

epoxy primmer, will be sanded down again when it comes to paint prep,


DSC_0001_zpsit0ndos1.jpg


DSC_0002_zpswg77sejg.jpg

DSC_0003_zpsakm1ibra.jpg

removed remains of A/panel! flange requires a couple of repairs,


DSC_0004_zpseoss5me6.jpg

front end of floor and flitch,  have made a part for the flitch,

DSC_0005_zpsn6cnffvo.jpg

rear end of inner sill in remarkable condition did remove subframe mounting bolts to make sure1 will be taking subframe

off later, still got to keep it mobile at the moment ,


DSC_0006_zps4fe8ilxi.jpg

cleaned the old welds from where the over sills had been fitted took a bit of work (the guy that welded them on could

weld!!

DSC_0009_zpscyxg1lua.jpg

DSC_0010_zpsflstx0te.jpg


have now treated all areas with deox next job to get it primed and painted inside the sill before fitting,


DSC_0011_zpsrsebqude.jpg

mocked up the new parts ready for marking out for plug weld hole drilling .

More to follow.


#29 Ben_O

Ben_O

    Mill Road Garage

  • Paint Doctor
  • PipPipPipPipPipPipPipPipPipPip
  • 9,781 posts
  • Location: Isle of Wight

Posted 25 February 2017 - 11:16 AM

Its remarkable how well this has survived.


Here's to more nice surprises  :highfive:


#30 spraybeater

spraybeater

    Speeding Along Now

  • Members
  • PipPipPipPipPip
  • 468 posts
  • Location: west yorkshire
  • Local Club: Mcr

Posted 03 March 2017 - 09:36 PM

Once again thanks for comments and views, as said Ben it seems to have survived very well

so far hasn't  thrown up any real surprises of the bad kind ! only good ones! keeps the bill

for panels low.

Anyway on with the story, retrieved my bracing frame from its storage and fitted it in maybe 

a bit over kill but why take chances when its there anyway,


DSC_0001_zps8ei00cp9.jpg

DSC_0002_zpstqkg7dmv.jpg


started cleaning up the floors and cutting out what rust there was,


DSC_0004_zpsaamgzg5y.jpg


welded in jacking point and primed inside the new sill,


DSC_0006_zpsugrsfwyy.jpg

DSC_0007_zps66ncjroc.jpg


cut out affected area from floor and welded in section to lower flitch,


DSC_0008_zpsvlauw6q1.jpg


on the tool side got new lenses for my welding mask including a 1.75 magnifying inner, defiantly helps my old eyes see

welds better!


DSC_0009_zpsmdvfxhyb.jpg


floor and inner sill welded in ground back and primed and painted inside used zinc based primer first ,


DSC_0010_zpsldfzox1b.jpg


while I was waiting for the paint to dry started to clean up under wing which turned up this not really unexpected as

this is normaly rusted even without the heat that was generated when the de-seam was done obviously they didnt

manage to treat inside the scuttle with wax, not a problem to repair just a bit awkward when the wings are on


DSC_0011_zpsbca0pcwy.jpg

DSC_0012_zpsu5uvxxpc.jpg


sill lined up and clamped on ready for welding, was meant to be the last job for today! but ran out of gas, of all times at

3.45pm on a Friday afternoon  :bah: my supplier is only 10mins away but they close early on Fridays.

So will need to wait till Monday, 

more to follow. Thanks for looking


0 user(s) are reading this topic

0 members, 0 guests, 0 anonymous users