Great progress and really neat work.
I am at a similar stage in my project and am planning to buy a spot welder. Please can you tell me the make and model of yours as it appears to work well. Thanks.
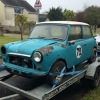

1972 Mini 1000 - Nut And Bolt Restoration.
Started by
SamG
, Apr 16 2017 03:36 PM
109 replies to this topic
#16

Racer Dan
-

- Noobies
-

- 4 posts
Starting My Mini Up
- Location: West Midlands
Posted 23 April 2017 - 10:04 AM
#17
SamG
-
- Noobies
-
- 88 posts
Stage One Kit Fitted
- Location: Somerset
Posted 29 April 2017 - 07:33 PM
Hi Pete. Ive only just found the 'goldilocks' settings, and it seems to depend on a few factors. My setting are -I have the same spot welder but my spot welds don't look as good as yours.
Can you tell me how did you set it up ?
Pete
Weld type - pulse
Metal thickness - 1.2mm + 1.2mm
Timing - default
What I found most important is that you need to ensure both seam surfaces are making a really good contact with each other. I use molegrips to squeeze the two seams together and close the gap between them so the current can run nicely.
After grinding the surfaces to bare metal, I spray this fully conductive Weld-Thru Primer on both surfaces to get some extra protection in there too.http://www.rust.co.u...aerosol/p512960
Hope that helps!
Thanks for that.
Two more setup questions for you:
How did you set the distance between the two copper points,
How did you set the spring pressure in the handle
Thanks
Pete.
EDIT - I made a mistake in my previous post! Here's the settings I currently use. Sorry for misleading you!

With regards to the spacing of the arms, its set at about 1mm. To set it up I'm afraid we just used trial and error! We had a couple of steel off-cuts that were the same thickness as the new M-Machine panels so we just tried various different settings and configurations, and then attempted to split the welds as you would any normal weld on the car. Here's the setting on the handle...

My technique is to rest the fixed probe on the surface of the metal and gently close the handle until the weld has initiated. Expect some splatter, happens nearly every time. Once the welder has finished its cycle, keep the handle pressed for a couple of seconds and the release. let me know how you get on!
Edited by SamG, 29 April 2017 - 07:48 PM.
#18
SamG
-
- Noobies
-
- 88 posts
Stage One Kit Fitted
- Location: Somerset
Posted 29 April 2017 - 07:37 PM
Great progress and really neat work.
I am at a similar stage in my project and am planning to buy a spot welder. Please can you tell me the make and model of yours as it appears to work well. Thanks.
Thanks!
It's a Clarke CSW13T. Does work very well once it's set up correctly, just takes a bit of honing in at the beginning but is well worth it!
#19
Steve220
-

- Members
-
- 4,883 posts
Up Into Fourth
- Location: Shropshire
- Local Club: RAF Mini Club
Posted 29 April 2017 - 08:14 PM
Great work!! It's clear i haven't got enough reinforcement between my A and B posts to support the car when i removed the floor  You guys have done a cracking job!
#20
Avtovaz
-

- Members
-
- 1,132 posts
One Carb Or Two?
- Location: widnes
Posted 29 April 2017 - 09:15 PM
hi mate, nice work like the floor pan, if you dont mind me askign how much was it?
This is also confusing, as minis seem to be, the old floor had the newer type stick hole, and you fitted what i thought should ave been there. I find it interesting as of plans i have for a project car... thanks
#21
SamG
-
- Noobies
-
- 88 posts
Stage One Kit Fitted
- Location: Somerset
Posted 17 May 2017 - 11:20 AM
hi mate, nice work like the floor pan, if you dont mind me askign how much was it?
This is also confusing, as minis seem to be, the old floor had the newer type stick hole, and you fitted what i thought should ave been there. I find it interesting as of plans i have for a project car... thanks
Not at all, its an M-Machine assembly, just over £700 delivered if I remember correctly.
Yes, they changed over from the 'Remote' change to the 'Rod' change around the end of '72 ish. Exactly when is a bit of a grey area but most, if not all 73's have have rod change tunnels as far as I know.
Hope that helps!
#22
jagman.2003
-

- Members
-
- 1,307 posts
One Carb Or Two?
- Location: In the shed.
- Local Club: Owner of my own club of Minis
Posted 17 May 2017 - 11:47 AM
Great job, you will definitely have a solid mini after this.
My '73 has a rod change, so looks like the change over dates were around there somewhere.
#23
slidehammer
-

- Members
-
- 1,081 posts
One Carb Or Two?
- Location: Surrey
- Local Club: LSMOC
Posted 17 May 2017 - 01:22 PM
Looking really good, some quality restoration work going on there. Keep it and t6he updates up.
#24
MiniLuke
-

- Members
-
- 1,204 posts
One Carb Or Two?
Posted 17 May 2017 - 07:24 PM
Really nice work. Thanks for the updates
#25
Avtovaz
-
- Members
-
- 1,132 posts
One Carb Or Two?
- Location: widnes
Posted 17 May 2017 - 07:38 PM
Nice one!
can you settle and argument for me please with a mate of mine?! Has your car got ash trays in the rear bins?
I think it will have and the seat belts if inertia on the outside of the bins...
#26
SamG
-
- Noobies
-
- 88 posts
Stage One Kit Fitted
- Location: Somerset
Posted 17 May 2017 - 08:03 PM
Nice one!
can you settle and argument for me please with a mate of mine?! Has your car got ash trays in the rear bins?
I think it will have and the seat belts if inertia on the outside of the bins...
Yes it does! Or at least it did before I ripped the bins out back along!
#27
blacktulip
-

- TMF+ Member
-
- 6,221 posts
Crazy About Mini's
- Location: Braintree
Posted 28 May 2017 - 08:55 PM
Wow, what great work you guys have done here. Glad to see you saving another mk3. Superb!!
#28
SamG
-
- Noobies
-
- 88 posts
Stage One Kit Fitted
- Location: Somerset
Posted 23 July 2017 - 07:48 PM
I know I said I'd try and update this every month, but not a huge amount has happened since May. Work has been slowed by life getting in the way a bit, a couple of holidays, a pregnant Wife and a poor work ethic have meant I've not been as productive as I should have been. Here's what I have achieved...
Managed to get both arches finished off with the little closing panels to the floor welded in.

And the view from the inside showing the spot welds to the wheel arch and the seam welds penetrating through where they mate with the boot floor...(thanks to Ellis again for the MIG welding)

Managed to get both arches finished off with the little closing panels to the floor welded in.
And the view from the inside showing the spot welds to the wheel arch and the seam welds penetrating through where they mate with the boot floor...(thanks to Ellis again for the MIG welding)
#29
SamG
-
- Noobies
-
- 88 posts
Stage One Kit Fitted
- Location: Somerset
Posted 23 July 2017 - 07:58 PM
I've also managed to get the inner sills spot welded to the door steps, so that's that little section ticked off too.


That's all for now. However, last week I ordered new -
rear quarters
companion bins
rear panel
parcel shelf
rear bulkhead
So lots of hard work over the next month or two before the baby arrives!
That's all for now. However, last week I ordered new -
rear quarters
companion bins
rear panel
parcel shelf
rear bulkhead
So lots of hard work over the next month or two before the baby arrives!
#30
SamG
-
- Noobies
-
- 88 posts
Stage One Kit Fitted
- Location: Somerset
Posted 23 July 2017 - 08:04 PM
I've also started using this primer to spray over the bare metal after ive finished welding etc. When it dries leaves a 90% zinc coating giving excellent protection against corrosion by all accounts! It'll be at least a year before the car sees any actual paint so I wanted something better than the porous Etch primer I had been using up until now!


0 user(s) are reading this topic
0 members, 0 guests, 0 anonymous users


