Jump to content


Photo
- - - - -

1972 Mini 1000 - Nut And Bolt Restoration.


  • Please log in to reply
109 replies to this topic

#61 SamG

SamG

    Stage One Kit Fitted

  • Noobies
  • PipPipPip
  • 88 posts
  • Location: Somerset

Posted 22 February 2018 - 07:14 PM

For Christmas I was lucky enough to receive some minispares vouchers from the family which was almost enough to pay for this 7.5 Cooper S brake set up. Is there a better feeling than getting nice new shiny bits in the post? I also bought new tie rods, upper arm rebuild kit, lower arm bushes and pin, bump stops, knuckle joints, ball joints, all the associated nuts, bolts, and washers and a few other bits and bobs to get the front subframe built up as soon as Im happy with the paint finish.
 
20180112_153648.jpg
 
The radius arms have also received a good clean and lick of paint and are ready to have their bushes reamed when I get back into work.
 
Ive decided to buy part used rubber cones as a temporary measure so I can get the subframes built. Brand new ones will perish and need replacing by the time the car hits the road and I didnt fancy spending £240 on new cones twice over. So Ill replace the used ones with new ones when the car is close to being ready.

Edited by SamG, 25 February 2018 - 08:49 PM.


#62 SamG

SamG

    Stage One Kit Fitted

  • Noobies
  • PipPipPip
  • 88 posts
  • Location: Somerset

Posted 22 February 2018 - 07:28 PM

This brings us up to today when I managed to steal a few hours to get up the unit a do a bit more work. A few weeks back I got the car back on the spit so I could attack all the penetration on the underside of the car. There was lots to grind down as I hadn't touched it since I welded in the boot floor and rear bulkhead. Same old process as before, grinding, painting, grinding, painting etc etc.


20180214_135103.jpg


I also cleaned off all the old paint from the bottom of the front bulkhead and painted that too.


20180222_145401.jpg


I was waiting for the car to be on the spit so I could plug weld the waist rails to the rear quarters with the help of a little gravity, but in the end it wasn't necessary. At first I didn't think the thin 45 year old waist rail metal would accept a spot welder without blowing out but to my surprise it did! Today I managed to get both sides all spot welded up, cleaned back and painted. Another little job ticked off.


20180222_145635.jpg


#63 SamG

SamG

    Stage One Kit Fitted

  • Noobies
  • PipPipPip
  • 88 posts
  • Location: Somerset

Posted 27 May 2018 - 06:17 PM

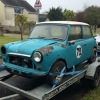
Unfortunately I've been struggling to get up to work on the mini recently due to work and family commitments, but I have managed to get the rear end pretty much finished off. I opted for a Magnum rear valance mainly due to it being less than half the price of a heritage panel. It's the first non-heritage or M-Machine panel I've gone for and although the steel is noticeably thinner, the fit was more than acceptable and it lined up well.  Along with the valance I bought M-Machines rear valance closing panel/subframe mount panel.


I didn't take any pictures of it all clamped up but it all fitted together well. Here's the O/S closing panel tacked in place ans spot welded to the valance. Note the ropey seam weld along rear of the wheel arch - I couldn't get the spot welder in there to weld all three panels together so tried to run a seam along the top, not the prettiest but it'll do for now! One of the holes for rear subframe bolt is unavoidably slightly out so that'll need re-drilling later on too. 


20180512_102127_HDR.jpg


And fully seam welded in place. 


20180512_102741_HDR.jpg


In future I'll also drill holes in the closing panel and plug weld it to the boot floor, not sure why I didn't this time, I think I just got a but of tunnel vision and overlooked it   >_< .


Here's the other one welded on too along with the valance.


20180512_114630_HDR.jpg


And a shot from underneath after welding the valance on. It was all nice and easy due to being nice new steel so the spot welder took really well to it, it was just a slow process as the duty cycle only allows 2 welds per minute. I also made sure to crank it up as it was essentially welding a 3 panel sandwich. 


20180512_114827_HDR.jpg


The only bit I'm not happy with is the the very ends of closing panels not mating with the end of the valance as you can see. I put this down to a slightly incorrect profile shape on the M-Machine closing panel but it won't be too much work to quickly knock up a piece to fill it in.


#64 SamG

SamG

    Stage One Kit Fitted

  • Noobies
  • PipPipPip
  • 88 posts
  • Location: Somerset

Posted 27 May 2018 - 06:34 PM

I've also got both of these little closing panels welded in place but don't have any pictures, I'll take some when I get back up there during the week.


20180222_145827.jpg


I've been using the shot blaster at work a fair bit as I try and get all the subframe components ready for assembly. This week I managed to blast all the old crap off the trumpets and I'm pleased with how they look. Certainly good enough to use again and not buy new ones.


Here's 2 before and 2 after going in the blasting cabinet


20180508_115204.jpg


And they are after I polished them up a bit with a sort of brillo-pad attached to a little air zapper we use at work,


20180527_192212_HDR.jpg


I've got nearly everything together now to build the front subframe apart from a pair of front hubs which I'm trying to avoid buying new. I also need to reassemble my upper arms with the minispares repait kit I bought back along, I'll try and do that this week! So once I do that and source a pair of hubs I can recondition I'll be ready to build the subframe up!


#65 johnR

johnR

    Up Into Fourth

  • Members
  • PipPipPipPipPipPipPipPipPip
  • 2,244 posts
  • Location: Dorset

Posted 27 May 2018 - 07:59 PM

looking good - think you'll finish it this summer?


#66 SamG

SamG

    Stage One Kit Fitted

  • Noobies
  • PipPipPip
  • 88 posts
  • Location: Somerset

Posted 28 May 2018 - 04:35 PM

looking good - think you'll finish it this summer?


Christ no! Not unless I stumble across a few grand anyway. This one is very much a slow burner as I currently only put about £100 a month into it. Hoping to have it on the road for his 50th birthday in 2022

#67 blacktulip

blacktulip

    Crazy About Mini's

  • TMF+ Member
  • PipPipPipPipPipPipPipPipPipPip
  • 6,221 posts
  • Location: Braintree

Posted 08 June 2018 - 09:42 PM

This project really gives me hope for mine. Love this!

#68 SamG

SamG

    Stage One Kit Fitted

  • Noobies
  • PipPipPip
  • 88 posts
  • Location: Somerset

Posted 29 June 2018 - 05:03 PM

After not much progress over the last couple of months, a change in our circumstances means I've managed to find enough funds to get the rest of the panels I need to complete the body work!


I priced up everything I needed and spent a morning phoning around the various suppliers to try and get the best deal I could and ended up going with Somerford Mini in Calne. Every supplier wanted a crazy amount to deliver the roof skin so in the end it worked out better to hire a van and drive the hour or so up the road to collect all these bits....


20180627_154647_HDR.jpg


As you can see it's all genuine Heritage panels bar the front panel. I've read it's one of the better Magnum panels and figured as it's bolted to the front subframe (which I know is straight), it can't be THAT far out! The rest are genuine as I wanted to make sure everything is as true as can be, I'd hate to have spent this much money and time on the car only for the front end to let it down.


I'm glad I decided to drive up there as it gave me a chance to have a nosey around workshop and all the stock. Really nice chaps up there so give them a go if you haven't done before!


20180627_140328_HDR.jpg


Once back I couldn't find anywhere to temporarily store the roof skin so thought it may as well rest where it'll eventually end up!


20180627_155241_HDR.jpg


Now I have everything I need to get the shell finished I'm hoping to have an actual update bodywork soon. I think I'm going to start with the windscreen surround panel as it means the scuttle will be in the right place ready to start on the front end. I have a vague idea of how to tackle the front end but I'm going to do a lot of research in the next few weeks to see how others have gone about it. Any good threads out there that are worth a read?


Edited by SamG, 29 June 2018 - 05:05 PM.


#69 SamG

SamG

    Stage One Kit Fitted

  • Noobies
  • PipPipPip
  • 88 posts
  • Location: Somerset

Posted 01 July 2018 - 06:57 PM

Made a start on replacing the windscreen surround today. Ever since I first got the car I'd been actively avoiding looking at the N/S a-pillar as it was an absolute mess and I didn't want to acknowledge it. Changing the windscreen surround meant i could avoid it no longer so that's where I started today.


The new panel comes with the gutter and cant rail (with corners) and because I'm replacing the roof skin next anyway I decided to cut along the roof just inside the gutter. I drilled out the spot welds along the bottom of the windscreen panel whilst managing to save the bulkhead and top dash rail lips.


SBd_QMn_SUWJCp_WWksv_Qmu_MAWn_U4l_VYZ5r_


The new windscreen panel comes with the inboard part of the a pillar so I drilled out the sport welds from inside to out as best I could. The O/S a-pillar was in really good condition and will take a weld when it comes to fitting the new panel - here's how it cleaned up 


20180701_152725_HDR.jpg


#70 SamG

SamG

    Stage One Kit Fitted

  • Noobies
  • PipPipPip
  • 88 posts
  • Location: Somerset

Posted 01 July 2018 - 07:07 PM

Unfortunately the same cannot be said for the N/S pillar. The roof has has a pretty shoddy repair in that corner at some point in its life and I think that's why the a-pillar was so bad - water had managed to drip down and just sit there eating through the metal from the inside out as you can see -


20180701_141618_HDR.jpg


20180701_152757_HDR.jpg


There's virtually no strength left in the steel which is now probably about 0.5mm thick. My heart sank at this point because I knew I couldn't buy that section (unless I buy a whole door surround and cut out what I need). I then remembered that about 6 months ago I fabricated up some repair panels at work for Ellis' pick up project that should in theory be the exact same dimensions as the a-pillar panel I need. Here's the prototype in ally - 


od_O9bii8w_Asks_XTw_SDGa_OZ_Oz4g_YRLMgqi


And the finished pieces in 1.2mm steel - 


v_O_X_Lcg_Km_Rl_CIRXCm6_NQd5_W7_NM_efbi_


They fit at the top of the door aperture, going from where the door seal sits, along to where the actual door sits, up the side to where the drip rails and roof skin form the 3 layer sandwich, and also include the roof gutter. (I hope the pictures are clearer than my explanation)


Anyway, I still have the program saved on the bending machine at work so this week I'll knock a couple more of these out (minus the gutter part obviously) and have one ready to weld onto the car in place of the rotten A-pillar.


#71 SamG

SamG

    Stage One Kit Fitted

  • Noobies
  • PipPipPip
  • 88 posts
  • Location: Somerset

Posted 01 July 2018 - 07:11 PM

I'm writing this update on my laptop and some of the pictures are uploading normally and some are enormous! They look okay on a phone but stretched and distorted on a PC. No idea why it's happening so sorry for that. >_<


#72 SamG

SamG

    Stage One Kit Fitted

  • Noobies
  • PipPipPip
  • 88 posts
  • Location: Somerset

Posted 01 July 2018 - 07:14 PM

Getting this windscreen surround out was hard work and it made me realise that I need to spend more on the car than I currently do. I'm going to try to aim to spend at least one afternoon/day a week working on it from now on as unfortunately I've realised it won't restore itself! (I keep leaving it 3 weeks between visits in the hope that I'll be Car SOS'd but it hasn't happened yet)

My absolute deadline is to have all the bodywork finished by this time next year as the car will be being shipped to New Zealand along with my family and I!

Edited by SamG, 01 July 2018 - 07:34 PM.


#73 MrBounce

MrBounce

    Up Into Fourth

  • TMF+ Member
  • PipPipPipPipPipPipPipPipPip
  • 2,562 posts
  • Location: The Manroom in Ipswich

Posted 04 July 2018 - 09:49 PM

Cracking work Sam. I've just read the whole thread and sometimes wish I'd bought a Mini instead of my Midas because at the time I "couldn't weld". Instead of having to wave the melty metal stick, I have had to correct thousands of old kit car bodges, most of which have been bespoke to my car! Hence why my project has taken WAY longer than expected...


I have bookmarked this and will look forward to the next installment.  :thumbsup:


Edited by MrBounce, 04 July 2018 - 09:49 PM.


#74 Avtovaz

Avtovaz

    One Carb Or Two?

  • Members
  • PipPipPipPipPipPipPip
  • 1,132 posts
  • Location: widnes

Posted 24 March 2019 - 07:25 PM

any progress mate? Its not far off this time next year now!

sadly looks like your pic links have died!


#75 mini_surfari

mini_surfari

    Speeding Along Now

  • Members
  • PipPipPipPipPip
  • 326 posts
  • Location: Wiltshire

Posted 25 March 2019 - 11:15 AM


od_O9bii8w_Asks_XTw_SDGa_OZ_Oz4g_YRLMgqi


And the finished pieces in 1.2mm steel - 


v_O_X_Lcg_Km_Rl_CIRXCm6_NQd5_W7_NM_efbi_


They fit at the top of the door aperture, going from where the door seal sits, along to where the actual door sits, up the side to where the drip rails and roof skin form the 3 layer sandwich, and also include the roof gutter. (I hope the pictures are clearer than my explanation)


Anyway, I still have the program saved on the bending machine at work so this week I'll knock a couple more of these out (minus the gutter part obviously) and have one ready to weld onto the car in place of the rotten A-pillar.


Are you still able to make these? Would be interested for my Van if you could!


0 user(s) are reading this topic

0 members, 0 guests, 0 anonymous users