OMG!!!


One Carb Or Two?


Posted 09 June 2017 - 06:23 PM
OMG!!!
Put's foolish ideas in peoples heads

Posted 09 June 2017 - 06:37 PM
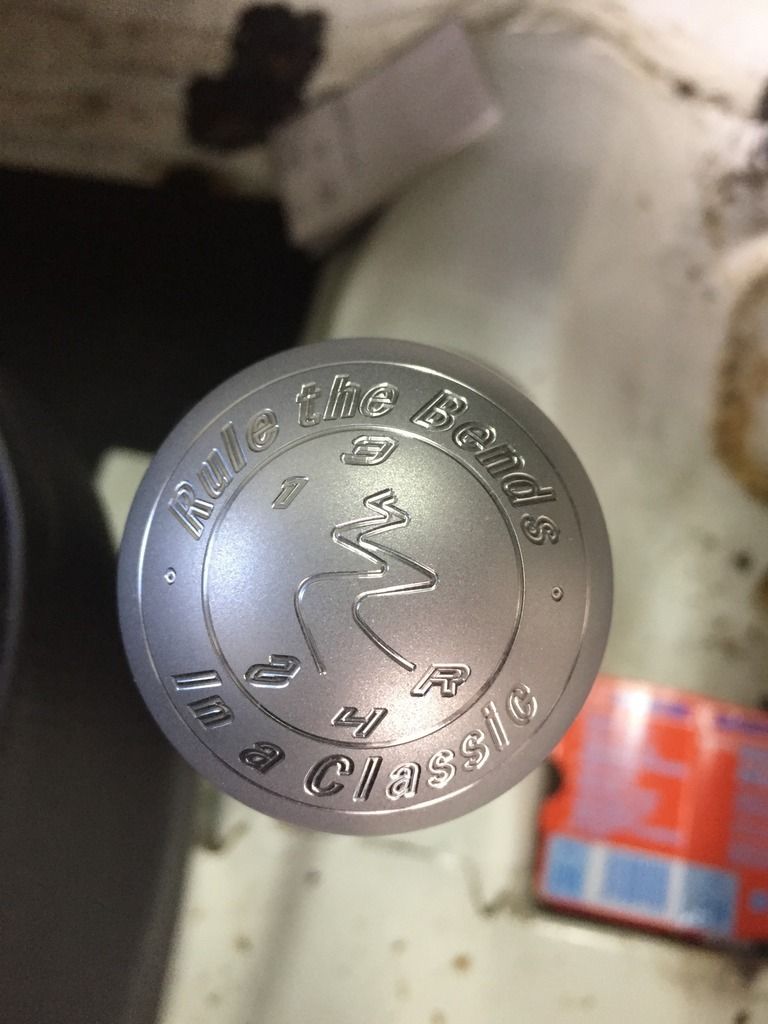
The gear knob even shows how wobbly a typical Mini gear selector is 
Jokes aside, the custom design looks really neat!
One Carb Or Two?

Posted 09 June 2017 - 11:05 PM
Gear knob looks awesome. You may find that the inner sleeve part of the accelerator cable is very corroded in. I myself had trouble with the same thing a few months ago. Just pulling it eventually gave way.
If the worse come to the worse its possible to drill out the hole from the inside of the car. If you gradually go up in size it'll become free.
If you find that none of the above is possible theres 2 more ways to fix it.
1st is you drill it out for an 10mm nut and bolt. Drill out the middle of the bolt enough to get the new cable in. Then drill the bolt partly to let the new throttle cable seat into the bolt. Then you bolt this to the bulkhead
2nd Way is weld the drilled out bolt to the bulkhead as a permanent fix.
hope that helps. but fingers crossed the corroded seating part is just stuck and needs a good yank
Lawrence
Mini Mad
Posted 10 June 2017 - 05:13 AM
Gear knob looks awesome. You may find that the inner sleeve part of the accelerator cable is very corroded in. I myself had trouble with the same thing a few months ago. Just pulling it eventually gave way.
If the worse come to the worse its possible to drill out the hole from the inside of the car. If you gradually go up in size it'll become free.
If you find that none of the above is possible theres 2 more ways to fix it.
1st is you drill it out for an 10mm nut and bolt. Drill out the middle of the bolt enough to get the new cable in. Then drill the bolt partly to let the new throttle cable seat into the bolt. Then you bolt this to the bulkhead
2nd Way is weld the drilled out bolt to the bulkhead as a permanent fix.
hope that helps. but fingers crossed the corroded seating part is just stuck and needs a good yank
Lawrence
Lawrence, thanks so much! I will give these a try tomorrow. Hopefully I can get it done without having to go into the final 2 fix options.
Mini Mad
Posted 10 June 2017 - 09:33 PM
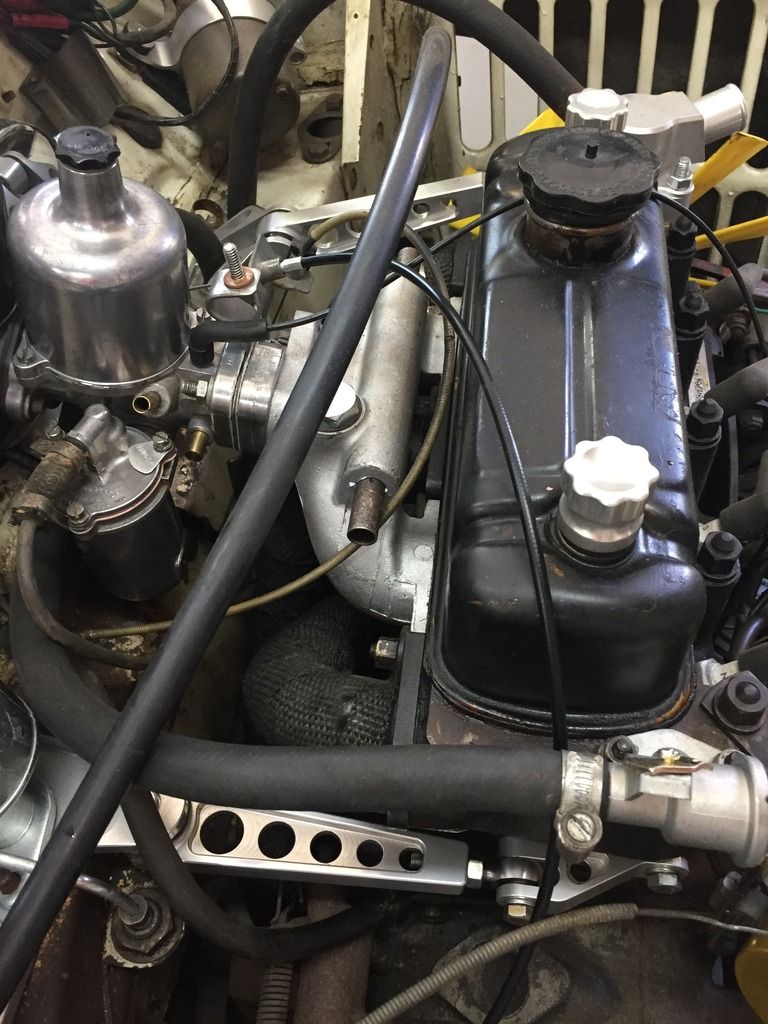
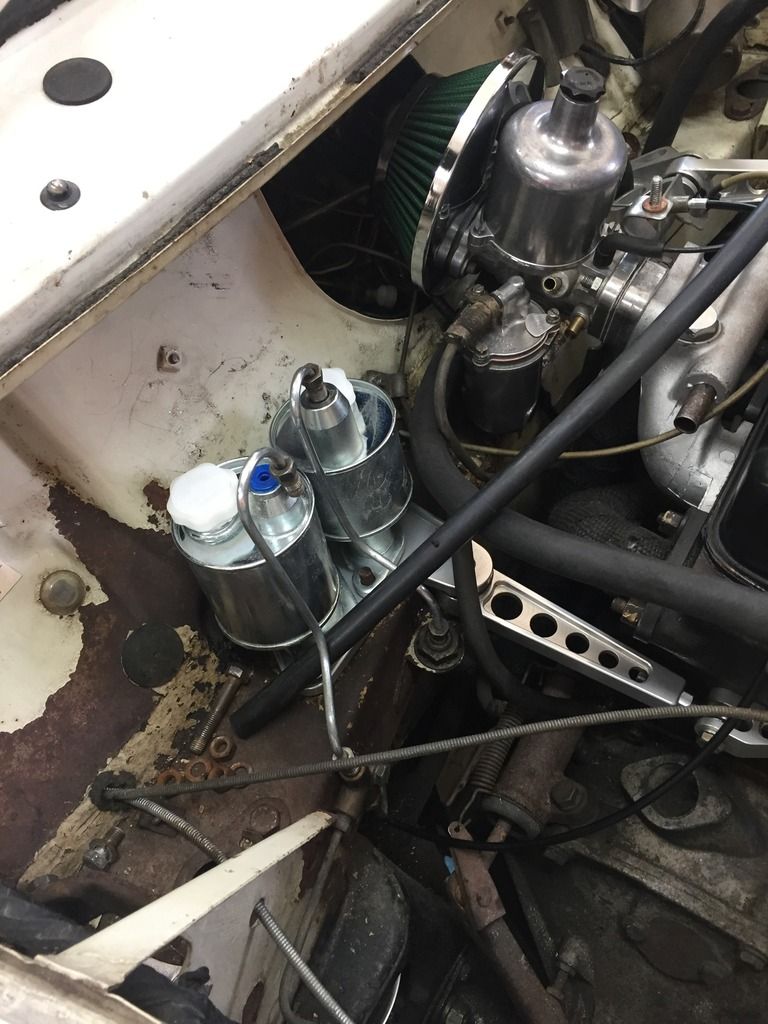
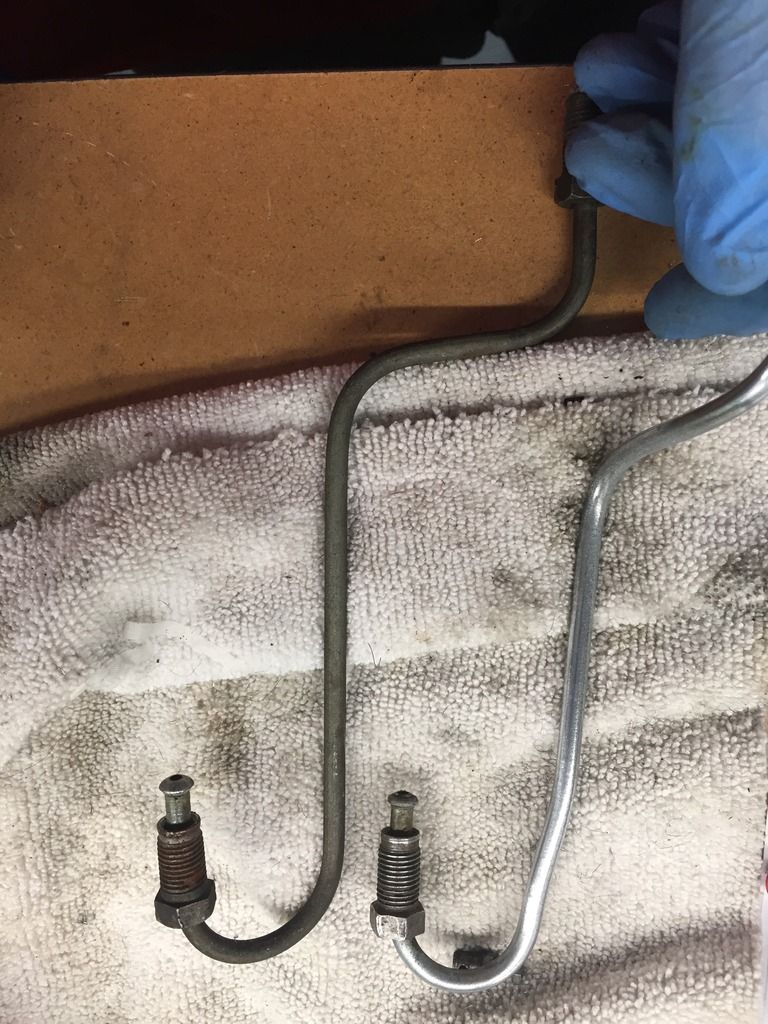
Thanks to Lawrence's tips, I was finally able to get the throttle cable housing removed. New throttle cable installed, test fitted the new clutch and brake master cylinders, and polished up some of the piping. Also, went back down and started working on the front suspension again. I've found some more items to be replaced and am starting to feel like I should continue down the rabbit hole and keep on taking the car apart before I try climbing out of the hole. I have been thinking about getting the car back together to be able to roll around town in it for the fall, but I am beginning to rethink my thoughts. It just seems like a waste of my time to put it back together to drive it for a few months to just take it all back apart again. How have you all gone about this problem? I'd assume this is a regular conundrum. A few pics for your enjoyment.
Edited by MasterD78, 10 June 2017 - 09:33 PM.
One Carb Or Two?
Posted 10 June 2017 - 09:52 PM
Glad I could be of help. What is actually wrong with the front suspension?
Crazy About Mini's

Posted 10 June 2017 - 10:02 PM
Gear knob looks awesome. You may find that the inner sleeve part of the accelerator cable is very corroded in. I myself had trouble with the same thing a few months ago. Just pulling it eventually gave way.
If the worse come to the worse its possible to drill out the hole from the inside of the car. If you gradually go up in size it'll become free.
If you find that none of the above is possible theres 2 more ways to fix it.
1st is you drill it out for an 10mm nut and bolt. Drill out the middle of the bolt enough to get the new cable in. Then drill the bolt partly to let the new throttle cable seat into the bolt. Then you bolt this to the bulkhead
2nd Way is weld the drilled out bolt to the bulkhead as a permanent fix.
hope that helps. but fingers crossed the corroded seating part is just stuck and needs a good yank
Lawrence
Lawrence, thanks so much! I will give these a try tomorrow. Hopefully I can get it done without having to go into the final 2 fix options.
Or a even easier fix, drill it out and replace it with a cable adjuster from a push bike.
Mini Mad
Posted 10 June 2017 - 10:06 PM
Cones were shot, replaced those and got it all back together to realize the CV Boot is torn badly. I have some Cooper S disc brake assemblies that I need to tune up and get ready, so I will do that when I tear that all apart again.
I am definitely learning a lot on this car. I've done quite a bit of car audio, some fiberglassing, and some minor maintenance on some of my other cars. But this is a whole new adventure, and I am enjoying learning new things.
So like I said, I'm thinking of going down the rabbit hole some more. I've been thinking about pulling the motor, and painting the car. I mean I have the vast majority of the interior out of the car, so that is one more step I could avoid having to do again. This car is going to be a fun driver and not a show car, so I have been debating on painting it myself (for the I've done everything on this car factor).
Mini Mad
Posted 28 September 2017 - 03:22 AM
Been working on my baby when time allows (which isn't much). But I will have some solid time tomorrow to put into it and I'm hoping in the next few weeks I can get it out and drive. I decided against pulling it all apart right now, because.....well I really want to drive it and enjoy it for a bit. But, I will be gathering items to replace at a future time so that I have everything ready for the full rebuild. I'll post pics tomorrow of some of the progress!
Mini Mad

Posted 28 September 2017 - 10:09 AM
Speeding Along Now

Posted 28 September 2017 - 11:10 AM
nice work on a lovely project! those engine steadies look great - can I ask where you go them?
Mr. 7-Port

Posted 28 September 2017 - 11:12 AM
nice work on a lovely project! those engine steadies look great - can I ask where you go them?
They are DSN ones. http://www.dsnclassi...ngine-steadies/
Speeding Along Now
Posted 28 September 2017 - 11:15 AM
nice work on a lovely project! those engine steadies look great - can I ask where you go them?
They are DSN ones. http://www.dsnclassi...ngine-steadies/
thank you!
Mini Mad
Posted 28 September 2017 - 02:26 PM
Spec on this (before you started adding shiny bits) looks very similar to mine and similar age. How solid is the shell because the bulkhead behind the master cylinders looks a fetching shade of rust. Just wondering on the choice of going to paint if the wire worm has a foothold?
Love the colour ways you have white shell and black interior and those wheels look awesome. Best of luck with the build I will be following it.
The shell is in fantastic shape as far as I have been able to detect so far. I found one tiny spot of rust under the passenger side window trim, but other than that nothing concerning. The rust you talk about on the bulkhead is just surface rust, and will be taken care of, but it is just surface rust. As far as painting the car goes. I have decided to hold off on that for a bit, because I want to drive the car. Once I'm ready I will strip the car down completely and fix any and all areas that are in need. Looking forward to getting this thing back in running form so I can enjoy it on the road....not just on stands in the garage. LOL.
Mini Mad
Posted 28 September 2017 - 03:21 PM
Wasn't trying to be funny or anything just as you mentioned paint. My shell is similar. Pretty solid but a few areas are concerning so just plan to do it once but not have to repeat in a few years. It's funny because on my shell I wiped some areas that looked terrible and it was surface dirt that had solid paint and metal underneath. Other areas looked solid, but were rotten.The shell is in fantastic shape as far as I have been able to detect so far. I found one tiny spot of rust under the passenger side window trim, but other than that nothing concerning. The rust you talk about on the bulkhead is just surface rust, and will be taken care of, but it is just surface rust. As far as painting the car goes. I have decided to hold off on that for a bit, because I want to drive the car. Once I'm ready I will strip the car down completely and fix any and all areas that are in need. Looking forward to getting this thing back in running form so I can enjoy it on the road....not just on stands in the garage. LOL.Spec on this (before you started adding shiny bits) looks very similar to mine and similar age. How solid is the shell because the bulkhead behind the master cylinders looks a fetching shade of rust. Just wondering on the choice of going to paint if the wire worm has a foothold?
Love the colour ways you have white shell and black interior and those wheels look awesome. Best of luck with the build I will be following it.
Edited by 73MkIII, 28 September 2017 - 03:23 PM.


0 members, 0 guests, 0 anonymous users


