Jump to content


Photo
- - - - -

Meet Caddy


  • Please log in to reply
7 replies to this topic

#1 Rapidmini59

Rapidmini59

    Mini Mad

  • Members
  • PipPipPipPip
  • 195 posts
  • Location: Sussex
  • Local Club: Minifreaks

Posted 28 May 2017 - 09:09 AM

Hi everybody.
Meet caddy.
My very long term build of 10 years.
She was built 24/11/1977 and started life as a 1275 gt clubman in white.
I bought her may 2007 for £400.
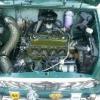
Having spent 10 years in a warehouse covered up,she arrived at my place and after i stripped her shell she looked like this see pic below.
In 93 i had a clubman estate and when ever i was working on it i use to hit the back of my head on the bonnet catch many times, so this time round i decided to make the front removable but keep the original front end.
After a lot of grinding and dremmel work the front end was off but intact.
I then had an issue were i had no further monies to carry on and no dry place to store her,so she was covered up and spent the next 3 1/2 years outside the front of my house with polythene,shrinkwrap,tarpaulins and rope.
So now it was 04/2010 and i was now in a position to start work on her.she was uncovered and was still how i had left her in 2007
Firstly to see where all the rot was.
It needed front floor pans,A panels,inner and outer seals,both door skins,lower inner door panel,both outer rear quarter panels,heal board,rear valance,rear valance supports,last part of boot floor,complete boot panel,parcel shelf and inner and outer seals.
So i tackled the floor pans first,ordered new front floor pans and when they arrived,cut the passenger side out first.
Offered up the new floor pan and spotted in place, before i welded it all round.
To my horror i cant weld very well, i managed to weld all four edges but only one came out very well,the other three sides looked like bird poo and i kept blowing holes.
So i called it quits and decided to try and find someone who could tackle it instead.
After a very long time (now october 2010) i found a chap who would undertake the mammoth repairs to my shell.
We agreed on a monthly budget system and it was decided to have the shell shot blasted and red oxide coated to protect it before work commenced.
So i said goodbye to my project and off it went.
After about 6 weeks and £670 later she was at her new home to be repaired.
Now the chap doing the work had agreed with me to accept £400 per month and he would do £400 of work so it would progress slowly but still progress,well i was on a very tight budget.
Well 11 months on and £2850 the chap had only done about 3 months of work on her.
Then drops a bomb shell and tells me hes closing up and come and get your car.
So i had to hire a lutton to get her back, arrived at the storage unit put car onto tail lift and up she went.
Tied her down and took her away.
He had basically just replaced the rear outer quarter panels,full outer boot panel,parcel shelf,boot floor panel,front drivers floor pan and sorted out my dodgy welding on the passenger floor panel.
He had taken pics as he went but i have never received them.
So moving on after about 6 months i found a new chap that would carry on the work.
He agreed to some new terms on payment and basically sorted out a lot of issues.
Firstly the rear outer quarter panels had to come off and be redone as previous guy had messed up,parcel shelf wasnt spotted correctly so had to be redone.
Now new chap was a kitchen fitter by trade so did cars as a hobby at weekends.
He sorted out an issue with the roll bar at the back as the roof had split away from the roll bar on both sides.
In the meantime i took both doors from sussex to blackpool to have them reskinned and sorted.
Loaded up my polo and drove to blackpool, (dont trust couriers to deliver in good condition).
On the way to blackpool, wet day, we discovered our sunroof leaked and had to stop several times to stop the water leaks. When we next stopped it had stopped raining and so i sealed up the sunroof with gaffa tape.
Got to blackpool and dropped off the doors.
The doors were away for about 2 weeks and came back to me in remarkable condition.
The mini door company in blackpool had replaced the outer skins using a jig,installed new rivnuts for the mirrors,replaced the bottom of the inner part of the door,repaired the centre of the inner panel as this had been butchered by someone in the past trying to fit deadlocks.
The doors when he sent them back to me were packaged like the crown jewels.
More to follow.

c_zpsfbedt8pj.jpg

IMG_0135_zpsobp9v9do.jpg


p_zpsem4lskws.jpg

o_zpsuaex9zaw.jpg

n_zps6wims0qh.jpg


f_zpse27h94bg.jpg


Edited by Rapidmini59, 29 May 2017 - 08:16 PM.


#2 Rapidmini59

Rapidmini59

    Mini Mad

  • Members
  • PipPipPipPip
  • 195 posts
  • Location: Sussex
  • Local Club: Minifreaks

Posted 28 May 2017 - 10:56 PM

The saga continues.
So i took the two doors down to the chap rebuilding my mini and he agreed they had been done very well indeed.
We offered them up with the original hinges and found a huge problem.
The top of the door was a long way out at the door handle end only so this had to be corrected.
Basically he cut the vertical part of the window channel and extended it by 6 mm to make the door look even and have a good fit.
This was also done on the other door and both sides were then finished off and its not even possible to see where the join had been made.
So the next step was to stiffen up the whole shell, mainly because i have a rather large piece of roof missing. It turns out the roll bar was actually part of a cabriolet aftermarket setup from a company called heathkit conversions and they basically supplied a full Convertable kit to make the car, you guessed it convertable.
Unfortunately the kit is no longer available as the company ceased around 1992 and the chap that designed it had passed away around 1997.
We had discovered the rollbar was not even welded in like it should have been but before work could commence on securing the rollbar correctly the inner and outer seals had to come off.
Now to make a car stronger when you have half a roof is a bit of a task, the chap and i decided we would strengthen the sides so metal box section was purchased and work commenced.
Inside the car we have 2" x 2" box section from front to rear on both sides, this then allowed us to weld the rollbar to the box section.
This was then all seam treated and sealed before installing the inner seals.
Once they were on we then installed 1&1/2" x 2" box section inside the seal on both sides,this was again seam treated and seam sealed.
Now before the outer seals could go on it was favourable to replace the rotten heal board,this was to make sure it was welded in good and again seam treated and sealed.
The outer seals were then purchased and placed on to make sure they would fit. They did so they to were welded on.
it was starting too look good and so the rear valance was then replaced, during the removal of the rear valance we spoke about some extra rollbars as there was nothing really down the sides of the shell to keep it strong.
Rear valance was removed as to was the supports.
New valance offered up,very good fit,then tacked in place and then spot welded all the way along, the inside of the panel was then treated and seamsealed.
Rear valance supports were next, these were easy as they fitted very well and so spot welded on and treated.
So the aditional roll bars, hmmmmm what can we do, i know i said what about going along the top of the doors and down the front to the 2" box we put in, yeah we like that.
The next weekend i arrived and he had a present for me, to very long poles that had been bent to the correct angles to run from the rear rollbar to the front floor.
He had added a gusset plate to the rear rollbar to the internal corners so we could weld the ends of the new rollbars to it.
They were placed inside the car and welded in then the floor end was welded to the 2" box section.
All good and now pretty strong the last thing to add was a bar across the top of the front screen to stop the sides crushing, so it just became a complete cage within the confines of the car.
All this work took about 3 months and then i was dropped another bomb shell.
Yep you guessed it he was going to have to stop work on my car, not because he was closing up but because his future wife was expecting and she would'nt permit him to work on cars at the weekends, which was the only time he could do my car.
So off i go again take my car back home and try and find someone else to do the final parts.
Alas there are no pics on this bit as this chap had taken the pics with his phone and never managed to download them.
More to follow with pics.

Edited by Rapidmini59, 28 May 2017 - 11:01 PM.


#3 Rapidmini59

Rapidmini59

    Mini Mad

  • Members
  • PipPipPipPip
  • 195 posts
  • Location: Sussex
  • Local Club: Minifreaks

Posted 29 May 2017 - 07:53 AM

So the boring bits first.
Time had moved on to May 2012
by now i was starting to wonder if me little clubby was ever going to get done, i'd already had two people tackle the shell and i just didnt have the time myself.
I had low income,no garage attached to the house,work was becoming the main part of my life so had to store my car back in the garage which is where it spent the next year or so.
Then i had a fresh chance to look at having the shell finished off.
A very good friend of mine said when are going to get that mini sorted as its been a while. Soon i said as im starting to get a bit fed up with all the messing around too, told him i had ordered a shelter to put it in so we could work on it and it was arriving in a few weeks.
He asked what had i ordered and i told him a 10' square gazeebo in blue complete with sides.
Well we came up with the idea that we would do the last bits ourselves, we chose a week in the summer and he came down from norhampton to help.
The weekend before he came down i got the mini back out from the garage and towed it round, put it back in the front garden and set about putting up my new gazeebo.
Gazeebo went up very easily and gave me enough room to work on the car all round and in the dry. Well friend turned up,had a catch up on things,we had a chat about progressing the mini and then set about sorting her at last.
Bought a new mini grinder as mine had died,bought some new tubing to add to the existing roolbar,bought some 10mm steel plate and gave my friend a hand with his massive welder.
So we measured up where the tubing was going and set about cutting it up, welder and gas switched on,tubing in place, let welding commence.
After a while all the tubing was in place, we connected the rear roll bar to the rear wheel arches diagonally and then due to having no rear seats we mounted a cross member to allow fitment of racing harnesses (yes its only a two seater mini).
Using the 10mm plate we cut these to shape and fitted to the cross member welding all round. Once all the welding was done all the tubing was then cleaned and primed to protect it.
Next tackle was the old A panels,took the old ones off and offered up the new ones i had purchased some weeks before and set about fixing in place, once this was done folded over the edge and made good.
During the fitment process the doors must have been on and off about ten times per side as we wanted to makesure the A panels gapped correctly.
So all this took nearly the week but we did mess about a fair bit, like a couple of kids really but my mini finally got the last bits done.
We finished off the week with a few drinks and he returned to northampton.
I then set about having a go at prepping the car so i could paint it. Well this was short lived as the weather had chaged for the worse heavy rain, strongs winds not really good for a light weight gazeebo.
Although it did keep the car dry i was concerned about it getting blown away. The weather cleared up and i popped out to get some bits for the mini, whilst i was in a car shop i got told of a chap who was very good at body work and would be good to contact if i wanted a good job done on the mini to prep and spray her.
Contacted the chap and he popped round to look at her. Gave me a quote of £1500 to prep and spray the whole car inside and out.
I agreed and he said he'd be in touch when he was ready to start it. Well it was actually quite a while he contacted me and said he could collect it at the end of november, the mini went off to be prepped and i left it with him.
So bomb shell number three appeared after about four months of me asking how it was going he kept saying its ok this has been done or that has been done, i did pop over to see the progress but he was not always in and when he was in the car was kind of a bit further but not as far as it could have been. He then called me a few months later and said he was having personal issues and i would have to have the car back, at least he decided not to charge me for the work he had done.
The car had been prepped from the doors to the back ready to be painted so it was just the front end to do.
So once again i took the car back and it just sat in my garage covered up.
u_zpsxgk1ydm8.jpg

s_zpsyukld5eb.jpg

t_zpstavkyxan.jpg

x_zps15cb0vna.jpg

w_zpsxp2ixb4v.jpg

z_zpshka2uljx.jpg


Edited by Rapidmini59, 29 May 2017 - 11:39 AM.


#4 Rapidmini59

Rapidmini59

    Mini Mad

  • Members
  • PipPipPipPip
  • 195 posts
  • Location: Sussex
  • Local Club: Minifreaks

Posted 29 May 2017 - 08:46 AM

Here we go again.
So time has now moved to november 2013.
Job front went south and i got made redundant from a 15 year job. Had a huge payout and got a new job, more money but working nights. No time to really work on the mini, got really tired working nights so changed to days, drop in monies but had part of my life back.
Still no time to work on the mini though so she still sat there in the garage covered.
Months came and went and then change of jobs again, now september 2015.
This time it was better money,better hours and no weekends.
It was now April 2016 the good weather came along and the gazeebo came out. Mini uncovered and brought out back round to the house.
First thing was to get some primer and topcoat. Decided to use a good quality zinc primer and set about priming the inside first.

3_zpsxvy47vbd.jpg


Inside done so on with the top coat, set about getting the paint from a good paint shop but most i contacted with the paint code kept telling me the code i had was grey, after getting frustrated i finally found a shop that would have the correct colour (pantone 2685c cadburys purple).
2 x 400ml cans bought to try first as have had hassle with watery paint before.
Got home and did a test piece,sprayed very well and so sprayed the entire inside with just two cans. As the weather was quite warm and the gazeebo sides were all shut, the paint went off very well with a finish i was pleased with.

5_zpsbi7vr3s3.jpg

7_zps4xjktc30.jpg


Ordered some new parts- 3 clock burr walnut dash,trigger handbrake,new cables for handbrake,main wiring loom,new cobra clubman seats,four point harnesses in red,deep pile carpet set in black.
Parts arrived.
Installed the trigger hand brake and cables, then fitted the rear carpet, had to trim the sides due to the box section inside the car, attempted to fit the front and it just would not fit, after three hours of complete hassle i decided to not have front carpet.

14_zpsuqfbolgz.jpg


Fitted the seats and racing harnesses, retrieved my clocks for the dash and found i had to adapt the housing on the dash to accomodate the three original clocks.

Once this was done it was then onto the top and bottom dash rail covering before installing the new dash in place.
Went in quite well and looked good.

22_zpsa5ckusps.jpg


All this time the car had no brakes and normal steelies with wornout tyres. I had in storage a new set of 6x12 reveloutions with yokohamas complete with locking nuts, kad complete four pot calipers with 8.4 vented and grooved discs for the front and single pot kad calipers with drilled discs for the rear,protech 400 series coil overs for the front and gaz coil overs for the rear and a complete set of goodridge hoses for the entire car.
Fitted all the coil overs,all the hoses and all the brakes,made up my own main brake lines and then fitted the wheels, all with out any major hassle.

35_zpsfgiqsej1.jpg

31_zpsk7nfy5b9.jpg


Spent a few weeks gathering more parts all from my storage and then ordered some new paint.
This time the paint had become to expensive and i decided to have a change of colour for the outside, so went for a different purple and chose traffic purple.

IMG_0131_zpsipzscjsw.jpg


Sprayed the outside and it came out ok but not as good as the inside, still it will eventually be resprayed as cadburys purple.

Next installed the main loom and the all the rear lights, sorted out a few issues with where things went only to discovered i had no front or rear light loom, i thought these were in with the main loom but according to the surplier these are extra.
Off to my storage boxes again to retreive me old looms, sorted them tidyed them up and found they all worked.
So we had car on new wheels,new brakes not yet bled as no master cylinder, seats in place, rear carpet and all the wiring in place.

Next was to send the engine off as i had thought about rebuilding it myself but thought well if i mess it up it will be even longer before i can get it on the road..I had decided to use minispeed in kingston as i had been there the year before to discuss having them do the engine.

i had two engines one was a 1380 avonbar racing lump and the other was a 1275gt. after thorough inspection it was better to recon the 1275gt than try to rebuild the 1380.

the 1275gt was cleaned, stripped,new core plugs,new crankshaft,276 kent cam,balanced conrods,new omega pistons and rings,all new upgraded bearings internally,all new seals and gaskets,MED 1.5ldx roller rockers,med upgraded pushrods,med rocker cover,med lightened and balanced flywheel with turbo clutch plate,hif44,hiflow water pump,hiflow thermostat housing and many other new parts.

The engine turn around was suppose to be 8 weeks but it took 3 months due to minispeed closing down.

image_zpstnaidmdk.jpeg

image_zps3uq27pw3.jpeg


It was now getting on for october 2016 and the weather was quite poor so she was put back into the garage again until 2017.
Finally getting there.
More to follow.


Edited by Rapidmini59, 29 May 2017 - 12:19 PM.


#5 Rapidmini59

Rapidmini59

    Mini Mad

  • Members
  • PipPipPipPip
  • 195 posts
  • Location: Sussex
  • Local Club: Minifreaks

Posted 29 May 2017 - 01:17 PM

So are we nearly there yet.
well over the last few years whilst all the hassle with the various people and parts, i had a go at some making good on bare panels and decided to buy some heavy duty adhesive,various thicknesses of mdf and 2 linear square meters of carpet.
mainly for the back of the car as this was looking a bit bare and could do with something, so i had a go and was very happy with the end result.
image_zps4r5i9gzp.jpeg
IMG_0142_zpsigogywfd.jpg
IMG_0141_zpsgsyqioao.jpg
IMG_0136_zps73lomxth.jpg
this is mainly because my original roof is so old,shrunk and destroyed that it will cost me an absolute fortune to have it remade.
heres a pic or two of the aforementioned roof.
IMG_0155_zpszy4txj08.jpg
IMG_0162_zpsqcy3kvjn.jpg
well we are now up to march 2017 and i am glad to say that the engine is in.
image_zpsjvhimeu0.jpeg
 
all my hard work has paid off so far.
all extra bits have been added as required including a fuel pump in the boot,a fuel pressure reg under the bonnet,6 gauges in the dash,the boot has been carpeted,a brand new battery and fuel has been added ((99 ron) or super unleaded).
IMG_0447_zps3mlcq8x0.jpg
IMG_0456_zpslpcbml3r.jpg
IMG_0455_zps0rjsp9ja.jpg
IMG_0476_zpsscrs9gyh.jpg
IMG_0474_zps2omfi1r1.jpg
 
So with a scary thought in mind pulled out the choke cable,turned the key and after the 6th rotation of the crank she fired up.
a little smokey at first from oil during the engine build stage, this cleared quickly and once she was warm enough and starting to splutter the choke was slowly pushed back in.
she ran on with out an issue, had to lean the mixture off a little as it was running way to rich,i was getting choke out by the fumes, adjusted the ignition timing a little and she now runs nice,revs very easily due to the flywheel, i checked all gears and had no weird noises so i was very happy, left her to get up to proper temp and then shut her off to cool down completely before i could do my re-torque of the head.
head now sorted and fired her up again all good so leaks,no squeaks, no rattles or knocks just a lumpy running idle but what do you expect from a 276 kent cam.
We get to april and i start having problems with her starting, just lots of clicking and strange noises, turns out the starter solonoid was just plain worn out (well it was probably the original from 1977). Purchased a new one and it fires up everytime.
So shopping again to get the last bits and i bought 4 new cv ends, 2 for each shaft, installed them and then found i had no drive or impossible to get into gear.
Turns out the DOT 5.1 i was using is too thin and basically not allowing the clutch to fully depress hence the no gears problem.
changed to DOT 4 and its all really good now.
I have also changed all the bulbs for LED's except for the headlights.
and the very gorgeous exhaust can is going on as a treat if it passes the MOT.
IMG_0449_zpsvhhtbrew.jpg

I had a total up of everything i have spent todate and it has cost be £14,400 and ten years of my life.
Would i do it again? Yes.
Did i enjoy the last 10 years? YES
Will i sell it? NO NO NO.

For now i'm gonna blooming well enjoy it
 
There is still some work to do like new wings waiting to be put on,a full external respray and sort out the front carpet and ah yes a supercharger is going in later this year.
firstly MOT, then tune it, then enjoy it.
 
She has here first MOT this friday and it will be the first in 20 years.
heres a pic as she is now.
IMG_0453_zps1rpvsxsf.jpg

And a reminder of how she was at the beginning.
IMG_0135_zpsobp9v9do.jpg
 
Thanks for reading my story or waffle and hope to see some of you at meets in the future.
cheers 


Edited by Rapidmini59, 29 May 2017 - 02:28 PM.


#6 rhys-89

rhys-89

    Camshaft & Stage Two Head

  • Members
  • PipPipPipPipPipPipPipPip
  • 1,549 posts
  • Location: Lancing, West Sussex
  • Local Club: minifreekz

Posted 29 May 2017 - 04:37 PM

Love it will get them wings n spray job done soon. will be cruising with you once ekos makeovers complete great work m8.

#7 Rapidmini59

Rapidmini59

    Mini Mad

  • Members
  • PipPipPipPip
  • 195 posts
  • Location: Sussex
  • Local Club: Minifreaks

Posted 29 May 2017 - 05:03 PM

cheers rhys

and thanks for your help on my SMALL project.


#8 Rapidmini59

Rapidmini59

    Mini Mad

  • Members
  • PipPipPipPip
  • 195 posts
  • Location: Sussex
  • Local Club: Minifreaks

Posted 04 June 2017 - 06:17 AM

Well just an update for those that havent read my other post.
She has passed her mot.
Initial test revealed three advisories.
Both lower front brake hoses were rubbing on front tie bar on lock so had to adjust this to clear (typical goodrich hoses and me not spotting it.
And the rear fog light i put on was on the wrong side, if you fit a fog light they were law after 1980 and if fitted it needs to be on the offside. So i have taken it off for now.
So its now fully road legal, all mods have been declared for my insurance and it was just over £150 fully comp on limited milleage.
Took her for her first proper drive and found a knocking from the rear.
Investigated and found the collar for the bottom of the spring was catching the centre lower part of the wheel arch behind the shock on both sides of the car.
Turns out i had fitted the rear shock backwards, coil overs have offset tops and bottoms, the tops are correct but the bottoms are backwards. Have now changed the drivers side and the bang has gone, just need to change the passenger side and its good.
Second drive out to show her to a mate and got a fuel leak from one of the hoses on my fuel pump, sorted with another new piece of hose and shes getting better.
Thrid drive out and she sounds great,just a slight resonance from the twin dtm rubbing on the bottom of the rear valance, this has now been re-spaced to give clearence, no more noise.
The top and bottom upgraded engine steadies have given me a new noise inside the car, i can hear gentle rumblings from the internals of the gearbox but this is NOT wear, this is because the KAD top steady is solid and rose jointed and the bottom ultimate engine steady is hard poly bushed.
The front and rear coil overs are great the front protechs are set on 6 clicks and the rear gaz are set on 10.
The lightened flywheel makes a big difference,picks up really well.
So will probaly do an update every so often on this post to let people know how she is getting on.
See some of you soon on the meets.
Thanks for all the help that people on here have given.
Good luck to all that are getting to where i am now.
Regards
Rapidmini59


0 user(s) are reading this topic

0 members, 0 guests, 0 anonymous users