Jump to content


Photo

Painting The Old Way...


  • Please log in to reply
21 replies to this topic

#1 Laurie

Laurie

    Mini Mad

  • Noobies
  • PipPipPipPip
  • 298 posts
  • Location: Gloucestershire
  • Local Club: GMOC

Posted 09 August 2017 - 04:14 PM

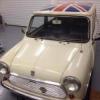
Right I've got my bonnet- still a long way off being ready to top coat but hey! You can't say I don't research everything right? lol 😂
It's had it's first going over with etch primer mainly to highlight any areas I might've missed whilst sanding / filling to be honest, and naturally I missed a couple places(!) so they've been highlighted/ refilled and are ready for a fresh rub down.

Now here's the issues:

A. After the etch and filler primer for that perfect flatness, is it spray primer or roll on to use?

B. Reverse (engine side) of the bonnet same colour as the top? Or cheaper likeness / black (car is white) as I'm going to be fitting sound proofing as well

C. Replacement of bonnet furniture, mainly the shield...while the paint is still not 100% dry but dry to touch iykwim, so it sticks and stays or wait? Rely on the three prongs or glue as well?

Bearing in mind the top coat is going to be roll on synthetic 'tractor enamel', this is already mixed and is sitting patiently in the garage waiting.
Now I've only done this method once before (wheels- and with a soft brush), I recall the flatting is the same as spray.

I refuse to spray the body panels with a rattle can as the finish is appalling! Uneven and streaky even with a solid colour!
I want to have done everything to this car that I can do (engine conversion excluded), I know how to and how not to paint, my first car taught me that, as did college.


I am after your top tips / what you would do, no matter how obvious/ silly sounding. Come on don't be shy x

Edited by Laurie, 09 August 2017 - 04:17 PM.


#2 Ben_O

Ben_O

    Mill Road Garage

  • Paint Doctor
  • PipPipPipPipPipPipPipPipPipPip
  • 9,781 posts
  • Location: Isle of Wight

Posted 09 August 2017 - 06:48 PM

Right I've got my bonnet- still a long way off being ready to top coat but hey! You can't say I don't research everything right? lol
It's had it's first going over with etch primer mainly to highlight any areas I might've missed whilst sanding / filling to be honest, and naturally I missed a couple places(!) so they've been highlighted/ refilled and are ready for a fresh rub down.

Now here's the issues:

A. After the etch and filler primer for that perfect flatness, is it spray primer or roll on to use?


If you already have used etch and filler primer, then no more primer is needed

B. Reverse (engine side) of the bonnet same colour as the top? Or cheaper likeness / black (car is white) as I'm going to be fitting sound proofing as well


If you are going to paint it black then you may as well paint it white. I think it would look better

C. Replacement of bonnet furniture, mainly the shield...while the paint is still not 100% dry but dry to touch iykwim, so it sticks and stays or wait? Rely on the three prongs or glue as well?


Wait for the paint to harden before putting anything back. You will mark the paint and yes i know, it won't be seen but you will compromise the protection the paint gives in those crucial moisture traps like under badges.

The badge should be fastened with clips from behind or use double sided trim tape

Bearing in mind the top coat is going to be roll on synthetic 'tractor enamel', this is already mixed and is sitting patiently in the garage waiting.
Now I've only done this method once before (wheels- and with a soft brush), I recall the flatting is the same as spray.


When rollering or brushing paint, its always better to flat each coat before the next.

I refuse to spray the body panels with a rattle can as the finish is appalling! Uneven and streaky even with a solid colour!
I want to have done everything to this car that I can do (engine conversion excluded), I know how to and how not to paint, my first car taught me that, as did college.


With patience and a good technique, you can get excellent results with rattle cans but this does depend on the quality of the paint in them and the type of nozzle.

I am after your top tips / what you would do, no matter how obvious/ silly sounding. Come on don't be shy x


Edited by Ben_O, 09 August 2017 - 06:50 PM.


#3 bluedragon

bluedragon

    Mini Mad

  • Members
  • PipPipPipPip
  • 286 posts

Posted 09 August 2017 - 07:25 PM

You may already know this, but I read an interesting article on brush painting a car in the July 2017 issue of Complete Kit Car. It suggests to brush paint on like so:


1) diagonal strokes at opposing angles (like an X pattern)

2) then horizontal strokes (like = )

3) then pure vertical strokes (like || ), applied lightly


It's something I'll try when I brush paint other items.


I agree - you can paint after your filler priming work is complete and flat each coat as soon as it is dry enough to do so (but apply the next coat before the recoat time on the paint expires, of course, so the next coat can still chemically bond to the previous one.) Naturally, I assume all the products are compatible with each other and a sealing coat is not needed between the final primer coat and the brushed topcoat (usually synthetic enamel is pretty benign for most anything underneath though.)


#4 Ben_O

Ben_O

    Mill Road Garage

  • Paint Doctor
  • PipPipPipPipPipPipPipPipPipPip
  • 9,781 posts
  • Location: Isle of Wight

Posted 09 August 2017 - 07:55 PM

(but apply the next coat before the recoat time on the paint expires, of course, so the next coat can still chemically bond to the previous one.) 

It wouldn't be necessary to do that as when you flat each coat, you are providing a key for the next anyway


Edited by Ben_O, 09 August 2017 - 07:55 PM.


#5 Mervyn

Mervyn

    Mini Mad

  • Members
  • PipPipPipPip
  • 256 posts
  • Location: Telford

Posted 09 August 2017 - 08:47 PM

TL;DR
Basically OP says rattle cans are appalling but wants to roller on tractor paint

I've done repairs you would never see, using rattlecans. It's all in the prep. You say you know how to paint, obviously not.

Take it to a bodyshop before you ruin it

Merv

#6 Laurie

Laurie

    Mini Mad

  • Noobies
  • PipPipPipPip
  • 298 posts
  • Location: Gloucestershire
  • Local Club: GMOC

Posted 09 August 2017 - 09:35 PM

TL;DR
Basically OP says rattle cans are appalling but wants to roller on tractor paint

I've done repairs you would never see, using rattlecans. It's all in the prep. You say you know how to paint, obviously not.

Take it to a bodyshop before you ruin it

Merv


Wow! complimentary

Tell me again with a stinking attitude such as yours why I'd pay you the slightest amount of attention? You clearly don't have the slightest idea what you're talking about *rolleyes*

#7 sonikk4

sonikk4

    Twisted Paint Polisher!!!

  • Admin
  • PipPipPipPipPipPipPipPipPipPipPip
  • 15,885 posts
  • Name: Neil
  • Location: Oxfordshire

Posted 09 August 2017 - 09:38 PM

AND before this gets out of hand boys lets leave any comments elsewhere. Thankyou.


#8 Laurie

Laurie

    Mini Mad

  • Noobies
  • PipPipPipPip
  • 298 posts
  • Location: Gloucestershire
  • Local Club: GMOC

Posted 09 August 2017 - 09:49 PM

AND before this gets out of hand boys lets leave any comments elsewhere. Thankyou.


My apologies to you x

#9 bluedragon

bluedragon

    Mini Mad

  • Members
  • PipPipPipPip
  • 286 posts

Posted 10 August 2017 - 12:18 AM


(but apply the next coat before the recoat time on the paint expires, of course, so the next coat can still chemically bond to the previous one.) 

It wouldn't be necessary to do that as when you flat each coat, you are providing a key for the next anyway


It isn't necessary, but a chemical bond in addition to the mechanical one from flatting is highly desirable. It links with the previous coat at a molecular level, further reducing the chance of peeling or delamination.


It's why many paint products specify a recoat time. It may be though that with unhardened synthetic enamel, it can't be sanded until after the recoat time has expired. In which case there's no other choice.


#10 tiger99

tiger99

    Crazy About Mini's

  • Members
  • PipPipPipPipPipPipPipPipPipPip
  • 8,584 posts
  • Location: Hemel Hempstead

Posted 10 August 2017 - 11:42 AM

A long time ago I successfully painted part of one of the colours on a two-tone Triumph Herald with rattle cans. Fins and body's ides but not doors or bonnet. It looked as good as any other paint job. I have also brush painted a car using Parsons Re-Paint, a synthetic enamel, sadly no longer available, but very similar to the several coach enamels that probably still exist.

I would venture to suggest that where paint is concerned, success or failure depends mostly on the care, and therefore time and energy, put into the job. Brush, roller, airless spray, HVLP spray and conventional high pressure spray each have their strengths and weaknesses, but it is proven fact (see various rebuild threads, if the photos still exist😡) that ALL can be successful.

But in every different set of circumstances usually only one will be the most economic, by a large margin. That will depend on what equipment and experience the person has, how much value people put on their personal time, etc.

Sometimes "do what you know best" is the right choice (unless it is unsafe ir damaging to the environment) even if a majority of others are strongly against it. It is all about making WELL-INFORMED choices, a good practice in every area of life.

In thst context, I think that a search of this forum (and others) is a good place to see what worked for others and may be suitable for you.

#11 nicklouse

nicklouse

    Moved Into The Garage

  • TMF+ Member
  • PipPipPipPipPipPipPipPipPipPipPip
  • 17,935 posts
  • Location: Not Yorkshire
  • Local Club: Anonyme Miniholiker

Posted 10 August 2017 - 11:53 AM

nothing wrong with rattle cans now. the old "celly" ones were a bit hit and miss.


modern acrylics give a good finish if you are good and can be buffed up to an excellent finish. 


I know what I would (did) use if I was doing it.


#12 sonikk4

sonikk4

    Twisted Paint Polisher!!!

  • Admin
  • PipPipPipPipPipPipPipPipPipPipPip
  • 15,885 posts
  • Name: Neil
  • Location: Oxfordshire

Posted 10 August 2017 - 02:06 PM

I have to say using modern rattle cans will give you a good finish. The biggest thing is in the preparation. I have had no issues getting a good finish. Even my son who has never really delved into the arcane art of paintwork got a really good finish on the spoiler of his VRS that needed a paint repair.


#13 nicklouse

nicklouse

    Moved Into The Garage

  • TMF+ Member
  • PipPipPipPipPipPipPipPipPipPipPip
  • 17,935 posts
  • Location: Not Yorkshire
  • Local Club: Anonyme Miniholiker

Posted 12 August 2017 - 08:15 PM

dx2NKuO.jpg
CSdgTOR.jpg
qOp1ulF.jpg
gSp8gBY.jpg
most of the back of this was repainted with rattle cans

Edited by nicklouse, 12 August 2017 - 08:30 PM.


#14 minidaves

minidaves

    Up Into Fourth

  • Traders
  • PipPipPipPipPipPipPipPipPip
  • 4,933 posts
  • Location: kent
  • Local Club: mine

Posted 14 August 2017 - 07:41 AM

cheaper to use correct paint rattle cans are ok for rattle can jobs, but these days some paints dont react well with others. seen some good jobs done with paint rollers


#15 Ben_O

Ben_O

    Mill Road Garage

  • Paint Doctor
  • PipPipPipPipPipPipPipPipPipPip
  • 9,781 posts
  • Location: Isle of Wight

Posted 14 August 2017 - 01:01 PM

I have painted a few cars with an Earlex spray station when a compressor was not available.


Good results can be had with patience and care.


Like anything really


0 user(s) are reading this topic

0 members, 0 guests, 0 anonymous users