Jump to content


Photo
- - - - -

Project Prim


  • Please log in to reply
44 replies to this topic

#31 Mogman

Mogman

    Passed Test

  • Just Joined
  • PipPip
  • 34 posts
  • Location: Tavistock

Posted 29 September 2019 - 03:11 PM

Well the front sub is now stripped wire brushed and primed. The front lower wish bones are primed and painted along with the rear bracket that hold the rear sub on. I have removed two front trailing arm bearings and my tool broke! so awaiting a replacement. Then painting the trailing arms front and rear once the bronze bushes have been realmed. Purchased all the front suspension part now as well, so soon will be starting assembly rather then more removals. The old Cones are a lot shorter then the new ones and are also stamped Dunlop like the rear one so must be old.


IMG-3224.jpg


IMG-3220.jpg


IMG-3221.jpg


IMG-3222.jpg


#32 TheFabMini

TheFabMini

    Speeding Along Now

  • Members
  • PipPipPipPipPip
  • 459 posts
  • Location: Swaffham, Norfolk

Posted 14 October 2019 - 02:59 PM

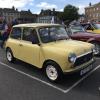
Looking great! Making me wish I could afford to get my primula paint resprayed as it’s a surprisingly nice colour when fresh!

#33 Mogman

Mogman

    Passed Test

  • Just Joined
  • PipPip
  • 34 posts
  • Location: Tavistock

Posted 19 October 2019 - 09:13 PM

Yes Lily loves it and i must admit it looks belter then it sounds.


Well been busy prepping the underside and rebuilding the rear sub frame as i have had the rear trailing arms refurbished by a great company found on here in Northern Ireland. as stated above one of our trailing arms had two roller bearing in and had been enlarged, so was scrap. the company do £60.00 per arm with £40.00 exchange so cost me £160 for two refurbished arms + postage. They look great and now are in place with new Cones and Knuckle's Brake pipe are also going on with new fixing kit. ready to lift into place now. Also finished some spraying this weekend, with the front sub top coated and the front trailing arms etc. It nice to start putting things on now instead of removing. The wheel have gone to be sprayed by the same guy who sprayed prim, in Old English White and have ordered two tyres to go with the two purchased last year, so she will have four new boots.


Photo's to tell the story


IMG-3260.jpg


IMG-3261.jpg


IMG-3246.jpg


IMG-3251.jpg


IMG-3252.jpg


IMG-3253.jpg


IMG-3263.jpg


IMG-3262.jpg


#34 Mogman

Mogman

    Passed Test

  • Just Joined
  • PipPip
  • 34 posts
  • Location: Tavistock

Posted 03 November 2019 - 10:22 PM

Well been busy on Prim today, Rebuilt the front sub frame up to the fitting the hubs. I have fitted the brake pipes but have not taken a photo yet. Stone chipped and sprayed the front bulkhead after removing the steering rack which is not primed and painted. Also fitted the rear Sub Frame to the car and fitted the new Shock Absorbers. Purchased some rubber from a local farm supplier, its a rubber floor squeegee blade but was the correct thickness and looks hard wearing, better than the sound proofing material which held water. Cleared the boot out and Primed the fuel tank ready for Gloss Black next week. Still awaiting the wheels but the next plan is to rebuild the rear hubs and brakes ready for wheels and then the rear can go back on the ground. Also now plan to rebuild from the rear to the front. Photos so far


IMG-3281.jpg


IMG-3282.jpg


IMG-3283.jpg


IMG-3286.jpg


IMG-3287.jpg


IMG-3288.jpg


IMG-3289.jpg


IMG-3290.jpg


IMG-3291.jpg


#35 Mogman

Mogman

    Passed Test

  • Just Joined
  • PipPip
  • 34 posts
  • Location: Tavistock

Posted 16 November 2019 - 06:32 PM

Well there are two wheels on our wagon,


Collected the wheel last week and have finished the two rear drum brakes and she also now has a working hand brake. Just have to finish the hydraulics and torque the rear hub s when its on the ground.

Spend the day today prepping and painting. The engine is now painted, the second hand grille has been wire brushed and stripped, an the manifold painted in heat paint and various brackets and the radiator. Have ordered more stuff this week so should be able to build up the engine and mount on the front sub frame soon. also still plan to start in the boot and final paint the fuel tank etc.

Photo's again ,


IMG-3298.jpg


IMG-3301.jpg


IMG-3302.jpg


IMG-3303.jpg


IMG-3317.jpg


IMG-3311.jpg


IMG-3311.jpg


IMG-3313.jpg


IMG-3314.jpg


IMG-3315.jpg


IMG-3316.jpg


#36 Mogman

Mogman

    Passed Test

  • Just Joined
  • PipPip
  • 34 posts
  • Location: Tavistock

Posted 01 December 2019 - 10:02 PM

Well been busy, The boot is close now just waiting to finish spraying the fuel tank, Install boot board and welded ( more Splatted) the board legs in, new battery fitted and spare wheel in. Also sound insulation laid in. Speakers wired, Boot rubber installed and E Decal, Number plate and new Handle (not black as should be as Lily wanted Chrome handles). Just waiting to spray the number plate light now and this can be fitted. Also finished the shuttle off the other night with wipe bezels, washers and blanks fitted again not black but chrome. new S/Steel rear bumper fitted (again not black) Also refitted the steering rack and connected the steering wheel back up. Next plain is head lining refit and then glass. Also engine now all back as was with new gaskets and Silicone black bypass pipe when refitting the water pump. Also fitted a temperature sensor for Lily's wooden dash which we got second hand. the gauge we have gone for are temperature and a 52mm Rev Counter.

Some photo's 

IMG-3327.jpg


IMG-3327.jpg


IMG-3329.jpg


IMG-3331.jpg


IMG-3332.jpg


IMG-3333.jpg


#37 Mogman

Mogman

    Passed Test

  • Just Joined
  • PipPip
  • 34 posts
  • Location: Tavistock

Posted 11 January 2020 - 02:53 PM

WE have not been sitting around much over the Christmas period, Been trying to catch time in the garage and Prim now has 4 wheels!, Completed the engine installation from below this time, still a wiggle but done. Completed the front disc conversion on the front, this was more involved than first though and took a view video watches to find i had installed the seals incorrectly and the shimming of the dome nuts was time consuming, but all done now,(one side twice!) Getting close now to having the engine, brakes and gearbox all connected, just have a few grommets on order as i have lost some, and have to remove the wood supporting the front to refit then gear lever rods and exhaust and bring the rear brake pipe up the the regulator. then on the ground and head lining, glass, doors, carpet and final fit out, Still have front lights and bonnet and some cabling for extra spot lights and gauges to install. The list and parts are going down but still away to go yet!

Photos as she stands


IMG-3350.jpg


IMG-3351.jpg


IMG-3352.jpg


IMG-3357.jpg


IMG-3358.jpg


IMG-3360.jpg


IMG-3361.jpg


IMG-3362.jpg


IMG-3363.jpg


IMG-3365.jpg


#38 Vinay-RS

Vinay-RS

    Put's foolish ideas in peoples heads

  • Members
  • PipPipPipPipPipPipPipPipPip
  • 2,093 posts
  • Location: Cape Town

Posted 11 January 2020 - 03:40 PM

Those boot panels look rather tidy. Might I ask how you made them? 


#39 Magneto

Magneto

    One Carb Or Two?

  • Members
  • PipPipPipPipPipPipPip
  • 889 posts
  • Location: Kansas City, USA
  • Local Club: KC MINI Club

Posted 11 January 2020 - 05:02 PM

Interesting to me that the engine has tappet chest covers, but a verto clutch - so late model transmission....did I miss something in your narrative?


#40 Mogman

Mogman

    Passed Test

  • Just Joined
  • PipPip
  • 34 posts
  • Location: Tavistock

Posted 11 January 2020 - 05:49 PM

These came in a sound proofing kit i Purchased from Mini sport part number MOT4001, was a full kit including boot, i think i had the three bits for an age trying to work out where they went in the boot, then when fitted the boot lid all came clear. I have sprayed the ones inside the boot matt black. We have a brown carpet cover for the inside of the boot lid and for the boot  made by Danbury car carpets.Newtons didn't do the right colour brown.


Ref the engine and gearbox dates. Think they are both original at least the engine number matches. Its 1983 model so this being the first mini i have worked on not sure when these changed. Its 10" wheels and being the basic model they may have been using up old stock?. 


#41 Mogman

Mogman

    Passed Test

  • Just Joined
  • PipPip
  • 34 posts
  • Location: Tavistock

Posted 15 February 2020 - 08:20 PM

Well been busy busy busy. The glass is all in, the headliner and the sound proofing and carpet are in, heater sprayed and in (not connected yet. The wiring in the front is finished, ended up changing the coil and adding a ballast, front fog lights are fitted and front bumper. Brake fluid in and clutch fluid in and bleed. door now made up with locks, handles and glass along with trim.also added Petrol today and coolant. 

Things to do.

Bleed brakes grease suspension, fit rear pillar covers, rear shelf cover, Fit speakers radio, Walnut dash and steering wheel, Finish pipes to heater, wire aerials dab and FM, fit door cards,fit rear quarter cards and pocket liners and rear arch padded covers, Hand brake handle, and gaiter. Fit Seats. Fit front grille & number plate, and bonnet after fitted wipers (current have bezels the wrong way round!) Washer bottle and sir intake cowl. Then back to the boot to finish carpet and space hinges off so the boot will shut! Start her up, set timing, take to have tracking and headlights set. Then MOT. Then on the road

There is light dim but i can see it!

Photo's of most of what has been done.

IMG-3367.jpg


IMG-3381.jpg


IMG-3383.jpg


IMG-3385.jpg


IMG-3386.jpg


IMG-3387.jpg


IMG-3389.jpg


IMG-3390.jpg


IMG-3392.jpg


IMG-3393.jpg


IMG-3394.jpg


IMG-3395.jpg


IMG-3396.jpg


IMG-3399.jpg


IMG-3400.jpg


IMG-3401.jpg


#42 Mogman

Mogman

    Passed Test

  • Just Joined
  • PipPip
  • 34 posts
  • Location: Tavistock

Posted 25 March 2020 - 08:49 PM

To Start with, hope all are safe and well in these unsettled times.


I have been working from home and not on the mini, as i am working longer hours and very busy.


But i have finally been able to download some photo to update this post.


Prim is not fully finished but had her first outing of the garage under her own steam


Things to do.


Bleed brakes again, think i have a small weep some where Finish boot carpet, Mud Flaps, Roof Gutter trim, Wiper Intermittent kit, Trim Screen inserts down, fit Door "City" Decals

take to have tracking and headlights set. Then MOT. Then on the road

The light is bright,

However Lily driving test as been cancelled , we can no longer go out for driving lessons at the present, so its bitter sweet.

Photo's of most of what has been done.


IMG-3431.jpg


IMG-3444.jpg


IMG-3439.jpg


IMG-3442.jpg


IMG-3443.jpg


IMG-3451.jpg


IMG-3452.jpg


IMG-3453.jpg


IMG-3454.jpg


IMG-3455.jpg


IMG-3456.jpg


IMG-3457.jpg


IMG-3458.jpg


IMG-3638.jpg


IMG-3639.jpg


IMG-3640.jpg


IMG-3641.jpg


#43 sonscar

sonscar

    Up Into Fourth

  • Members
  • PipPipPipPipPipPipPipPipPip
  • 2,724 posts
  • Location: crowle
  • Local Club: none

Posted 26 March 2020 - 09:56 AM

Lovely,Steve..

#44 TheFabMini

TheFabMini

    Speeding Along Now

  • Members
  • PipPipPipPipPip
  • 459 posts
  • Location: Swaffham, Norfolk

Posted 10 May 2020 - 07:25 AM

Great build. Well done!

#45 Mogman

Mogman

    Passed Test

  • Just Joined
  • PipPip
  • 34 posts
  • Location: Tavistock

Posted 05 October 2020 - 06:59 PM

Well Prim passed her MOT no advisories and after restrictions lifted LILT PASSED HER TEST FIRST TIME and Prim is rolling around loving life.

She passed four week ago so only had one small issue when her decided not to give us 3rd or 4th. Replaced the Yoke and pins below the gear lever and fitted a spring return thing, so the she sits between 3rd and 4th now and things have tighten up and we have all 4 forward and reverse gear. Noted that the reversing lights only flash on when stick is pushed across then go out when moved back. so will have look into this but. other then that no issues so far!

Final photo's for you:-


IMG-3681.jpg


IMG-3682.jpg


IMG-3680.jpg


IMG-3679.jpg


IMG-3678.jpg


IMG-3677.jpg


IMG-3675.jpg


IMG-3676.jpg


IMG-3659.jpg


IMG-3657.jpg


IMG-3656.jpg


IMG-3655.jpg


IMG-3654.jpg


IMG-3653.jpg


Thanks to everyone for the support and think this site is great for Discount and help when needed.


1 user(s) are reading this topic

0 members, 1 guests, 0 anonymous users