Jump to content


Photo
- - - - -

1988 City E For Essex Boy

roundnose

  • Please log in to reply
78 replies to this topic

#61 ga2davt

ga2davt

    Stage One Kit Fitted

  • Noobies
  • PipPipPip
  • 97 posts
  • Location: Brentwood, Essex

Posted 12 November 2017 - 09:01 PM

After 2  x two hour sessions with a power file (7 off sand paper belts snapped!) then by hand with 40 grit sand sand paper, the wheels looked like this

Attached File  sanded.JPG   132.19K   0 downloads


Then after wiping over a few times with paint thinners to clean up, they were brushed with Bilt Hamber Hydrate 80 as rust proofer/sealant... looks like they got smurfed!! 

Attached File  smurfed.JPG   142.18K   0 downloads


Not sure what I'll put on next though. I know it needs primer then top coat. Normally I'd brush on  2-pack epoxy mastic (not poisonous--- from Bilt Hamber) then brush on silver coach enamel, that smooths nicely and goes super hard. That's probably what I'd do... Thirty years ago, I'd just slap on Hammerite / Smoothrite (Smoothrite doesn't exist anymore  ;-0)  


#62 1984mini25

1984mini25

    Crazy About Mini's

  • Members
  • PipPipPipPipPipPipPipPipPipPip
  • 8,781 posts
  • Location: -

Posted 12 November 2017 - 09:12 PM

Hammerite smooth does still exist, but it contains silicone, so nothing you try painting over the top (other than hammerite) won't react badly. Witch is a pita, as I rattle canned mine with hammerite smooth silver, but now have pans on redoing them.


Also it might be worth popping the tyres off, and giving were the bead of the tyres sit a going over with a flap disk and grinder. As the build up of corrosion will cause the tyres to not seal properly and lose air.


#63 ga2davt

ga2davt

    Stage One Kit Fitted

  • Noobies
  • PipPipPip
  • 97 posts
  • Location: Brentwood, Essex

Posted 14 November 2017 - 09:23 PM

Cheers 1984mini25... I'll certainly pop the tyres off and refurb the rims. Not sure whether the garage will do it or I get a "Roughneck Traditional Wrecking Bar 24" (600mm)" from Toolstation.com and do it myself..


The smurf blue wheels (Bilt Hamber Hydrate 80) dried black 

Attached File  IMG_0808.JPG   137.11K   1 downloads


Two coats of heat resistant (to 200 Celcius) brake caliper paint  ...it is Rosso Red... We won't see the calipers or brake drums but I'll know it is painted.  

Attached File  IMG_0807.JPG   140.87K   1 downloads


The front sub-frame got a second coat of coach enamel paint and is now Flame red.

Attached File  IMG_0809.JPG   144.61K   1 downloads 


#64 ga2davt

ga2davt

    Stage One Kit Fitted

  • Noobies
  • PipPipPip
  • 97 posts
  • Location: Brentwood, Essex

Posted 15 November 2017 - 08:58 PM

Spent tonight filling up the steering rack with 1/3 pint of EP90 gear oil and sealing it all in with Delphi (top quality) rubber gaiters. Both sides of the rack were done but you only see one side in the picture.  

Attached File  new boots and gear oil in rack.JPG   145.35K   2 downloads


Tried to remove the tyres from the wheels, but I couldn't break the beads. I'll take them to the local garage.

Attached File  couldn't break bead.JPG   138.31K   2 downloads


Got the paint tin out again and flipped the front subframe over. Painted other side

Attached File  painted other side.JPG   137.25K   0 downloads


and a couple of bits.

Attached File  painted some bits.JPG   147.81K   0 downloads


Don't know to do next... maybe take a break until the shell comes back... but probably not.. I'll find something.. ;-)


#65 Wise Old Elf

Wise Old Elf

    Camshaft & Stage Two Head

  • Members
  • PipPipPipPipPipPipPipPip
  • 1,655 posts
  • Location: Maldon
  • Local Club: Club Lotus

Posted 16 November 2017 - 08:28 PM

I have found a blunt garden spade will break the bead on all the Mini wheels I have tried.

#66 ga2davt

ga2davt

    Stage One Kit Fitted

  • Noobies
  • PipPipPip
  • 97 posts
  • Location: Brentwood, Essex

Posted 16 November 2017 - 09:48 PM

Thanks for that !! I'll go and get the spade on them after I post this. 

Update .. as you said, the spade easily broke the bead, but the next thing was the pry bar bends the metal wheel rim as it needs quite a bit of force to get the tyre over the rim... I'll hammer the rim into shape tomorrow and leave it to tyre fitters.. 


Tonight I was looking at how the front sub frame would come back together. The lower arm bushes are shot, so I got them out and will need to order more. I'd snipped off the brake flexi-pipes on the front sub frame so undid them and got the bits ready to put new flexi-hoses back on. Then I got the hi-los, sanded off most of the old red paint and sprayed in clear lacquer. 


Attached File  hi lo 1.JPG   143.25K   0 downloads


Edited by ga2davt, 16 November 2017 - 10:06 PM.


#67 Wise Old Elf

Wise Old Elf

    Camshaft & Stage Two Head

  • Members
  • PipPipPipPipPipPipPipPip
  • 1,655 posts
  • Location: Maldon
  • Local Club: Club Lotus

Posted 17 November 2017 - 09:29 PM

Thanks for that !! I'll go and get the spade on them after I post this. 
Update .. as you said, the spade easily broke the bead, but the next thing was the pry bar bends the metal wheel rim as it needs quite a bit of force to get the tyre over the rim... I'll hammer the rim into shape tomorrow and leave it to tyre fitters.. 
 
Tonight I was looking at how the front sub frame would come back together. The lower arm bushes are shot, so I got them out and will need to order more. I'd snipped off the brake flexi-pipes on the front sub frame so undid them and got the bits ready to put new flexi-hoses back on. Then I got the hi-los, sanded off most of the old red paint and sprayed in clear lacquer. 
 
attachicon.gifhi lo 1.JPG


I use rim protectors https://www.ebay.co....dYAAOSwo4pYJStn

I have never bent a rim. You need to push the tyre into the wheel well on one side and then lever the opposite side. The rim protectors stop the dents and scratches you can get on alloy wheels. Maybe you have bigger muscles than me.

#68 ga2davt

ga2davt

    Stage One Kit Fitted

  • Noobies
  • PipPipPip
  • 97 posts
  • Location: Brentwood, Essex

Posted 18 November 2017 - 02:45 PM

I think the difference between you and me is many years of experience .. I'm not bothered about small dents and scratches as the wheels are unpainted, so just had another go at getting the tyre off. I broke the bead on both sides, pushed one side into wheel-well but still don't get the tyre over the rim.. My huge pry bar might not be helping either.. a slim wide bar may be better. 


Just replaced the bushes in the front lower arms, on the front sub frame. One side needed the metal inserts as well as the poly bush, the other not. Even after a lot of sanding of the pin, no room for the metal inserts. It is tight onto the pin so clearly didn't the metal inserts on that side.


I cleaned up the replacement 12" hub caps. I don't think they need new paint. However I'm stumped as to how to fix them on. If anyone has ideas, apart from finding the proper clips --i can't... I'd appreciate it.. Cable ties and drill a few holes or stick on with silicone bathroom sealant ... these are the best I've got so far..    


#69 ga2davt

ga2davt

    Stage One Kit Fitted

  • Noobies
  • PipPipPip
  • 97 posts
  • Location: Brentwood, Essex

Posted 21 November 2017 - 04:44 PM

I just had a call with the garage who are meant to be welding new inner/outer sills and heel board. 


It looks like the shell is too rotten to go forward ..

   Floors are glued in and need replacing, before sills can be welded to them  

   It needs full boot floor.

   There is three inch thick filler where the sill meets the inner wing.  

I'll make photos at the weekend when I go to see it. 


Hopefully the garage owner can put me in touch with someone with a good shell... 


Ouch ...  


#70 Wise Old Elf

Wise Old Elf

    Camshaft & Stage Two Head

  • Members
  • PipPipPipPipPipPipPipPip
  • 1,655 posts
  • Location: Maldon
  • Local Club: Club Lotus

Posted 21 November 2017 - 07:40 PM

Anything can be fixed. Mine was a proper rust bucket but not so bad now.

#71 ga2davt

ga2davt

    Stage One Kit Fitted

  • Noobies
  • PipPipPip
  • 97 posts
  • Location: Brentwood, Essex

Posted 21 November 2017 - 10:42 PM

Cheers Wise Elf! I've just got in after seeing another shell ('89 Mayfair.) It's being delivered in a couple of days and I'll try to start again off this. Its going to be a learning curve building it up as, like you, the clevis pins on the clutch/brake are not fun, the steering column etc.. It had a glass-fibre front end so I'll need to swap the front panels over from the yellow shell... the boot floor/just the wheel well is shot.. but apart from that, it looks honest. 


Then paint needs doing...it's not bright yellow now... the shell is orange.... with bright yellow doors, boot lid, bonnet and front end off the car I've got now.. Yummy!   I'll post some pics when it's here. 


First thing will be to swap the rear sub frames over... I hope the heel board on this is okay.. that was the start of this journey..     


#72 ga2davt

ga2davt

    Stage One Kit Fitted

  • Noobies
  • PipPipPip
  • 97 posts
  • Location: Brentwood, Essex

Posted 25 November 2017 - 02:07 PM

So... rather than spend the next six months welding and paying out for panels, mig gas and wire, I did something crazy...I bought another shell, after seeing it in the dark with a torch and not able to check underneath. I was daft enough to buy a rusty car in the first place, so double or quits on this shell....  


Yellow doors, yellow bonnet and yellow boot lid will go on the orange shell. The car is missing a front end so the yellow car will also donate a yellow steel front end. The shell has rough paint and needs a respray in the years to come.. Here's my friend Matt again :-)

Attached File  a_shell.JPG   127.93K   2 downloads


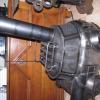
The shell used to have a fibreglass front on it, apparently had a red top engine (2 litre 16 valve Vauxhall)  and was used for racing ..

Attached File  b_minus front.JPG   139.2K   1 downloads


Lots of holes for, I guess, two different roll cages

Attached File  c_Holes for rollcage.JPG   128.98K   1 downloads


First job after sanding was covering the car in Bilt Hamber Hydrate 80, that goes on milky blue then dries black 

Attached File  d_Painted.JPG   124.02K   0 downloads


So here are the problems, apart from the missing front end. Rotten boot floor.

Attached File  1_boot floor.JPG   142.05K   1 downloads


Heel board is going off, but caught in time. 

Attached File  2_heel board.JPG   121.02K   2 downloads


Small hole in rear wheel arch and more holes from roll cage.

Attached File  3_wheel arch.JPG   115.25K   1 downloads


And the same on the other side

Attached File  4_wheel arch.JPG   97.75K   0 downloads


Some other random hole. By the way the sills aren't over-sills, they don't look old and there is no sign of welding. I can't believe they are original, so they must have been replaced and spot welded. There are patches on the door step, so there has been rust in the past. The jacking points inside are not as new, so that probably means the sills were replaced. 

Attached File  5_another hole.JPG   104.43K   0 downloads


These holes are small. The roll cage holes are much bigger.. I might just clean up, rust-proof, add thick epoxy primer then the hole won't get a bigger. Add a patch of fibreglass. Do the same with the roll cage holes.. Under the car, the floor pan is covered in old crusty waxoyl. There are no surprises there. The floor near the drivers and passenger side foot-well is looking thin, so I'll cut out patches from the yellow car to use later and save on buying panels.


Yippee -- the gamble on the shell has paid off, but still a lot of work to do. 


#73 Wise Old Elf

Wise Old Elf

    Camshaft & Stage Two Head

  • Members
  • PipPipPipPipPipPipPipPip
  • 1,655 posts
  • Location: Maldon
  • Local Club: Club Lotus

Posted 25 November 2017 - 06:14 PM

Fingers crossed for you.

#74 ga2davt

ga2davt

    Stage One Kit Fitted

  • Noobies
  • PipPipPip
  • 97 posts
  • Location: Brentwood, Essex

Posted 28 November 2017 - 12:15 PM

Thanks Jason. I'm hoping to get outside tonight and put Bilt Hamber Epoxy Mastic 2-pack primer on the inside of the shell so it goes white. 
 
Jamie at 'Little Legends' Mini Specialists at Canvey Island is sending the yellow shell back tomorrow on a recovery truck, so I can get more bits off it. 
 
I talked to the technical staff at this site and told them that I was daft enough to brush paint a car on the driveway. They recommended this paint and told me how to best thin it to speed drying and minimise brush marks (but it still runs..) They told me to check out Youtube to get idea on how to finish (i.e. 1500 grit, 2000 grit with water, 3000 grit with water, then Farecla compound on a polisher. 
 
 
I'll post more photos soon..

Edited by ga2davt, 28 November 2017 - 12:16 PM.


#75 panky

panky

    Camshaft & Stage Two Head

  • Members
  • PipPipPipPipPipPipPipPip
  • 1,776 posts
  • Location: Cheshire
  • Local Club: Northwest Casual Classics

Posted 28 November 2017 - 01:01 PM

Have you tried a roller? I know of a few people who have rollered Rustoleum with good results.


Also tagged with one or more of these keywords: roundnose

0 user(s) are reading this topic

0 members, 0 guests, 0 anonymous users