Jump to content


Photo
- - - - -

Restoration Dilemma - John Cooper Si


  • Please log in to reply
28 replies to this topic

#1 Chodosh

Chodosh

    Stage One Kit Fitted

  • Noobies
  • PipPipPip
  • 72 posts
  • Location: London

Posted 23 December 2017 - 01:17 PM

I have an original John Cooper Si sold new by JC Garages.

The car has some tin worm around the scuttle by the front screen as well as at the seams under the headlights.

To repair and let in new metal is probably more hassle and work, particularly around the headlight and parts are so cheap it makes sense to just put a new front to save repairing the metal work in half a dozen different spots (and I cant guarantee its not worse than that). I also quite fancy taking it off, having it welded up and hanging a complete front on the wall 😃

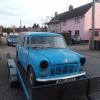
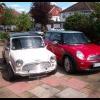
My question is... should I have my guy - who is a fantastic metal worker - deseam the front end and lead fill like I had on my old mini. See pics. The car is a beauty and incredibly well specd. Do people think that I should stick to original seams or would deseaming alter it from original, both value and sense of how they were built.

I just think that it gives clean lines and if done well, add to longevity and rust prevention.

Answers on a postcard. Attached File  94798CBD-B875-41AE-848D-035F87DA40FD.jpeg   40.25K   6 downloadsAttached File  066DC323-EE36-4079-8B0E-CE3B8E5E2794.jpeg   43.82K   6 downloadsAttached File  8EE02A82-A16A-4540-B049-5358B785A57F.jpeg   69K   7 downloadsAttached File  3B371DF1-E44A-486B-B748-353A19234417.jpeg   47.03K   10 downloads

#2 wingnut

wingnut

    Speeding Along Now

  • Members
  • PipPipPipPipPip
  • 463 posts
  • Location: bury st edmunds

Posted 23 December 2017 - 01:21 PM

Keep it standard.It will look original and hold its value


#3 Haygate

Haygate

    Mini Mad

  • Noobies
  • PipPipPipPip
  • 115 posts
  • Location: Telford

Posted 23 December 2017 - 01:23 PM

Im not a fan of the scuttle/wing loading, I dont mind the front but I would prefer the seems.

#4 Chodosh

Chodosh

    Stage One Kit Fitted

  • Noobies
  • PipPipPip
  • 72 posts
  • Location: London

Posted 23 December 2017 - 01:45 PM

Im not a fan of the scuttle/wing loading, I dont mind the front but I would prefer the seems.


I just had a call with my guy and am pretty certain I will steer clear of seam welding the front scuttle.

The front wing is less noticeable but probably more practical in terms of keeping the water out and ensuring it’s done once and once only.

#5 Cooperman

Cooperman

    Uncle Cooperman, Voted Mr TMF 2011

  • TMF+ Member
  • PipPipPipPipPipPipPipPipPipPipPip
  • 23,036 posts
  • Location: Cambs.
  • Local Club: MCR, HAMOC, Chelmsford M.C.

Posted 23 December 2017 - 04:38 PM

De-seaming or non-original panel joins will seriously de-value any classic Mini.
Basically it reduces the value by the cost of putting it back to original.
I once had to RE-seam a 1967 Cooper and it was a lot of work.

#6 1984mini25

1984mini25

    Crazy About Mini's

  • Members
  • PipPipPipPipPipPipPipPipPipPip
  • 8,781 posts
  • Location: -

Posted 23 December 2017 - 04:56 PM

Filled over seams to me scream that someone has bodged it with filler, either because of rusted out panels or poorly fitted replacement's.

#7 slidehammer

slidehammer

    One Carb Or Two?

  • Members
  • PipPipPipPipPipPipPip
  • 1,081 posts
  • Location: Surrey
  • Local Club: LSMOC

Posted 23 December 2017 - 05:19 PM

I respective of the potential to de-value and make the car less sell-able long term, I like the look of the standard seams I think they are a big part of the Mini's character.


#8 dyshipfakta

dyshipfakta

    Camshaft & Stage Two Head

  • Members
  • PipPipPipPipPipPipPipPip
  • 1,696 posts

Posted 23 December 2017 - 06:12 PM

Thats bog all on that cooper anyway. I wouldnt do anything inject it with rust prevention stuff and drive it that front end has another 5 years on it yet lol

#9 Big Sam

Big Sam

    One Carb Or Two?

  • Members
  • PipPipPipPipPipPipPip
  • 853 posts
  • Location: Merseyside

Posted 23 December 2017 - 06:13 PM

Unless you really want to spend the money I'd leave it as is.


#10 Chodosh

Chodosh

    Stage One Kit Fitted

  • Noobies
  • PipPipPip
  • 72 posts
  • Location: London

Posted 23 December 2017 - 06:49 PM

Im committed to get the work done as it needs two new door skins and I dont want the tin worm to get worse.

What is the main cause of the seams popping around the headlights. Is it simply down to people not drying the car when putting it away? Are there ways to help prevent recurring it without deseaming it?

Im hearing peoples thoughts and the more I consider, standard is the way to go.

#11 dyshipfakta

dyshipfakta

    Camshaft & Stage Two Head

  • Members
  • PipPipPipPipPipPipPipPip
  • 1,696 posts

Posted 23 December 2017 - 07:45 PM

Proper seam sealer and zinc primer before hand then front arch protectors should last donkeys.

#12 mab01uk

mab01uk

    Moved Into The Garage

  • Members
  • PipPipPipPipPipPipPipPipPipPipPip
  • 11,795 posts
  • Local Club: Mini Cooper Register

Posted 23 December 2017 - 08:49 PM

The later wide windscreen seal is a water and rust trap........earlier Minis with the narrow seal rarely rusted around the windscreen area, see below.
 
WINDSCREEN SEAL, LATER WIDER TYPE 1991-2000

"Fitted from late 1992 and on all MPI cars 1996 on it has an extra lip to give a neater seal line to help quieten down windscreen/panel vibration noise on the "drive by" homologation tests.
Also designed to help stop windscreens from leaking this seal does hold water under the extra lip causing rust on the windscreen scuttle/bodywork aperture if the rubber is perishing or going hard through weather exposure--to save rust problems many owners fit the earlier screen rubber-see CZH1719MS."

https://www.minispar...CCB10011MS.aspx


Edited by mab01uk, 23 December 2017 - 08:51 PM.


#13 some1158

some1158

    Speeding Along Now

  • Members
  • PipPipPipPipPip
  • 369 posts

Posted 24 December 2017 - 02:24 PM

The seam below the headlights tends to rust from the inside out, from within the wheelarch - so the best way to stop rust there is to use something like Bilt Hamber UC in the arches. If putting on new wings then use a good seam sealer at the appropriate time, then once painted apply the Bilt Hamber and potentially think about arch liners.


#14 Chodosh

Chodosh

    Stage One Kit Fitted

  • Noobies
  • PipPipPip
  • 72 posts
  • Location: London

Posted 27 December 2017 - 07:12 PM

Thanks for the input folks. Picked up all the panels today and the car goes in to the shop tomorrow.

I think I mentioned but Im having the old front welded up and it will sit nicely in the garage as a bit of wall art. All I need now are a couple of old headlights and trim rings and Ill wire up a couple of small Edison bulbs in them so I can connect it to the mains and use it as a light feature.

Ill update with progress as it comes together. Am sticking with traditional seams. None of my cars are garage queens, but I do try and use them in fair weather. I keep the car indoors under cover anyway so it should last a lifetime like that.

Attached File  75FCF166-447F-4524-9008-462B1458A93C.jpeg   91.05K   2 downloadsAttached File  C34A2422-A452-40AB-987C-449C9F417DC9.jpeg   78.32K   2 downloadsAttached File  DFA358E3-7E09-4555-9220-5272DD4458DE.jpeg   69.57K   1 downloads

#15 Chodosh

Chodosh

    Stage One Kit Fitted

  • Noobies
  • PipPipPip
  • 72 posts
  • Location: London

Posted 30 December 2017 - 07:27 PM

So the car came apart quite quickly. Seems there was a little more then surface rust with some nice holes in the inner wings and along the inside edge of the doors although the sills seem pretty solid.

Going to the body shop during the week to clean and degrease the engine whilst access is good. My guy has to let in some new metal where its rotten but once that is done and the front is cleaned up, the new front should go on pretty quick.

Might as well use this as a rolling resto thread. Seems Im in it for the long haul (yet again having done the same to my Porsche last year).

Attached File  AC685913-79D7-47A1-B24A-E82075A7E7CB.jpeg   57.05K   3 downloadsAttached File  8944CA6A-7C45-41A0-8878-E520B9D99044.jpeg   39.06K   3 downloadsAttached File  14F1F218-FC23-46A0-819E-15D786C1CEF1.jpeg   29.62K   3 downloadsAttached File  1C19DFAF-8B6A-46E5-B4BC-586AAB0AAF8A.jpeg   21.4K   1 downloads


0 user(s) are reading this topic

0 members, 0 guests, 0 anonymous users