Jump to content


Photo

Bringing A Convertible Back To Life


  • Please log in to reply
6 replies to this topic

#1 Ivandit

Ivandit

    Starting My Mini Up

  • Noobies
  • Pip
  • 3 posts
  • Location: London

Posted 07 October 2018 - 03:15 PM

Hi everyone,


I recently joined the forum and the "Mini world" with the exciting project of bringing a 1980 convertible back to life. This is my first Mini experience, so I don't even know where to start! :lol:


She's been stored for over 8 years, but as mentioned in my introduction post her overall condition is quite good, with the worst areas being brakes and suspension (rear subframe looks like it will need a replacement). I would like to re-do the interior (it's currently quite terrible) and under the bonnet there will be some work to do as well.


So...my first absolute-noob question would be...is there any particular order? I guess stripping it all to check the body is OK and repair any sign of rust? and then? It's a winter project (hopefully just winter, hahaha!) so no rush at all, I'd rather do it well than quick ;)

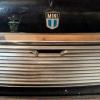
As a starting point, the photos I used to introduce her:


msyqtf.jpg


a47erp.jpg


Thanks!!


#2 Bat

Bat

    One Carb Or Two?

  • Members
  • PipPipPipPipPipPipPip
  • 903 posts
  • Location: Bermingum

Posted 08 October 2018 - 07:34 AM

Hi,

Welcome to the forum  :proud:

First I'd build a shed to put all the parts in your going to remove when stripping the shell.

It doesn't look like you've got enough room for storage and working on the shell in your garage.

Cheers  :proud:


#3 Ivandit

Ivandit

    Starting My Mini Up

  • Noobies
  • Pip
  • 3 posts
  • Location: London

Posted 08 October 2018 - 12:16 PM

Thanks Bat!


That garage is where it was parked when I went to pick it up, luckily I have a bit more room than that in my garage...it would have been a pain in there! ^_^


#4 Ivandit

Ivandit

    Starting My Mini Up

  • Noobies
  • Pip
  • 3 posts
  • Location: London

Posted 28 October 2018 - 11:41 AM

Hi all,


A quick update with the first steps. As recommended everywhere, I started by removing the fuel tank, what also was good to have a closer view to the area and take note of the issues found.

As expected, rust was the main one, being not too bad on some areas and (as I guess to be normal) quite a lot in some others.


I took some photos, feel free to comment/advice!! ;D


I might be wrong because of inexperience, but the trunk looks fairly good, some bits of rust here and there but nowhere near some of the restorations I´ve seen before.


72q7ug.jpg


bhewib.jpg


The battery box needs some attention


c013c.jpg


The trunk lid looks OK, despite some (IMO) terrible spraying.


10nezbn.jpg


34j4y6o.jpg


As expected, the bumber and its mounts are quite rusty. 2 out of 3 bolts broke when trying to remove the mounting nuts...I´ll search how to fix that >_<


1z4yj38.jpg


sd1dvc.jpg


Only rust in the tank is this, not sure how to fix it (I read some serious advice about risks when working on petrol tanks). The interior looks OK, but there´s quite a lot of dirt...any advice for cleaning it?


10ygck4.jpg


The rear subframe is, as expected, the worst part so far. I´m not sure if it´s worth restoring or maybe just getting a new one. Same for brake drums, maybe replacing the whole thing is safer?


s3q5qg.jpg


1zqg67c.jpg


2me3b15.jpg


Thanks!!


#5 jamesquintin

jamesquintin

    One Carb Or Two?

  • TMF+ Member
  • PipPipPipPipPipPipPip
  • 1,016 posts
  • Location: Harlow

Posted 28 October 2018 - 10:15 PM

this is what it looks like underneath for reference:
 

7KzBGuK.jpg


Q


#6 Boycie

Boycie

    Camshaft & Stage Two Head

  • Members
  • PipPipPipPipPipPipPipPip
  • 1,978 posts
  • Location: Kent/ East Sussex border

Posted 29 October 2018 - 08:32 AM

Great project, and welcome!

You'll have to go through the entire car but on first glance, it looks pretty good on the whole.

That rear subframe is obviously very crusty but you may find that once it's removed, it's not as bad as it looks.  If you don't manage to make any holes in it, have it media blasted and then paint and refit.  I try to save all the usable original subframes I can find as the modern reproductions are very thin (and noticeably lighter in weight).  The super-expensive Heritage frames are hardly any better in my experience either.

Have fun!


#7 Bat

Bat

    One Carb Or Two?

  • Members
  • PipPipPipPipPipPipPip
  • 903 posts
  • Location: Bermingum

Posted 29 October 2018 - 08:40 AM

Hi,

Looking fairly solid so far. Removing the subframe will allow you to see the top of it and more of the floor. I too would use the subframe again if it's solid.

Cheers  :proud:


0 user(s) are reading this topic

0 members, 0 guests, 0 anonymous users