Allright so, New Part today!
today we are talking about dashboard. unfortunately, I have less pictures to share for that one but I'll be glad to share what I have.
ok, So as many of you probably, I wanted to fit a wooden dashboard in my mini. But you know the deal, there are constraints  :
:
1. if possible, I wanted to have the best possible quality out there and not some crappy dashboard that barely fits in the car
2. I want 3 additionnal instruments.
3. electrical wiring must be selfcontained and fused
4. I don't want the monstruous glove box handle with a 200kg (metric, of course) pull force necessary to get the magnet off. I wanted the more elegant push-pull mecanism that one find on some later Mini Cooper I believe, post 1995.
Well, turns out that the last one, is just simply not available, SO, I have to make it myself.
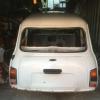
this is what it looks like today:
 IMG_20190529_202918_247-W600.jpg 75.24K
22 downloads
IMG_20190529_202918_247-W600.jpg 75.24K
22 downloads
and yes, the steering wheel is the traditionnal made in UK Motolita.
1. finding the right dash.
there are tons and tons of wooden dash board out there, they mostly look the same and assembly quality, is, well... questionable some time. I found a quite unique dash here, in a french on-line shop:
https://www.thelittl...-seventies.html
(sorry, all in french)
It's made localy by a guy in western France. I liked the quite unique look of it. it's not for everyone of course, but it's at least something different from the classic plasticy faux wallnut burr that one can find everywhere. the dash does not exist with 3 additionnal instruments, but the guys were nice enough to modify one for me and they did it well.
did it come with some flaws ? Sure enough it did, but that's because I'm a pain in the *** to start from 
It did have excessive glue on the back of chrome ring that I had to shave off. and the retaining metal bracket on the instrument bay was a bit too close to the instrument, so I shaved it off too. one of the indicator arrow was not exactly horizontal, but no big deal, this not glued, so you can change it.
appart from that, nothing major.
removing the instrument cluster and the existing vents is nothing special, you can find many tuturials online to do so, no big deal:
remove the 4 screens in the engine bay (behind the dirty, creepy insullation foamy thing if you did not ditch it already, now is a good time to do so)
remove the instrument canopy
unplug gently the electrical connectors, those are fragile
unplug the tacho cable and voila.
Now let's talk about the glove box.
I wanted the push type of latch. so I removed the magnet and the handle. I found in my next hardware store this type of latch for 5€:
https://latourdupin....31,787,1225.htm
(sorry in french again)
I then made a custom aluminum bracket to hold it:
IMG_20190813_153629-W600.jpg 21.98K
8 downloads
piece of advice here: the push-mechanism is not that strong but I doubled the thickness of aluminium to get enough rigidity. and then, you just have to screw the little plastic latch on the back of the glove box door and voila.
IMG_20190813_153639-W600.jpg 20.06K
5 downloads
of course, you are left with a hole in the glove box door (where there was the handle). you could fill it in, then paint and polish so it looks like wood. I took a different route. I ordered a badge at what is probably the first and last Cafe Racer bar in London: the Ace Cafe.
check out here for a bit of history, marvel and glory: https://london.acecafe.com/history/
the club was at the root of the Cafe Racer culture with the ton-up boys, 59 club and so on, especially up to the mid 60's.
so, back to the workshop: I got the badge, removed the pin and carved in the glove box door just the right depth for the pin to sit. then it is glued in place with black silicon rubber (that you can buy again from your hardware store). I think it looks quite cool, unique, and very few people will get its reference, especially in France, but accross the Channel, I think it's part of motoring culture that is worth celebrating before it disappear all together.
IMG_20190508_154120_933-W600.jpg 63.04K
4 downloads
tech tip here: why black silicon ?
it's because of weather: if you glue metal hard on wood, then the thermal expansion coefficient of both will not match. Since in summer we get glose to 40°C and -10°C in winter up here. the silicon will give me a bit of flexibility. will it degrade with time ? Maybe, but it's none agressive, non destructive, and silicon rubber tubes are cheap, so I can reglue if I feel the need to.
on instruments side, I changed the background of original instruments to maniola (again, tons of how-tos out there, no need to expand on it). and I installed 3 instruments gauges:
oil pressure
clock
volt-meter.
the oil pressure is an electrical one, and we covered its installation here for those who are interesting in fitting an electrical sender unit:
http://www.theminifo...ressure-sensor/
now here is the catch:
for those instruments, you need:
a permanent +12
a contact +12
a ligth-on +12
some ground.
and the cable from the electrical sender unit.
because I'm kind of paranoid and also because I have seen burned minis in the past, I installed an extra fuse box for ALL the live wire (and yes, you have to consider the electrical sender unit as a live wire). it's installed in the side of the glove compartment on its own alluminium bracket. you can use a standard mini fuse box for that. here it is box opened:
IMG_20190813_153610-W600.jpg 30.57K
5 downloads
luckily you can get all the power you need just on the other side of the fire wall, on the original fuse box itself. there is a schematic somewhere on the forum to help you find what color is what. and often there are enough pins left on the right side of the fuse box to allow you to plug your own wire and be on the safe side: your instruments will have fuse, and the all thing will also be fused by the main box. better safe than sorry.
before remounting the dash, one has normally to mess with the evil eyes of fresh air vent. you know the deal: if you want to reuse those, you have to cut them, and use some kind of pipe to go from the bulkhead opening to the actual airvent. But of course, those are ugly as a Monday morning in office. so that's a no-no. I have been looking for weeks for a cool alternative. and because the holes in the dash are not quite standard, it's hard to find one that fits. So I looked outside the box and found those:
IMG_20190813_153724-W600.jpg 52.45K
4 downloads
I got those from a company called "Franklin Louvers company" in Providence. they make vents for house ventiliation. 
but I think they are quite cool. they cost next to nothing (well, compared to the actual car vents out there) and are aluminium so they can be polished. you can get them from those gentlemen, they ship to europe:
https://www.ventmyho...featured&page=1
So I got a lil selection of those:
IMG_20190813_155706-W600.jpg 20.32K
6 downloads
so I can try which one fits what I want. you can also choose the grill type of course.
Now couple of tricks: they fit in the air vent, but the hole is still too large, so I have made a bracket, fixed from behind the dashboard based on plastic kitchen evacuation pipe. and painted black with black bumper paint. this thing is strong as hell and will adhere to plastic super good. several reasons fo make such tube bracket:
1. then I was just able to pop my vent in. it stays in place, it's flush and I can remove it to clean inside the pipe if I need to.
2. the pipes you get from mini vendor is actually not nice:
I used that: https://www.minispar...sic/CZH700.aspx
it's WAY too rigid! if you don't have a bracket to hold the pressure from the pipe, I wonder how any vent does not pop out of place once in a while. so, with a bracket, the pressure is actually on the dash and not on the vent.
one issue with this installation: you can't close the vents anymore. but it looks a bit cooler than the plastic black blod, or worse, the plastic black blobs with the plastic chrome thing glued on top of it.
That's it for the work on this dashboard. A couple of good to know tips as well if you plan to install any dash:
the dash comes with metal braces to fix in against upper and lower metal shelf edge. it's a good idea to slice open a bit of rubber fuel hose and glue it (silicon rubber again) on the edges of the metal braces that will go in contact with the shelf: this will reduce vibration a lot.
also something very important: when you screw back the instruments on the wooden bay, you MUST pad the contours where the instruments glass will touch the wood. otherwise, vibrations will mess your instruments, and the rub will destroy the glass eventually. use some thin foil polystyrene foam sheet (you know, the one you get from buying a canvas, or a mirror, etc). it's unoticeable, and if your glass is destroyed, you will be sorry. those are hard to find.
that's it for today! hope this helps someone one day! let me know if you have any questions folks!
IMG_20190529_202918_247-W600.jpg 75.24K
22 downloads
Edited by Benoit_Dupont, 13 August 2019 - 02:45 PM.