Jump to content


Photo
- - - - -

1989 Mini - Been Residing Under A Tree For The Past 7 Years


  • Please log in to reply
23 replies to this topic

#1 robbur

robbur

    Learner Driver

  • Noobies
  • PipPip
  • 13 posts
  • Location: Tamworth

Posted 02 March 2020 - 06:59 PM

Hi All


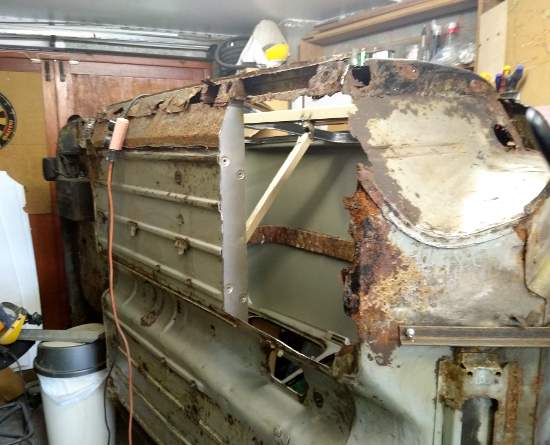
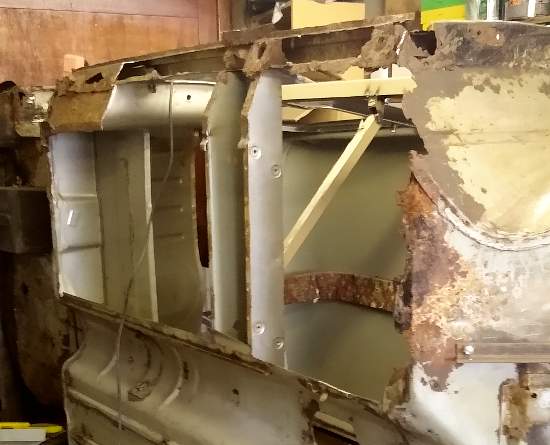
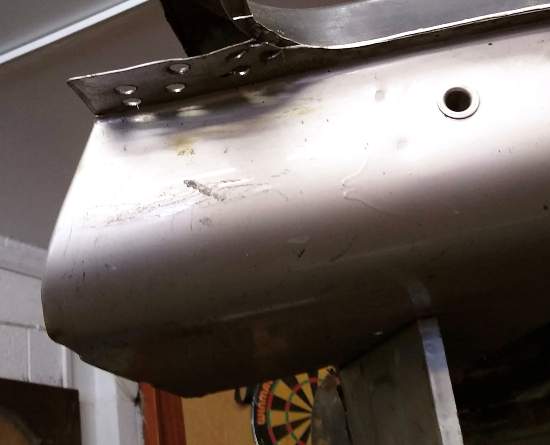
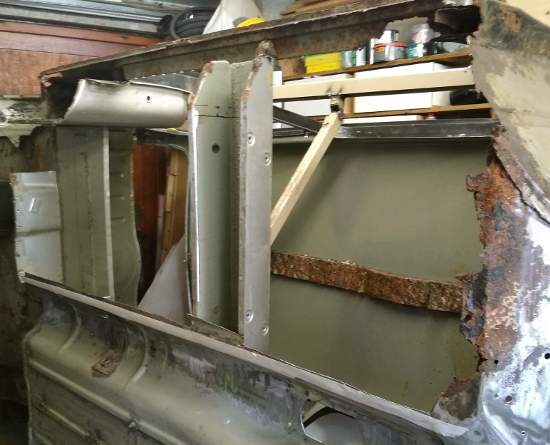
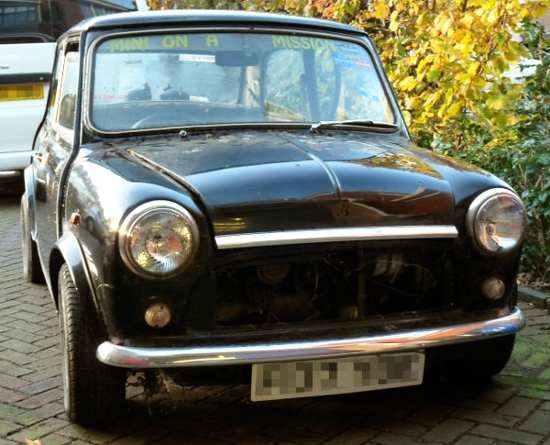
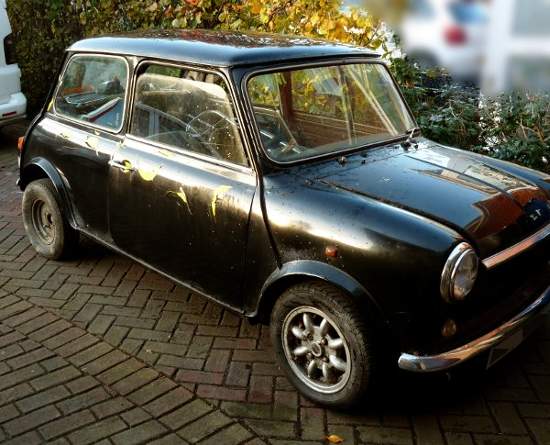
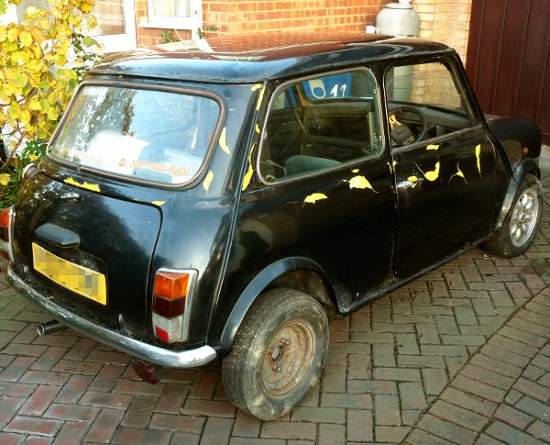
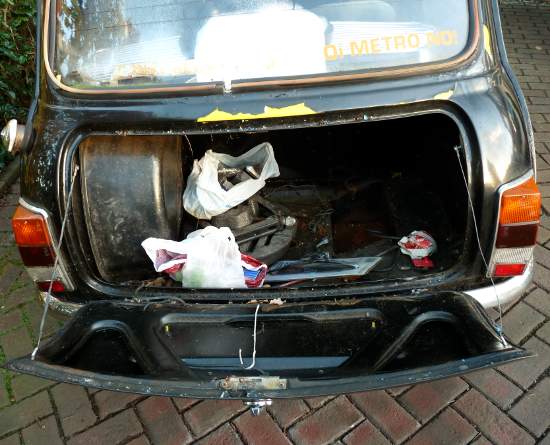
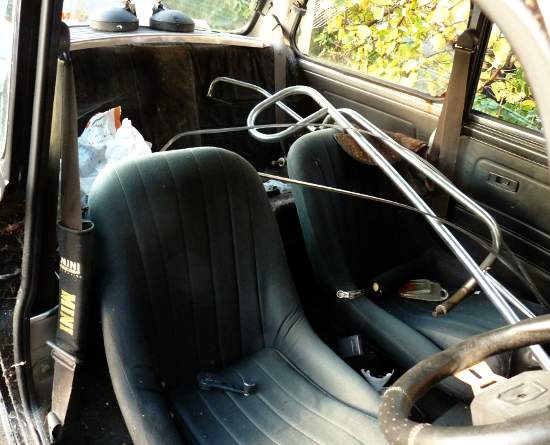
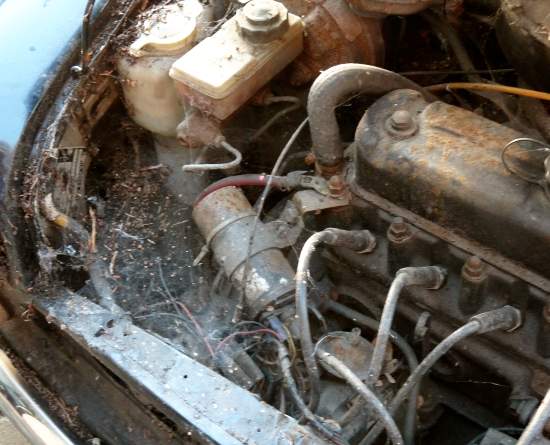
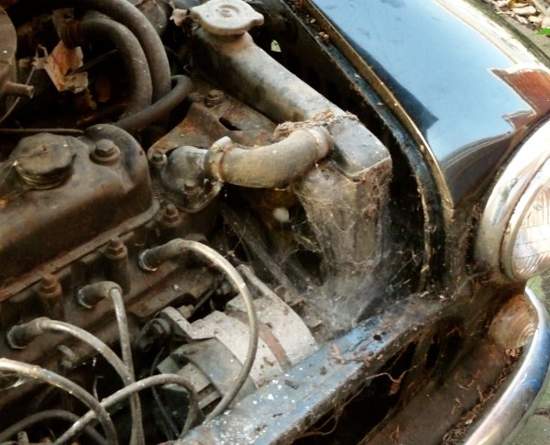
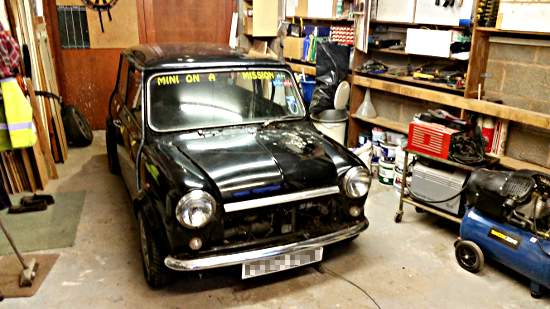
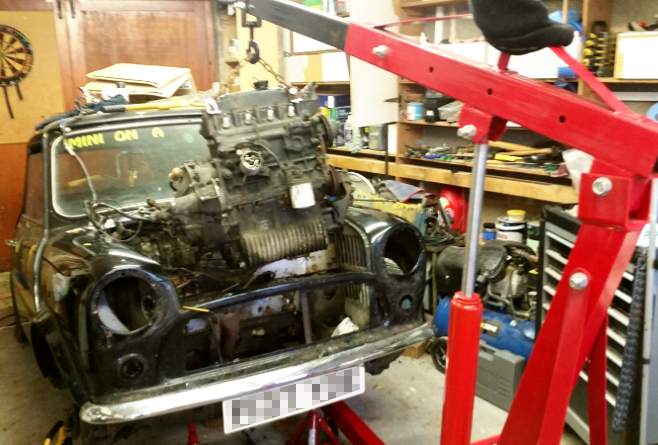
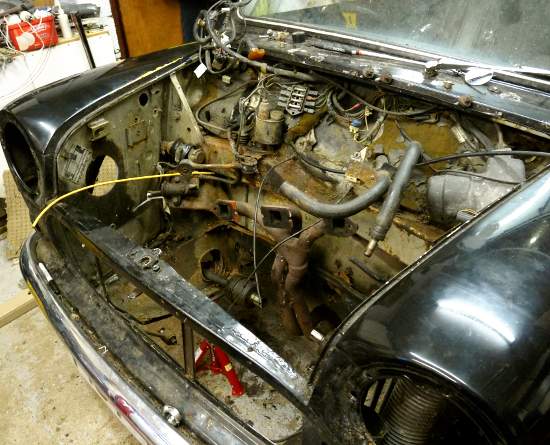
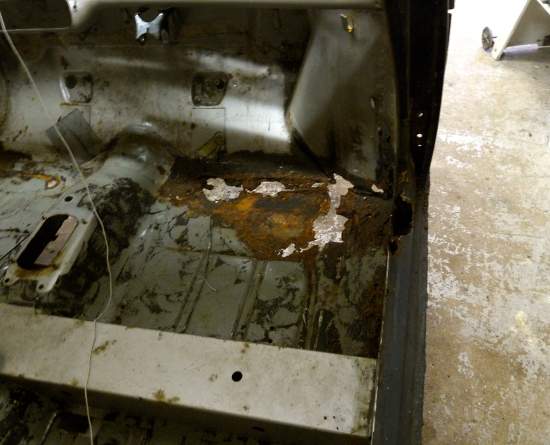
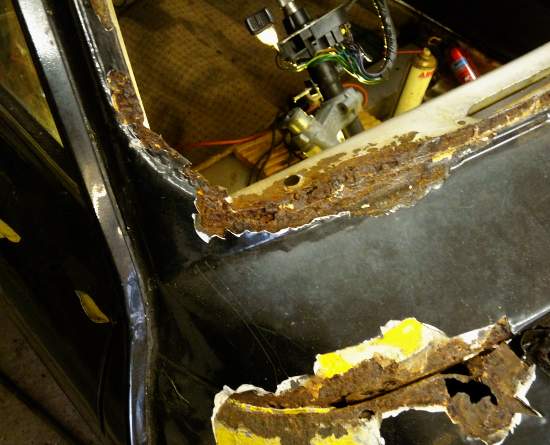
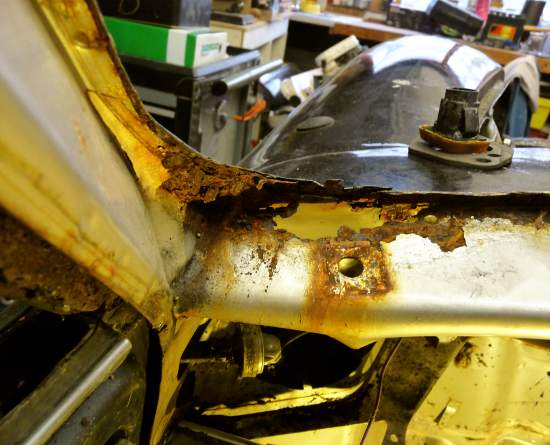
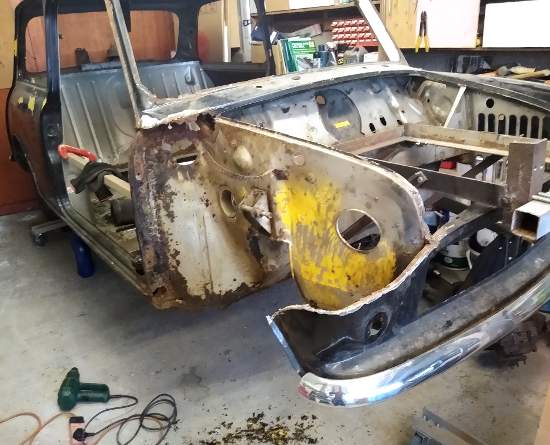
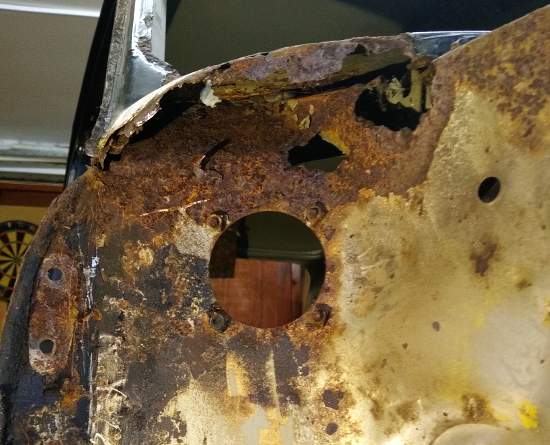
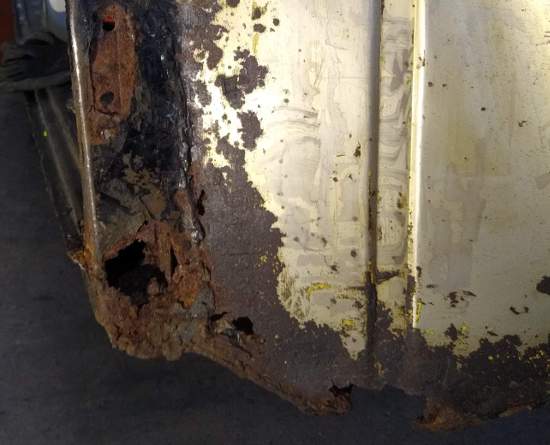
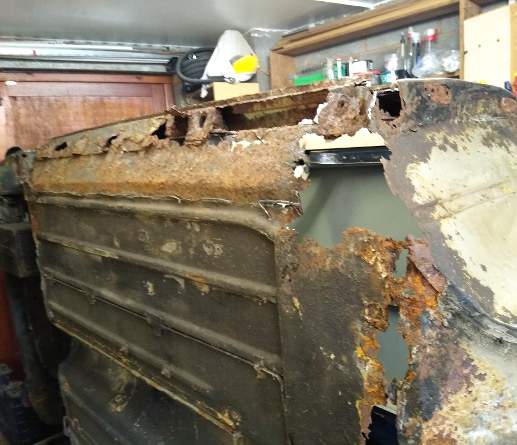
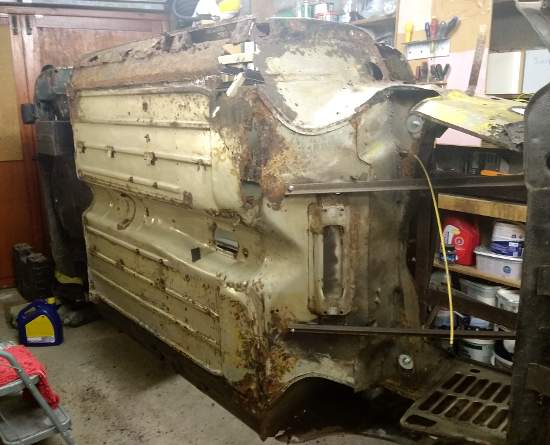
The other year a friend was about to scrap a 1989 Mini City that had been in their family for years, unfortunately for the last 7 of them it was left outside sitting under a tree. I decided to take it on as a project and try to rebuild it back to rust free condition. It's a bit bigger than any previous bodywork repairs I have tackled but decided it might worth having a go.


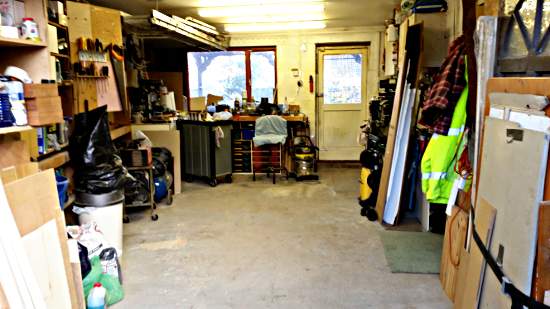
The Mini was towed a mile my house then sat under cover on my drive for a year whilst I made room for it in the garage. This is what it was like when I got it home:


austin-mini-001.jpg


austin-mini-002.jpg


austin-mini-003.jpg


austin-mini-004.jpg


austin-mini-005.jpg


austin-mini-006.jpg


austin-mini-007.jpg


#2 mercenary62

mercenary62

    Speeding Along Now

  • Members
  • PipPipPipPipPip
  • 359 posts
  • Location: some where in the 70s
  • Local Club: mini clan

Posted 02 March 2020 - 08:17 PM

brilliant project mate ,another one being saved too ,keep us posted on your progress


#3 tankertanker

tankertanker

    Stage One Kit Fitted

  • Noobies
  • PipPipPip
  • 53 posts
  • Location: Gillingham dorset

Posted 02 March 2020 - 08:54 PM

As above , now crack on ☺

#4 robbur

robbur

    Learner Driver

  • Noobies
  • PipPip
  • 13 posts
  • Location: Tamworth

Posted 03 March 2020 - 08:12 AM

From the photos in the first post it took me about a year to re-roof my 16 ft x 12 ft shed and move all my wood working tools into it clearing the garage for the mini.


austin-mini-008.jpg


austin-mini-009.jpg


A quick oil change, cleaned and reset the points and rigged a temporary fuel feed and it runs.


Knowing the engine was okay, it was time for the strip-down.


A new engine hoist arrived off Ebay, I bought the 2 tonne hoist because I will have other uses for the ram (home made log splitter). Amazing what you can get for £120.00


austin-mini-010.jpg


austin-mini-013.jpg


austin-mini-014.jpg


austin-mini-015.jpg


austin-mini-017.jpg
 

austin-mini-018.jpg


All the usual rust areas on the floors, sills, scuttle and many other places. Also some really dubious repairs with plates welded over rust and the notorious cover sills hiding what I expect to be a few kilos of rust.


Edited by robbur, 03 March 2020 - 08:13 AM.


#5 robbur

robbur

    Learner Driver

  • Noobies
  • PipPip
  • 13 posts
  • Location: Tamworth

Posted 03 March 2020 - 04:08 PM

It was at this stage seeing the amount of work needed under the mini and the fact that I was getting a bit to old to be lying under cars welding for many weeks of work, that I decided to build a rotating jig. I had enough scrap steel lying around so it was designed around the scraps I had available.


I use Blender the opensource 3D creation suite for most of my design work and there is a short article on my website that details how I went about designing it.


blender-reference-002.jpg


austin-mini-019a.jpg

austin-mini-019.jpg


Edited by robbur, 03 March 2020 - 04:08 PM.


#6 Alex_B

Alex_B

    Doesn't put foot in mouth enough!

  • TMF+ Member
  • PipPipPipPipPipPipPipPipPip
  • 4,573 posts
  • Location: Eastbourne

Posted 03 March 2020 - 04:16 PM

Impressive modelling! I mostly work on Solidworks myself for the day job and a bit of fusion 360 in my home time when I can be bothered. Attempted surfacing the mini in the same way you have a couple of times on my lunchbreak but never got it good enough for my liking. Hoping to model / scan my Minus in at some point so I can model some aerodynamic surfaces and CFD it, I may well look into Blender to rough out the initial model if I don't get anywhere with Soldiworks surfacing tools. 


#7 frankm

frankm

    Learner Driver

  • Just Joined
  • PipPip
  • 21 posts
  • Location: Zwolle

Posted 03 March 2020 - 07:43 PM

I like it how the rust seems to fall out of the shell at the end of the clip

#8 robbur

robbur

    Learner Driver

  • Noobies
  • PipPip
  • 13 posts
  • Location: Tamworth

Posted 04 March 2020 - 07:59 AM

Thanks Alex_B back in the early 2000s I used Solidworks for product and machinery design, great for laying out drawings but the rendering was really limited. I stumbled on Blender in 2003 just after it had been released as open source, I was looking for software that would take my designs and produce decent visualisations for marketing and training manuals. I discovered its 3D engine was pretty powerful, especially if you applied CAD modelling principles to it. I ended up designing a lot of the more decorative products with it as it gives much more artistic control than solid works. I wrote the Blender Precision Modelling Guide in 2007 and more recently "3D Computer Graphics Using Blender 2.80 - Modelling Methods, Principles & Practice" which covers using blender from a more product design/engineering perspective. Solidworks surface tools might be better now but they were awful back in the early 2000s. We used to recreate architectural terracotta for English heritage etc, try modelling a cherub or dragon finial in solidworks!


frankm - for some reason I lost the sound when I uploaded that video, it sounded like rattling stones in a tin can.


Edited by robbur, 02 May 2020 - 07:22 PM.


#9 MikeRotherham

MikeRotherham

    One Carb Or Two?

  • TMF+ Member
  • PipPipPipPipPipPipPip
  • 939 posts
  • Location: Westwoodside North Lincs

Posted 07 March 2020 - 05:19 PM

I love these sorts of restorations. When all hope seems lost. A back from the brink restoration

#10 robbur

robbur

    Learner Driver

  • Noobies
  • PipPip
  • 13 posts
  • Location: Tamworth

Posted 18 March 2020 - 12:10 PM

A few updates exposing some of the rust on the floors sills and door hinge posts:


austin-mini-022.jpg


austin-mini-023.jpg


austin-mini-024.jpg


austin-mini-025.jpg


austin-mini-026.jpg


austin-mini-028.jpg


#11 blacktulip

blacktulip

    Crazy About Mini's

  • TMF+ Member
  • PipPipPipPipPipPipPipPipPipPip
  • 6,221 posts
  • Location: Braintree

Posted 18 March 2020 - 02:36 PM

It was at this stage seeing the amount of work needed under the mini and the fact that I was getting a bit to old to be lying under cars welding for many weeks of work, that I decided to build a rotating jig. I had enough scrap steel lying around so it was designed around the scraps I had available.

I use Blender the opensource 3D creation suite for most of my design work and there is a short article on my website that details how I went about designing it.

blender-reference-002.jpg

austin-mini-019a.jpg
austin-mini-019.jpg

Now that's just showing off ha ha. Great project you have there

#12 ads7

ads7

    Speeding Along Now

  • Members
  • PipPipPipPipPip
  • 351 posts
  • Location: oswestry

Posted 18 March 2020 - 02:52 PM

Putting in some serious effort there. Great to see another being saved from certain death ?

#13 robbur

robbur

    Learner Driver

  • Noobies
  • PipPip
  • 13 posts
  • Location: Tamworth

Posted 20 March 2020 - 08:08 PM

:D 
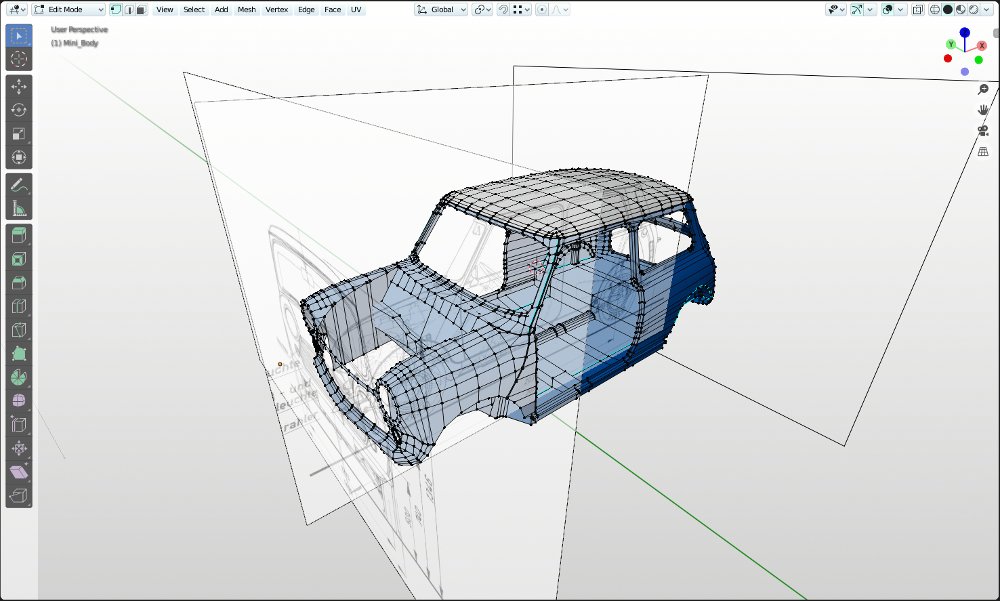
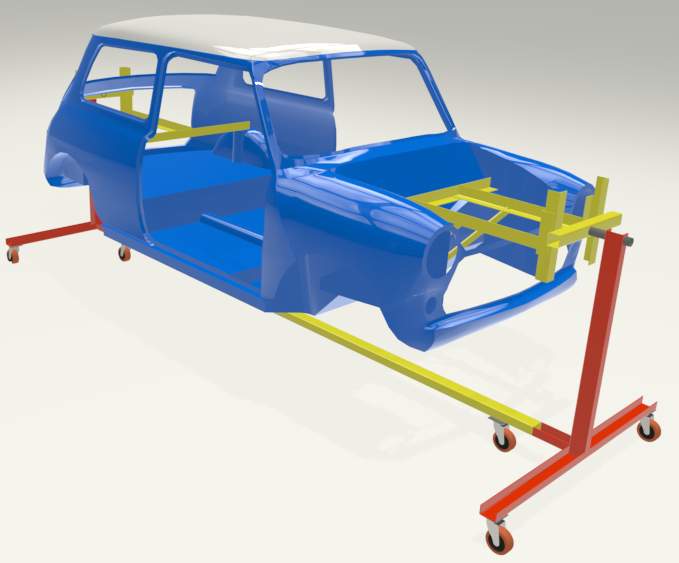
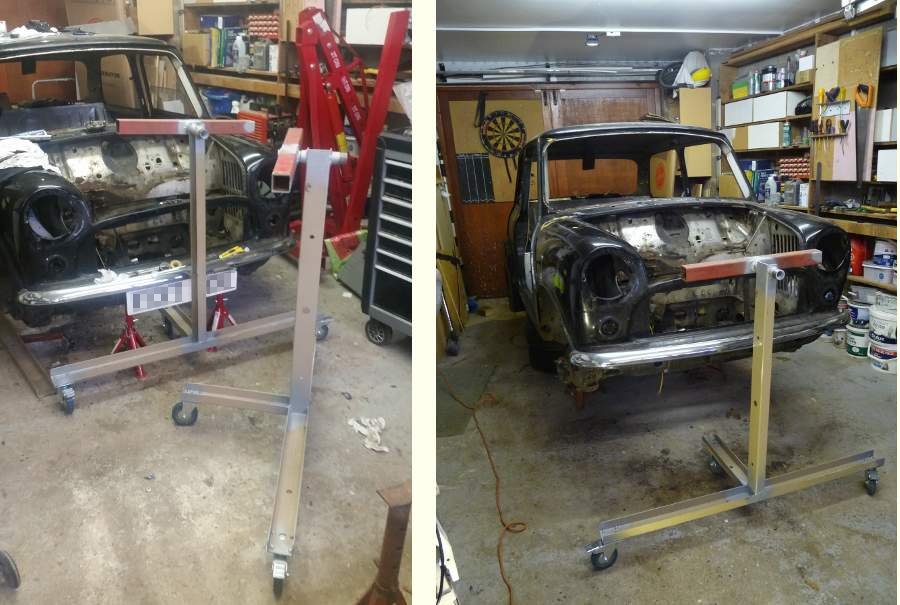
Not showing off, just years of geeking out on a computer with open source software. Anyone that could do technical drawing and knew their way around a computer could learn.


I was travelling between Barnsley and Rotherham today and spotted a mini on the side of the road.


austin-mini-042.jpg


I always thought they were made in factories, not grown from seed.


#14 robbur

robbur

    Learner Driver

  • Noobies
  • PipPip
  • 13 posts
  • Location: Tamworth

Posted 31 March 2020 - 07:26 AM

It's a slow process cutting out the sills and floor, I will leave the door step temporarily in place as a guide for locating the sills.


austin-mini-032.jpg


austin-mini-033.jpg


austin-mini-034.jpg


austin-mini-036.jpg


austin-mini-038.jpg


The front sub-frame mounting holes on the kick board were badly corroded and a fatigue fracture had developed under the sub-frame mount. I made a template so I could re-drill the repaired steel by tek screwing a steel sheet to the toe board and drilling through the existing sub-frame mounting holes.


austin-mini-039.jpg


austin-mini-040.jpg


austin-mini-041.jpg


Edited by robbur, 02 May 2020 - 07:24 PM.


#15 johnR

johnR

    Up Into Fourth

  • Members
  • PipPipPipPipPipPipPipPipPip
  • 2,244 posts
  • Location: Dorset

Posted 01 April 2020 - 04:41 PM

Looks like this car is in safe hands


0 user(s) are reading this topic

0 members, 0 guests, 0 anonymous users