Jump to content


Photo
- - - - -

'97 Mpi Sportspack Rescue


  • Please log in to reply
5 replies to this topic

#1 thewormman

thewormman

    Just On Tickover

  • Noobies
  • Pip
  • 9 posts
  • Location: Southend on sea

Posted 30 March 2020 - 10:53 AM

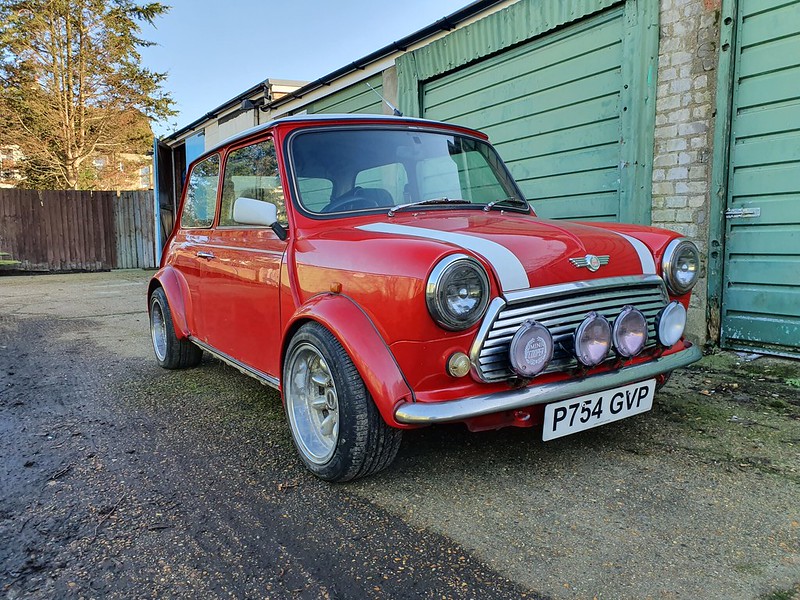
Just introducing my project 97 MPI.


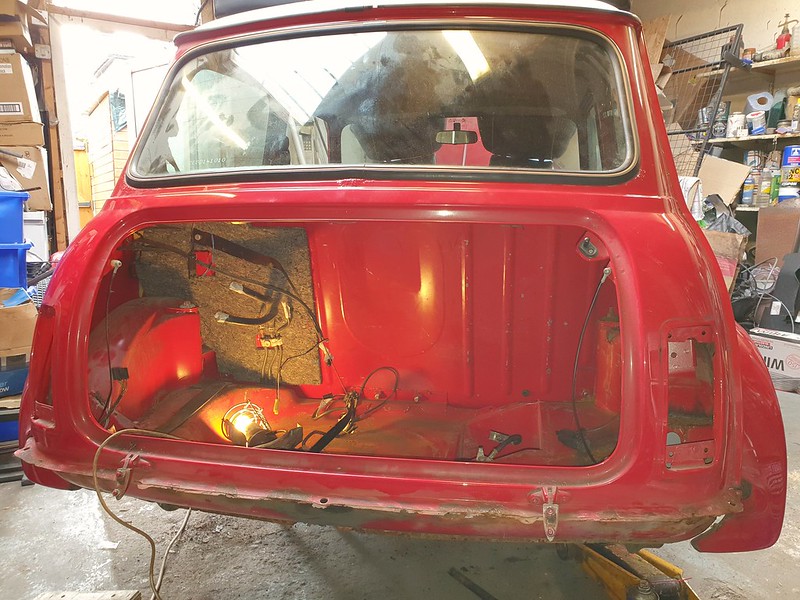
Bought it blind off ebay in December (I never buy anything without checking it out thoroughly usually!) Was bought to use as a second car and for my sons to learn how to drive in. Messaged the lady who owned it the night before the auction ended and she said it just has a hole in the floor at the front and one at the back but runs ok. Yeah right!


So broke my rule and just bid on it and no-one else did! First pictures are what was on ebay.


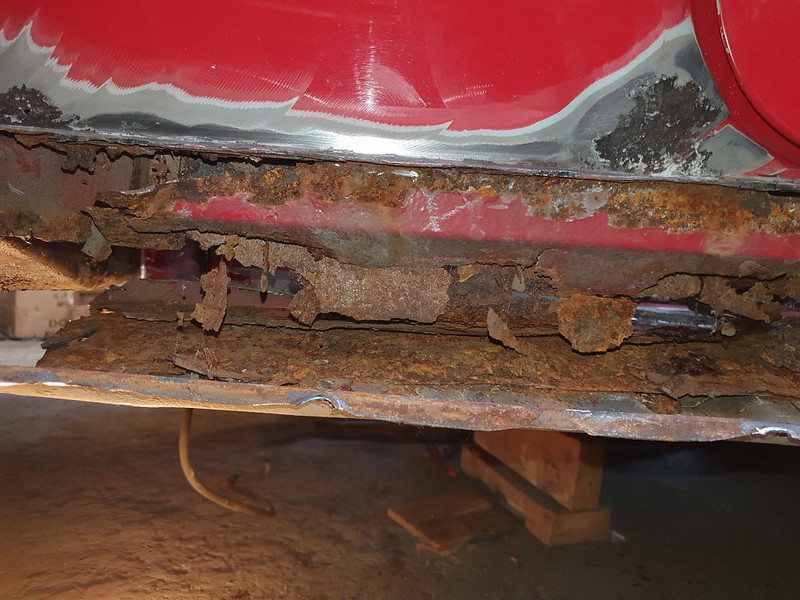
Doesn't look to bad on the outside but started to poke around, Oh dear... Project time...


49708802848_b031ae55e6_c.jpg


49709336476_2ebd60bd4e_c.jpg


49709336196_2735377b11_c.jpg


49709335941_b2e465cc52_c.jpg


49708799248_08776019de_c.jpg


49708798763_c1c5155f4f_c.jpg


49708808328_77b5bbee70_c.jpg


49708814773_b4d67a7cb0_c.jpg


49709672387_11e0027cc9_z.jpg


49709673652_8996dc2233_c.jpg


49709673877_502b255ac8_z.jpg


49708815608_ba02306c90_c.jpg


49708815488_7600abd1a0_c.jpg


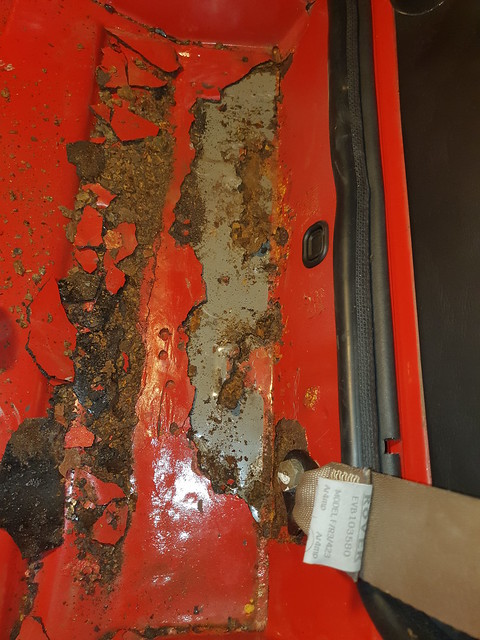
Some lovely person has put cover sills over the rusty original ones then covered the rust in filler, mastic and painted them.


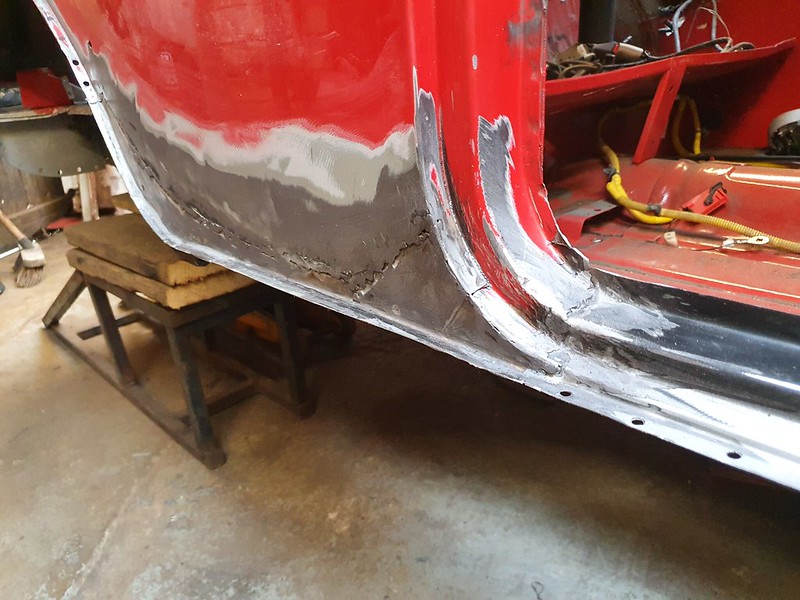
So will be outer half floors, inner sills, outer sills, heel board, one rear wheel inner arch, boot corners and rear valance. The front wings and front panel are actually new and look like they were fitted properly!


#2 jamesquintin

jamesquintin

    One Carb Or Two?

  • TMF+ Member
  • PipPipPipPipPipPipPip
  • 1,017 posts
  • Location: Harlow

Posted 30 March 2020 - 10:56 AM

Do yourself a favour and get a full replacement floor with the sills and everything attached. I know its expensive, but you will save yourself SO MUCH time. I believe it also includes the studs for the fuel lines

Q


#3 thewormman

thewormman

    Just On Tickover

  • Noobies
  • Pip
  • 9 posts
  • Location: Southend on sea

Posted 30 March 2020 - 11:07 AM

Hi James, I've been reading your build thread and it is mega!


I've already bought the panels unfortunately, really from the second groove inwards the floor is really solid, no rust at all so I'll stick with what I have, I know it will be more welding but to late now.


#4 thewormman

thewormman

    Just On Tickover

  • Noobies
  • Pip
  • 9 posts
  • Location: Southend on sea

Posted 30 March 2020 - 08:05 PM

Made a start, need to drop the rear subframe as the heelboard mounts and one corner of the boot had gone


49717659726_736b3558ef_b.jpg


Started stripping, more rot :(


49708816658_86e1b6f172_c.jpg


49717978342_a8a6b57064_b.jpg


Petrol tank out


49717126753_11c5bb3381_c.jpg


Crappy previous repairs


49717980922_204ed33195_z.jpg


Subframe out


49717668731_39b285ef99_z.jpg


Heel board mounts gone through


49717982172_6574fd1378_c.jpg


49717668051_29bf1bd2ab_c.jpg


I noticed a lot of people cut out all the mounting points for the rear subframe in one go. I'm a bit worried about it all not lining up and the car ending up crabbing down the road. So I am going to use the subframe as a jig to position the new panels in place by using three location points at a time. 


I stripped down the subframe to make it more manageable then cut out the rear of the boot floor one side. I then bolted the frame back in on the two heelboard points and the other side of the boot floor. This gave me the position for the repair on the other side of the boot floor to bolt into place.


I will use the same three reference point technique to do the heel board locations, one at a time.


49717672411_210fc39cf9_z.jpg


49717135648_10a22b3198_c.jpg


49717137698_452a1fde57_c.jpg


Braced the door gap. Subframe off again, inside bin out, then that part of the heelboard end out.


49717138523_bae9e81a59_z.jpg


49717994067_a1d31ce200_z.jpg


Next job will be bolting the subframe back in with the heelboard repair panel bolted to it and start to cut all the floor and sill out on this side to position the repair sections.


#5 thewormman

thewormman

    Just On Tickover

  • Noobies
  • Pip
  • 9 posts
  • Location: Southend on sea

Posted 03 June 2020 - 01:29 PM

Been off doing the Mini for a while as I had an angle grinder disc and backing pad explode and hit me in the face, almost lost an eye. Suitable PPE now purchased.


Did some stuff before that and starting to get back to it now, here's the pics.


49728020271_c6300847f0_c.jpg


49727475168_aaf6b4d42c_m.jpg


49728337227_1524da799e_m.jpg


49728019606_2813dc6724_c.jpg


49728019306_da6f604119_c.jpg


49727474128_777748fd3c_c.jpg


49730723428_e51d0f6177_m.jpg


49730723298_370079b4e1_b.jpg


49863763036_edc7751018_m.jpg


49864067752_fbccf147ce_c.jpg


49863226973_f07811013a_c.jpg


49863225818_222250b322_m.jpg


49864069497_27fa7ec046_c.jpg


49863225418_0a1624e9ff_c.jpg


49863225253_045bb808f3_c.jpg


Just welding the new half floor/inner sill/outer sill on now will update when its in


#6 thewormman

thewormman

    Just On Tickover

  • Noobies
  • Pip
  • 9 posts
  • Location: Southend on sea

Posted 06 June 2020 - 06:39 PM

Got the rear part of the floor all welded ground down and crossmember welded back in. Put a bit of zinc paint on it. Will finish front tomorrow


49978190507_d2b9692847_z.jpg


1 user(s) are reading this topic

0 members, 1 guests, 0 anonymous users