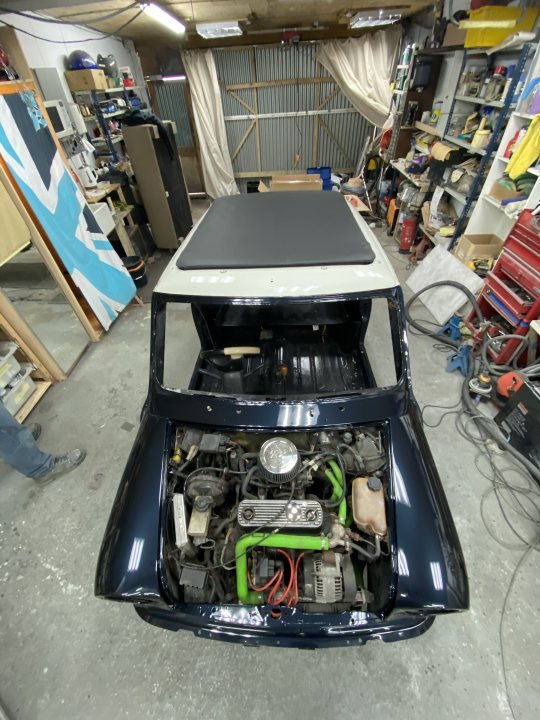
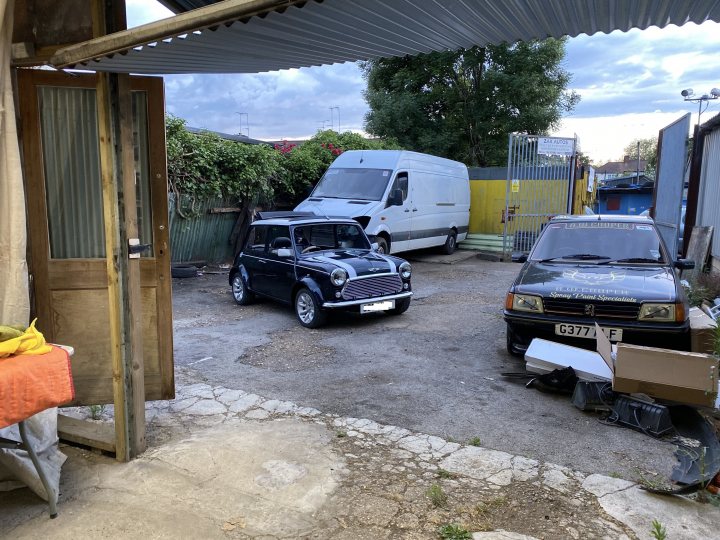
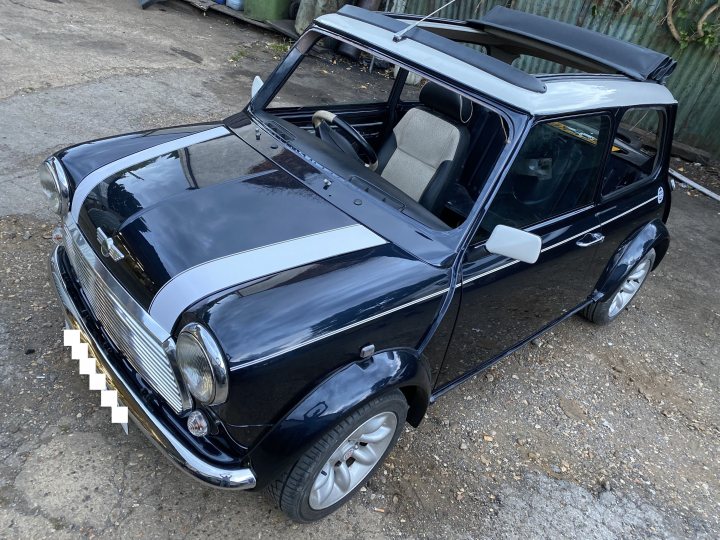
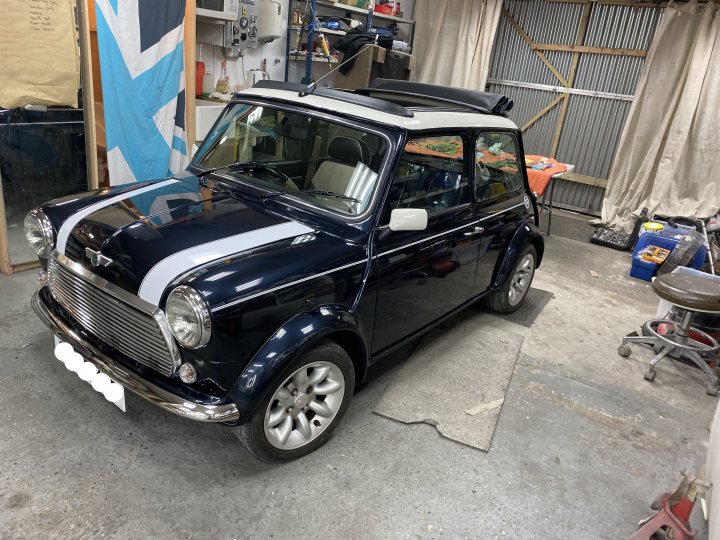
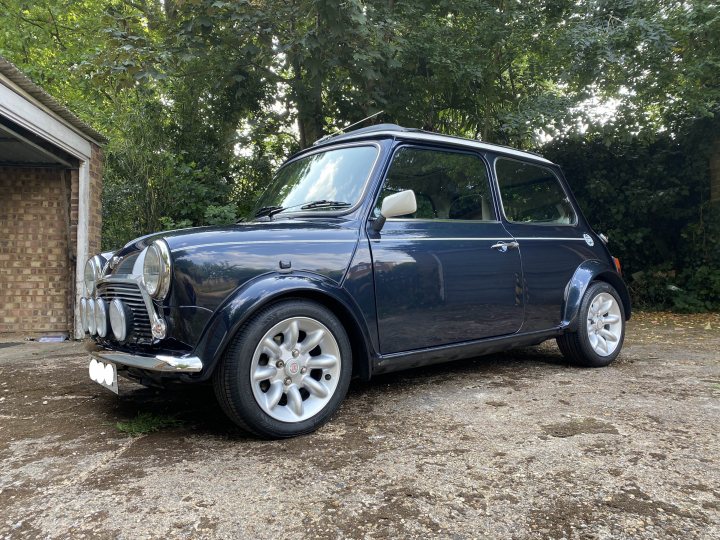
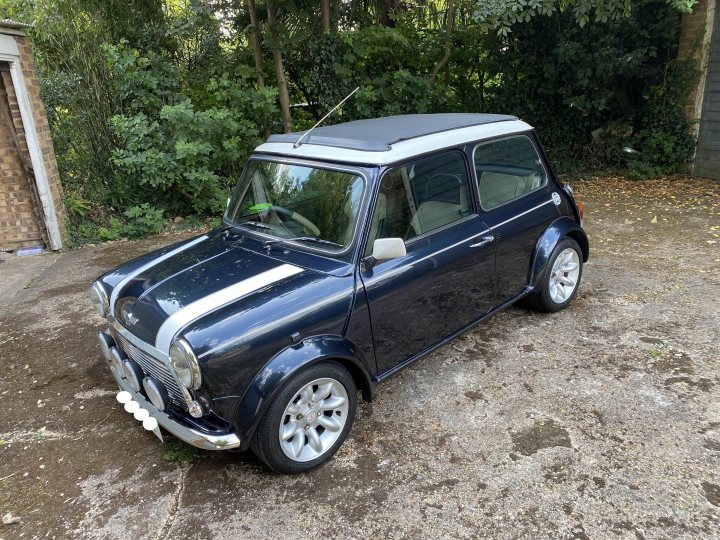
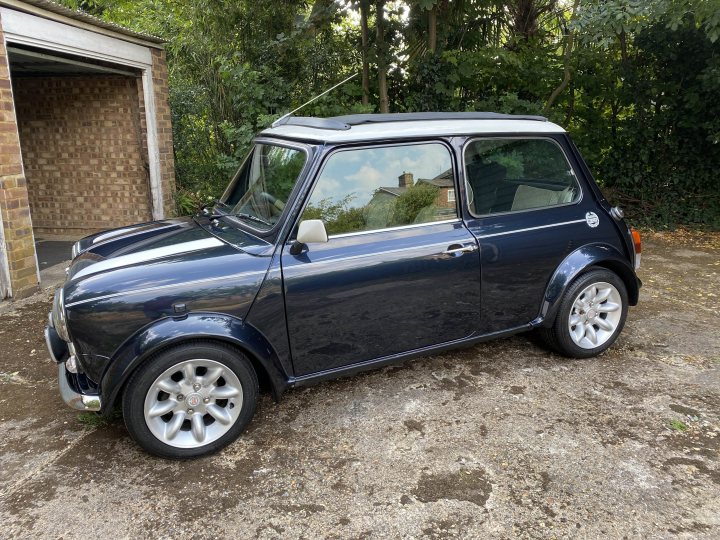
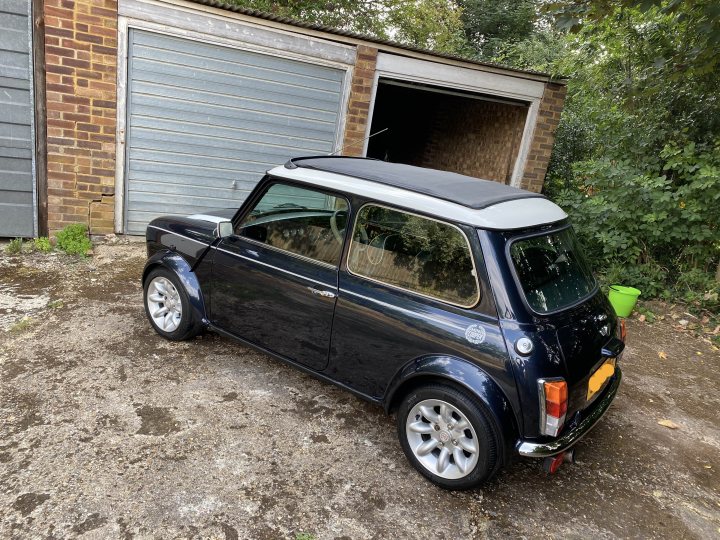
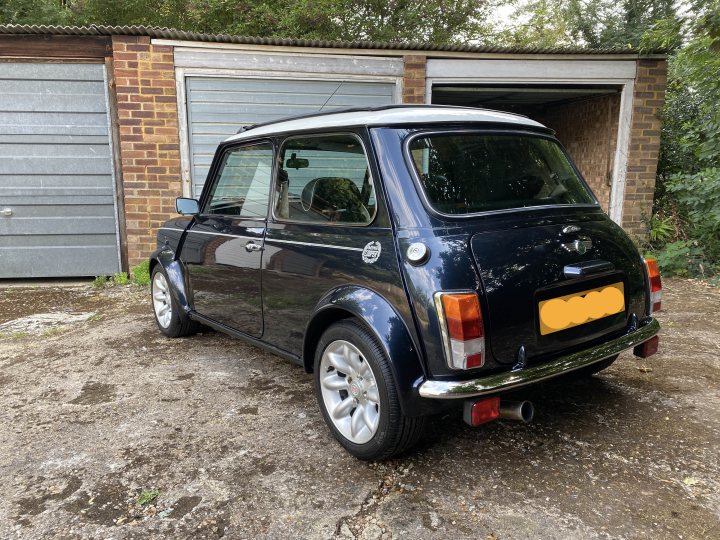
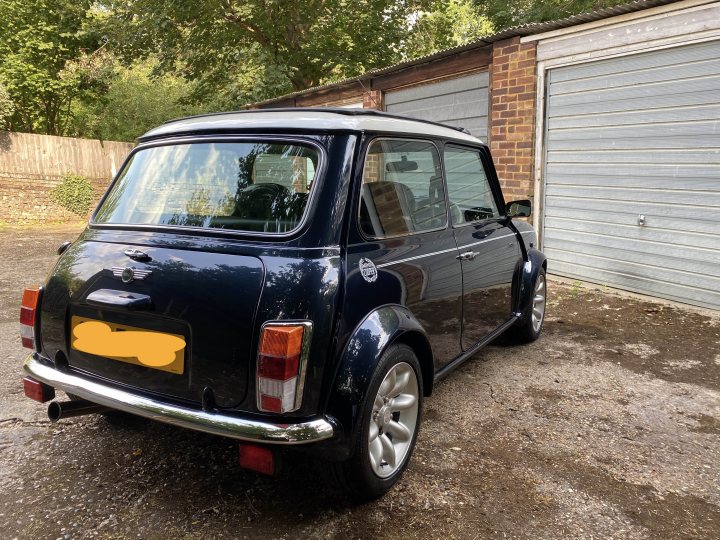
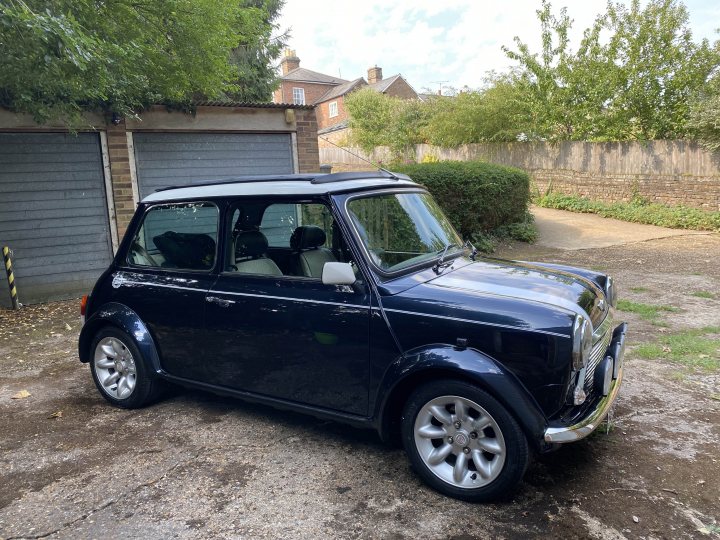
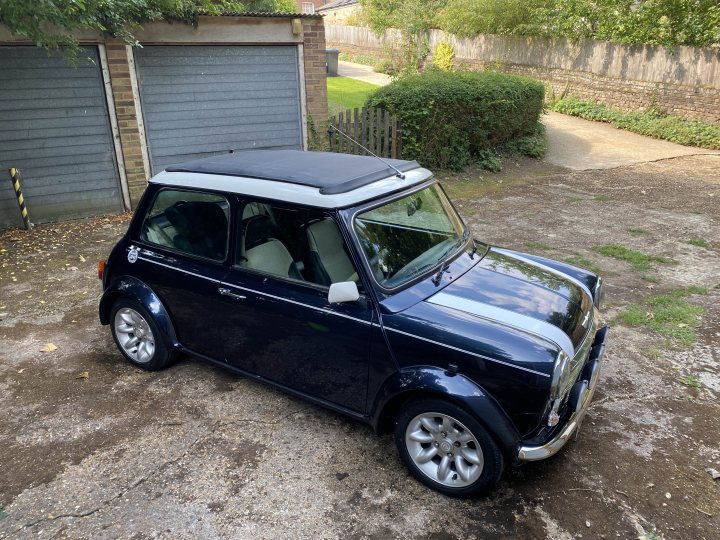
Jump to content


Photo
- - - - -

Rover Mini Cooper Mpi - 10 Day Restoration


  • Please log in to reply
55 replies to this topic

#31 nitrodave

nitrodave

    On The Road

  • Noobies
  • PipPip
  • 44 posts

Posted 28 August 2020 - 08:25 AM

Day 7 pt2
 
After rolling the car out the paint booth we polished the roof which came up a treat. I was really pleased that we didn't have to paint this and it was nice to keep some original paint on the car.
 
8hDqTQ88.jpg
 
N9cEhSR6.jpg
 
Ki9fKWzj.jpg
 
Fitting the sunroof back in was pretty satisfying. A healthy bead of silicone was used to seal it in place along with the 40+ bolts that hold it in.. It instantly felt like it was all coming together at this point.
 
nWfxaGRL.jpg
 
aiUqiuHG.jpg
 
Don't worry! That nasty green coolant hose has been replaced for a new original item when the cooling system was refreshed.
 
dn9wHCRY.jpg
 
We then prepped the arches and panels ready for paint. In an ideal situation the panels would have been mounted on the car and painted at the same time; but being a dark colour and wanting to get all the jams properly covered it was easier to do the body and then the panels / arches afterward. 
 
Z7YKrRc7.jpg
 
4bonFwH6.jpg
 
There was also time to start mounting a few things such as rear lights. The car came with silly aftermarket smoked rear lights so new OE lights and gaskets were fitted. 
 
6hiQ3Zm2.jpg
 
I also used rivnuts instead of pop rivetted for the headlight bowls. Rivnuts seemed the logical and easy way to attach these and they worked well.
 
84cwBzAE.jpg


#32 nitrodave

nitrodave

    On The Road

  • Noobies
  • PipPip
  • 44 posts

Posted 28 August 2020 - 09:17 AM

Day 8 pt1
 
First task of the day was to get the panels and arches painted up. They had been prepped the day before so a quick degrease and then wipe down with a tack cloth and they were ready to go.
 
tttyS2hG.jpg
 
4gc9nU2t.jpg
 
TTwKzknu.jpg
 
cXYq6QJT.jpg
 
2GmjNUNG.jpg
 
Whilst we let the panels dry we cracked on with the roof lining. This was a task we were slightly dreading as we had no experience of doing this and it had to be custom made as there was nothing off the shelf available.
 
I found a fabric supplier on who provided a nice stretchy fabric in a greyish brown colour. 
 
The correct way to do this is to apply a strip of strong double-sided tape along the edge for the fabric to stick to and it worked well. 
 
We also had to sew in one support bar at the back. Ideally this would have been done with a sewing machine, but we didn’t have one so did it by hand. It’s ok, but could have been better. It’s barely visible in the car though.
 
This job took 5 hours in total and was a complete chore, but we were very happy with the results.
 
YYiVyQie.jpg
 
wi33cn1w.jpg
 
CL9pMsvV.jpg
 
nPhQ6KYE.jpg
 
a3odCrnd.jpg


#33 slidehammer

slidehammer

    One Carb Or Two?

  • Members
  • PipPipPipPipPipPipPip
  • 1,081 posts
  • Location: Surrey
  • Local Club: LSMOC

Posted 28 August 2020 - 04:06 PM

Looking very good.


#34 nitrodave

nitrodave

    On The Road

  • Noobies
  • PipPip
  • 44 posts

Posted 28 August 2020 - 04:33 PM

Day 8 pt2
 
Next up was to apply the graphics to the bonnet before we put this on the car. It was easier to do this on the stand first.
 
kj5Px7Ex.jpg
 
We also put the dash pad back in
 
y736UisG.jpg
 
And fitted the arches… with the wildy overpriced studs they needed at the front!
 
6nxC6zrz.jpg
 
qDvXyPiQ.jpg


#35 exuptoy

exuptoy

    Super Mini Mad

  • TMF+ Member
  • PipPipPipPipPipPip
  • 674 posts

Posted 28 August 2020 - 09:06 PM

Gorgeous.

#36 nitrodave

nitrodave

    On The Road

  • Noobies
  • PipPip
  • 44 posts

Posted 29 August 2020 - 07:27 AM

Day 9
 
This was actually the final day in the workshop. After this I got the car home and then reassembled the interior. 
 
First task was to fit the boot which lined up really great. 
 
j3RhJXRw.jpg
 
NsmgrazP.jpg
 
Next up was the doors. Thankfully they went on without issue! We bolted them up using the original shims and there were no adjustments needed on either of them. 
 
The gaps are fantastic and I shouldn’t have worried as they’re the original doors that came off the car so went straight back on without issue.
 
H18zsqHP.jpg
 
Bonnet was fitted next. This took a little fettling to get it to fit correctly, but again no major dramas there.
 
GggD6Fyt.jpg
 
Lights in, bumpers bolted on easily and the new front grille was fitted and aligned. I actually ordered the wrong grille by mistake but really like this one.
rHgXEGyu.jpg
 
We then applied the stripes and graphics down the sides and all the door accessories, glass and furniture. 
 
I also purchased some new original correct wing mirrors. It had aftermarket bullet style mirrors on the car when I got and I wanted the white originals. I found these on ebay and the seller had removed them from a new mini 20 odd years ago and had them boxed up since then. It saved us having to paint them!
 
ix1R1N62.jpg
 
Q8JQEf4k.jpg
 
At this point we thought we should at least see if the car would start again and it fired right up on the button. We moved it out into the dusk light and the colour of the car flipped into a dark blue / almost black tone! 
 
It’s amazing how this colour changes depending on the light conditions.
 
NfRK8v7d.jpg
 
AA8iJbbN.jpg
 
It was then a case of fitting the rest of the glass into the car and buttoning up any last bits and bobs such as wipers etc…
 
We really struggled with the front and rear screen and after wrestling with these for an hour decided to get someone in to fit these. We found someone to come and do this for £60 which was a very fair price. We probably could have done it, but we still had more to do and time was really against us at this point. 
 
We now had a completed car, minus the interior. I just fitted the drivers seat and seatbelt to get it home.
 
GURWvWCA.jpg
 
bcdZYUaG.jpg
 
cPjpm3Pa.jpg


#37 Sprinkler23

Sprinkler23

    Passed Test

  • Noobies
  • PipPip
  • 28 posts
  • Location: Roeselare

Posted 29 August 2020 - 11:14 AM

impressive!!! looks very good


#38 exuptoy

exuptoy

    Super Mini Mad

  • TMF+ Member
  • PipPipPipPipPipPip
  • 674 posts

Posted 29 August 2020 - 01:45 PM

Really impressed. Well done.

#39 nitrodave

nitrodave

    On The Road

  • Noobies
  • PipPip
  • 44 posts

Posted 30 August 2020 - 08:15 AM

Day 10
 
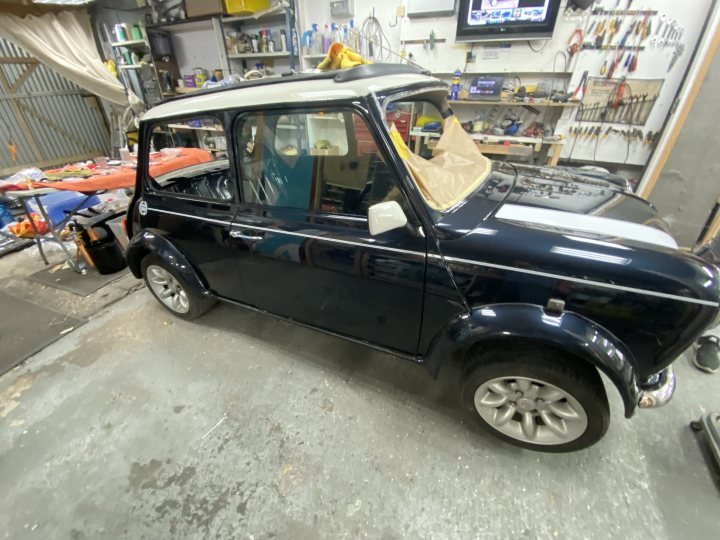
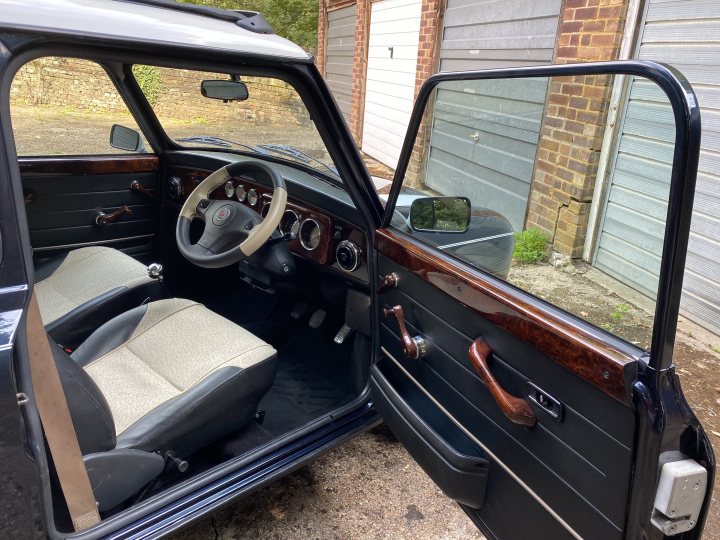
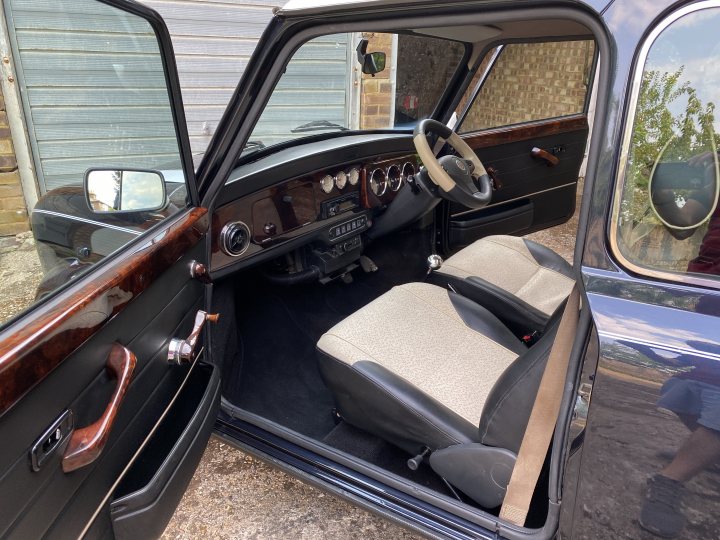
With the car completed and now home it was now time to turn my attention to the interior. I actually did this over a couple of afternoons, but I could have easily done this in one day if the missus didn’t need help with the little one. 
 
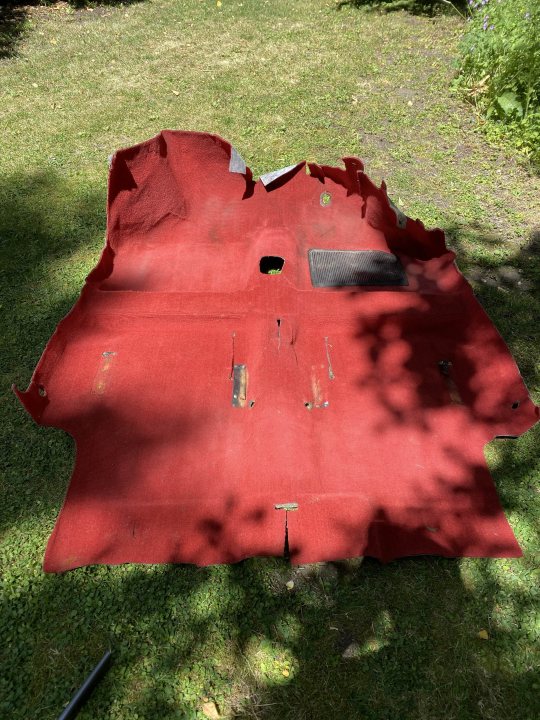
The previous owner had removed the carpet and lost it, so I had to source a replacement. 
 
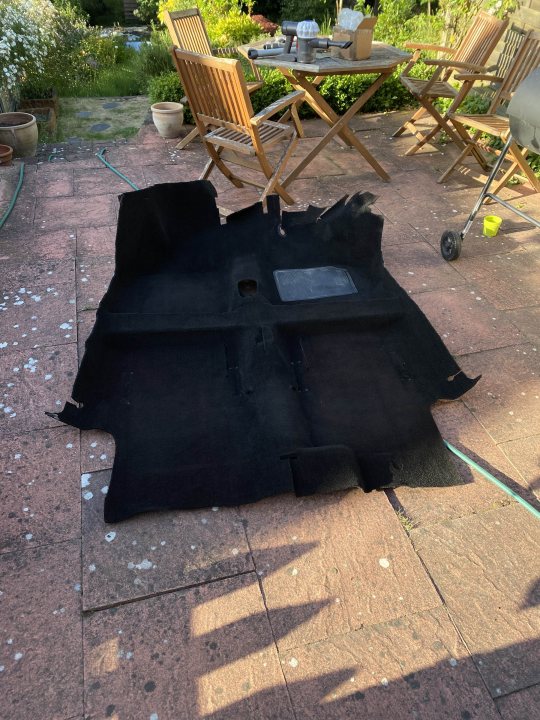
I couldn't find a one-piece carpets new and the only used one for sale in the entire country at the time was a red carpet on ebay. I didn’t want to attempt to fit one of the multi-piece aftermarket kits, so I snapped this up cheap and decided to give it a thorough hoovering and dye it black.
 
It actually came out really well and I am very happy with the result! I used a vinyl spray paint and it absorbed into the fibres well. It retains the original texture and looks as good as new. I also fitted new seat support plates before fitting it into the car.
 
6H3vtwSK.jpg
 
2kiSa8ro.jpg
 
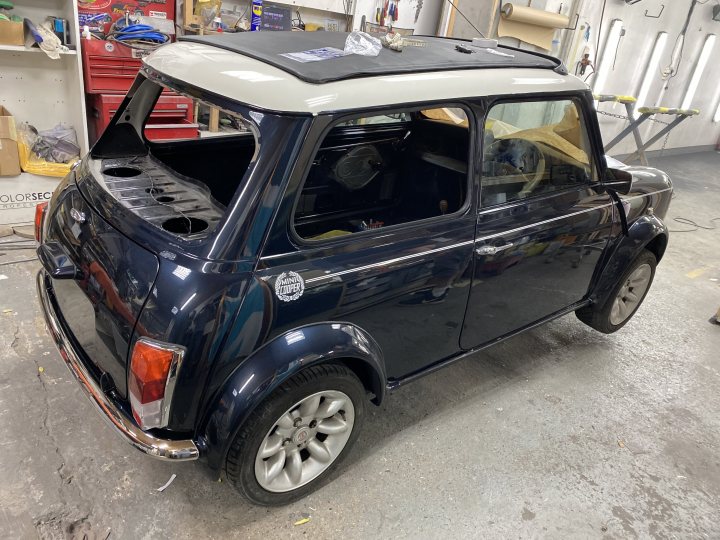
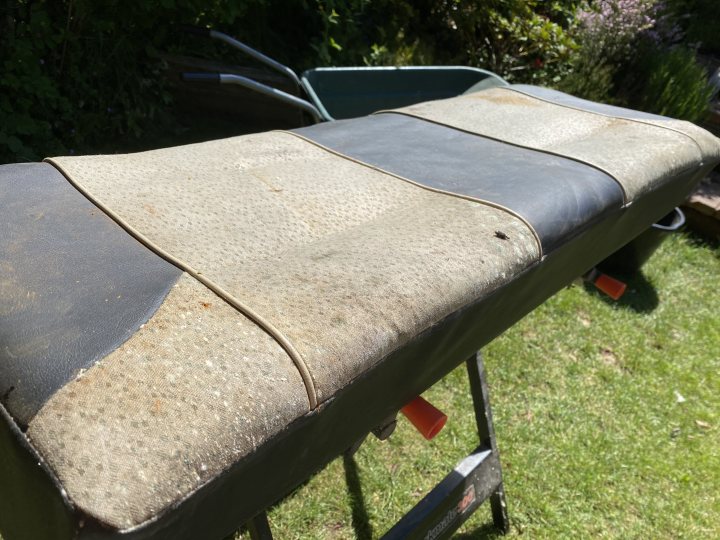
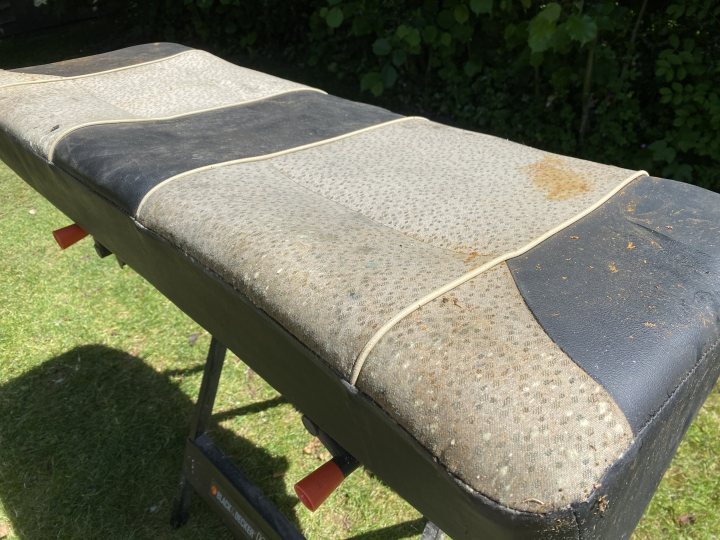
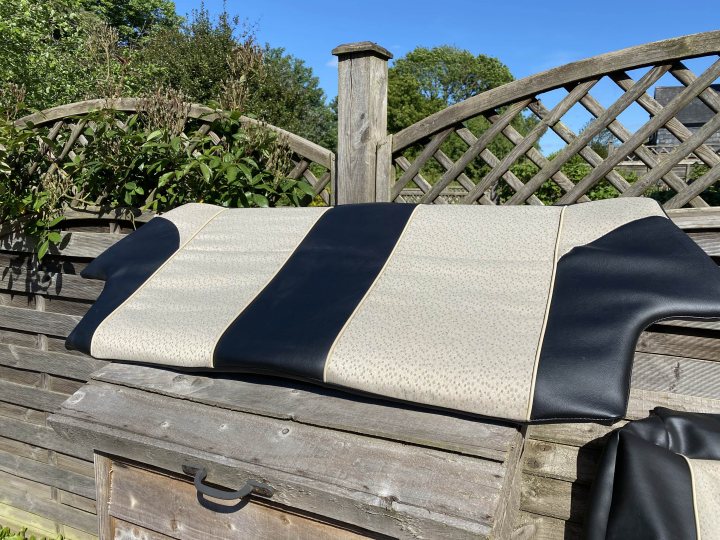
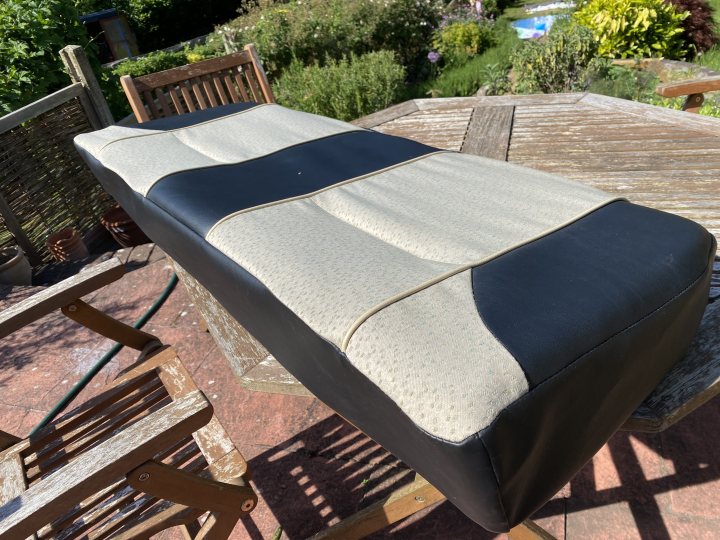
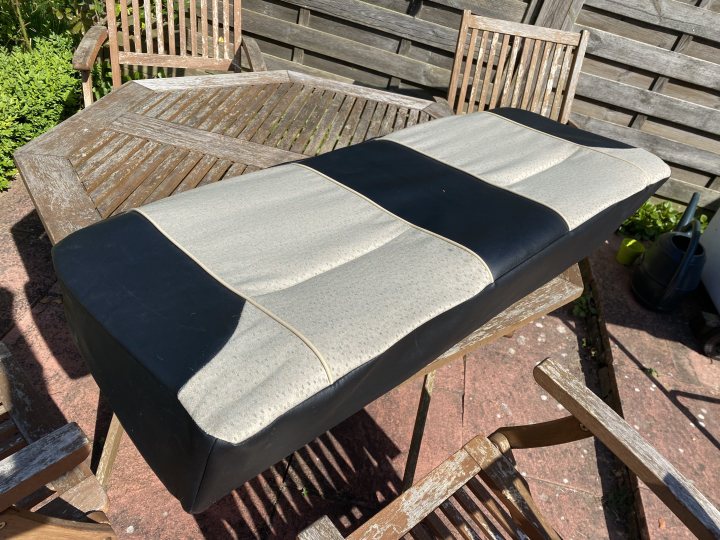
With the carpet drying out in the sun I turned my attention to the seats. As you can see the rears were really mouldy and the fronts were quite stained. 
 
7JjwdKQd.jpg
 
XQXq6tCT.jpg
 
It was really easy to strip the seats back and remove the covers. I then soaked them in white vinegar for an hour to kill off and release the mould, smothered them in stain remover then put in the washing machine with a couple of wash tabs. I set it to 30 degrees with a pre wash of white vinegar and extra rinse with no spin drying as it didn't want them to rip themselves apart.
 
They came out so much better than I thought they would. Reassembling them was very straightforward but before doing that I also replaced the front drivers seat base foam as it had collapsed.
 
GxMJz2KG.jpg
 
fmpZT4k9.jpg
 
ZgD55waZ.jpg


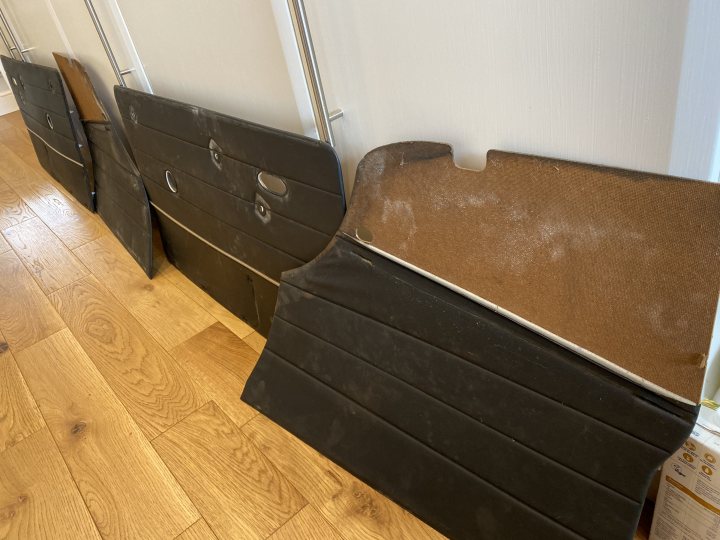
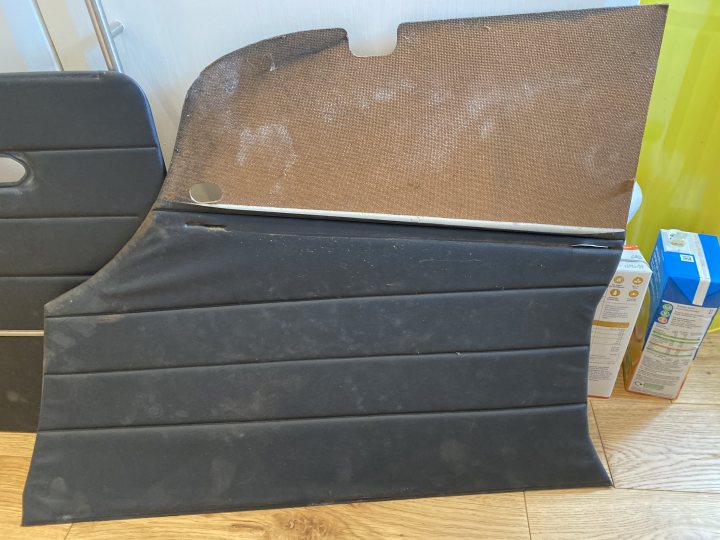
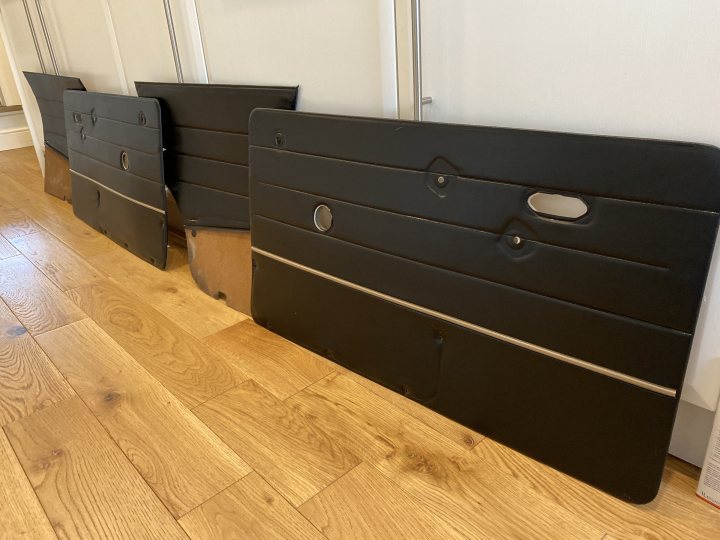
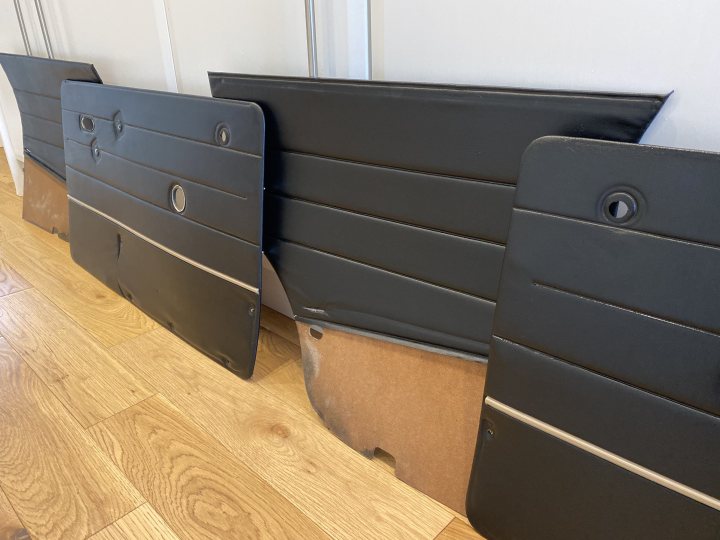
The door card were easy to clean up with some multi-surface cleaner. I also treated them to some autoglym vinyl protect that I had laying around. They came out looking like new.
 
PcwYaFtx.jpg
 
f5pLB6Fe.jpg
 
eYZBYDPR.jpg
 
vdaf5qV7.jpg
 
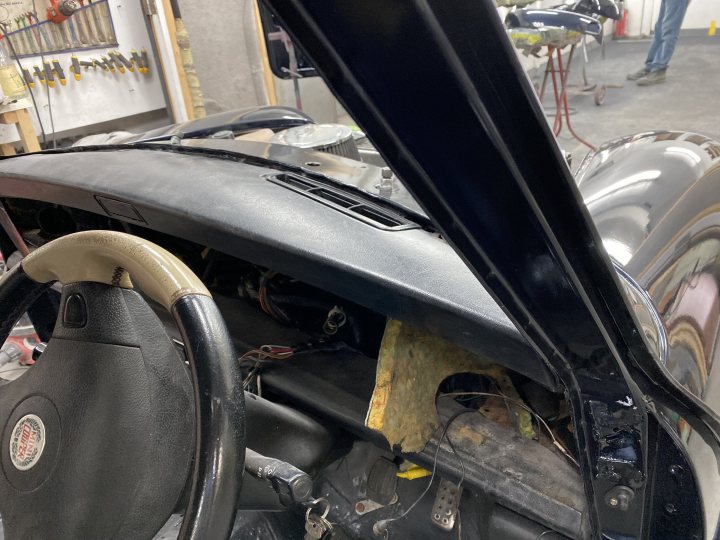
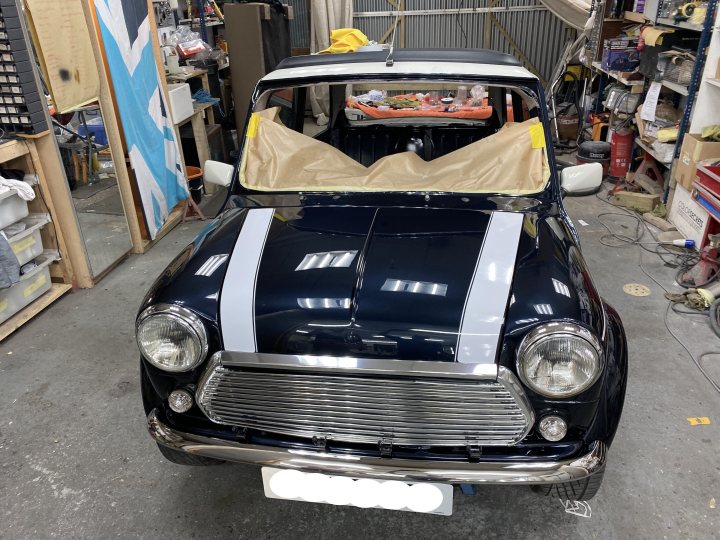
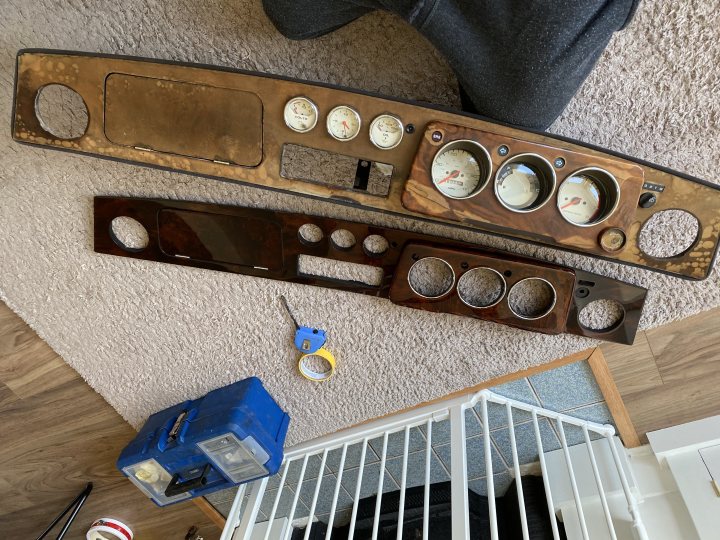
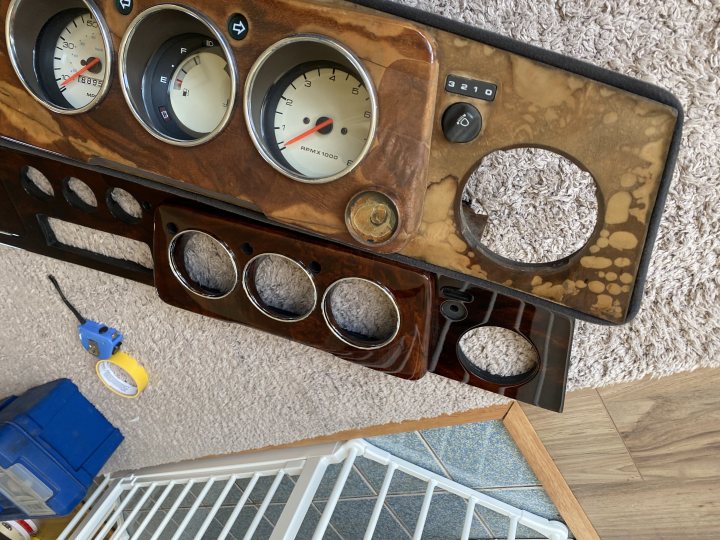
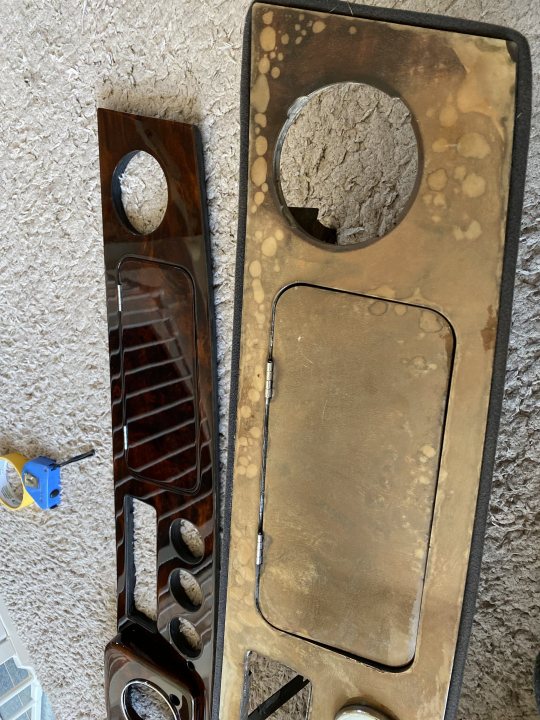
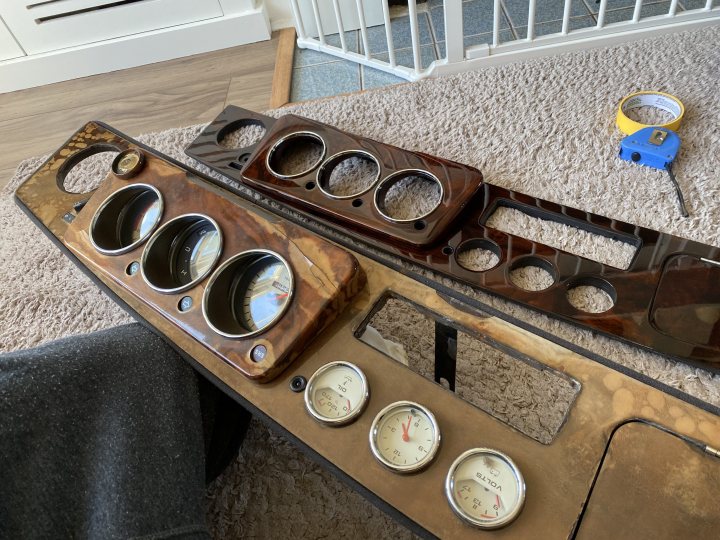
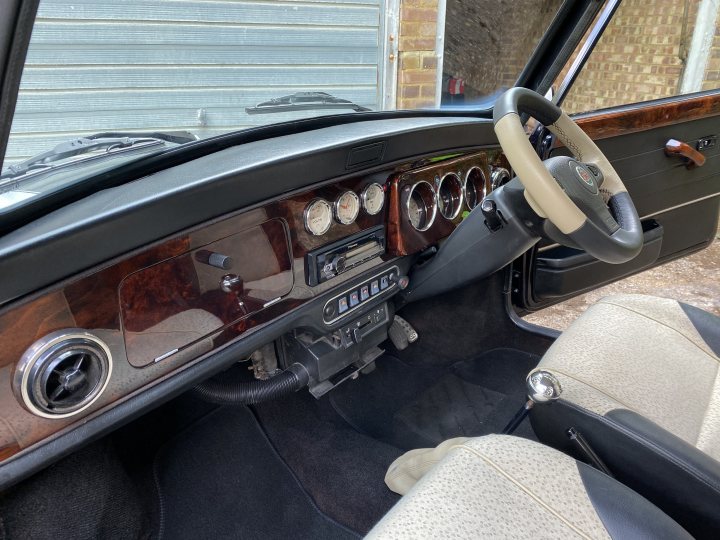
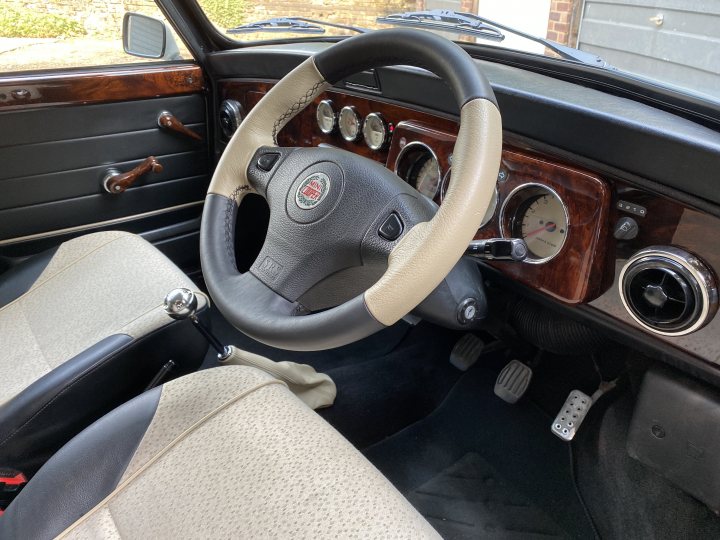
Next task was to build up the new dashboard. I would have ideally restored the original dash and door cappings, but I have kept hold if it and that’s something I may do in the future.
 
Swapping all the gauges and switches over was very easy. I also cleaned up all the contacts on the back of the gauges as they furred up from the moisture in the car. Before this nothing worked apart from the speedo nor did any of the illuminations, so it was the first thing to try.
 
I didn’t get any photos of the new dash fully built, but I’ll post some pics later of it in installed into the car.
 
qgrMBKzP.jpg
 
6jCfCZBM.jpg
 
TAqejiR3.jpg
 
vw7MoETi.jpg
 
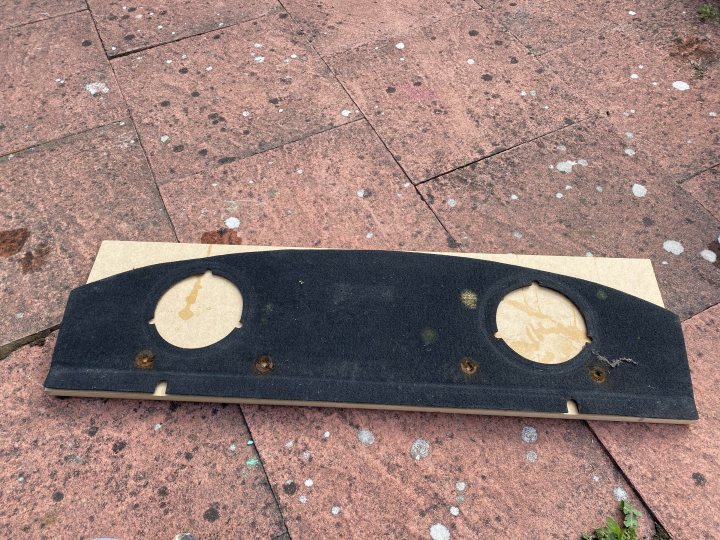
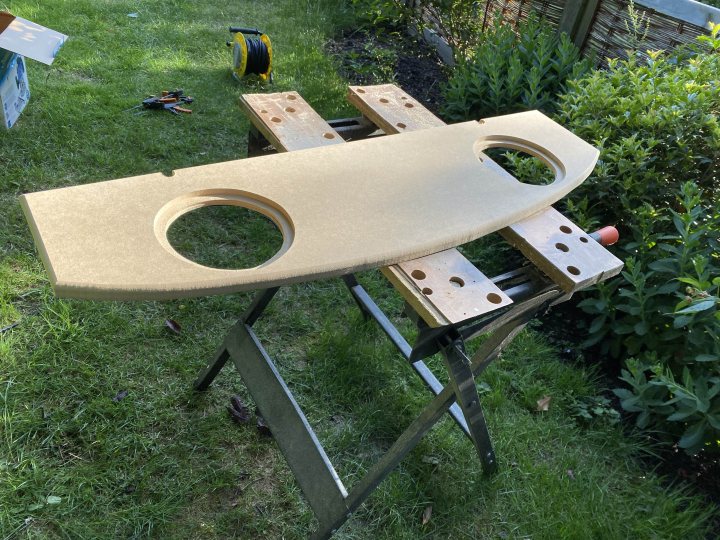
Last job on the list was to build a stealth parcel shelf. It bugged me that the speakers were on show and they really stood out. I happened to have a piece of mdf offcut in the loft that was an almost perfect size! 
 
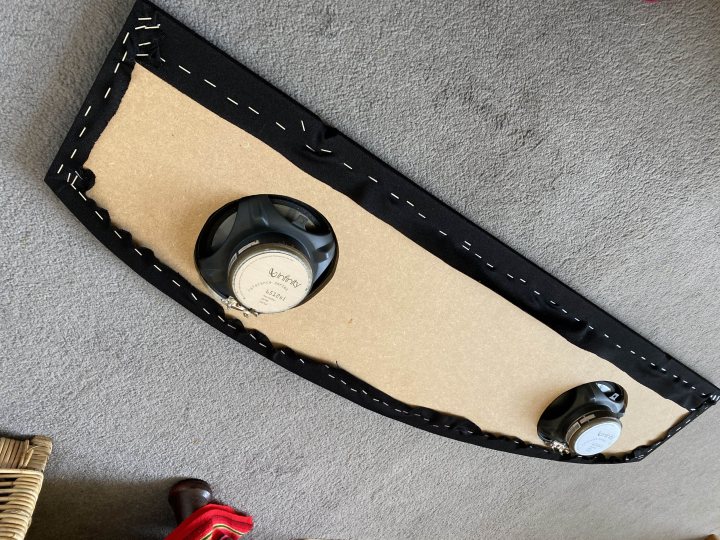
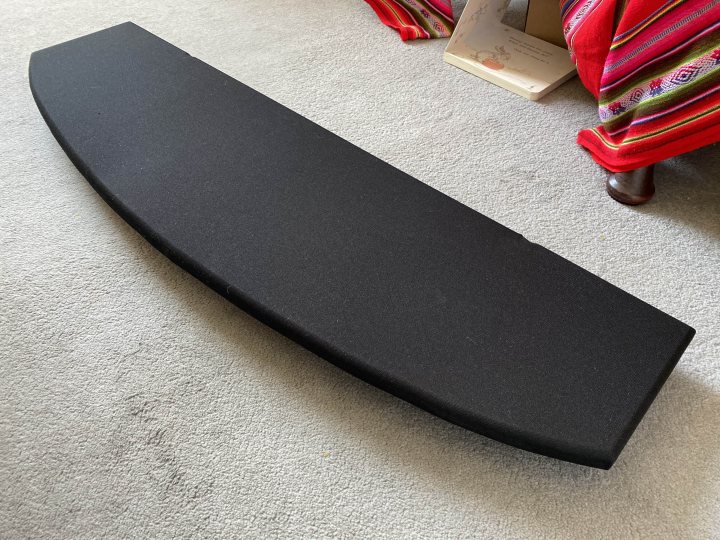
I used the original bit of carpet from the shelf and in 10 minutes with the jigsaw and router it was done. £4 worth of acoustic cloth from ebay and it was also covered. 
 
It dropped straight in and looks fantastic.
 
78NrXPVH.jpg
 
Xdw26edf.jpg
 
eKUM9eKk.jpg
 
gLfC7EbM.jpg


#40 exuptoy

exuptoy

    Super Mini Mad

  • TMF+ Member
  • PipPipPipPipPipPip
  • 674 posts

Posted 30 August 2020 - 08:45 AM

I look forward to your updates. Very nice job on the interior too

#41 leepol83

leepol83

    Camshaft & Stage Two Head

  • Members
  • PipPipPipPipPipPipPipPip
  • 1,744 posts

Posted 30 August 2020 - 06:22 PM

Brilliant mate looks beautiful!!! Top work, what colour is the actual car ? Also the measurements for the decals very helpful ?? Did you take any of where the cooper laurels go in the rear quarters ?

#42 colinf1

colinf1

    One Carb Or Two?

  • Members
  • PipPipPipPipPipPipPip
  • 900 posts
  • Location: Dundalk

Posted 30 August 2020 - 09:24 PM

That parcel shelf looks fantastic! Well done...some MDF added to my supplies list :P

#43 nitrodave

nitrodave

    On The Road

  • Noobies
  • PipPip
  • 44 posts

Posted 31 August 2020 - 07:47 AM

I look forward to your updates. Very nice job on the interior too


Thanks! I'm liking your project also !!


#44 nitrodave

nitrodave

    On The Road

  • Noobies
  • PipPip
  • 44 posts

Posted 31 August 2020 - 07:50 AM

Brilliant mate looks beautiful!!! Top work, what colour is the actual car ? Also the measurements for the decals very helpful Did you take any of where the cooper laurels go in the rear quarters ?


Thank you! It's Anthracite. Don't see many of them around. It's a very dark blue. In bright sun you can really see the blue but when it clouds over and at night it almost looks black. I really like it.


Here's a pics of the laurel measurement. I can seem to find the vertical shot I took


yMJrZYGE.jpg

Edited by nitrodave, 31 August 2020 - 07:51 AM.


#45 nitrodave

nitrodave

    On The Road

  • Noobies
  • PipPip
  • 44 posts

Posted 31 August 2020 - 08:03 AM

Final post as the car is as good as finished!
 
As far as the interior goes, after cleaning all the contacts behind the dash and renewing the earth points all over the car, everything sprang back into life and absolutely everything works as it should. 
 
I found a replacement steering wheel that has been re-trimmed in new leather. I’m not sure if the walnut door handles are original as they came on the car, but they match the new dash and cappings perfectly.
 
I fitted a Pioneer head unit which I found on amazon for £48 new! At less than half price I had to have it and I also fitted a tracker.
 
Since getting it all back together I have also given it correct new spark plugs, oil service, fitted new drive shaft seals, cleaned the engine bay thoroughly, new aux belt, fitted a standard air box with K&N panel filter and also treated it to entirely new cooling system. It runs fantastic now and pulls strong and clean through the rev range.
 
It’s also had new discs and pads up front and a set of brand new tyres all round. The ball joints were a little creaky up front but packing them with grease has quietened them down and thankfully there's zero play in them.
 
I took it for MOT and it passed with no advisories and I’ve since done 500+ trouble free and very fun miles in it. It doesn't use any oil, the cooling system works as it should and it's a delight to drive.
 
I think that’s pretty much it for now. I hope you enjoyed this project and thanks for all the kind comments. 
 
DVuCjPfb.jpg
 
JV3tzUWd.jpg
 
Fg24JqoJ.jpg
 
UUHZJeJ2.jpg
 
skcs7epc.jpg
 
HujigatQ.jpg
 
PDVxU2CS.jpg
 
CcT6hWk6.jpg
 
e6wtPBfX.jpg
 
vf7UL5P5.jpg
 
T8bxR8bw.jpg
 
BfWEHygK.jpg
 
uuydcXFb.jpg


0 user(s) are reading this topic

0 members, 0 guests, 0 anonymous users