Jump to content


Photo

Spraying sills


  • Please log in to reply
8 replies to this topic

#1 Lund

Lund

    Camshaft & Stage Two Head

  • TMF+ Member
  • PipPipPipPipPipPipPipPip
  • 1,864 posts

Posted 06 November 2006 - 08:05 PM

Hi there, a few requests for how I have painted my sills and got them upto scratch so here is a beginner’s brief description of how I did it and what I did! I also did the drivers side rear arch whilst I was at it. Hope this is of help :-
Positive critism is welcome.

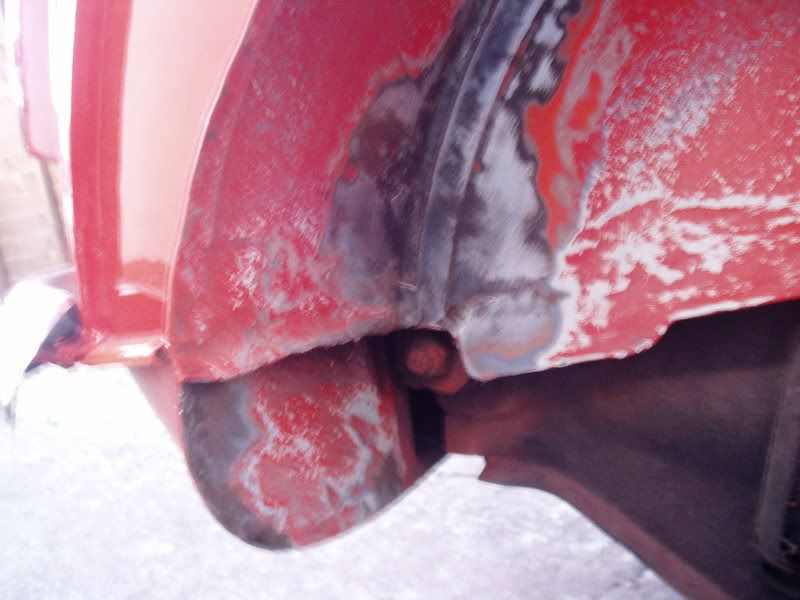
Jack the car up from the rear sub frame and support it using an axel stand, and a block of wood between the sub frame and stand. (Be careful to make sure you don’t jack the car up on the floor!) As the back is now supported by the axel stand remove the jack and do the same to the front of the car supporting with axel stands. You can always keep the jack under for extra safety!

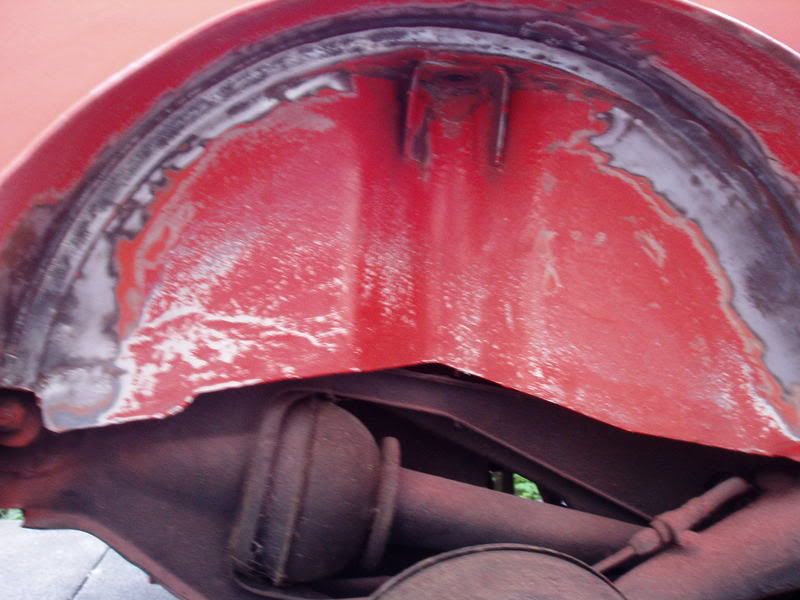
Now you are ready to start prepping the sills for paint. Sand down the sills until smooth and the desired finish is made. I used P600 (I think!? The green stuff!)

Firstly to remove the ‘thick of’ the existing paint. After sanding down using a fairly brutal sand paper, switch to a finer grade paper and do the same, continue doing so until it feels smooth and looks the part! It doesn’t really matter if the sanding down isn’t all that brilliant as you shouldn’t notice it under the thick coat of stone chip paint!
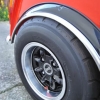
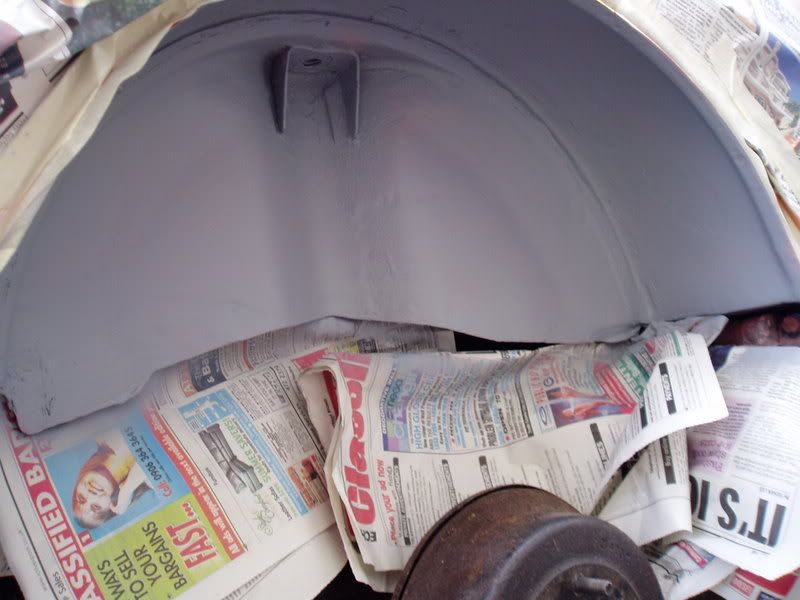
Here is my rear arch, sanded down ready for paint:

Posted Image

Posted Image

Wipe down the area using panel wipe to remove dirt and grease from the exposed metal/paint. After doing so I then masked off the panels that I wanted to cover and got the compressor going! I used undercoat primer thinned down with paint thinners to get a fine spray of paint, (less runs). I then began to spray the sills in the primer. I applied 2 coats of primer to the prepped area.

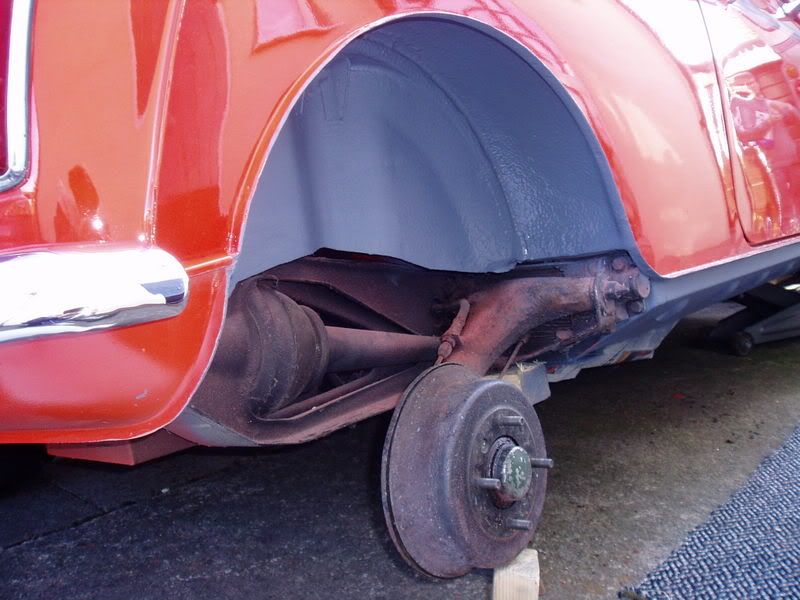
Here are the sills and arch in primer:

Posted Image

Posted Image

Posted Image

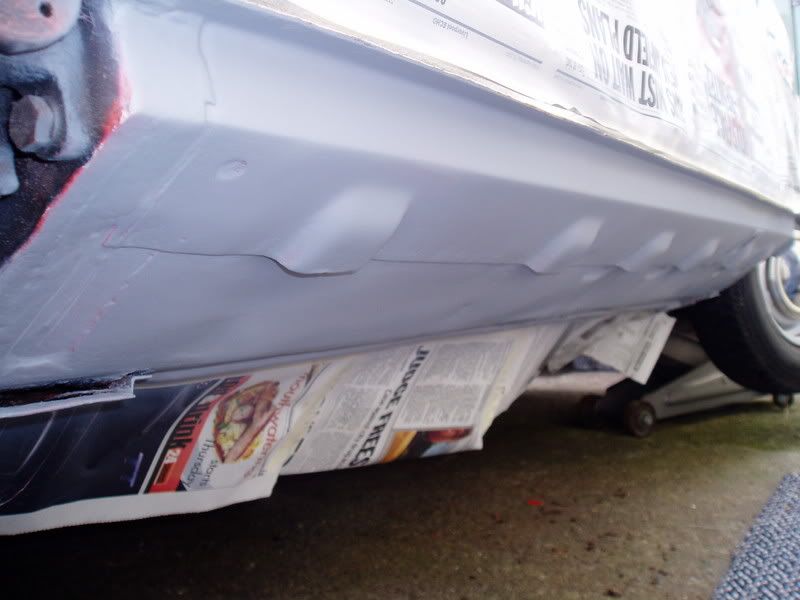
**I also brushed on grey seam sealer around the joins of the arch. (As seen below) I used an ordinary paint brush to brush the seam sealer on.**


Give it time to dry.

Once dried you are ready for the thick layer of stone chip paint! I connected the stone chip paint canister to the compressor yet again at the correct spray pressure. Spray the sills and arch in the thick layer of stone chip. The force of the spray was unbelievable so do make sure you mask off all areas as the stuff goes everywhere! (Managed to stone chip the front of the Land Rover behind in the process!:w00t:)

After applying a few coats of stone chip let it dry.

Posted Image

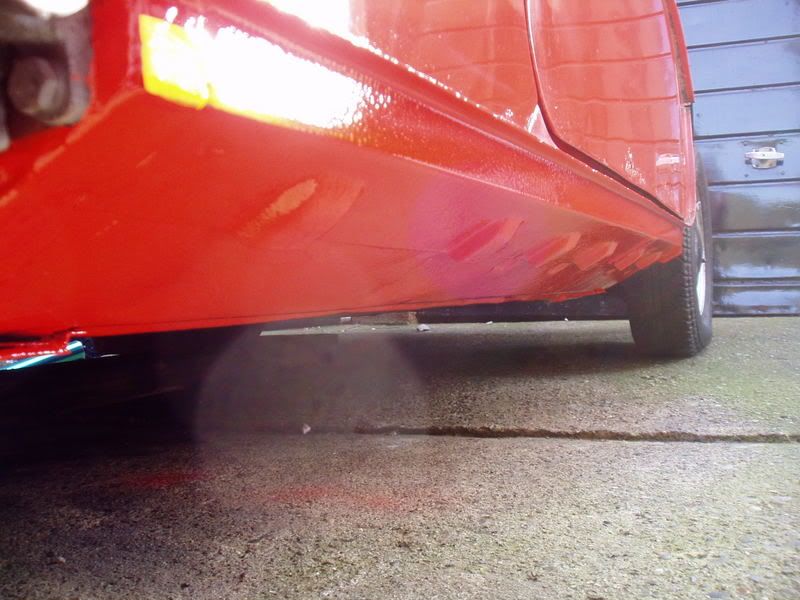
After letting the stone chip dry. You are now ready for the colour coat! I used QD Enamel paint as it is instant shine and needs no buffing. It is perfect for coating the underneath of the car as it is fairly hard wearing stuff! Spray over the stone chip using the enamel paint. Give it a few coats of enamel to ensure that it is well covered. Then after doing so, lightly sand what you have sprayed and then spray on a final top coat of enamel body colour. Your sills should now look perfect! :)

Finished result:

Posted Image

Posted Image

:thumbsup:

Tom

Edited by Lund, 06 November 2006 - 08:13 PM.


#2 minivanman

minivanman

    Up Into Fourth

  • TMF+ Member
  • PipPipPipPipPipPipPipPipPip
  • 3,454 posts
  • Local Club: Backstreet Minis

Posted 06 November 2006 - 08:21 PM

Great guide Lund, Cheers!

#3 Retro_10s

Retro_10s

    Moderator

  • Members
  • PipPipPipPipPipPipPipPipPipPipPip
  • 10,129 posts
  • Location: Bromsgrove

Posted 06 November 2006 - 09:36 PM

nice one lund, maybe this could get put along with Coopershaz's complete Guide to respray?

#4 Lund

Lund

    Camshaft & Stage Two Head

  • TMF+ Member
  • PipPipPipPipPipPipPipPip
  • 1,864 posts

Posted 06 November 2006 - 09:53 PM

nice one lund, maybe this could get put along with Coopershaz's complete Guide to respray?


Thank you, yeh maybe it could get pinned? :w00t:

#5 Retro_10s

Retro_10s

    Moderator

  • Members
  • PipPipPipPipPipPipPipPipPipPipPip
  • 10,129 posts
  • Location: Bromsgrove

Posted 06 November 2006 - 09:56 PM

gotta admit lund, that's a factory finish!!! tempted to do mine.... hmmmmm just got fresh black underseal at the moment.......

#6 Lund

Lund

    Camshaft & Stage Two Head

  • TMF+ Member
  • PipPipPipPipPipPipPipPip
  • 1,864 posts

Posted 07 November 2006 - 04:40 PM

gotta admit lund, that's a factory finish!!! tempted to do mine.... hmmmmm just got fresh black underseal at the moment.......


Im lightly sanding them again and re-painting the top coat as the newspaper blew onto the wet paint in the wind and made a mark! I wont settle for less than 98% perfect! Is perfect achievable for a Mini?!

#7 Mini 360

Mini 360

    Up Into Fourth

  • Members
  • PipPipPipPipPipPipPipPipPip
  • 4,933 posts
  • Location: Aberdeenshire
  • Local Club: Independent

Posted 07 November 2006 - 05:49 PM


nice one lund, maybe this could get put along with Coopershaz's complete Guide to respray?


Thank you, yeh maybe it could get pinned? :w00t:

Couldnt give a bigger hint if you tried!

#8 andywaller

andywaller

    Camshaft & Stage Two Head

  • Members
  • PipPipPipPipPipPipPipPip
  • 1,636 posts
  • Local Club: turbominis.co.uk

Posted 07 November 2006 - 05:53 PM

awsome lund they look mint.

what make of underseal did you use, and what gun pressure was that. i am defianetly going to do mine like this.

#9 pinch

pinch

    Das Pingu's

  • Members
  • PipPipPipPipPipPip
  • 527 posts
  • Local Club: Kentish Mini Club

Posted 08 November 2006 - 06:26 PM

UPOL make a good version of over-paintable stonechip, called Gravi Tex. Stonechip is very different to underseal! 3M will do something similar too. ps, thats a million times better than factory, my late mini has no stonechip and paint on some places underneath. nice guide and pics mate.


1 user(s) are reading this topic

0 members, 1 guests, 0 anonymous users