
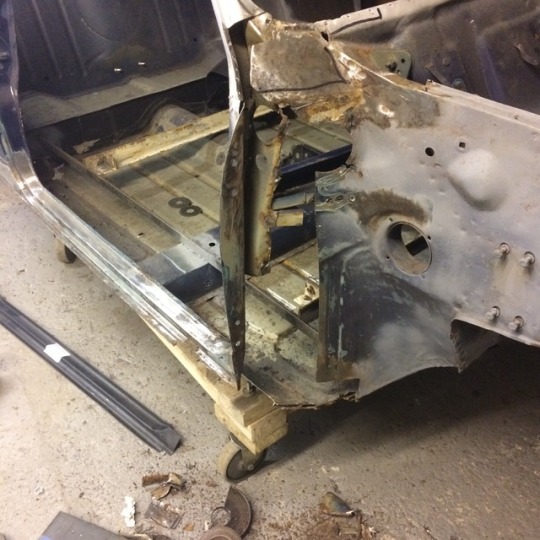
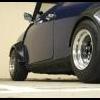
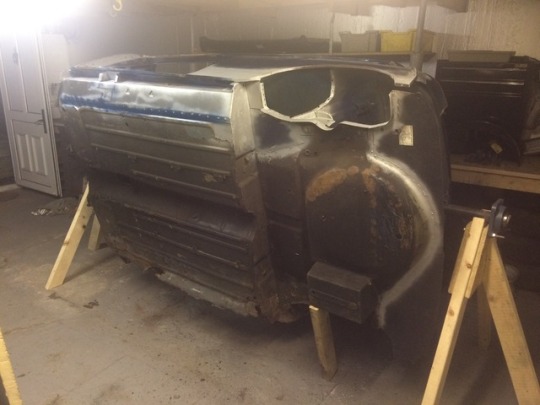
One of many amazing repairs.

Mini Mad

Posted 18 November 2017 - 09:45 PM
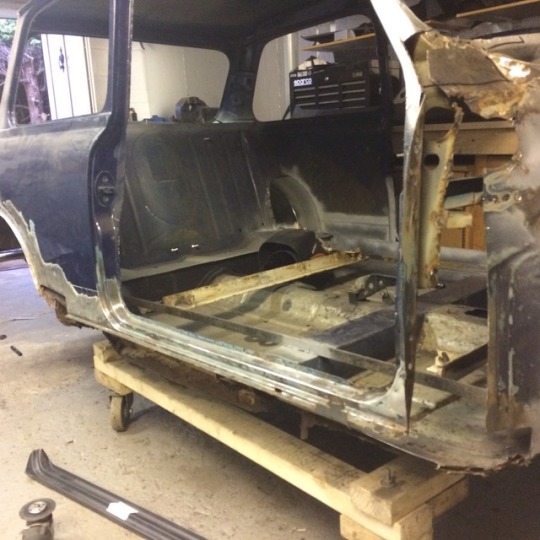
One of many amazing repairs.
Mini Mad
Posted 18 November 2017 - 09:48 PM
Made a spit back in March - used some old bits of steel a had laying around.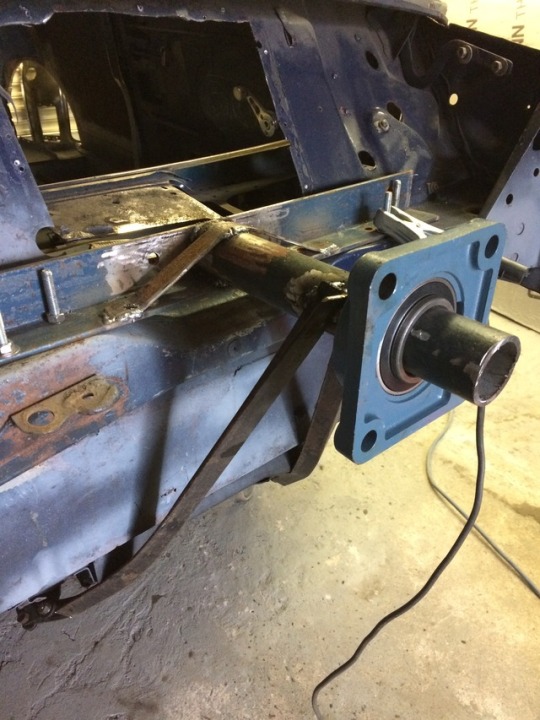

Works a treat. The bearings have grub screws in them so I just nip them onto the scaffolding.
Its really easy to get on and off by myself too. I just put the trolly i made under it and jack each side up removing the ends one by one.
Edited by slyrmini, 18 November 2017 - 09:52 PM.
Mini Mad
Posted 18 November 2017 - 10:07 PM
Ive got some many photos, really should have put them up after that day or nights work. I'm just randomly picking the pictures of the big jobs.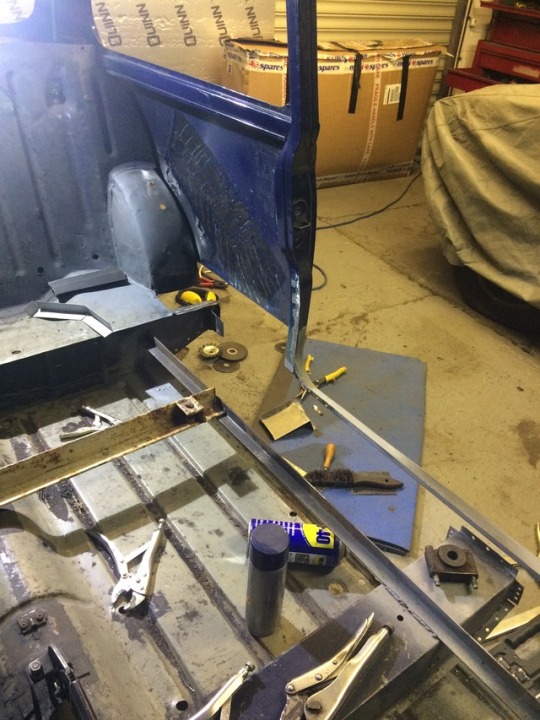
Mini Mad
Posted 18 November 2017 - 10:32 PM
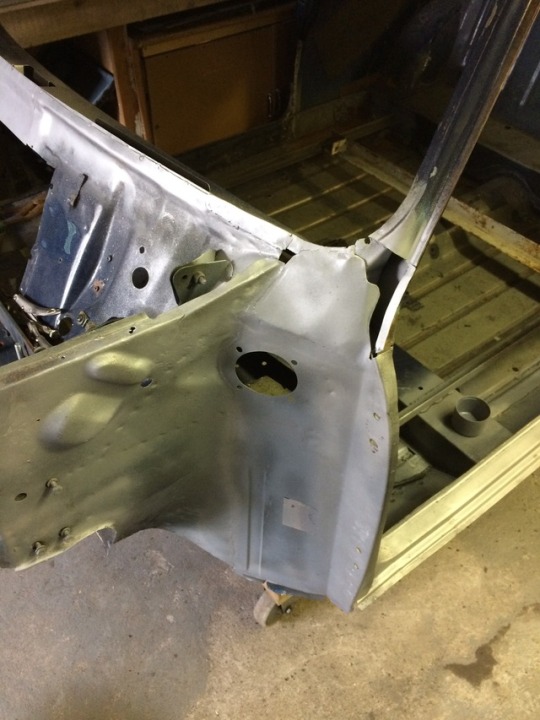
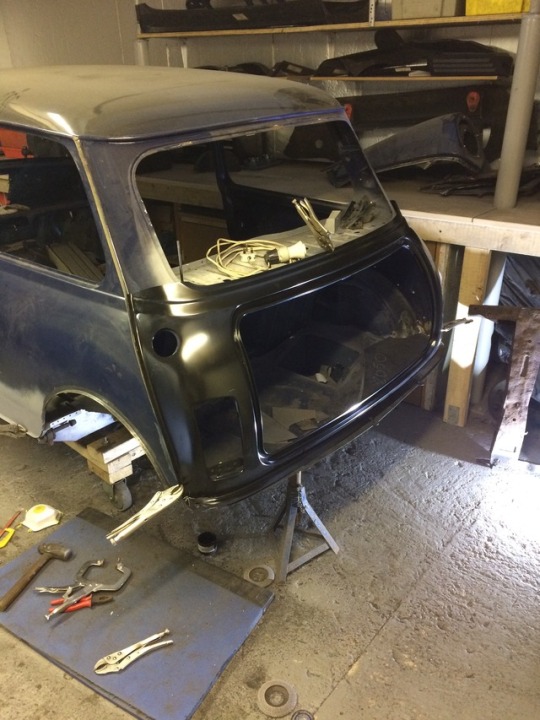
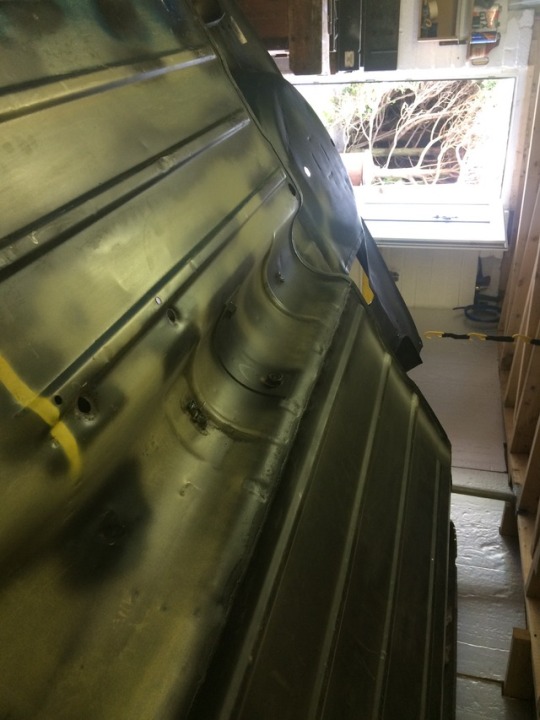
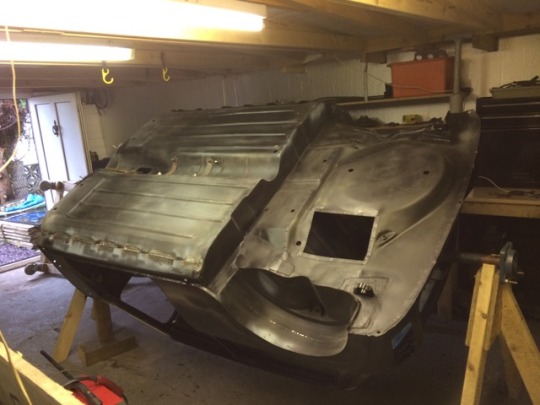
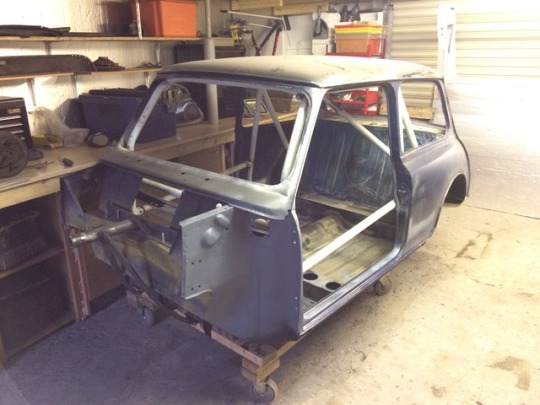
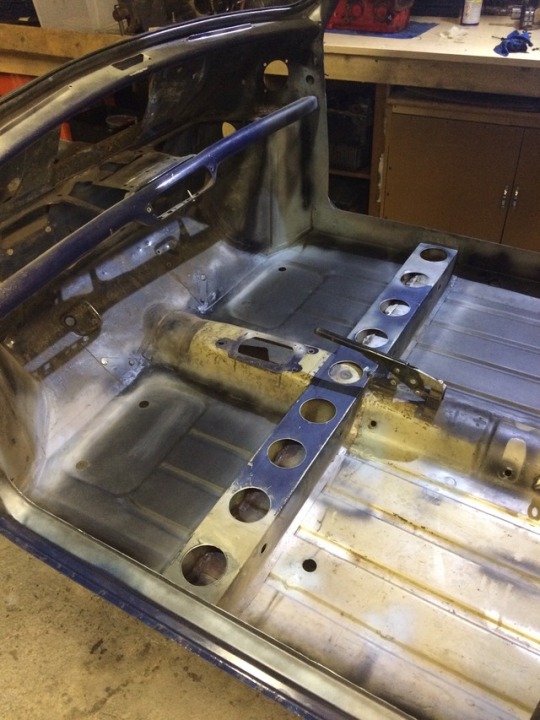
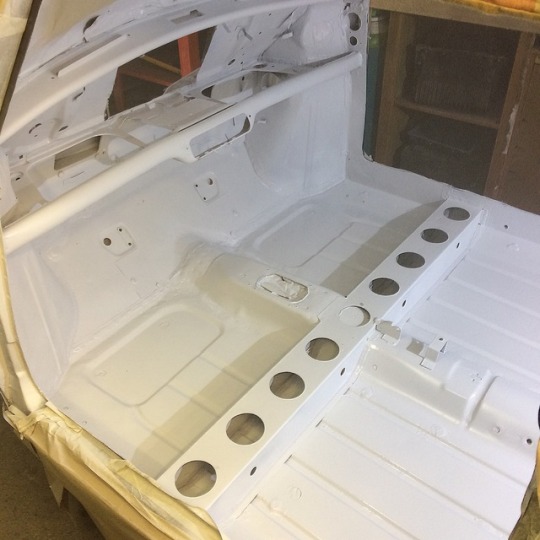
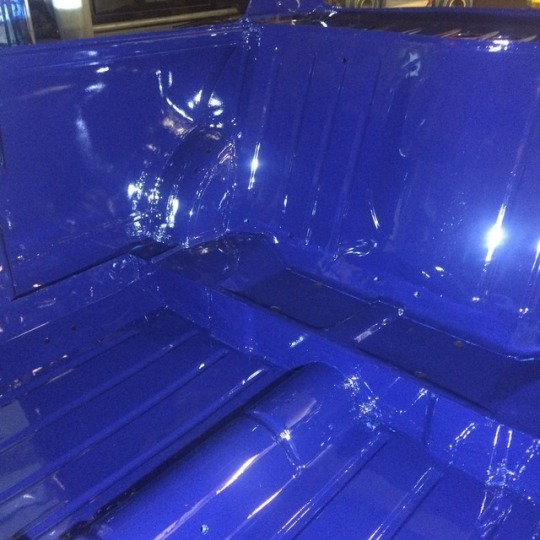
Complete drivers side floor and front passenger floor pan. New arches (tubbed) Removed battery box (making an alloy bolt on blank) New rear section of boot floor.
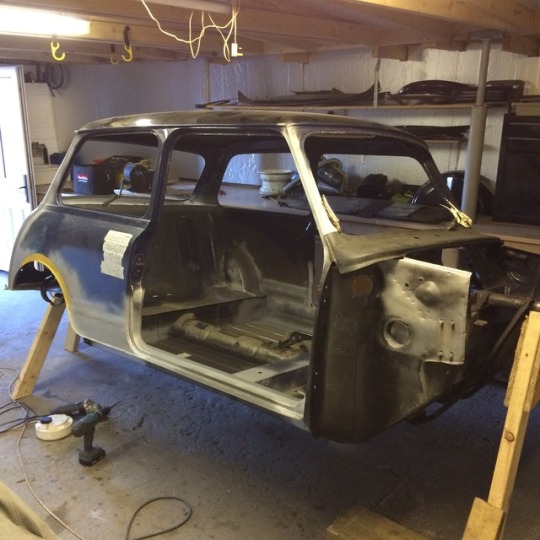
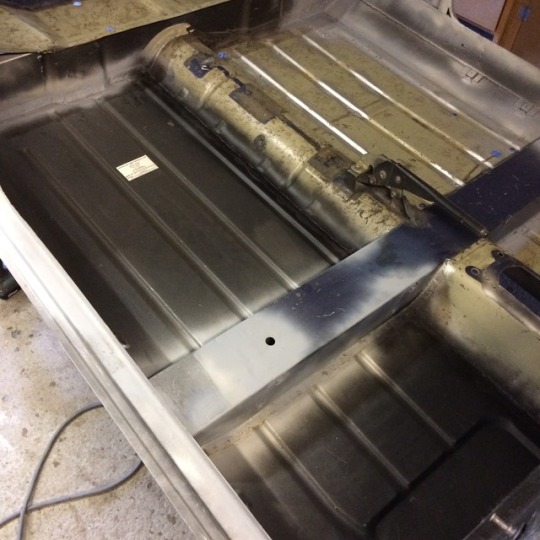
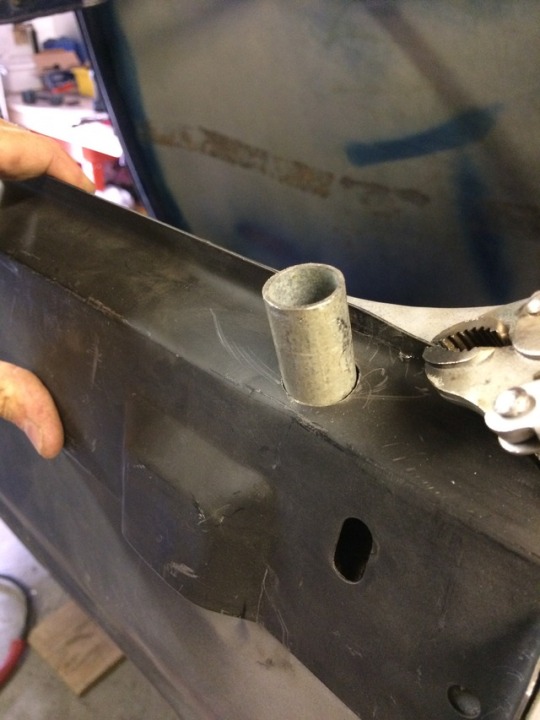
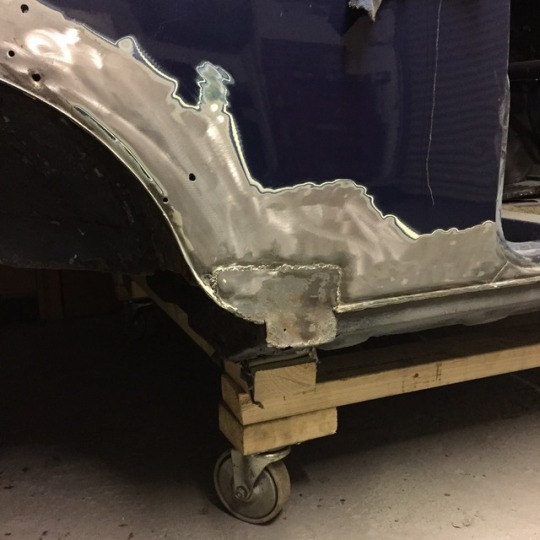
Im heavily inspired by the racers - 7s and Migs. Always loved the idea of the sill stands - I used some steel conduit the electrician left behind after a job he did for me.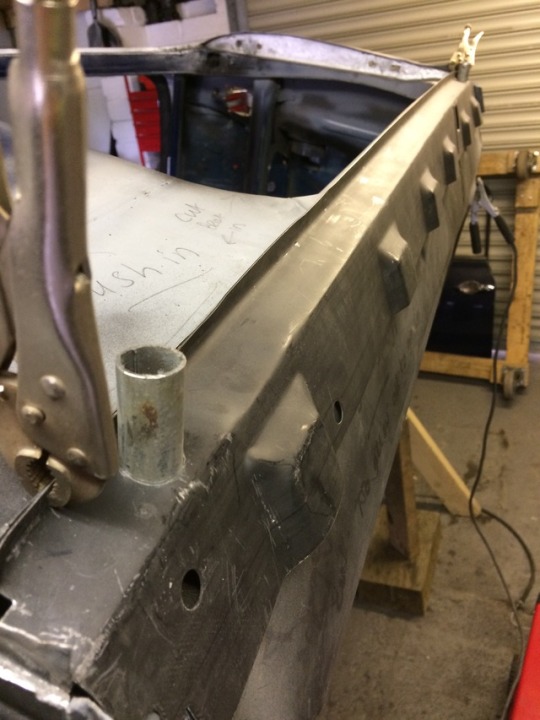
Mini Mad
Posted 18 November 2017 - 10:49 PM
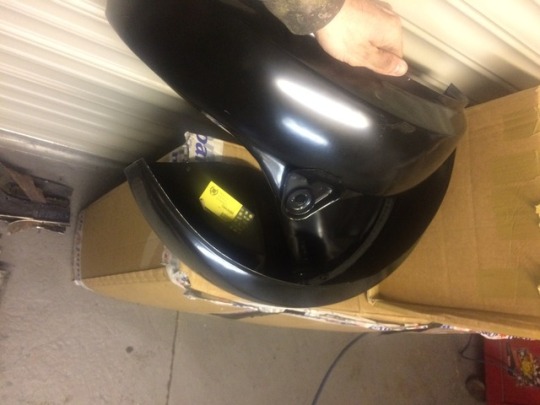
Wheels are Specialist Comps - the originals back from 2008... Ill be stripping and polishing all the centres.
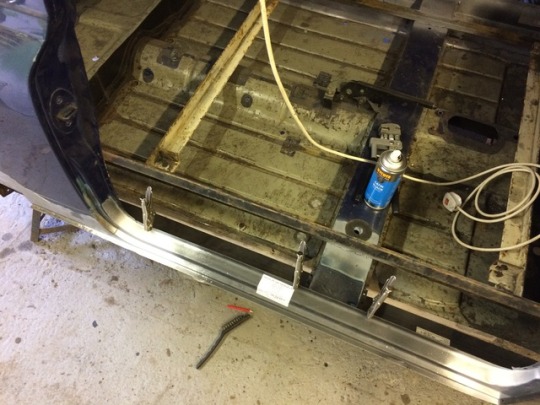
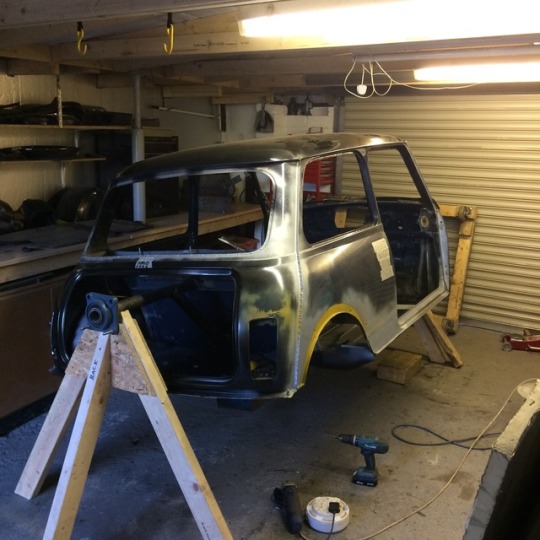
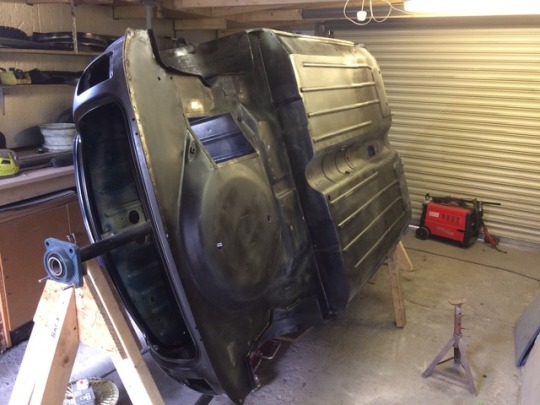
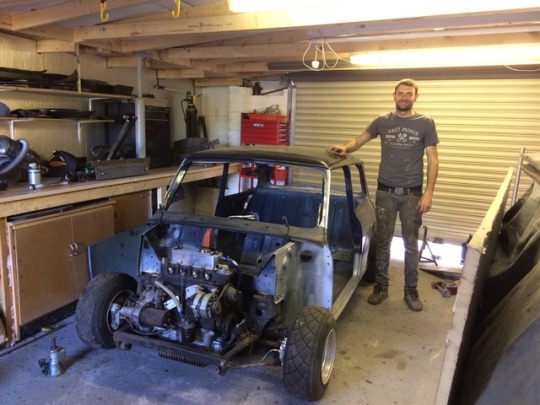
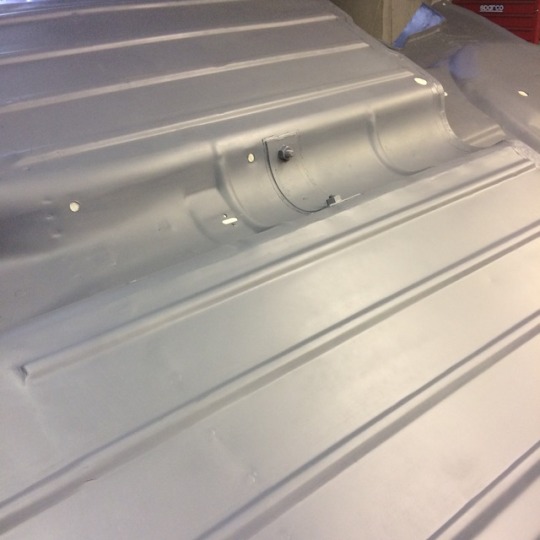
Put the subs back in place and sat her back on four just to check everything still fits and lines up after the amount of cutting and replacing panels. I did brace and measure everything very obsessively, just wanted to do some more checking. PS... Fast Minis tee available from www.heavyrightfoot.co.uk 
Mig arches will be going back on, for sure.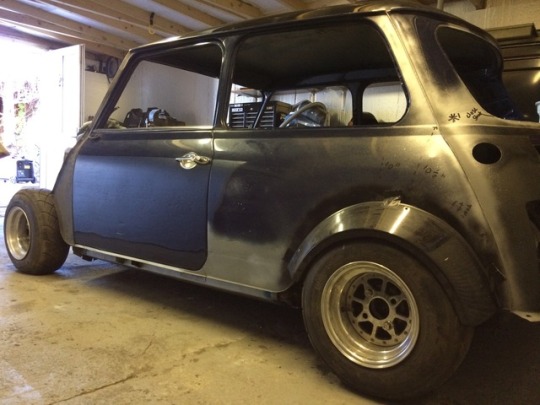
Edited by slyrmini, 18 November 2017 - 10:54 PM.
Mini Mad
Posted 18 November 2017 - 11:22 PM
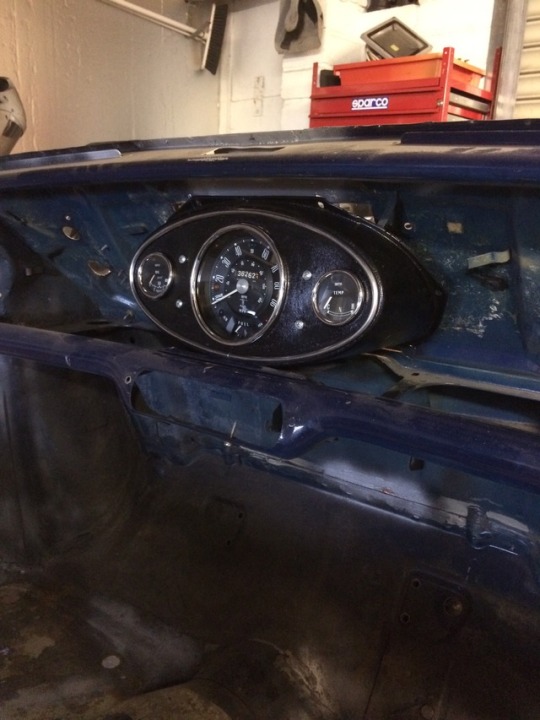
Seen this on gumtree, fairly local, so had to have it. Needs sorting, the guy hand painted it. Wont be using these particular oil and water gauges, iv got a volt and a water/oil together in the one gauge. Im keeping the original 90mph clock too.
Made these years ago with my old man. Will need chopping down very slightly - the indents on the magnum panels are slightly smaller than the originals.
Bargain cage from modern and classic in South Wales. Needed some welding and im currently cleaning it up. Going to 2pak it gloss black.
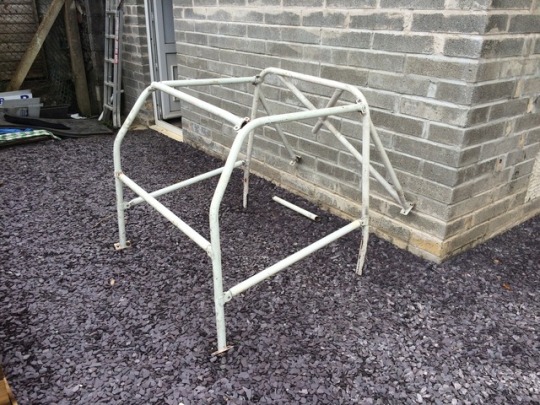
Edited by slyrmini, 04 June 2020 - 09:06 AM.
Mini Mad
Posted 18 November 2017 - 11:43 PM
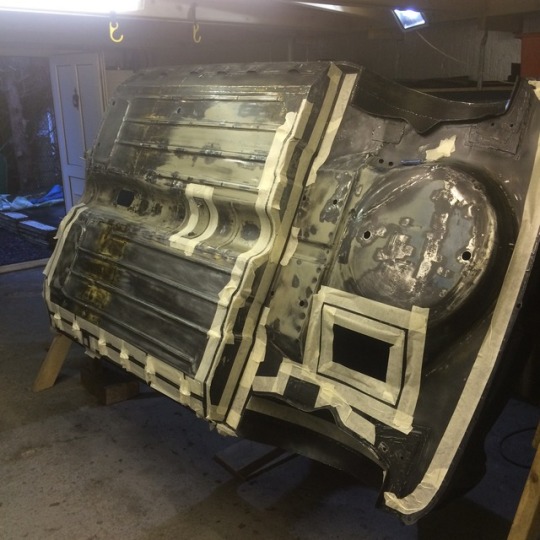
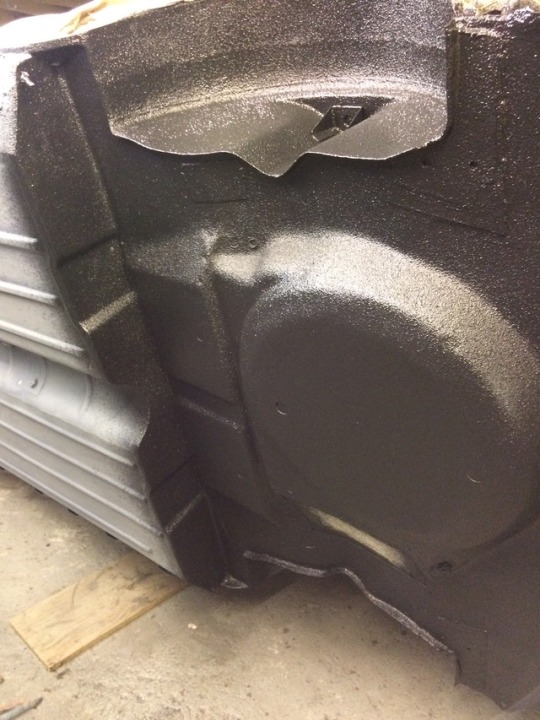
UPOL Raptor going on. Why i didn't remove that dent in the boot floor i have no idea. Was nice to see this going on. Spent so many hours this year getting it to this stage.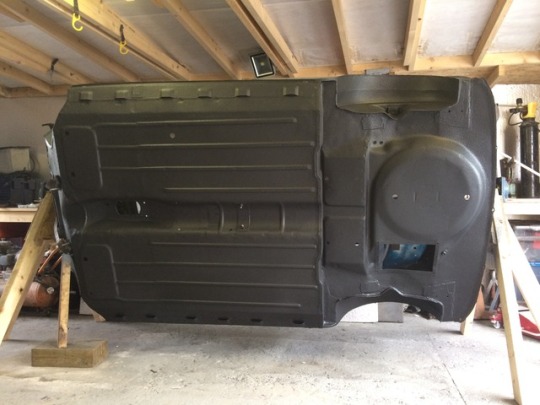
Edited by slyrmini, 18 November 2017 - 11:43 PM.
Mini Mad
Posted 19 November 2017 - 12:17 AM
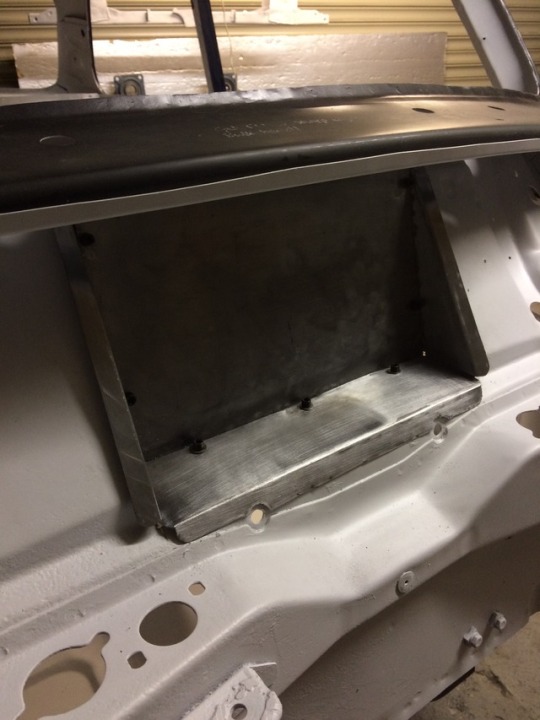
I made a shallow stainless bulk head box from some left over industrial kitchen splash back. (My old man keeps EVERYTHING) - I run a Weber on my 1293 years ago and didn't want to weld the hole back up, i may run it again one day. For now this will keep it looking tidy and give the SU some more breathing room.
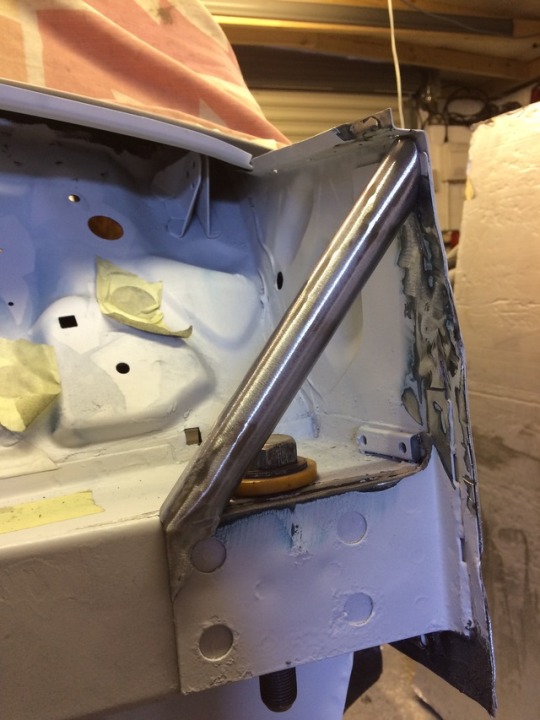
Always wanted something a little different from the original braces here but didn't want it to look too far from original. This is what i came up with.

Also made and welded on my inner wind brace bar mounts. Will be rose jointed at the top.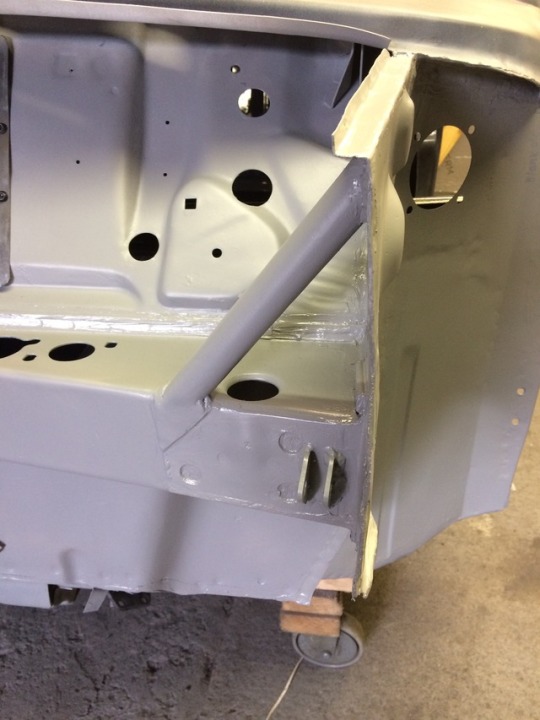
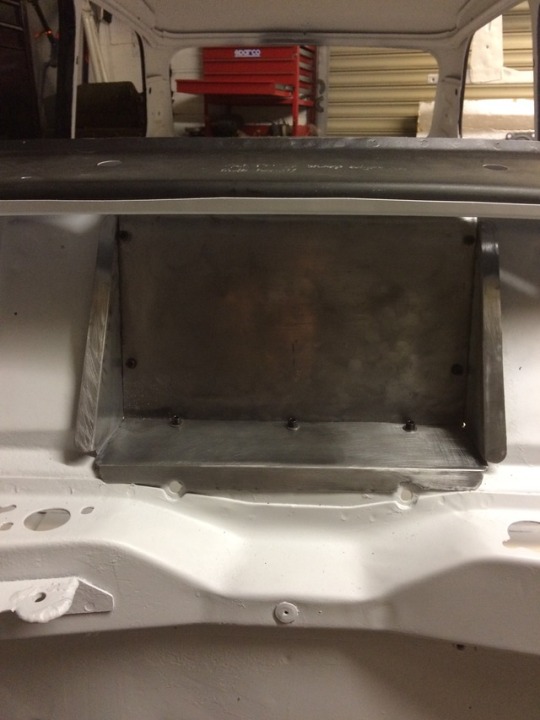
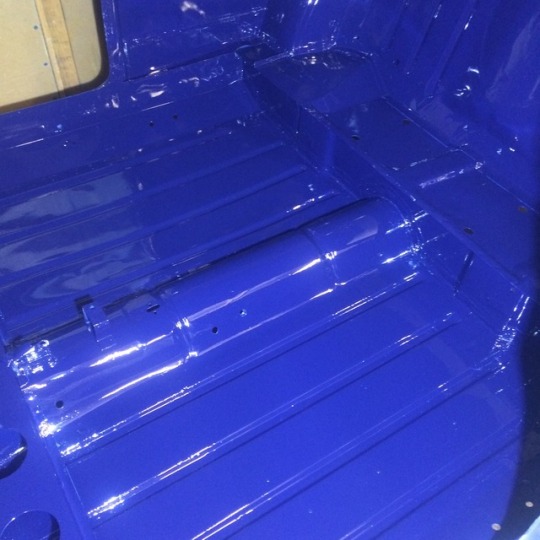
And painted. 2pk Valspar.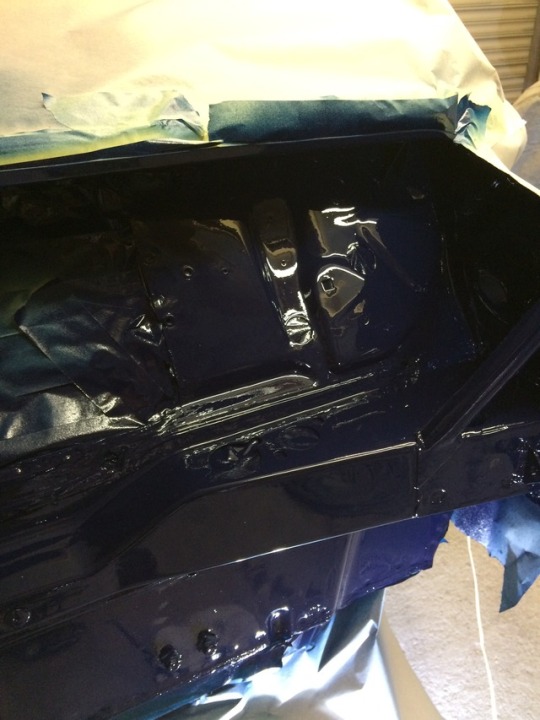
Flash has made the colour look very purple on the below images. The above bulk head image is much better at showing what the colour is in real life.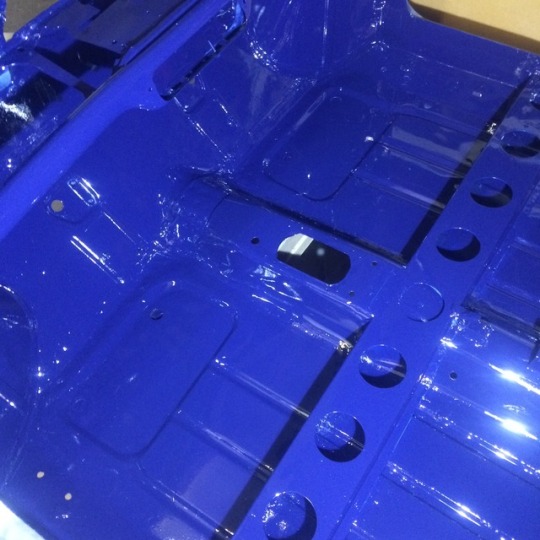
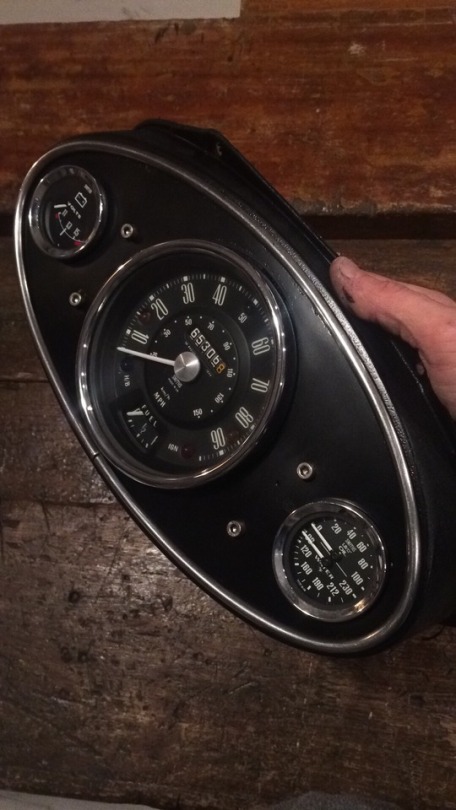
Cleaned up with my gauges in place. Had to make some brackets for the speedo and bolted it on with some allen bolts. The original brackets didn't work as they were setup for the single holder.
I removed the chrome trim to clean the plastic but didn't take note as to were the join sat - anyone know if it should be at the top or bottom? I seem to think top now i've got it back on - getting those little pins to line up is a bloody fiddle.
Mill Road Garage

Posted 19 November 2017 - 12:26 PM
Just read this through from the start.
Very nice. keep the updates coming 
Ben
Stage One Kit Fitted
Posted 18 December 2017 - 07:53 PM
Hi Craig,
I guess it is a stupid question, but would you consider painting the whole car in Raptor, maybe with a tint of colour?
My car has no history and it will never be a heritage motor, so I'm thinking why not go crazy?
Interested to hear your thoughts..
Philip
Mini Mad
Posted 27 December 2017 - 02:24 PM
Hi Phillip - personally, i can't say i'd like the look of it on the outer body. I've seen it used on the inside of cars and when done right it looks well.
Suppose it depends on the look you are after.. it would be a harder car to dent and be well protected from stone chips if you were to use it, thats for sure.
I'm sure some one will have used it on a whole car before - maybe do some searching on a VW forum - them boys normally like to go wild.
Hi Craig,
I guess it is a stupid question, but would you consider painting the whole car in Raptor, maybe with a tint of colour?
My car has no history and it will never be a heritage motor, so I'm thinking why not go crazy?
Interested to hear your thoughts..
Philip
Mini Mad
Posted 27 December 2017 - 03:54 PM
Some more progress...
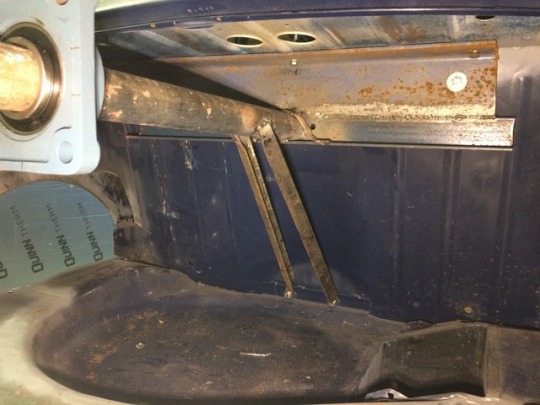
Started mounting drivers seat. Made the tubular mounts back when i was fitting the sills. I welded some thick plates and nuts behind inner sills. Didint want to weld the mounts in as i wasnt too sure at the time if i'd go with this idea and figured some extra plates and nuts woudnt matter if i didnt end up using them.
Just noticed front passanger mount looks to be on the piss - have to take a look at that.
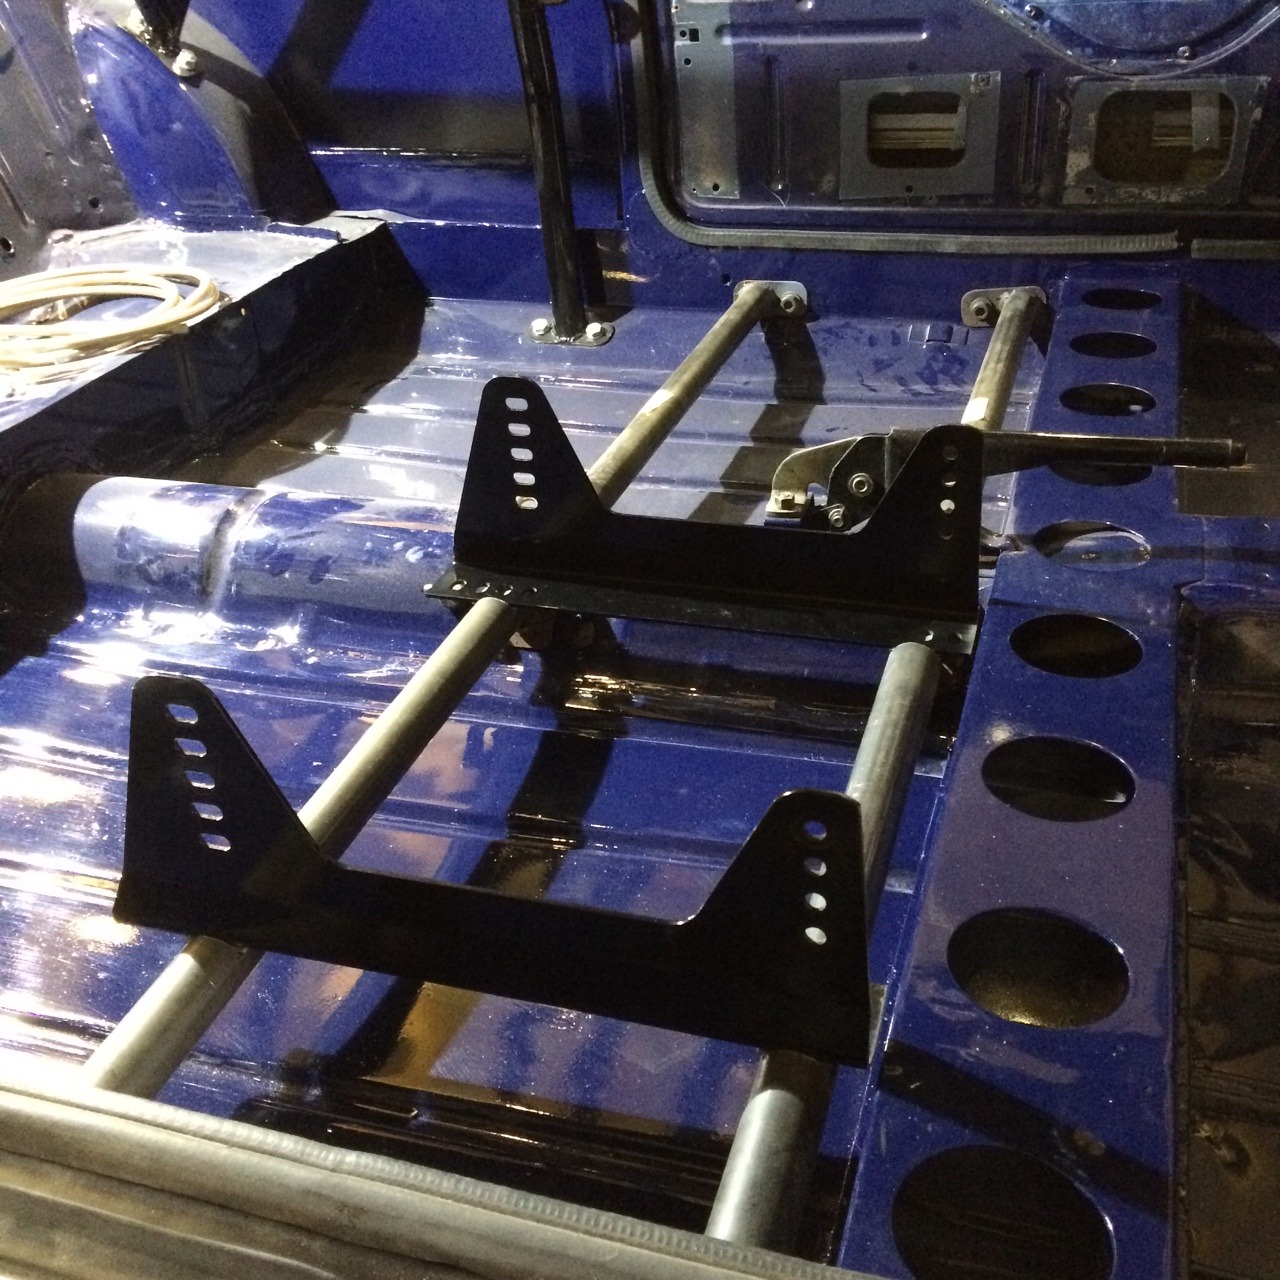
Welded some flats with nuts into the tubes to sit the side mounts on, got some nice adjustment back and forth too. I previously had the inner side mount sat up against the tunnel but was never comfortable with the seat position. Now its higher im able to mount it over the tunnel and its a much better position.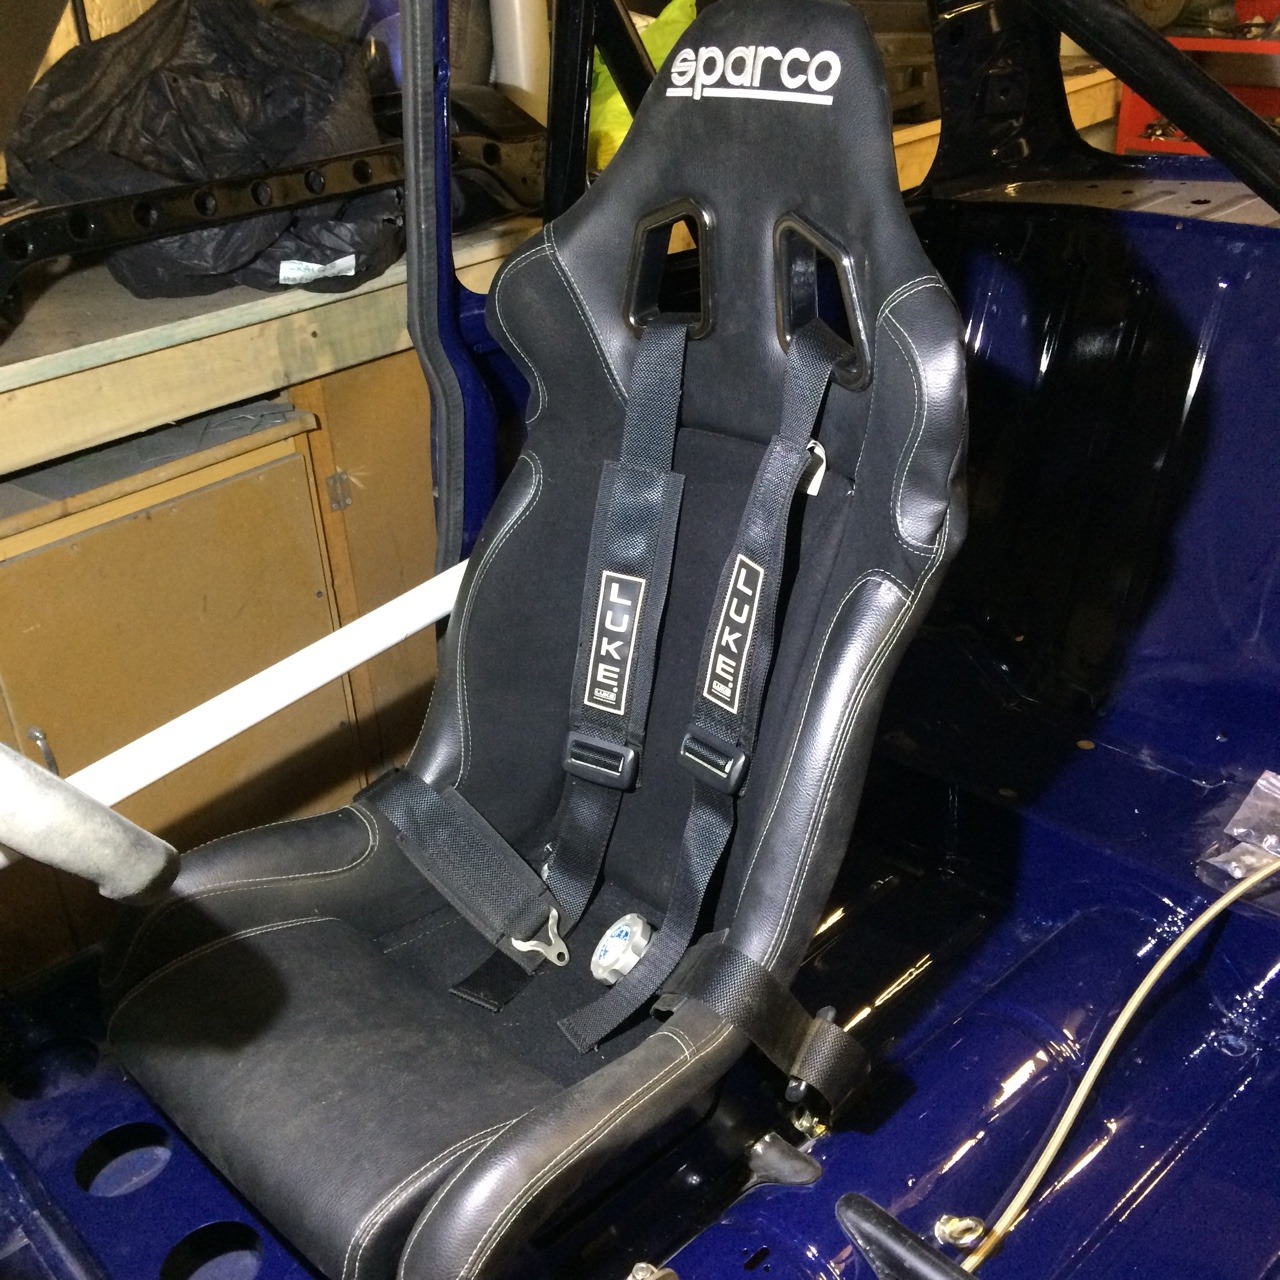
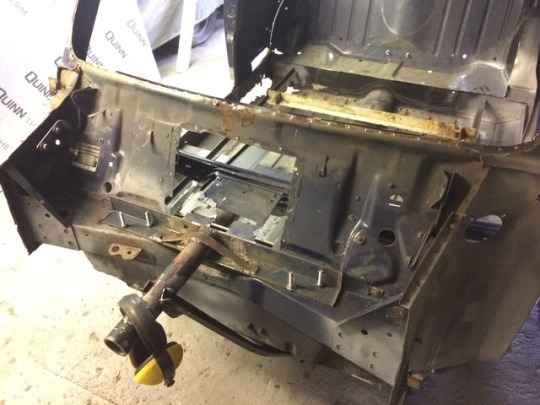
Always wanted an internal shift but not paying 400 for the Kad kit so had a crack at my own. 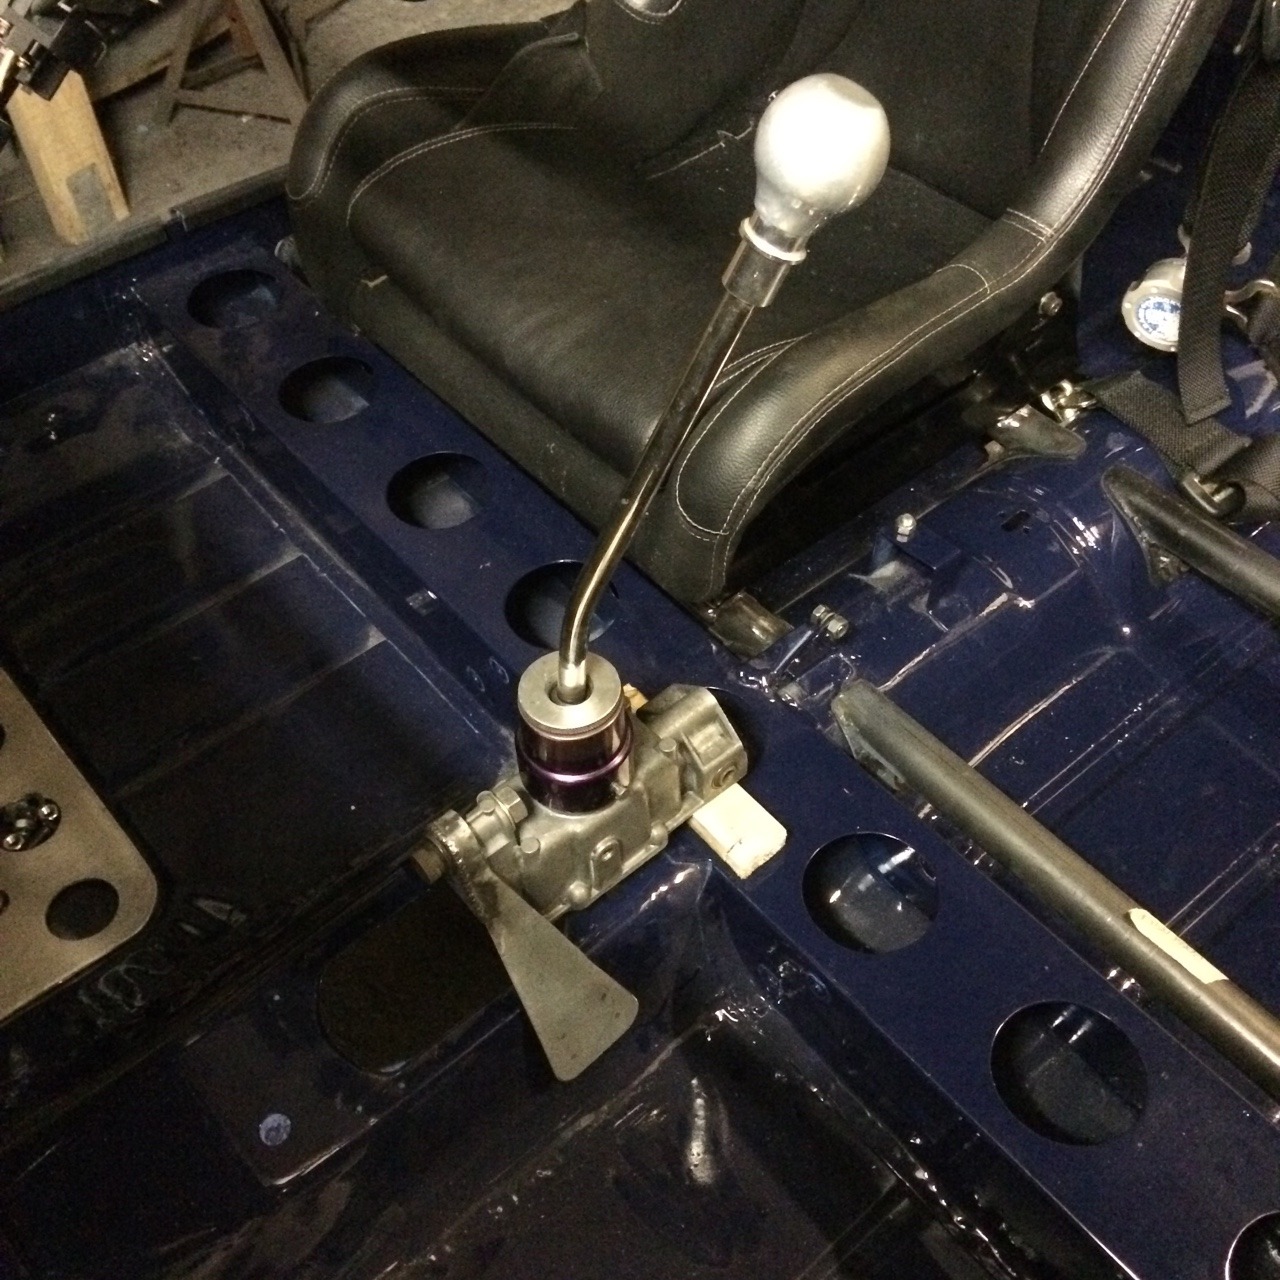
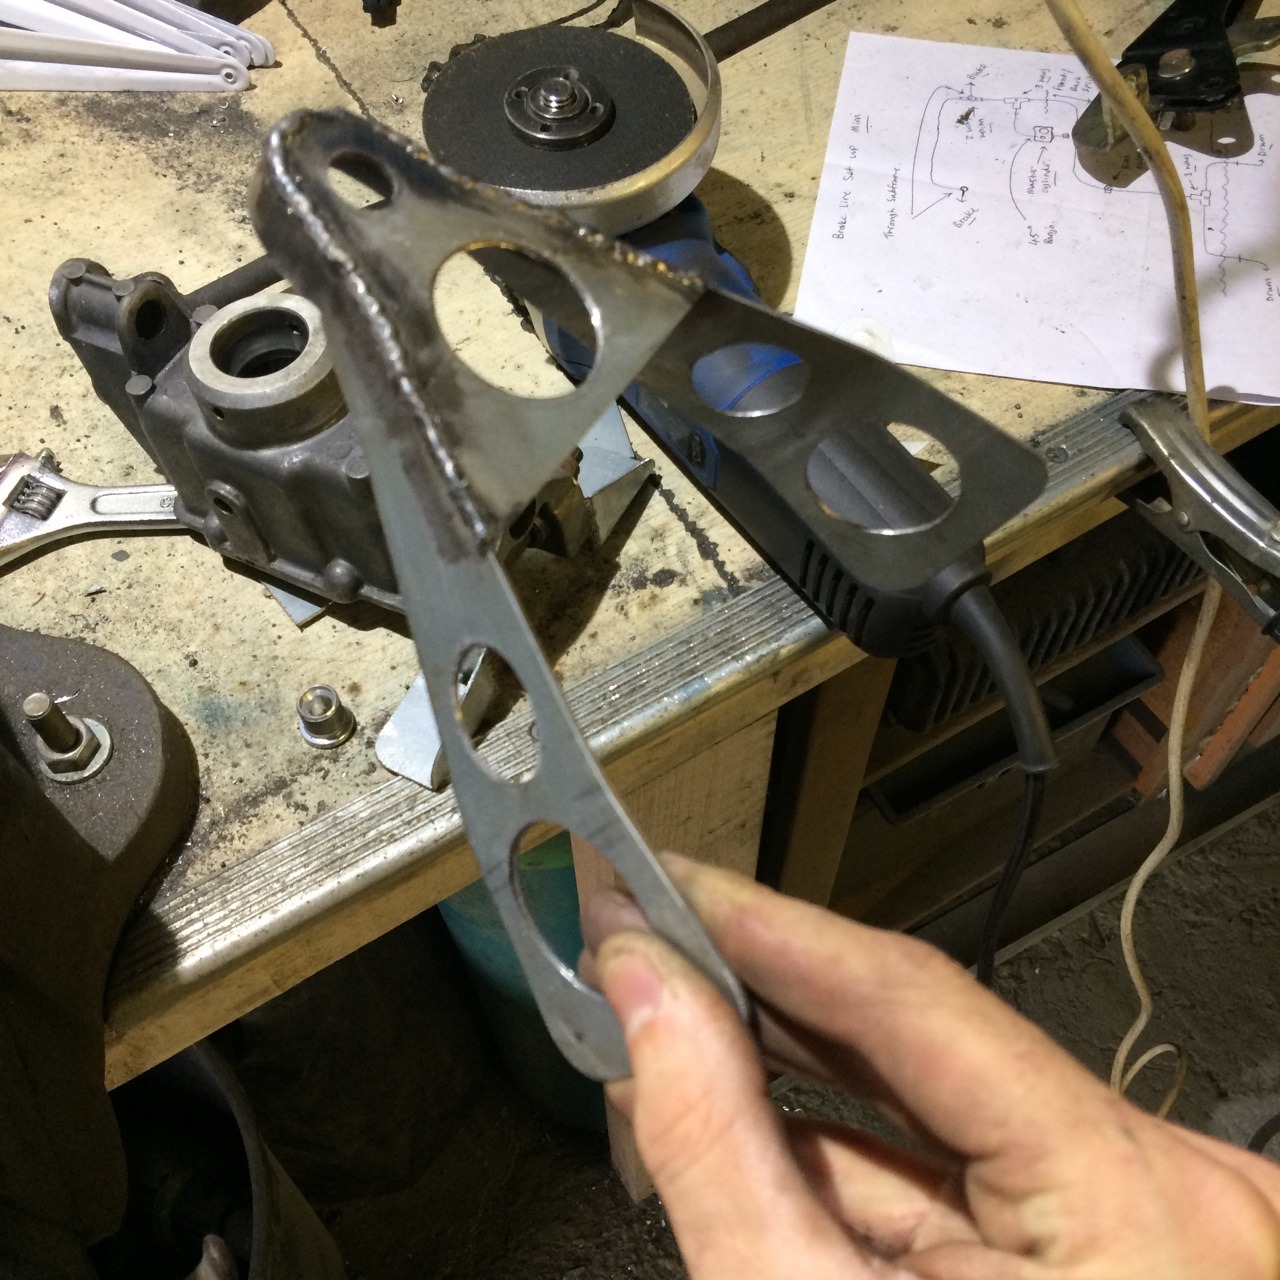
I'm mounting it a little more forward than alot of people tend to do - one reason being hand brake position, i hate seeing them stuck in the air and im also not a fan of them over to one side. Done a lot of mesuring and figured id be able to strip, cut and rebuild the hand brake - see picture below...
Need some kind of flooring in the garage - floor dont half kick up some dust.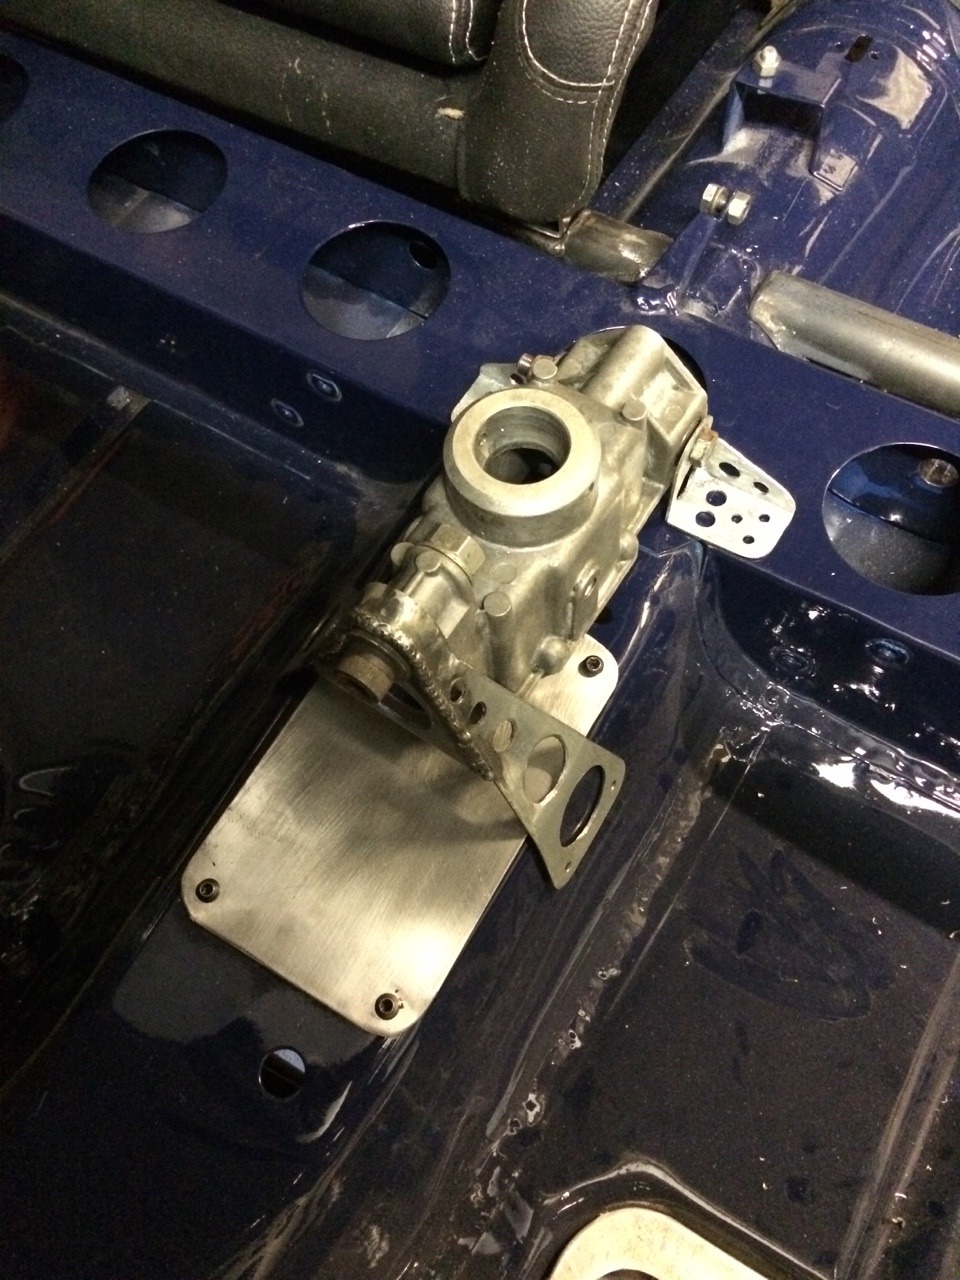
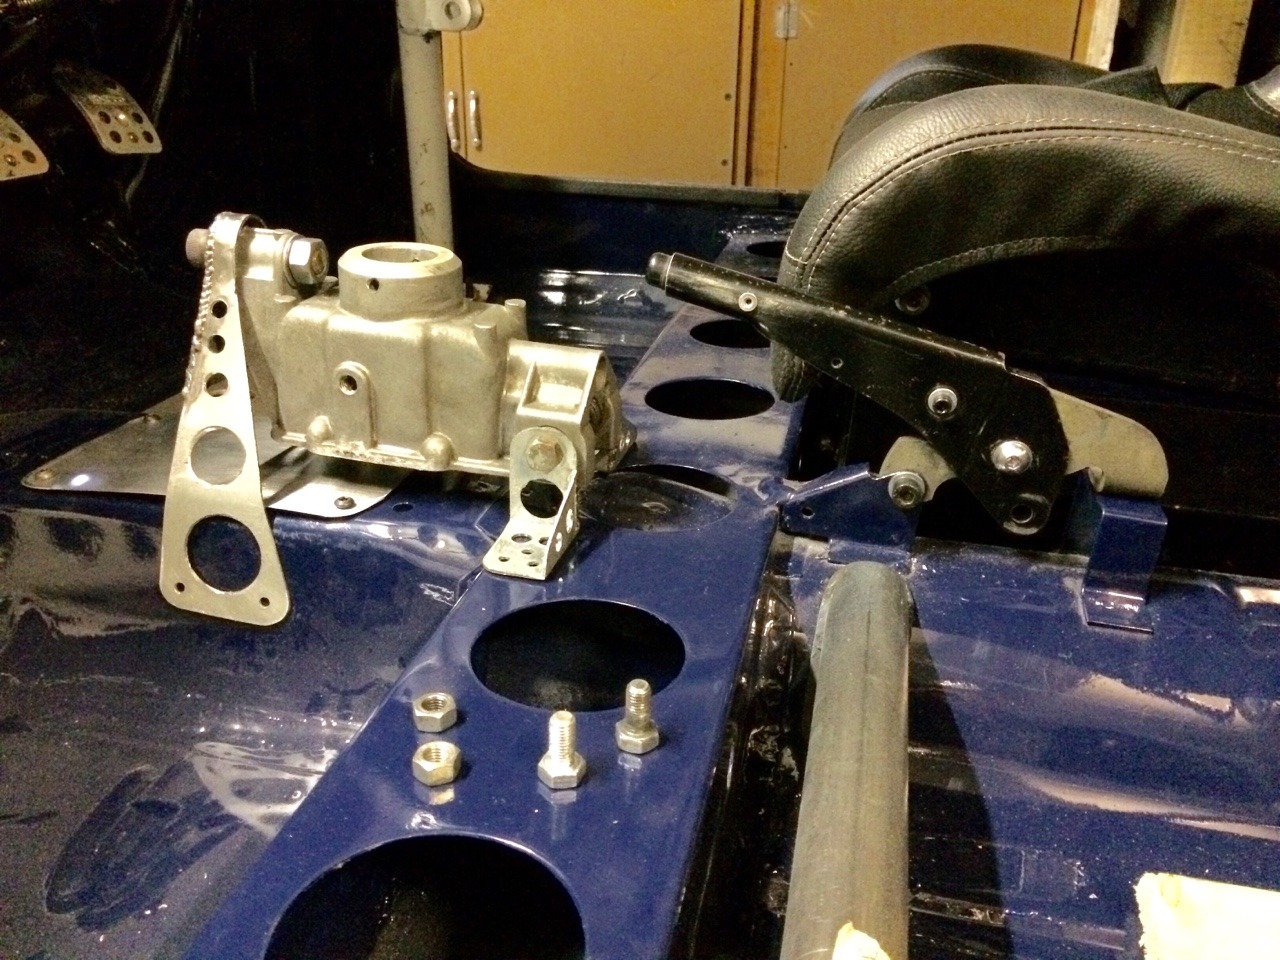
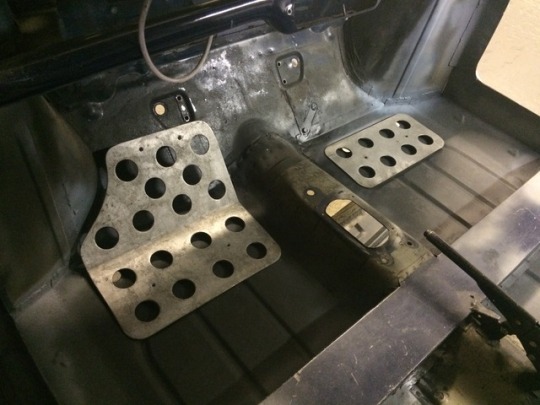
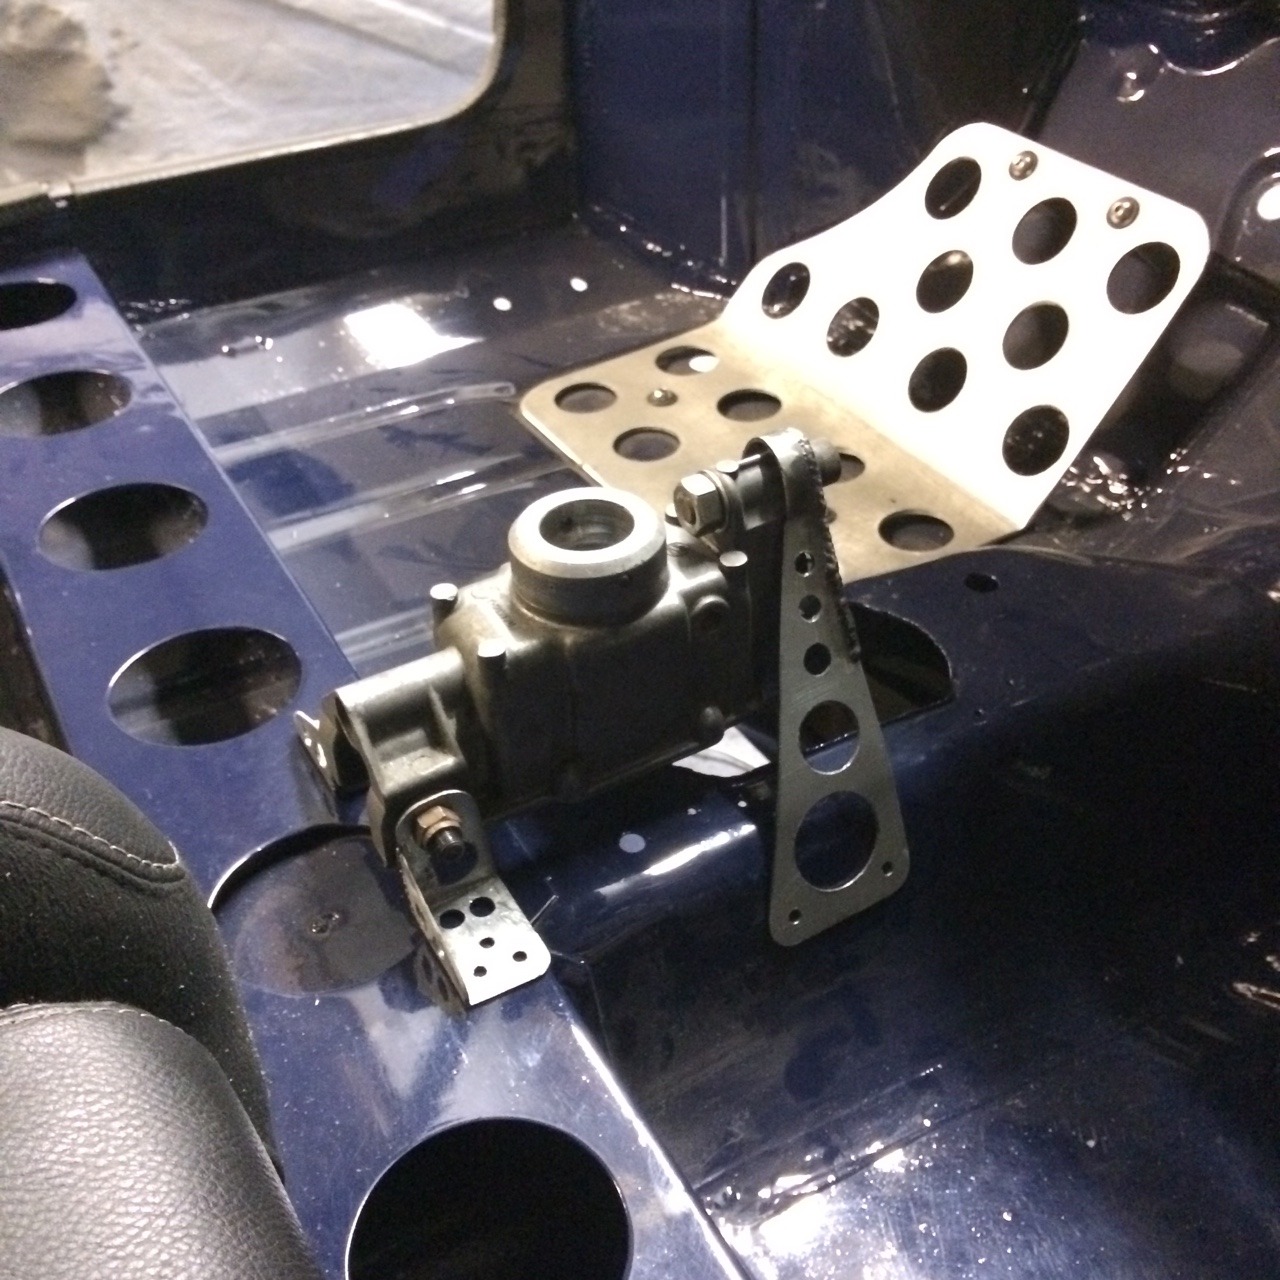
Heres the hand brake - drilled the pins, pulled it a part, cut it down, drilled and used rivets to re-locate the spring stop and used allen bolts with nilock nuts to hold it back together and not to pinch it too tight.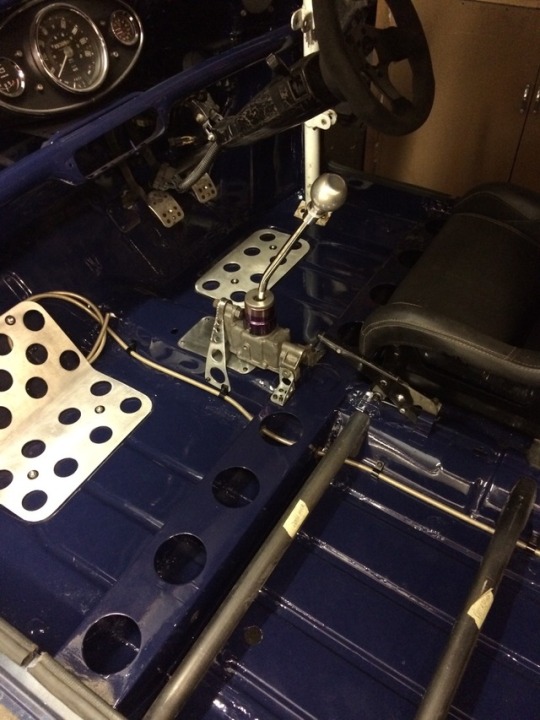
Will be using a standard stick. Also started to route the fuel line.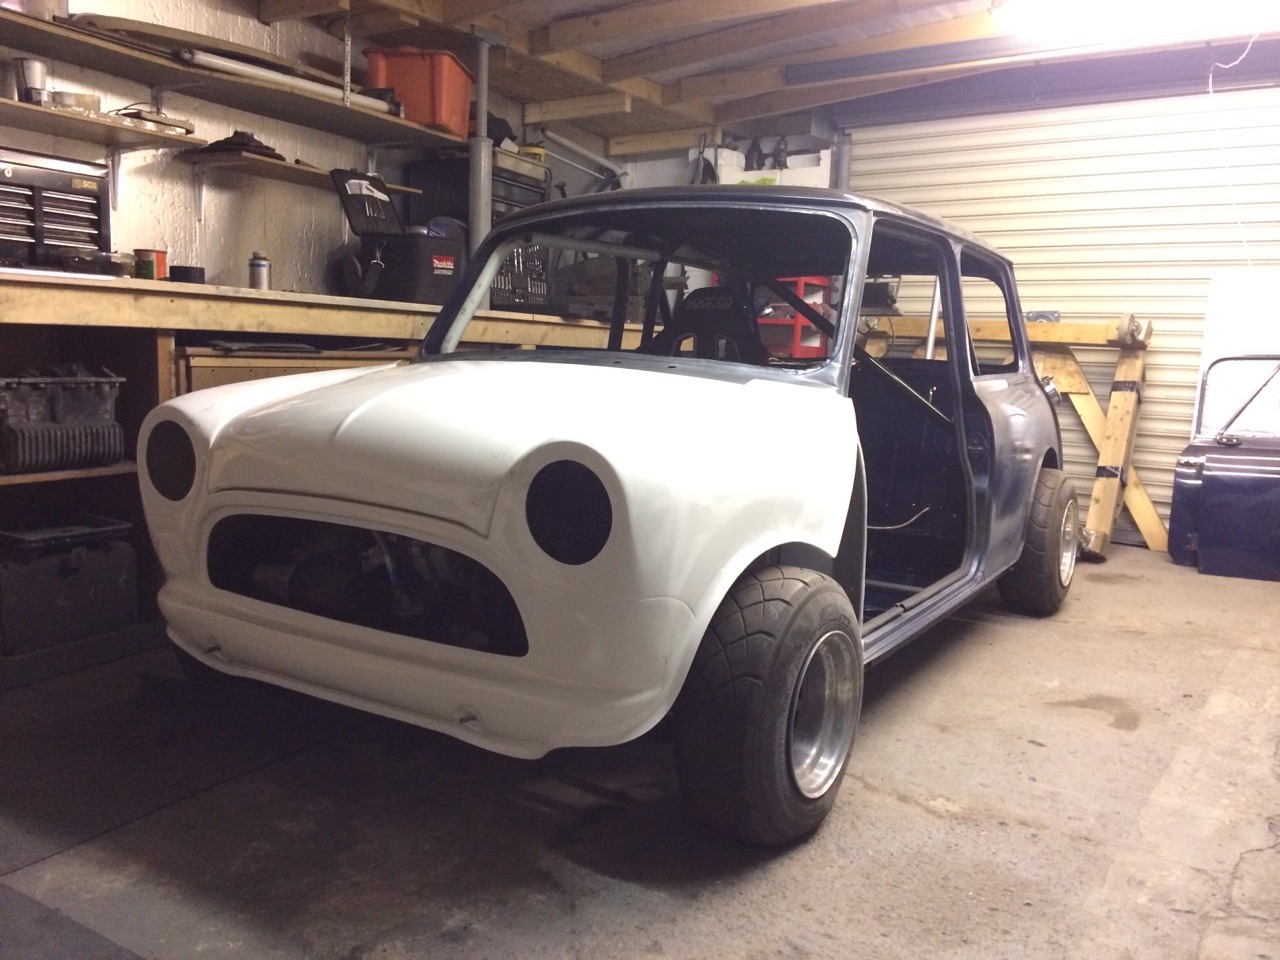
Sat her back on the subframes to get the front end / a-panels started. Wings will be pinned at the a-panels. Bonnet is fibreglass but i still want it on hinges so got an idea for this, will post images when i've got round to it - going to pin it at the front in both corners.
Edited by slyrmini, 27 December 2017 - 04:28 PM.
Speeding Along Now

Posted 27 December 2017 - 04:09 PM
Edited by g111mds, 27 December 2017 - 04:10 PM.
Mini Mad
Posted 28 December 2017 - 09:17 AM
Mini Mad
Posted 08 May 2021 - 03:15 PM


Edited by slyrmini, 08 May 2021 - 03:15 PM.


0 members, 0 guests, 0 anonymous users


