Jordan

Stage One Kit Fitted


Posted 07 July 2009 - 11:50 AM
Up Into Fourth

Posted 15 July 2009 - 12:35 PM
Up Into Fourth
Posted 15 July 2009 - 12:38 PM
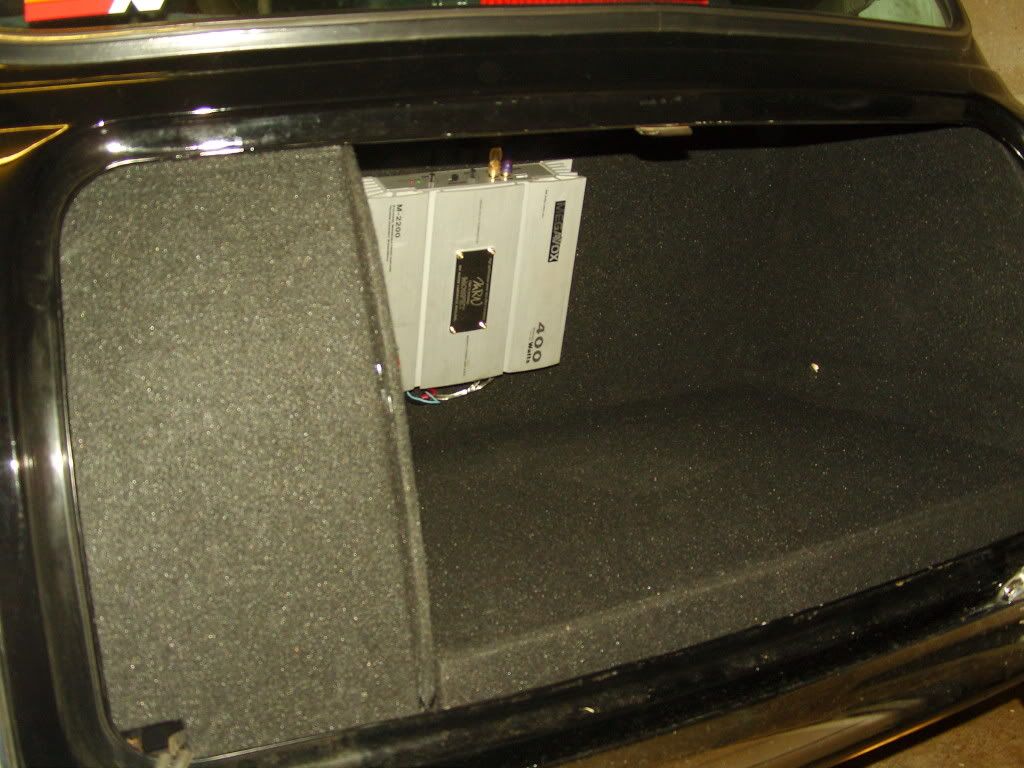
First off thanks for an excellent guide gave a great starting point. In all it cost me about 11 or 12 quid to i got the wood free so a bit more if i had to pay for it. Here is the finished product very happy with it, makes such a difference (not the best pic so i might get a better one later). Now i need a bit that goes over the boot lid, anyone know where i can get one from? Cheers.
Jordan
Speeding Along Now

Posted 15 July 2009 - 12:48 PM
Moderator

Posted 15 July 2009 - 01:05 PM
Stage One Kit Fitted
Posted 10 September 2009 - 11:34 AM
boot lid covers cost about £3 from carmatsrus if i remember correctly
Learner Driver

Posted 16 September 2009 - 09:14 AM
 )
)Up Into Fourth

Posted 10 December 2009 - 11:05 PM
Mini Mad
Posted 08 February 2010 - 07:29 PM
Do the bought ones come with fitting instructions? Where do you actually attach the boards to the rest of the car? What kind of brackets have other people used???
Mini Mad
Posted 08 February 2010 - 07:29 PM
Before:
(not really a TRUE before picture...as I'd already tidied all the rubbish etc. out!)
Cardboard Stage:
After:
(Not perfect....but better than nothing!)
Andrew.
PS Thanks for the guide Russell

Mini Mad
Posted 08 February 2010 - 07:32 PM
Looks good with the tank exposed imo, but can you remove the LHS board without losing the structure? Because that would look better.
Stage One Kit Fitted

Posted 28 April 2010 - 10:48 PM

Mini Mad
Posted 30 April 2010 - 06:48 PM
Thank you to Russell-Mini30 for this thread, it was a great help when i made mine back at christmas.
I chose to use hard-board, plywood and a thicker plywood instead of the MDF. Only two problems with this: One was cutting each and ever screw's tip off as they were slightly too long. The second was my mum after she found out i used her car bonnet as a second work bench.
Pictures
sam
On The Road

Posted 26 June 2010 - 06:48 PM
Mini Mad
Posted 14 July 2010 - 07:20 PM
glad i could helpNice, Very helpful. May have a go at making one sometime next week.
post up the pictures when you have made yours


0 members, 0 guests, 0 anonymous users


