Jump to content


Photo
- - - - -

Mike's X18xe1 Powered Mini


  • Please log in to reply
79 replies to this topic

#61 M J W J

M J W J

    One Carb Or Two?

  • Members
  • PipPipPipPipPipPipPip
  • 976 posts
  • Location: Midlands
  • Local Club: not yet

Posted 14 May 2013 - 08:14 AM

Well its taken long enough but its finally back on its wheels


DSC00885_zps6c13c562.jpg


I didn't roll it completely out the garage as it was chucking it down with rain. Also my rear wheels are slightly catching on my rear coilovers. I need to check my alloys but I think they have a larger off set so will miss them.


Just to prove that there is nothing underneath it


DSC00886_zps628a77b4.jpg


And a small video of it rolling a few inches. At first I couldn't work out why it wouldn't budge but then realised I had left it in gear. Duh!


th_MOV00887_zps053931c1.jpg


Apologies for the poor quality of the pictures but they were on my phone and the light was going.


Right. Now to fit the front end and see what space I have to cram a radiator into.


#62 M J W J

M J W J

    One Carb Or Two?

  • Members
  • PipPipPipPipPipPipPip
  • 976 posts
  • Location: Midlands
  • Local Club: not yet

Posted 15 July 2013 - 10:02 PM

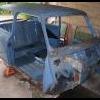
Still working on this. Just been sorting out little bits and pieces so not really had much to show. Also with the death of my phone and digital camera I've not been able to take any pictures.
 
I swapped my rear wheels to my alloys. My alloys need a complete refurb but the off set makes them miss the rear coil springs so it doesn't sound like a 'dinosaur' anymore
 
DSC_0001_zps1e765487.jpg
Picture of my really shabby alloys. They will be stripped, repainted and have brand new tyres fitted.
 
DSC_0002_zpsdbdf784a.jpg
About 1/2" clearance between the inside of the wheel and the coil spring.
 
I lowered the the car right down onto its bump stops. The frame is about 3" at its lowest point off the floor when on the bump stops. Not loads of clearance but its not exactly a monster truck. If the frame is made to be any higher than that, all that will happen is that the sump will smash into the floor instead. The engine can't go any higher or the drive shafts wouldn't line up and the engine wouldn't fit in the engine bay.
 
DSC_0021_zps97cde834.jpg 
Might not looks loads but it does clear the floor. The bottom of the frame is level with the sump.
 
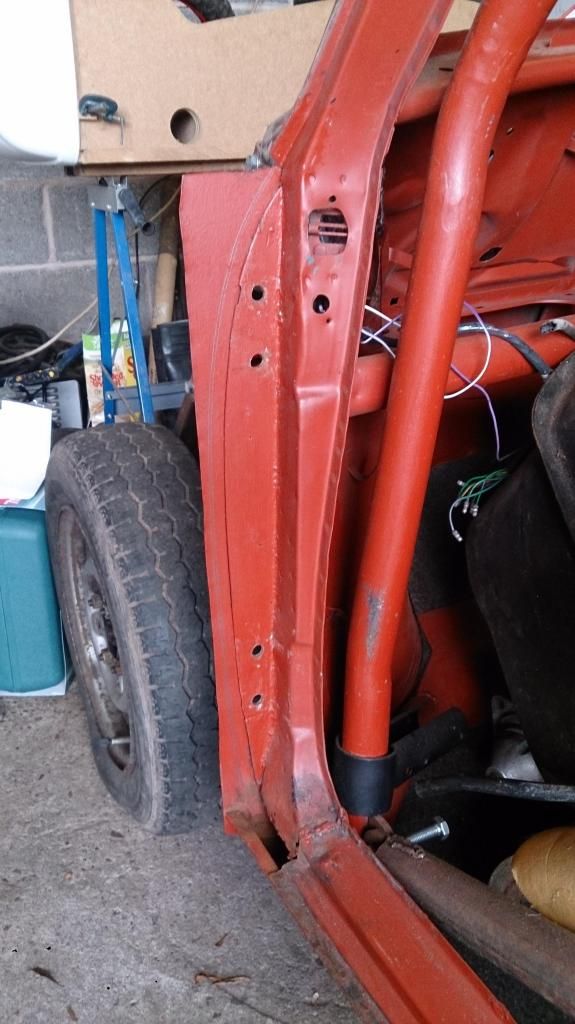
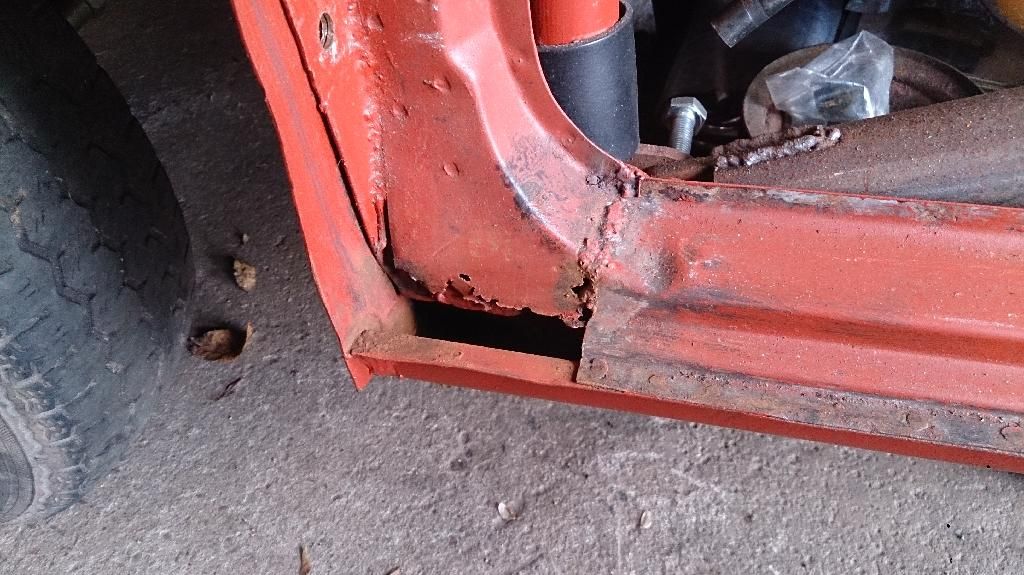
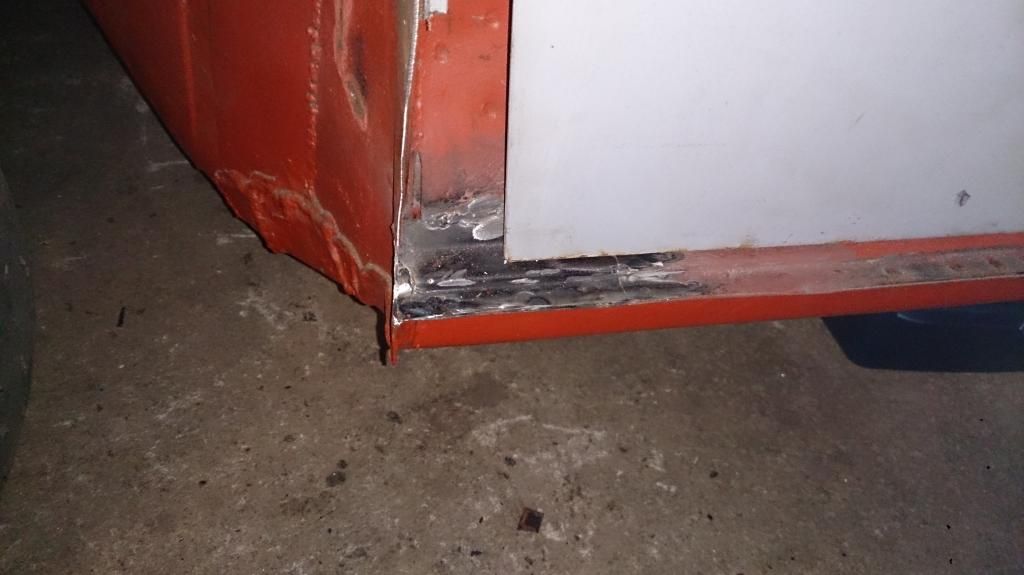
Did some body work to the rear of the car. Just little bits and pieces. Repaired round the filler neck hole, a small piece at the bottom of where the rear lights fit and bashed out and filled in some dents.
 
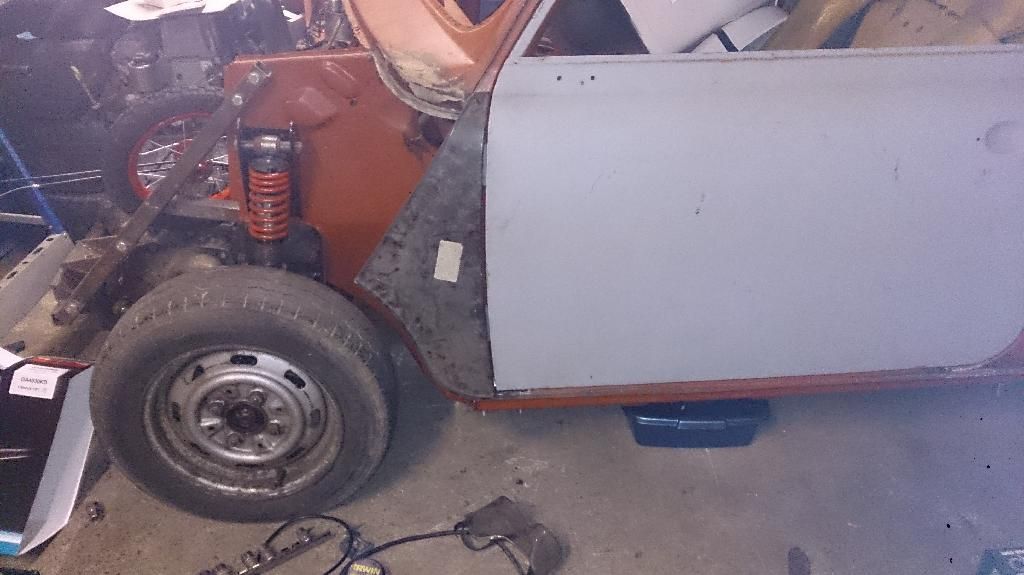
Fitted my rear lights and the rear wiring loom. Also put the tank in place to see where I need to put the new bracket for the strap to bolt to. The original was cut out with the boot floor when it was repaired.
 
DSC_0022_zpsd9c61f15.jpg
 
DSC_0023_zps8f029de0.jpg
 
Once I've sorted out some of the little niggly things on the back end that require a welder (wire retaining clips, tank strap bracket, a patch in the boot lid, battery earth cable mount, rear fog light mount and anything else that I come across) I will turn the car around and start on the front end.
 
I also swapped my front discs around so they are on the right sides now. I've also spent a little time in the evening machining new pistons for my brake callipers. I have the rarer ATE callipers so can't just buy replacement pistons. Stainless is a b**** to machine so has taken a while. They are part way done so don't bother saying 'just buy some lockheed ones'.  I'll just finish rebuilding these callipers.


#63 M J W J

M J W J

    One Carb Or Two?

  • Members
  • PipPipPipPipPipPipPip
  • 976 posts
  • Location: Midlands
  • Local Club: not yet

Posted 12 September 2013 - 09:12 PM

Someone on the mighty car mods forum said I had been quiet for a while so I just posted this small update.
 
First of all the car has moved to a garage much closer to home. Should hopefully be able to work on it a bit more but need to finish off another small project first.
 
DSC_0050_zpsa3553eb8.jpg
One fog light cleaned and fitted. Not sure if this is the original or not but was in a really poor state when I removed it. All the electrical connectors have been cleaned, replacement bolts and screws used, new holes drilled in the replacement rear valance and boot floor and all new grommets fitted in the holes. I did bench test it before fitting and everything worked. Even the original bulb which I cleaned the contacts on.
 
One thing I always hated about my original mini was that there was nothing to hold the spare wheel down. Before I scrapped my astra a drilled out the spot welds to the spare wheel retaining thing. I intend to weld it to the mini's boot floor at some point.
 
DSC_0051_zps26d64e95.jpg
The original little spacer in the mounting bracket pretty much disintegrated due to rust so after finishing a part off that was in the lathe for another project, I turned a new one and painted it.
 
DSC_0052_zpse8637059.jpg
Door re hung. Panel gap may not be perfect but we all know that they didn't fit perfectly from the factory. I want the car to look standard so I think I have achieved the correct look. With the door in place I can start to align the A panels and front end.
 
DSC_0053_zps38a67cf3.jpg
Couple of holes patched up in my boot lid. Still needs work to get it into shape. I could buy a new boot lid but I would rather use what I have.
 
I also cleaned my boot lid hinges but didn't take a picture of them. A mate of mine gave me a tip to cleaning paint of aluminium parts. Chuck them in brake fluid. It worked a treat. Cheers to my mate Steve for that one. Hopefully I will finish off my other small project in the next couple of weeks and so can turn my attention back to this properly.


#64 HJ22

HJ22

    Passed Test

  • Noobies
  • PipPip
  • 32 posts
  • Location: Godalming, Surrey
  • Local Club: Not Yet.

Posted 14 September 2013 - 09:01 PM


'Someone on the mighty car mods forum said I had been quiet for a while so I just posted this small update'


That was me ;D

Good to see its coming together  :proud:


#65 M J W J

M J W J

    One Carb Or Two?

  • Members
  • PipPipPipPipPipPipPip
  • 976 posts
  • Location: Midlands
  • Local Club: not yet

Posted 14 September 2013 - 10:03 PM

Had to roll it out the garage today to get some stuff out and while it was out took some pictures. These are the first ones I have of the whole car. Only taken 5 years to get to this point.


DSC_0061_zpsc1d08cbe.jpg
DSC_0062_zps4d425999.jpg
DSC_0060_zpsad95941b.jpg
2448fe33-5cd4-40fb-80a5-7f1ce2a7cb42_zps


You can just see in the last picture the other small project I am working on. Need to get it finished so I can get my work-mate back from underneath it and gain some space in the garage.


Edited by M J W J, 14 September 2013 - 10:08 PM.


#66 M J W J

M J W J

    One Carb Or Two?

  • Members
  • PipPipPipPipPipPipPip
  • 976 posts
  • Location: Midlands
  • Local Club: not yet

Posted 05 December 2013 - 05:01 PM

Its been ages since I've updated this and not a lot has been done really.


As it was my birthday this week I thought I would spend a day working on the mini (not my actual birthday as that was spent in a hospital waiting around for my sister who was in chronic pain- she's ok now). My other small project is almost finished (better had be before christmas) so hopefully afterwards I will get to work on the mini a lot more. Still needing a couple of pieces to finish all the back end off but they were on my birthday/christmas wish list so I need to wait until christmas to see if I get them.


With my door all lined up I Scribed round the shape of it onto the repair piece I welded in on the flitch. In hind sight I wish I had bought flitch repair panels but hey-ho, it's done so I will continue with the way I am fixing them.

DSC_0111_zps41f89a59.jpg


I then removed the door and set about sorting this hole out.

DSC_0112_zpsewzxi2r5.jpg

(some pretty shocking welding when my welder was acting up- this has now been sorted)


Using part of a damaged spare sill I had I made the patch piece and welded it in and bolted the door back on.

DSC_0114_zpsb1260cd1.jpg


I then trimmed the flitch repair so the A panel would fit and held it in place to see how it lined up.

DSC_0113_zpsjw5bhh3c.jpg
 
I need to weld a lip onto the flitch repair bit to attach the a panel to. I will pick up my sheet of steel from where the car was store before tomorrow to make the lip from.Once both sides are tacked in I can hopefully align the flip front and get it mounted. That's probably going to be done around christmas.


#67 scotty_1987

scotty_1987

    One Carb Or Two?

  • Members
  • PipPipPipPipPipPipPip
  • 874 posts
  • Location: Dublin, Ireland
  • Local Club: MiniBallers

Posted 05 December 2013 - 09:37 PM

Good work dude :highfive: , hope your sister is doing alright too!! How adjustable are the coilovers!? Can the coilovers be stiffened!? Or are they just height adjustable!?


Nath


#68 M J W J

M J W J

    One Carb Or Two?

  • Members
  • PipPipPipPipPipPipPip
  • 976 posts
  • Location: Midlands
  • Local Club: not yet

Posted 05 December 2013 - 09:55 PM

The shocks can be stiffened too.


Sister is ok. She's on pain killers and has been discharged from the hospital.


Will be back on this properly starting the 24th of December. My other project is a swing bin racer which I have to deliver on the 23rd.


#69 scotty_1987

scotty_1987

    One Carb Or Two?

  • Members
  • PipPipPipPipPipPipPip
  • 874 posts
  • Location: Dublin, Ireland
  • Local Club: MiniBallers

Posted 08 December 2013 - 02:40 PM

Nice on dude, look forward to it!! That's good to hear pal  :highfive:


#70 M J W J

M J W J

    One Carb Or Two?

  • Members
  • PipPipPipPipPipPipPip
  • 976 posts
  • Location: Midlands
  • Local Club: not yet

Posted 23 December 2013 - 11:53 PM

Swing bin racer is done and has been delivered. I will be resuming the mini shortly (need to tidy up the workshop and garage a bit first and have a part that I need to finish for work)


DSC_0124_zpsj5svmzuk.jpg


DSC_0123_zpscns47ki1.jpg


DSC_0125_zpshgfpqebe.jpg


DSC_0126_zpszslkl2db.jpg


My cousin's kids liked the fact that they can switch the front and rear lights on more than they have a car. Unfortunately due to the weather they didn't get to use it and as the pedals need to be moved (they were built so they had multiple mounting locations for when they grow a bit) the rear brake isn't set up. I left their dad instructions on how to do it.


Before I delivered it to them I added the lotus 7 logo to the front.


My advice to anyone who wants to build one:


1. Buy the plans. I designed this one myself from pictures on the net

2. Use a 24v drill. I used an 18v one and the battery died on me, so ended up using a 12v sealed lead acid cell. 18v batteries are hard to find. 12v and 24v not so hard to find if an alternative has to be found. A 12v drill might not be enough to power it along.

3. DON'T BUILD ONE. It took a lot more work to build than I thought it was going to.


#71 vx220

vx220

    Speeding Along Now

  • Members
  • PipPipPipPipPip
  • 419 posts

Posted 24 December 2013 - 07:27 AM

That looks the nuts!

Well done, I bet kids will love it

#72 M J W J

M J W J

    One Carb Or Two?

  • Members
  • PipPipPipPipPipPipPip
  • 976 posts
  • Location: Midlands
  • Local Club: not yet

Posted 09 January 2014 - 11:13 PM

Small update. After getting the A panel in place, a template was made for the lip that needed to be created. This was then transferred to steel and welded in place.
DSC_0133_zps0925c957.jpg
 
A little more fettling afterwards and the A panel sits nicely in place. The seam along the sill also had to be altered slightly at the front to allow the A panel to sit in place.
 
I needed to smooth out a few points but didn't want to waste a load of filler being mixed and not having anywhere to put the left overs. As I know my boot lid was going to need some I started to metal work it back into shape. In the end I made a relief cut and moved the steel back into place. With where it was before it was acting like a spring. If i had filled over the top of this, the filler would have cracked. It looks a lot but its only about as thick as a 1p coin at its thickest. Its just spread over a really large area. It still needs loads of sanding and work doing to it.
DSC_0134_zps5483d410.jpg
 
Seam sealant has also been applied to the rear of the relief cut on the boot lid and on a repair seam on the flitch panel.
DSC_0135_zps3c508af7.jpg
DSC_0136_zpsccd44a60.jpg
 
A small hole was also welded up in the rear arch but I didn't bother taking a picture of it as its tiny.
 
I hope to put up slightly more regular updates on this as its the only project I have on the go and I am able to spend a couple of hours each night doing some work on it.


#73 M J W J

M J W J

    One Carb Or Two?

  • Members
  • PipPipPipPipPipPipPip
  • 976 posts
  • Location: Midlands
  • Local Club: not yet

Posted 02 February 2014 - 12:27 AM

Still slowly plugging away at this.


After painting the lip I tacked the A panel in place. It may need to be move a little to line up with the front so haven't bent the lip over on the back yet.

DSC_0138_zps9b1ab3f5.jpg


Once I had fitter the A panel I turned the car around so I had more space to work on the other side. I wasn't happy with the repair I did on the a pillar (had about 3 patches welded in) so decided to cut it out and replace it with a single new panel.


DSC_0145_zpseab3e671.jpg


It was after cutting the outer panel out that I found the piece behind had also rusted through right behind the dash rail. Everywhere else was fine so I can see why I missed it. A piece was cut out (had to remove part the roll cage to get the grinder in), a patch piece made and welded in.


DSC_0150_zps52854ef2.jpg

Piece removed


DSC_0151_zpsaed53c5e.jpg

Patch welded in.


DSC_0147_zps94c7eb2e.jpg

Seam sealant has been applied where it was needed. Everything has been painted in primer as well since.


I also managed to get the hinge reinforcement panel and the piece which the door stop passes through out  in tact. These have been painted ready to be fitted back in. Hopefully I will be able to trim the replacement panel next week and fit it. I also need to make a replacement sill reinforcement piece as I missed it when I repaired the sill.


#74 1293gt

1293gt

    Speeding Along Now

  • TMF+ Member
  • PipPipPipPipPip
  • 306 posts
  • Local Club: nonw

Posted 14 February 2014 - 11:55 AM

Those pedal bin kids cars are ace!


#75 M J W J

M J W J

    One Carb Or Two?

  • Members
  • PipPipPipPipPipPipPip
  • 976 posts
  • Location: Midlands
  • Local Club: not yet

Posted 11 May 2014 - 08:55 PM

Its been ages since I updated this. It was my intention to post more regular updates on this but not a lot has been done since the last one. I started welding in a replacement A panel post and then my Mondeo started dying on me. Long story short. My garage is now packed with Mondeo parts as I ended up breaking it for spares.


Small update. I decided to go for a steel front end. I was originally going to go fibreglass (soon to be in the swaps or for sale section when I get round to taking some pictures) but have decided against it. I managed to pick up a steel front not far from me. I only really wanted the front panel as I have a couple of wings but I found the complete front for the same money. I'll save the wings for my other one when I get round to it.


After some trimming of the inner wings yesterday I got the front into a state where I could place it over the front. It still needs a lot of work but at least it looks like a mini now.


DSC_0360_zps1c4f1641.jpg


As all Vauxhall conversions seam to need, a small bit will need to be trimmed out of the wing's inner lip but other than that it should all fit under a standard bonnet. The cam cover and be modified a little to gain some clearance too.


DSC_0361_zpsf1d34797.jpg


Looks like I will have reasonable space to fit a radiator. One good thing about the demise of my Mondeo is that they have tubular exhaust manifolds. I am going to cut and modify it to make it fit the Vauxhall engine and sit closer to the block. This will get it to fit behind the grill and may gain me an inch or too more room for the radiator as well. I have a Corsa radiator in the garage somewhere for this although looking at it I think it will be a case of take a trip down the scrap yard with a tape measure and see what fits. I'll work it out when I get there.


DSC_0362_zpsca3787cf.jpg


Now all I need is someone come and buy a Mondeo dash, boot lid and N/s rear door off me so I have space to resume work on this properly


1 user(s) are reading this topic

0 members, 0 guests, 0 anonymous users


    Bing (1)