Also be wary of the inner sills that fit over the cross member are questionable.Have fun,Steve..


1983 Mini City
Started by
colinf1
, Jun 22 2020 10:34 AM
519 replies to this topic
#91

sonscar
-

- Members
-

- 2,718 posts
Up Into Fourth
- Location: crowle
- Local Club: none
Posted 17 December 2020 - 09:05 AM
#92
colinf1
-
- Members
-
- 900 posts
One Carb Or Two?
- Location: Dundalk
Posted 17 December 2020 - 02:58 PM
I just got those inner sills to have them if needed...I hoping that I don't.
I thought I had ordered a scuttle panel, but I must have removed it from my cart before placing order. Will try to remove the existing scuttle with a small Dremel cutting disc to cut at A pillar, drill out spot welds, then try to remove full front in one go....
I thought I had ordered a scuttle panel, but I must have removed it from my cart before placing order. Will try to remove the existing scuttle with a small Dremel cutting disc to cut at A pillar, drill out spot welds, then try to remove full front in one go....
#93
colinf1
-
- Members
-
- 900 posts
One Carb Or Two?
- Location: Dundalk
Posted 18 December 2020 - 05:27 AM
I 3d printed a guide sleeve for reaming the radius arm bush.... wonder will it work??
16mm bar, through the guide sleeve with a pilot on the end of bar that matches up with pilot hole on end of adjustable reamer, everything is a nice snug fit

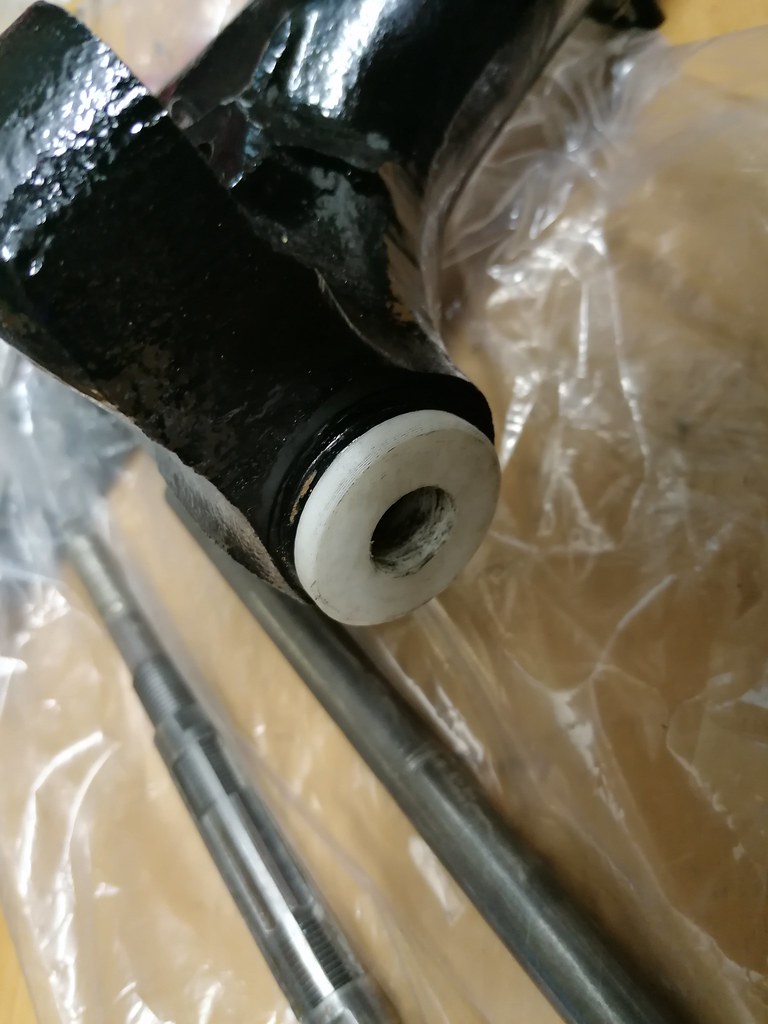


16mm bar, through the guide sleeve with a pilot on the end of bar that matches up with pilot hole on end of adjustable reamer, everything is a nice snug fit
#94
colinf1
-
- Members
-
- 900 posts
One Carb Or Two?
- Location: Dundalk
Posted 22 December 2020 - 05:27 PM
Reamed out the bush with the help of the 3d printed guide and pilot...
New bearing pressed in with the help of M16 threaded bar....but looked around and noticed the plastic sleeve...doh! Forgot to put it in...
Tried to tap out the bearing gently but wasn't successful, pinched a bit of the casing and caught one of the needles.
You can see one of the needles pushed outwards against the casing..
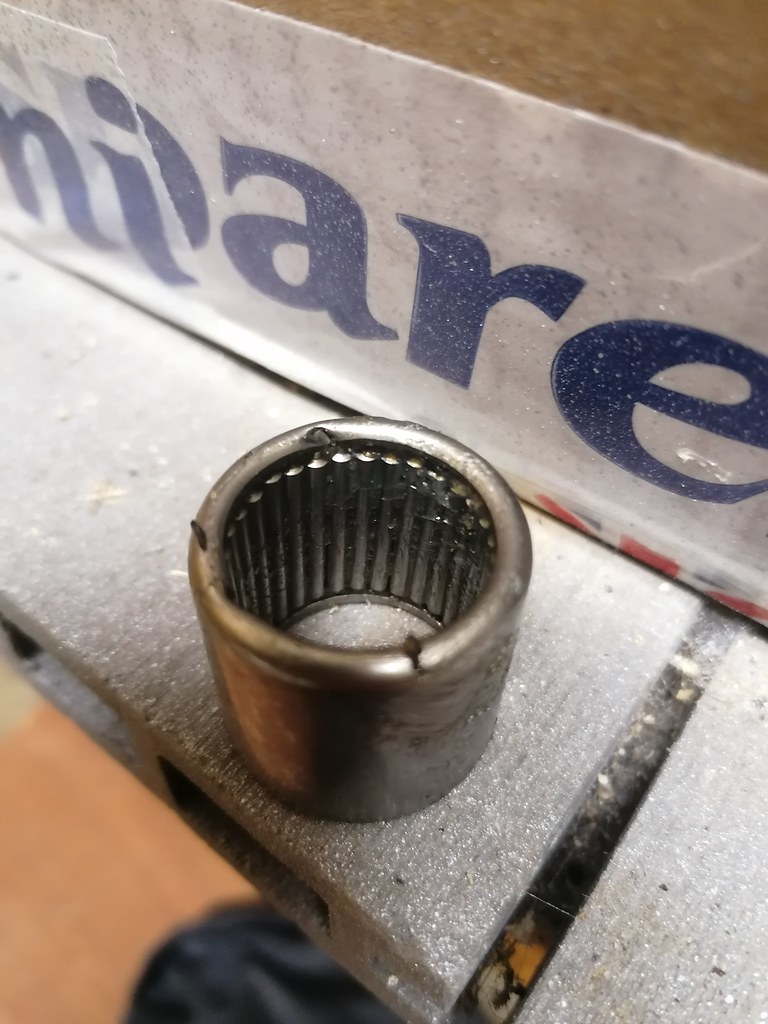

Took the bearing out of the repair kit for the opposite side to at least get one side finished.
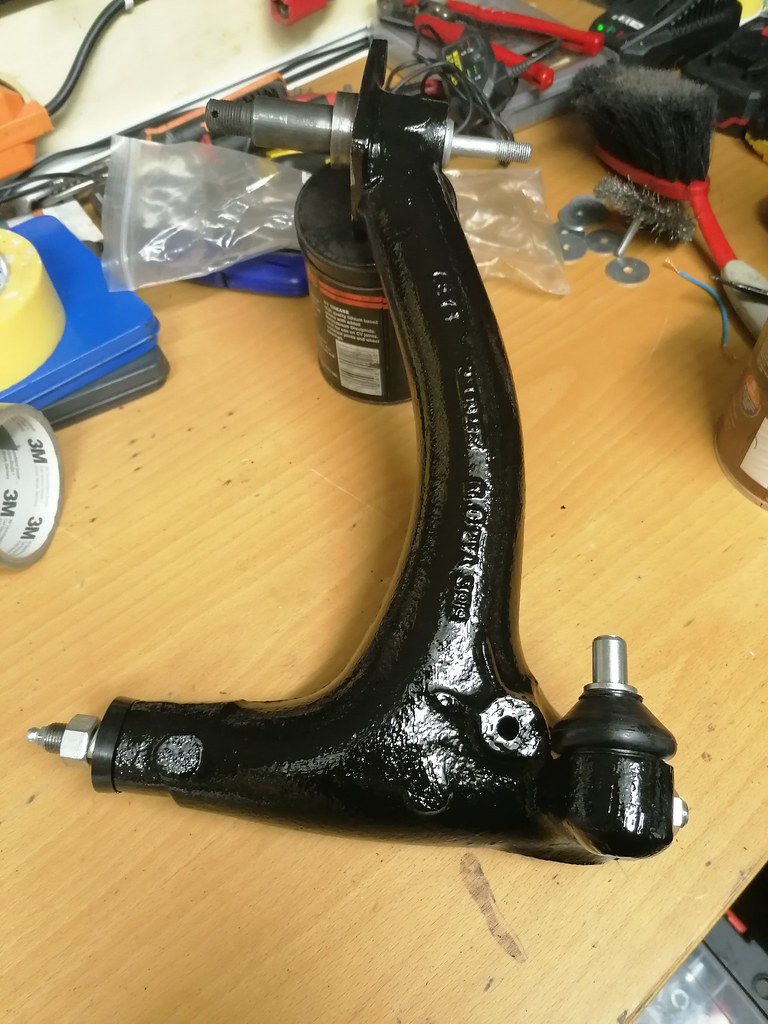
All assembled and touched up any paint chips...
New bearing pressed in with the help of M16 threaded bar....but looked around and noticed the plastic sleeve...doh! Forgot to put it in...
Tried to tap out the bearing gently but wasn't successful, pinched a bit of the casing and caught one of the needles.
You can see one of the needles pushed outwards against the casing..
Took the bearing out of the repair kit for the opposite side to at least get one side finished.
All assembled and touched up any paint chips...
#95
colinf1
-
- Members
-
- 900 posts
One Carb Or Two?
- Location: Dundalk
Posted 01 January 2021 - 05:25 PM
Got a few hours at the mini today, it was a toss up between cleaning the shed or doing something on the car...
Decided to start taking off the front end, drilled out all the spot welds on the drivers wing to avoid any further damage to the inner wing. Passenger side was easier as I just cut through the inner wing.
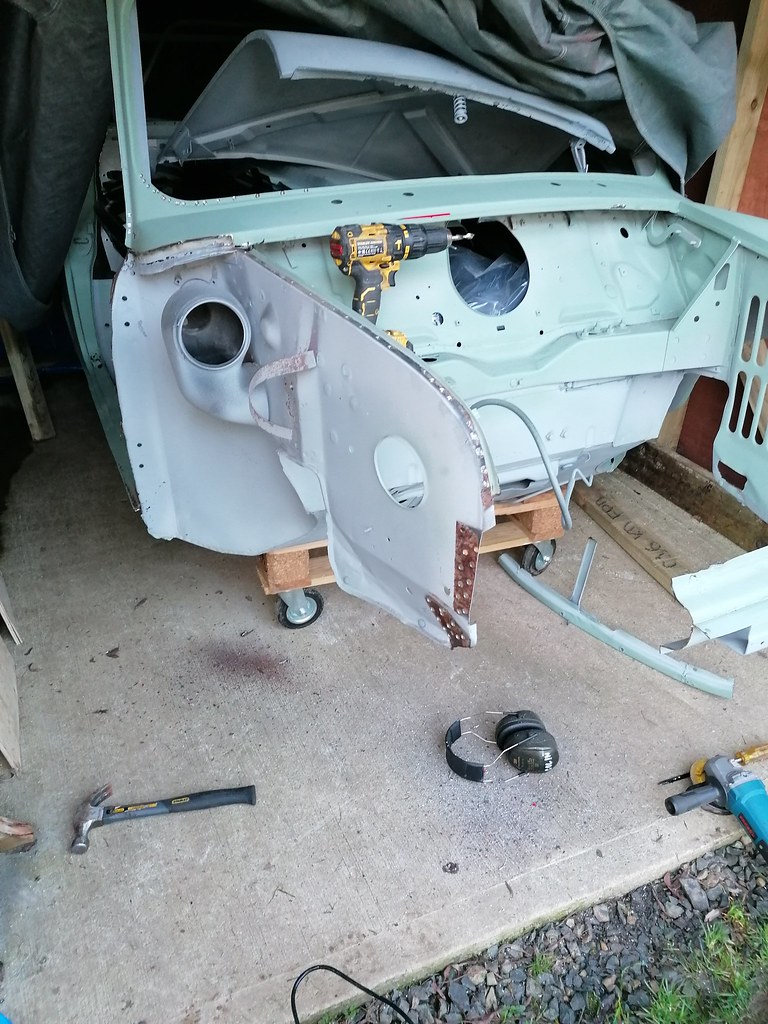
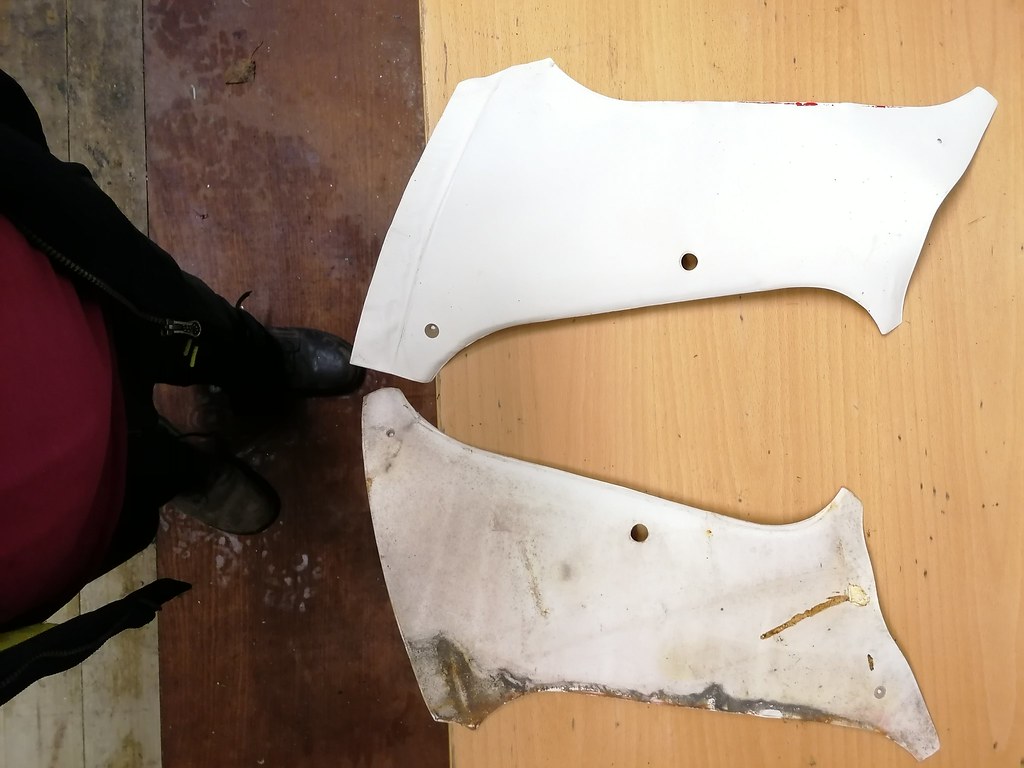
I didn't even need to do much to get passenger A panel off, literally fell off after I removed wing.

Inner wing was very difficult to remove, thanks to the dodgy repair that had been done. A patch was weld to the inner and outer A posts, then was losing light so couldn't see where spot welds where along floor panel, so nipped it off an inch or so into the inner wing.
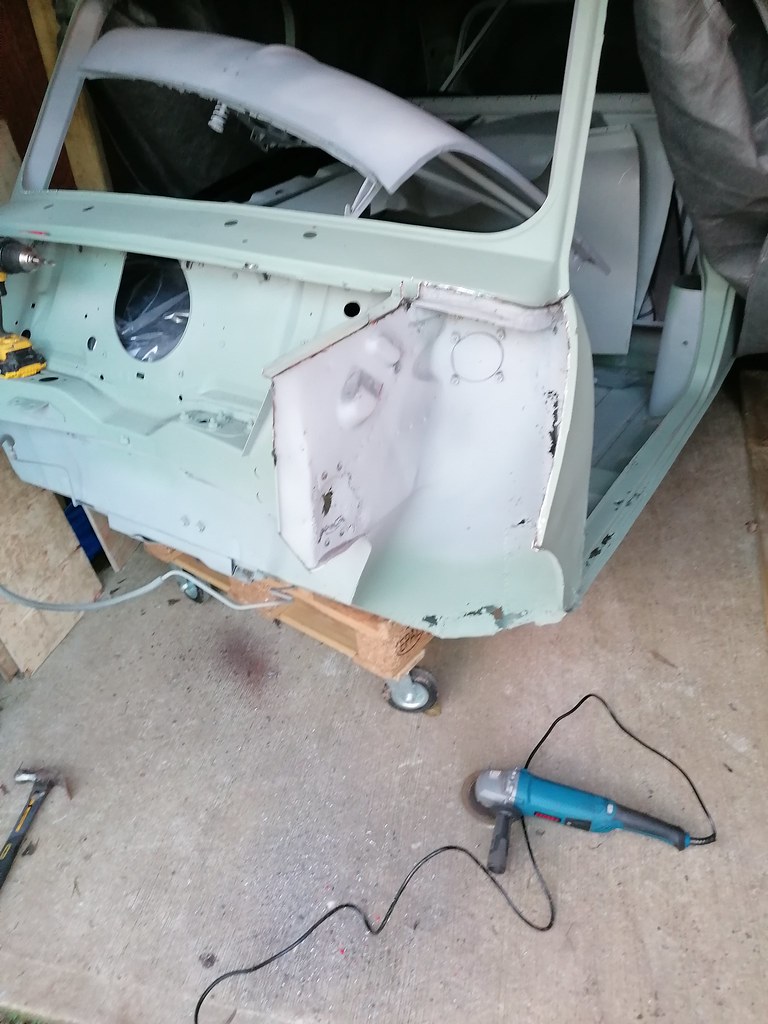
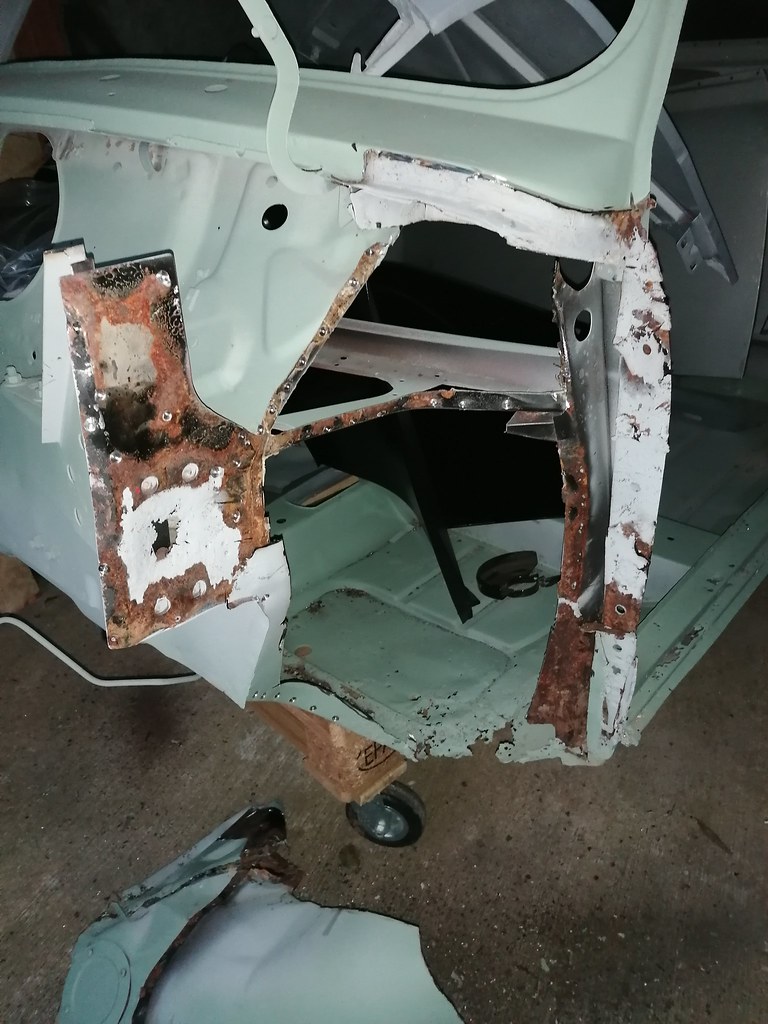
A bit of cleaning up to do on the cross member, next I'm planning on removing the scuttle panel to get better access to the top of the inner wings and closing panels
Decided to start taking off the front end, drilled out all the spot welds on the drivers wing to avoid any further damage to the inner wing. Passenger side was easier as I just cut through the inner wing.
I didn't even need to do much to get passenger A panel off, literally fell off after I removed wing.
Inner wing was very difficult to remove, thanks to the dodgy repair that had been done. A patch was weld to the inner and outer A posts, then was losing light so couldn't see where spot welds where along floor panel, so nipped it off an inch or so into the inner wing.
A bit of cleaning up to do on the cross member, next I'm planning on removing the scuttle panel to get better access to the top of the inner wings and closing panels
#96
colinf1
-
- Members
-
- 900 posts
One Carb Or Two?
- Location: Dundalk
Posted 10 January 2021 - 03:55 PM
Tried cleaning the original headliner and rear covering panels, both covered in red overspray and contact adhesive on the back sides.
No joy, contact adhesive will come off with white spirit but the staining that has gone through the preferrated material and the overspray is just too much to try and save it, time for the bin unfortunately.
Even it rods are a bit rusty, need a good cleaning but salvageable.
No joy, contact adhesive will come off with white spirit but the staining that has gone through the preferrated material and the overspray is just too much to try and save it, time for the bin unfortunately.
Even it rods are a bit rusty, need a good cleaning but salvageable.
#97
colinf1
-
- Members
-
- 900 posts
One Carb Or Two?
- Location: Dundalk
Posted 10 January 2021 - 05:24 PM
Some pictures of headliner and rear covering panels...
These almost came up as good as new...

Someone was a bit heavy handed with the glue...

Overspray, glue weeping through and rust staining...

These almost came up as good as new...
Someone was a bit heavy handed with the glue...
Overspray, glue weeping through and rust staining...
#98
colinf1
-
- Members
-
- 900 posts
One Carb Or Two?
- Location: Dundalk
Posted 23 January 2021 - 06:00 PM
Some more practice with welder today, decided to try and join the front end together again. Wasn't overly concerned about it lining up properly, just concentrating on good strong welds. Was also using gasless wire, wasn't too bad to use, just a bit fumey

Will turn it into a garden feature, maybe a bench or a planter...
Cleaned up around the inner LH wing and A post, getting the remaining pieces ground off. A post needs a small patch but is good otherwise, door jam panel also looks ok once cleaned. There was a lot of brazing around front part of the doorstep panel, would it have been like that from factory?
Wire brushed around the number a bit more today and revealed it was 8 not 6. So 470383 - suggests it's 03/1983 build date of shell. 47 part is a mystery, maybe production line or operator number?
#99
blueovalcraig
-

- Members
-
- 193 posts
Mini Mad
- Location: Rothesay, Isle of Bute
Posted 23 January 2021 - 06:24 PM
Could it be the 47th shell assembled in March ‘83 ?
#100
Gilles1000
-

- TMF+ Member
-
- 438 posts
Speeding Along Now
- Location: Karlsruhe
Posted 23 January 2021 - 06:34 PM
Do you mean brazing like this?
https://www.theminif...road/?p=3628024
There were a lot from factory, I have seen them there, A-panel to windscreen surround, in the gutter corners, door step to rear quarter panel, rear quarter to rear panel.
My car is pretty original (had a not-so-bad front crash).
Please see from page 3 in my project, you'll spot them.
I cannot remember of such a number stamped in the inner wing. It was pretty bad corroded too.
Ohh, and I should update my topic with the only thing I have done to it. Buying spares...
#101
colinf1
-
- Members
-
- 900 posts
One Carb Or Two?
- Location: Dundalk
Posted 23 January 2021 - 07:42 PM
Do you mean brazing like this?
https://www.theminif...road/?p=3628024
There were a lot from factory, I have seen them there, A-panel to windscreen surround, in the gutter corners, door step to rear quarter panel, rear quarter to rear panel.
My car is pretty original (had a not-so-bad front crash).
Please see from page 3 in my project, you'll spot them.
I cannot remember of such a number stamped in the inner wing. It was pretty bad corroded too.
Ohh, and I should update my topic with the only thing I have done to it. Buying spares...
Yes brazing like that, the RH door step was already replaced before so no brazing there.
#102
colinf1
-
- Members
-
- 900 posts
One Carb Or Two?
- Location: Dundalk
Posted 06 February 2021 - 07:12 PM
Got a few hours out at the car today, the 1st hour was spent pulling car out then trying to get it back on the skids as it came off slightly and the castor wheels immediately sunk in the grass....ughhh
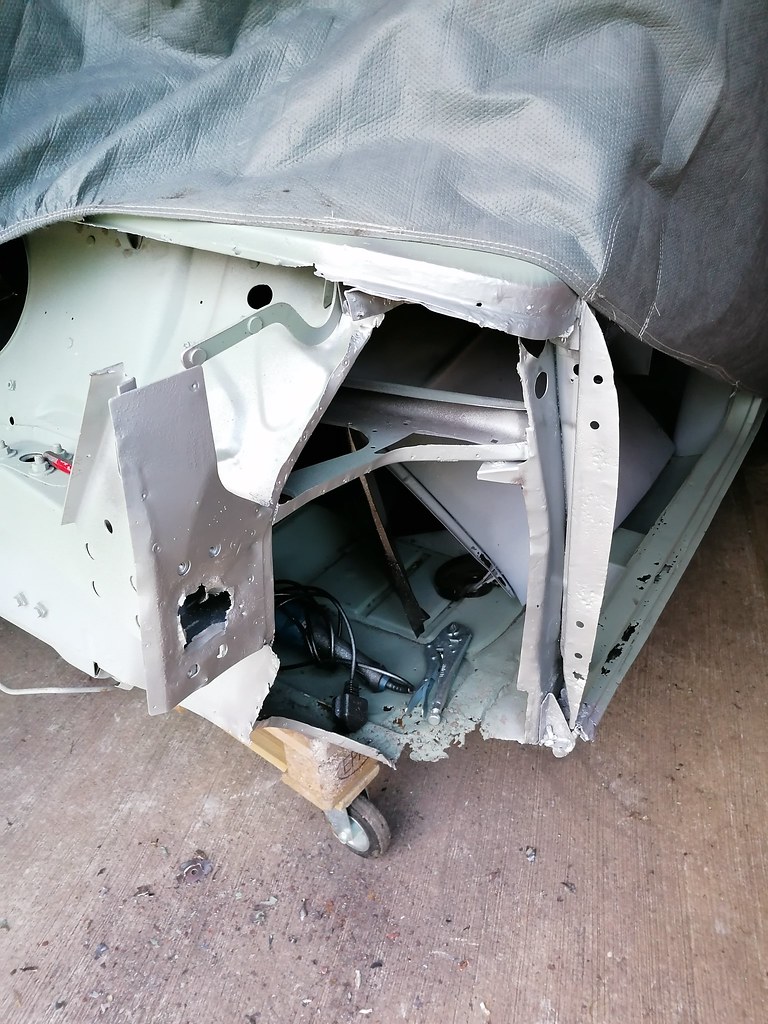
Took off the scuttle panel to allow me to finish removing the last parts of inner wing.
Offered the new inner wing up, bolted it in at the door hinge panel, then set about trying to make it fit. There was a small captive nut above the shock mount, maybe for charcoal canister in later models? Ground it down flush as it was fouling in the cross-member..
Tried fitting up the rest of the front panels, a fair bit of fettling needed to get these into the correct locations..

Hopefully get a bit more done tomorrow if the weather is good..
Took off the scuttle panel to allow me to finish removing the last parts of inner wing.
Offered the new inner wing up, bolted it in at the door hinge panel, then set about trying to make it fit. There was a small captive nut above the shock mount, maybe for charcoal canister in later models? Ground it down flush as it was fouling in the cross-member..
Tried fitting up the rest of the front panels, a fair bit of fettling needed to get these into the correct locations..
Hopefully get a bit more done tomorrow if the weather is good..
#103
colinf1
-
- Members
-
- 900 posts
One Carb Or Two?
- Location: Dundalk
Posted 10 February 2021 - 03:43 PM
Ordered a new scuttle panel to replace the old one I cut off, its rusty both ends and some of the gutter is missing. Planning on cutting out the VIN stamp and welding it onto new one, then blanking off the LHD wiper holes.
Also ordered another radius arm bearing, to replace the one I damaged, at least then I can get that finished.
Will be interesting to see what changes there will be to packages from minispares, what import tax and duty will have to be paid
#104
MiniCarJack
-

- Just Joined
-
- 486 posts
Formally known as W1NG3D
- Location: Fareham
- Local Club: Midweek Minis
Posted 10 February 2021 - 03:59 PM
You could turn that old front end into a BBQ or a fridge, I knocked this together a few years ago and it did a surprisingly good job at keeping my beers cool 

#105
colinf1
-
- Members
-
- 900 posts
One Carb Or Two?
- Location: Dundalk
Posted 28 February 2021 - 08:34 PM
Got the front subframe refitted, well by the tower bolts for now. Need to find the bolts for front mounting points to offer up front panel.
My teardrop parts no longer have the rubber on them, but I did buy a poly fitting kit, do I just use the small bushings from that directly on the teardrop part?
My teardrop parts no longer have the rubber on them, but I did buy a poly fitting kit, do I just use the small bushings from that directly on the teardrop part?


0 user(s) are reading this topic
0 members, 0 guests, 0 anonymous users


