Finally Got My New Project Home. 93 Cooper Spi.
#31
Posted 25 September 2020 - 04:47 PM
EC66B989-7DCE-4CF2-83BB-14F0466D2449.jpeg 76.87K 2 downloads
084855AD-E4EA-4737-AA1B-112223B446AF.jpeg 39.43K 0 downloads
C944EDCF-0B67-48AC-B7D1-C96C7D7E391E.jpeg 55.7K
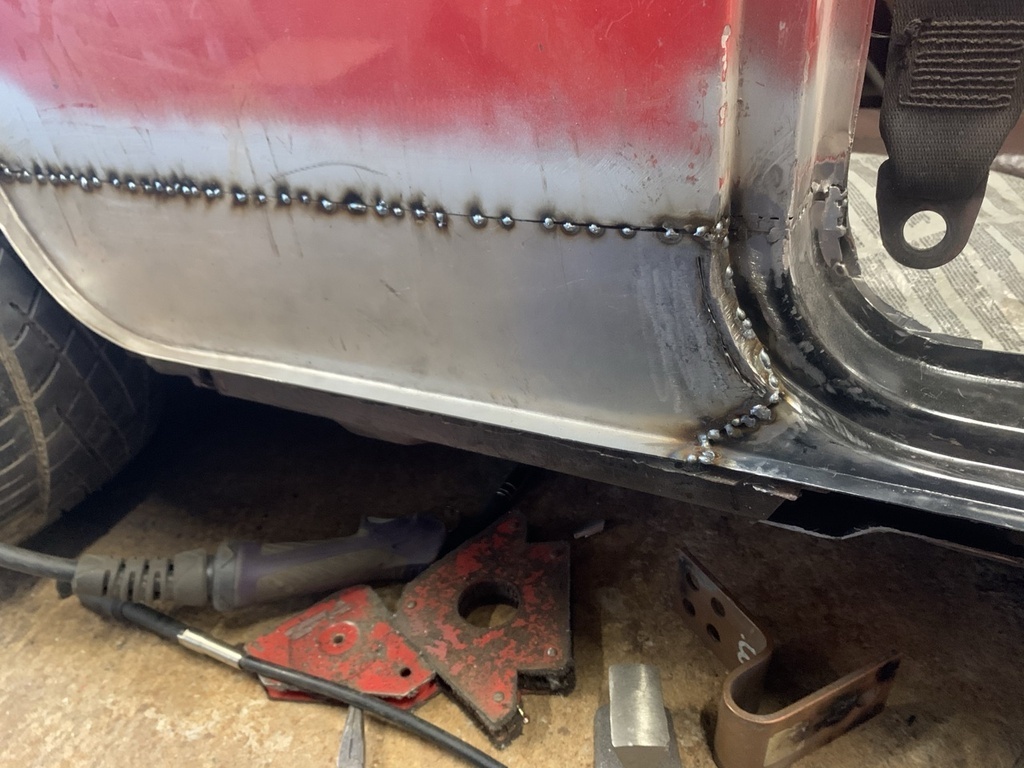
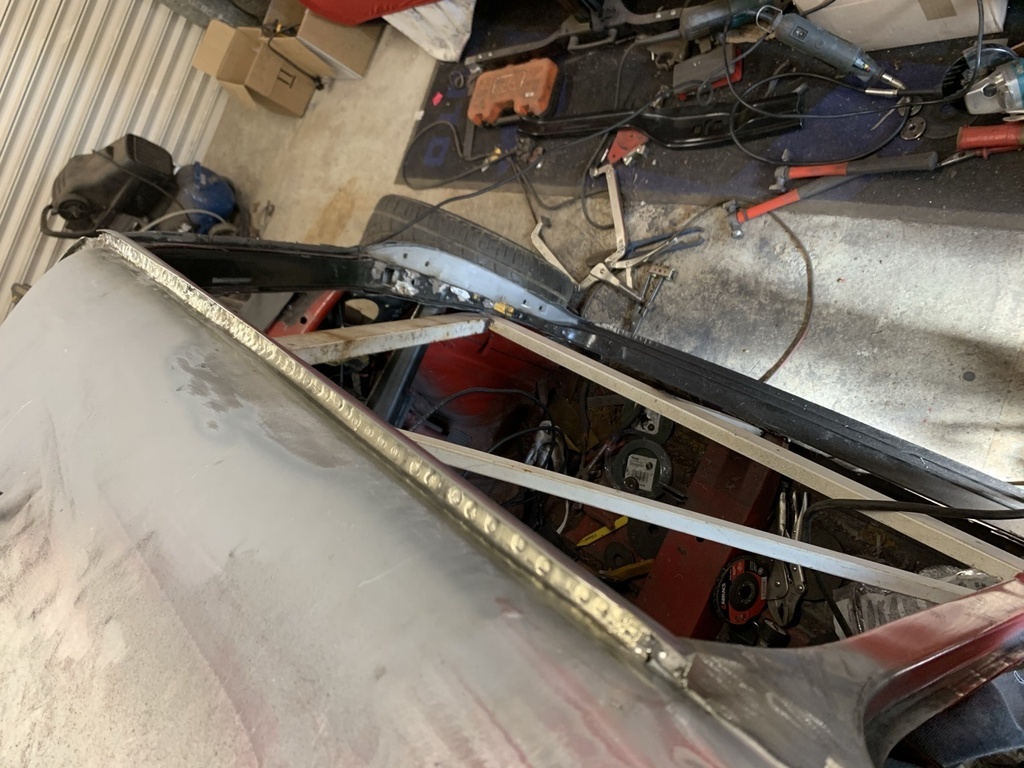
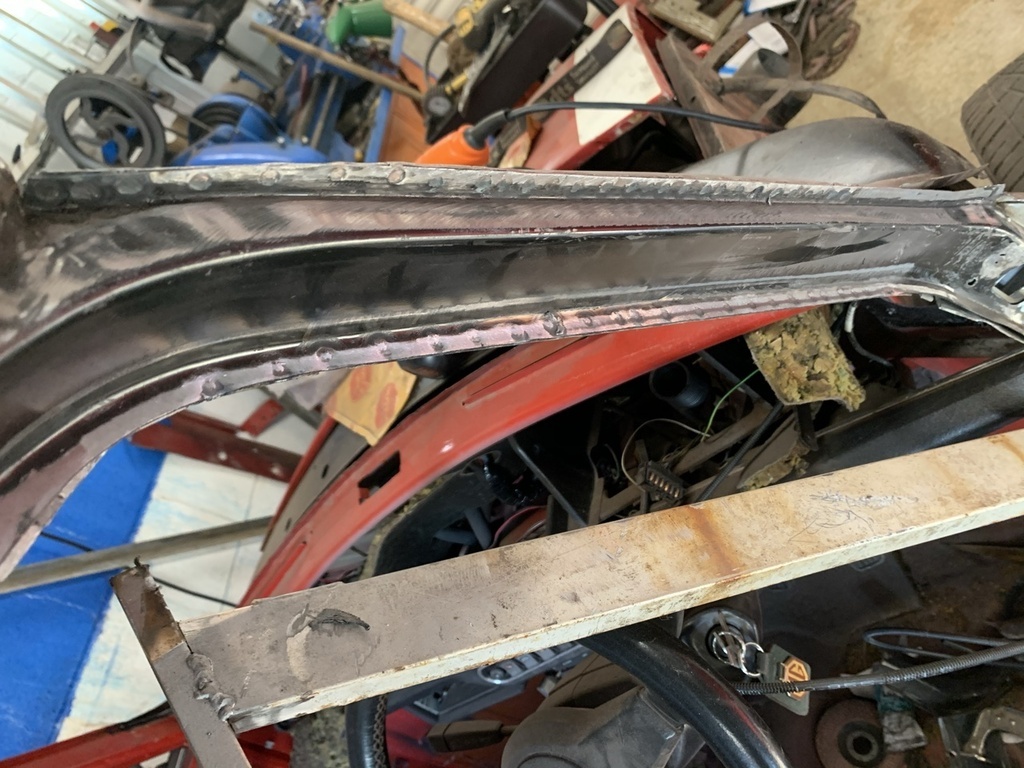
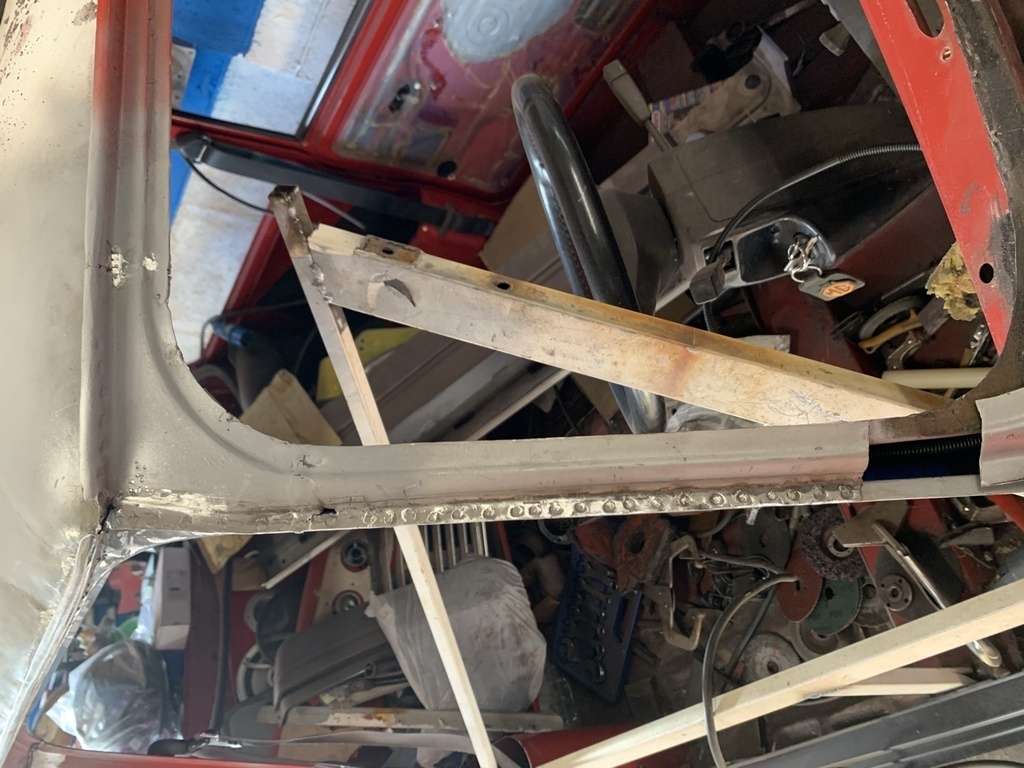
 0 downloads
I borrowed a spot welder from a mate, got a few tacks on the frame and test fitted the door. All gaps look good so tomorrow I will complete the door frame install.
03782EEE-96DC-4533-BEB7-940FB3114086.jpeg 69.42K 0 downloads
6DB6C645-3C17-40F2-9DBF-738346138BB7.jpeg 52.27K 1 downloads
0023E3B4-E4CF-4529-A37C-152E1AFF2D80.jpeg 49.89K 2 downloads
A950CD3E-8B61-4603-B6F9-F0E88D0D6261.jpeg 51.94K 3 downloads
#32
Posted 26 September 2020 - 07:07 PM
Made a start spot welding the roof gutter and tidied a few welds up. Distortion is minimal. May have gone overboard on the spots though
#33
Posted 21 October 2020 - 05:27 PM
Decided to flatten the lips on the rearmost end of the sill to allow it to sit under the rear subframe which means I can re-attach the new sills on the floor. Maybe when theres more strength in the shell I can rotate it, so started cutting out along the floor. My door brace is still attached to the crossmember so nothing has moved.
C9881057-8B3B-446E-B0C6-8F20C2BA8BF5.jpeg 48.12K 0 downloads
steel RC40? 69942001-5351-45FE-9583-BE9A31B92386.jpeg 86.26K 2 downloads
That’s a lot of rot gone. Also scored a win on a secondhand exhaust for £50. Turned out to be a stainless
B7193138-945E-4327-9EC1-382D3C9D1130.jpeg 62.53K 3 downloads
#34
Posted 22 October 2020 - 05:14 PM
D7E99342-E94C-45C3-B6C7-488A4BEB02A6.jpeg 41.09K 0 downloads
Next a few spot welds all on the doorstep to check the fit of the door (door skin is shot so it looks worse than it is).
F1FBC012-F240-46DD-8290-CF7D4BCF717A.jpeg 50.72K 0 downloads
6D42AF9D-EF73-4F0F-89AA-C7C357707E86.jpeg 52.19K 3 downloads
Trying to work out where to cut the floor to allow me to butt weld it in I marked a point 60mm in from the inboard edge of the sill with a steel rule and transferred that mark back 60mm on top of the floor, held my breath and cut out with a grinder at 45 degrees Fitzee style, this allowed me then to chop a wooden wedge 140mm high and block up the inboard end of the sill until it was flush and tack welded along its length. Not finished yet but not too much to do on the sill itself and the integrity of the shell is almost as it should be.
D2919754-3CB7-4212-9631-2DF9F604A8D9.jpeg 73.86K 1 downloads
#35
Posted 23 October 2020 - 12:31 PM
Got my SH spot welder from a member on here who had emptied a body shop and this was surplus to requirements. It’s a Clarke CSW6T and I got it for £300 which is ok as they seem to fetch reasonable money so I don’t think I’d lose too much on it.
34C27B3F-F0FB-4513-BFCA-BEB2434D4D99.jpeg 67.94K
0 downloads
Also started welding up the seam in the floor and grinding it back. Just gonna give the underside a flash over with a grinder and seam seal then Gravitex stonechip. Then I cut out the door brace followed by the seat crossmember. Just in the process of welding up where the crossmember was.
E3859D8B-7D5D-4ADE-A5FF-F00149930FA4.jpeg 67.5K
0 downloads
DD9627A7-B36F-40A6-93C4-D368C8E2D5E2.jpeg 56.4K
0 downloads
Edited by exuptoy, 23 October 2020 - 07:36 PM.
#36
Posted 23 October 2020 - 04:04 PM
D8B9C68A-09AE-4748-8551-398F516F7B37.jpeg 51.16K 0 downloads
441FFD31-4DDD-455F-BE2F-BC8456341B5A.jpeg 45.25K 0 downloads
E3B02930-E1ED-4607-9F8C-B53C92B70094.jpeg 48.29K 0 downloads
E35C7CF8-7DEC-42E0-8784-87570691731B.jpeg 58.7K 1 downloads
83A5063D-19AA-4B6D-AE97-34E3BC8268C7.jpeg 74.29K 2 downloads
Edited by exuptoy, 23 October 2020 - 04:05 PM.
#37
Posted 24 October 2020 - 03:27 PM
8601EA41-541C-408F-BCA4-AA6D21138495.jpeg 66.49K 1 downloads
1A302346-5E13-4E45-8AD7-F9B5C0387415.jpeg 55.81K 3 downloads
67F515FA-6B56-40B5-BD67-1B0CE003AE8F.jpeg 69.75K 5 downloads
47725BB0-CB1A-4E36-9D01-2096F114BB43.jpeg 81.38K 6 downloads
Edited by exuptoy, 24 October 2020 - 07:33 PM.
#38
Posted 08 May 2022 - 08:26 PM
I did finish the quarter floor repair to fitch panel once I repaired my welder.
802949C6-E713-476C-A95F-D29E5102483B.jpeg 62.27K 0 downloads
So this week I cleaned up the scuttle area and got it all clamped and lined up.
AC20FC97-CFF5-4E76-91B7-A18C84DD085E.jpeg 124.56K 0 downloads
339E2E1D-7124-4999-A6F7-26B50201DCF7.jpeg 129.71K 1 downloads
Then after mulling over removing the ears from the front panel and being left with scared original paper thin inner wings, I thought I’d cut out the crap and replace it.
60D3E895-92C1-45C0-A971-867F3C8F9C6A.jpeg 64.39K 3 downloads
63A9EAC4-7CF7-4780-A1AE-92CAA1F77037.jpeg 65.71K 0 downloads
#39
Posted 13 May 2022 - 08:52 AM
Got my NS lower inner wing repair completed.
3C595383-C21C-4795-92F9-116EF47FFF2E.jpeg 48.26K 0 downloads
B6908E7A-7D42-4800-B940-8DB1935B8352.jpeg 35.51K 0 downloads
Next up was 2x small repairs to the upper fitch before fitting the scuttle closing panel.
28911FD8-320B-4D65-B773-D5F2BFB2691A.jpeg 75.48K 0 downloads
Welded the OS repair before seam sealing then painting with Bonda zinc rich primer.
D648FAA4-EE2D-449B-8044-9EE57310BAE1.jpeg 49.19K 0 downloads
0BBBCB89-C104-4162-9149-18B8207BDE12.jpeg 44.49K 1 downloads
And following my question regarding the front mounts, I thought I’d add a pic for anyone asking.
AA61D0DC-4DD9-4A02-878A-33F9FC78EEED.jpeg 56.34K 2 downloads
And temp mounting of the front and wing.
568DC4BF-B388-48E0-83D1-BC0A7E313358.jpeg 57.03K 1 downloads
Starting to take shape now.
Edited by exuptoy, 13 May 2022 - 08:56 AM.
#41
Posted 18 May 2022 - 10:24 AM
Looks a good project, are you back on it to push it to a finish now?
#42
Posted 18 May 2022 - 10:25 AM
More time spent on it now means less time in the future..
Keep up the good work.
#43
Posted 18 May 2022 - 05:02 PM
Yeah, back on it as I’m fed up looking at it in the garage looking so sorry for itself.
The good thing is now I’m back on with it I’m enjoying the work and the more it progresses the more I want to finish it.
#44
Posted 18 May 2022 - 05:11 PM
Scotched the rear of the wing and primed it and linished the seams back to bare metal before plug welding to the inner wing and a few spot welds along the surface of the seams to hold it all in place until I can set up my spot welder to do the backside of the front panel seams tomorrow.
Spot welds around the scuttle linished back below level so a nice bead of sikaflex should finish off the seam nicely.
Edited by exuptoy, 18 May 2022 - 05:12 PM.
#45
Posted 18 May 2022 - 05:35 PM
0 user(s) are reading this topic
0 members, 0 guests, 0 anonymous users