im adding tappet clearances to the list before london to brighton, she's starting to run noisily and losing power
besides, ive always wanted to have a go

My 1993 Rio Rebuild
Started by
adam_93rio
, Feb 06 2009 08:27 PM
108 replies to this topic
#77

scoticus
-
- Members
-

- 1,805 posts
Camshaft & Stage Two Head
Posted 02 May 2010 - 11:26 PM
Hows she coming along mate?
#78
adam_93rio
-
- Members
-
- 3,271 posts
Up Into Fourth
Posted 05 May 2010 - 09:53 PM
Hows she coming along mate?
alright man, got a new headlight switch and cv joint ordered today from MRA minis. still got that to fit before london to brighton. but it will be hopefully done by sunday ready for himley hall
not really had much of a chance to do stuff on effy recently as ive been helping my dad a lot with the mk1, which should be ready for an MOT soon
i dont know if i said a bit back, when she went for her MOT she passed straight away with the only thing being the tyre worn out, (which a new one was sat next to the car at the time of test) so i was really chuffed at that
Edited by adam_93rio, 05 May 2010 - 09:56 PM.
#79
adam_93rio
-
- Members
-
- 3,271 posts
Up Into Fourth
Posted 11 May 2010 - 10:08 PM
just thought i would update the list as of today,
ill do a propper update soon
1. buy and fit new CV joints (drivers side at least)2. buy and fit new inner steering column3. remove front end and clean, and kurust and paint exposed metal4. kurust then paint bits where stupid halfrauds paint did a s**t job
5. buy and fit new seat membrane for my standard drivers seat
6. fit original interior7. remove steering column drop bracket8. fit stick on number plate9. sort out my oil pressure light
10. decide if a roofrack would be good for L2B11. fit hi los all round
ill do a propper update soon
#80
adam_93rio
-
- Members
-
- 3,271 posts
Up Into Fourth
Posted 28 May 2010 - 10:57 PM
ok havnt touched this for a bit so thought i would quickly bring us up to date.
the hilos are fitted all round, and i have had a few teething problems with them at the back. the front went in. i set them both the same and they have settled probably around where they want to be. if not a little high.
the back however is a different story, my shocks are quite stiff so i though i would maybe get away with going a fair bit lower, but i was wrong. anything lower than standard seems to just scrape when i hit bumps or take corners enthusiasticly. they are set at a hieght now where they dont scrape unless there is more than 2 people in the car and i hit a bump a bit quick. but it isnt exactly low.
before i fitted the hilos i decided to make a little measuring stick so i could roughly see how much they settled by. this didnt work in the end as i put different cones on in the end.

how it works

basically i line it up at the top of the wheel to the arch before ive even jacked the car up, therefore this is where the cones setlle over the time
marked it before, then jacked the car up for a bit, let the car down and marked it after


simples! now i know that the ride will settle by that amount after being jacked up for a bit
so first side i did was the hard side as the petrol tank has to be moved to undo the top of the shock absorber

shock out and ready to strip

wondering how low it could go

the hieght i settled with at first

i havnt got full pictures of the whole process but you guys know what they look like
the other side had to have a wheel bearing done, so a trip out to minispares after packing it with grease i got me a new one

hubs off, bearings out and new race started

the best way i found to get a race in is to get it started by tapping it with a similarly sized socket. then get an old race on top of it to push it down evenly and to the bottom. then just take the old race out off the top

after torquing it up it was almost lined up but just on the following edge of the hole. going to the next hole is the reason its costing so much in wheel bearings so i decided to give it a go backing off a touch this time

you can see how close the gap is
while i was at minispares (harrogate) i asked for a new seat diaphargm but they only stock them at the main one (potters bar?)
so i had to order it on next day delivery to get it in time for london to brighton

this is the temporary repair to get us there last year, which seemed to hold up ok for the little amount of miles the car did (1000 or so)

with the cable ties removed

i was struggling for ages to get the new one in an couldnt get one particular pin in place
half in

the hilos are fitted all round, and i have had a few teething problems with them at the back. the front went in. i set them both the same and they have settled probably around where they want to be. if not a little high.
the back however is a different story, my shocks are quite stiff so i though i would maybe get away with going a fair bit lower, but i was wrong. anything lower than standard seems to just scrape when i hit bumps or take corners enthusiasticly. they are set at a hieght now where they dont scrape unless there is more than 2 people in the car and i hit a bump a bit quick. but it isnt exactly low.
before i fitted the hilos i decided to make a little measuring stick so i could roughly see how much they settled by. this didnt work in the end as i put different cones on in the end.
how it works
basically i line it up at the top of the wheel to the arch before ive even jacked the car up, therefore this is where the cones setlle over the time
marked it before, then jacked the car up for a bit, let the car down and marked it after
simples! now i know that the ride will settle by that amount after being jacked up for a bit
so first side i did was the hard side as the petrol tank has to be moved to undo the top of the shock absorber
shock out and ready to strip
wondering how low it could go
the hieght i settled with at first
i havnt got full pictures of the whole process but you guys know what they look like
the other side had to have a wheel bearing done, so a trip out to minispares after packing it with grease i got me a new one
hubs off, bearings out and new race started
the best way i found to get a race in is to get it started by tapping it with a similarly sized socket. then get an old race on top of it to push it down evenly and to the bottom. then just take the old race out off the top
after torquing it up it was almost lined up but just on the following edge of the hole. going to the next hole is the reason its costing so much in wheel bearings so i decided to give it a go backing off a touch this time
you can see how close the gap is
while i was at minispares (harrogate) i asked for a new seat diaphargm but they only stock them at the main one (potters bar?)
so i had to order it on next day delivery to get it in time for london to brighton
this is the temporary repair to get us there last year, which seemed to hold up ok for the little amount of miles the car did (1000 or so)
with the cable ties removed
i was struggling for ages to get the new one in an couldnt get one particular pin in place
half in
Edited by adam_93rio, 28 May 2010 - 11:02 PM.
#81
adam_93rio
-
- Members
-
- 3,271 posts
Up Into Fourth
Posted 28 May 2010 - 10:57 PM
and it took me a while to find the cause. on this type, the seat frame is wider at the front therefore it has longer pins to hold it in place. (three longer ones to the front then 2 shorter on each side). not to my amusement i found that one side had 3 shorter ones!!
so i took a longer one off the old diaphragm and it all went smoothly from then on

all in and ready for action

dont think i have a picture with the standard interior in but youve seen it before. i think it will stay this time as im quite fond of it again
before the run i decided to have the wheels balance as i got a lot of wheel wobble at higher speeds
when i took my car i said jack it up on the subframe, so he put the jack under the subframe and started jacking. i left for a couple of minutes to get some cash out at the end of the road. and when i got back he had it back on its wheels
when i got home i realised he had started jacking on the subframe, then for god knows what reason moved the jack to the floor and dented it all up
i was well peeved but theres not a lot i can do as he'll just claim it was the jacking point
however the edge of his jack has actually split the floor. with only a day to go before the trip i had to just tiger seal it up for now.


im not happy, but thats what you get for letting someone else touch your car. it wont happen again, and he will be out of business anyway soon so screw him
on the trip we set off early morning (well around half 9), me, my dad, my sister and her boyfriend.
unfortunatly by the time we had got to peterborough my dads clutch had completely gone, (crankcase seal let oil onto the clutch)
so the AA man came and took my dad back home. which was a huge shame and im still gutted but the rest of us continued the journey and got there ok.
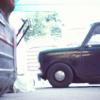
a couple of pictures from the road
at the services before my dad completely broke down, left a lot of oil there though

you can see my sisters mini behind ours

one of us 3 stuck in traffic

the front of your car is on fire!!!

managed to get in front of them at one point

only to be passed with ease

my breakes were a bit dodgey all the way back from brighton, i had to run with my handbrake up 3 clicks and could manage a stop eventually
we got home late on the sunday night and only our mucking about on the motorway kept us awake
the next day i went out to check on effy and she didnt seem happy and was crying
brake fluid all disapeared, i think the servo seal has gone and sucked it all into the engine, oh well

what used to be a slight leak from the gear linkage seal now seems a bit more of a problem i think

and a bit of a coolant issue from the heated inlet manifold.

today i topped the break fluid up and although there is air in the sytem the brakes work fine again, i will bleed them in the morning, the oil level was fine and so was the coolant, and the leaks appear to have stopped. nevertheless i will get them sorted asap
after sorting these few little things and topping stuff up, i got rid of the salad sandwich that had gone off, and a carton of milk and she started first time
went out for a bit of a drive and im well happy with her still.
plans for this year are to reshell her. i plan to buy a shell, repair whatever needs doing to the best possible standard, give a respray then move everything across. then i will repair this shell for the sprite to be sorted. and see where we go from there.
hope this all makes sense, but its been a long day today. just thought i would update because i havnt even so much as looked at effy sinse we got back, and im well happy with her now!
so i took a longer one off the old diaphragm and it all went smoothly from then on
all in and ready for action
dont think i have a picture with the standard interior in but youve seen it before. i think it will stay this time as im quite fond of it again
before the run i decided to have the wheels balance as i got a lot of wheel wobble at higher speeds
when i took my car i said jack it up on the subframe, so he put the jack under the subframe and started jacking. i left for a couple of minutes to get some cash out at the end of the road. and when i got back he had it back on its wheels
when i got home i realised he had started jacking on the subframe, then for god knows what reason moved the jack to the floor and dented it all up
i was well peeved but theres not a lot i can do as he'll just claim it was the jacking point
however the edge of his jack has actually split the floor. with only a day to go before the trip i had to just tiger seal it up for now.
im not happy, but thats what you get for letting someone else touch your car. it wont happen again, and he will be out of business anyway soon so screw him
on the trip we set off early morning (well around half 9), me, my dad, my sister and her boyfriend.
unfortunatly by the time we had got to peterborough my dads clutch had completely gone, (crankcase seal let oil onto the clutch)
so the AA man came and took my dad back home. which was a huge shame and im still gutted but the rest of us continued the journey and got there ok.
a couple of pictures from the road
at the services before my dad completely broke down, left a lot of oil there though
you can see my sisters mini behind ours
one of us 3 stuck in traffic
the front of your car is on fire!!!
managed to get in front of them at one point
only to be passed with ease
my breakes were a bit dodgey all the way back from brighton, i had to run with my handbrake up 3 clicks and could manage a stop eventually
we got home late on the sunday night and only our mucking about on the motorway kept us awake
the next day i went out to check on effy and she didnt seem happy and was crying
brake fluid all disapeared, i think the servo seal has gone and sucked it all into the engine, oh well
what used to be a slight leak from the gear linkage seal now seems a bit more of a problem i think
and a bit of a coolant issue from the heated inlet manifold.
today i topped the break fluid up and although there is air in the sytem the brakes work fine again, i will bleed them in the morning, the oil level was fine and so was the coolant, and the leaks appear to have stopped. nevertheless i will get them sorted asap
after sorting these few little things and topping stuff up, i got rid of the salad sandwich that had gone off, and a carton of milk and she started first time
went out for a bit of a drive and im well happy with her still.
plans for this year are to reshell her. i plan to buy a shell, repair whatever needs doing to the best possible standard, give a respray then move everything across. then i will repair this shell for the sprite to be sorted. and see where we go from there.
hope this all makes sense, but its been a long day today. just thought i would update because i havnt even so much as looked at effy sinse we got back, and im well happy with her now!
Edited by adam_93rio, 28 May 2010 - 11:10 PM.
#82
adam_93rio
-
- Members
-
- 3,271 posts
Up Into Fourth
Posted 28 May 2010 - 11:03 PM
for some reason photobucket has given me dodgey codes for some pictures, so just pretend it makes sense for now because i can only be bothered to sort half of them. if you was going to say something
EDIT: just fixed it, hope it reads ok
EDIT: just fixed it, hope it reads ok
Edited by adam_93rio, 28 May 2010 - 11:10 PM.
#83
Stevee
-

- Members
- 0 posts
- Local Club: #
Posted 02 June 2010 - 11:28 AM
looks very nice
i really wanted to go L2B this year but someone stole my rocker cover and mini wasnt running or doing anything right so im restoring it now
but your car looks very very nice
i really wanted to go L2B this year but someone stole my rocker cover and mini wasnt running or doing anything right so im restoring it now
but your car looks very very nice
#84
adam_93rio
-
- Members
-
- 3,271 posts
Up Into Fourth
Posted 02 June 2010 - 03:56 PM
looks very nice
i really wanted to go L2B this year but someone stole my rocker cover and mini wasnt running or doing anything right so im restoring it now
but your car looks very very nice
thank man, im not completley happy at the moment with her, at higher speeds i have a lot of wheel wobble, and the steering is very drifty throughout. im having the tracking done by a mate early next week and not using her until then
thanks for the info in the pm too! hope to see you at shows sometime
#85
Sackboy
-

- Noobies
-
- 47 posts
On The Road
Posted 13 June 2010 - 10:28 PM
Sat up all evening reading the whole write up!
Absolutely bloody brilliant what you've done mate, it's a massive inspiration and a kick up the arse to start mine off now.
Just hope I learn how to weld as quick and as well as you.
Absolutely bloody brilliant what you've done mate, it's a massive inspiration and a kick up the arse to start mine off now.
Just hope I learn how to weld as quick and as well as you.
#86
scoticus
-
- Members
-
- 1,805 posts
Camshaft & Stage Two Head
Posted 13 June 2010 - 10:42 PM
Bugger me sideways...
i hate you by the way...
need to come over and look
i hate you by the way...
need to come over and look
#87
adam_93rio
-
- Members
-
- 3,271 posts
Up Into Fourth
Posted 19 July 2010 - 09:18 PM
Sat up all evening reading the whole write up!
Absolutely bloody brilliant what you've done mate, it's a massive inspiration and a kick up the arse to start mine off now.
Just hope I learn how to weld as quick and as well as you.
thanks mate, its not much of a read is it? only 6 pages lol. ill be updating more often now i think
Bugger me sideways...
i hate you by the way...
need to come over and look
why do you hate me scott? i havnt done anything
#88
adam_93rio
-
- Members
-
- 3,271 posts
Up Into Fourth
Posted 19 July 2010 - 09:32 PM
ok so a bit of an update from recent events.
after reading a bit of mini mag in the 'our cars' section i realised the symptoms i have been tracking for a while are the same as jeff ruggles recent problems. turns out its the steering rack. which was actually my first suspicion, but then went ahead and changed the steering column, engine steady, then fitted and ultimate engine steady and bought quick release poly bush engine mounts.
i nipped over to p&l minis last week to pick a new rack up. but still havnt fitted it
on saturday i went to leeds and on the way back the car got very hot, then the oil pressure light came on and moments later the crank started to go.
today i picked up another engine which i am borrowing whilst the original is being rebuilt.
got a couple of pictures but nothing special
the almost complete engine, will need my clutch cover and distributor as its from a 98 mpi. apparently this may have a 5 speed box too!!


and a picture of my car once i got the front end off, much easier to work like this.

i actually disconnected everything on the engine except driveshafts and gear linkag tonight after work, took me about 2 hours which wasnt bad. hopefully tomorrow i will get it out and get the replacement built up ready to go in, maybe get it lifted in and driveshafts and gear linkage back on tomorrow depending on progress. then get it working on wednesday
oh, i also fitted the nikki carb yesterday which went well. only had the choke connected and just did the throttle by hand. i think it needs some serious setting up, but oh my god was that roar amazing, especially when both chokes started going.
really excited about this getting back on the road.
watch this space
after reading a bit of mini mag in the 'our cars' section i realised the symptoms i have been tracking for a while are the same as jeff ruggles recent problems. turns out its the steering rack. which was actually my first suspicion, but then went ahead and changed the steering column, engine steady, then fitted and ultimate engine steady and bought quick release poly bush engine mounts.
i nipped over to p&l minis last week to pick a new rack up. but still havnt fitted it
on saturday i went to leeds and on the way back the car got very hot, then the oil pressure light came on and moments later the crank started to go.
today i picked up another engine which i am borrowing whilst the original is being rebuilt.
got a couple of pictures but nothing special
the almost complete engine, will need my clutch cover and distributor as its from a 98 mpi. apparently this may have a 5 speed box too!!
and a picture of my car once i got the front end off, much easier to work like this.
i actually disconnected everything on the engine except driveshafts and gear linkag tonight after work, took me about 2 hours which wasnt bad. hopefully tomorrow i will get it out and get the replacement built up ready to go in, maybe get it lifted in and driveshafts and gear linkage back on tomorrow depending on progress. then get it working on wednesday
oh, i also fitted the nikki carb yesterday which went well. only had the choke connected and just did the throttle by hand. i think it needs some serious setting up, but oh my god was that roar amazing, especially when both chokes started going.
really excited about this getting back on the road.
watch this space
Edited by adam_93rio, 19 July 2010 - 09:32 PM.
#89
Milten
-

- Noobies
-
- 9 posts
Just On Tickover
Posted 28 October 2010 - 04:09 PM
Hi.
It's nice to see a progress. Could you tell me a name of your tyres? Is it a yokohama?
It's nice to see a progress. Could you tell me a name of your tyres? Is it a yokohama?
#90
adam_93rio
-
- Members
-
- 3,271 posts
Up Into Fourth
Posted 24 December 2010 - 02:07 PM
Hi.
It's nice to see a progress. Could you tell me a name of your tyres? Is it a yokohama?
sorry for the late reply, yokohama's is right, A539's


3 user(s) are reading this topic
0 members, 3 guests, 0 anonymous users


