Hi,
I'm soon going to be painting a shell from bare, Inside and out.
It's going to be in a really flourescent orange, so I have been told I will need to paint it white first. When the paint is on I also want to paint 2 black stripes up the middle.
How do I go about painting the shell start to finish and more importantly what shall I do underneath.
Do I carry on painting in the same colour underneath and leave it or is there something I should be putting on top of the paint.
I would appreciate any help.
John

Painting A Bare Shell
Started by
BlueminiJohn
, Mar 01 2009 09:48 AM
2 replies to this topic
#1

BlueminiJohn
-
- Members
-

- 204 posts
Mini Mad
- Location: Midlands
- Local Club: n/a
Posted 01 March 2009 - 09:48 AM
#2
Southy
-
- Members
-
- 1,579 posts
Camshaft & Stage Two Head
- Local Club: Oldham and Distrcit Mini Club
Posted 01 March 2009 - 12:34 PM
Right first of all im not expert on this, but ive not long since done a full resto and painted inside and out of my car.
I found it was best to spray the underside of the car first, to do this we tilted the shell on its side by placing it on 3 axle stands, one on the rear arch near the shockmount, one under the front arch again near the shock mount and the third one was placed with some padding under the top of the B posts just under the guttering.
The underside, including under the top of the wings was completely stripped of paint and any underseal, it was then sprayed first of all with Acid Etch primer. This was then followed by a couple of coats of primer and then a nice lashing of paintable stone chip.

Also the inside of the car was done in the exact same way as the underneath (depending upon your usage of the car the stone chip isnt needed, I used it on the inside as im going for a rally look with little carpet fitted).

Once the stone chip had time to seal and dry we then applied the paint to the underside as what the rest of the car would be painted in.

The underside was left to cure for a few days to make sure it was fully dry before the car was flipped back over and place ontop of axle stands covered with some rags to stop them stratching/scrapping the freshly painted underside. The stands were placed under where the tower bolts fit through and where the rear subframe sits.
The exterior of the bodywork, the car was flatted back down to baremetal, etch primered, filled, primered at the same time as the inside of the car was being done, then we painted the inside of the engine bay along with the under side of the bonnet, inside the boot and the inside of the car.


Finally the exterior of the car was painted with the doors and bootlid off the car, the bonnet was left on and just opened to get the shut lines painted.
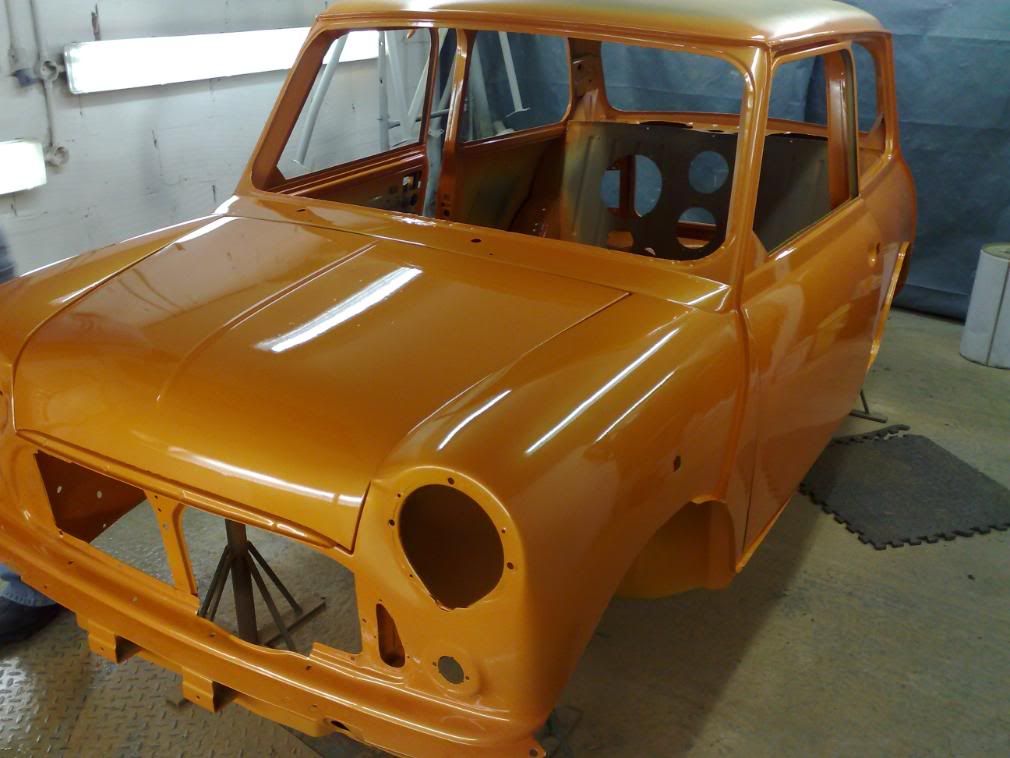
The rest of the car was then covered up with some clear sheeting and the roof was flatted and painted black.
I found it was best to spray the underside of the car first, to do this we tilted the shell on its side by placing it on 3 axle stands, one on the rear arch near the shockmount, one under the front arch again near the shock mount and the third one was placed with some padding under the top of the B posts just under the guttering.
The underside, including under the top of the wings was completely stripped of paint and any underseal, it was then sprayed first of all with Acid Etch primer. This was then followed by a couple of coats of primer and then a nice lashing of paintable stone chip.
Also the inside of the car was done in the exact same way as the underneath (depending upon your usage of the car the stone chip isnt needed, I used it on the inside as im going for a rally look with little carpet fitted).
Once the stone chip had time to seal and dry we then applied the paint to the underside as what the rest of the car would be painted in.
The underside was left to cure for a few days to make sure it was fully dry before the car was flipped back over and place ontop of axle stands covered with some rags to stop them stratching/scrapping the freshly painted underside. The stands were placed under where the tower bolts fit through and where the rear subframe sits.
The exterior of the bodywork, the car was flatted back down to baremetal, etch primered, filled, primered at the same time as the inside of the car was being done, then we painted the inside of the engine bay along with the under side of the bonnet, inside the boot and the inside of the car.
Finally the exterior of the car was painted with the doors and bootlid off the car, the bonnet was left on and just opened to get the shut lines painted.
The rest of the car was then covered up with some clear sheeting and the roof was flatted and painted black.
#3
BlueminiJohn
-
- Members
-
- 204 posts
Mini Mad
- Location: Midlands
- Local Club: n/a
Posted 01 March 2009 - 02:12 PM
Thanks slot for that, it's a great help.
John
John


1 user(s) are reading this topic
0 members, 1 guests, 0 anonymous users


