
Jump to content


Photo
- - - - -

The Rise And Fall Of Sir Reginald!


  • Please log in to reply
356 replies to this topic

#346 Retro_10s

Retro_10s

    Moderator

  • Members
  • PipPipPipPipPipPipPipPipPipPipPip
  • 10,175 posts
  • Location: Worcs

Posted 22 July 2024 - 07:27 PM

Decided to pull the distributor today with the intention of flipping the drive 180°, though I didn't do the latter, I did rebuild the dizzy using the new parts I'd bought a while back.

Blue points, condenser (had to find a washer to go underneath the screw mounting tab - as it has not been placed correctly offset by the factory,... Old parts are still the best by the looks of things!) Powermax rotor arm, and a new cap. Also had to fit a cable tie around the cable shroud where it pops through the dizzy body, the old type had a step in the moulding which would hold it there, the new parts do not. I find this lack of attention from manufacturers frustrating, these are small but functional differences, not just aesthetic !

Stumbled across the accuspark coil in my parts stash, I've no recollection of getting it, but it's correct for my ballasted ignition, and after checking the windings with my multimeter, it checks out. A nice find!

qFpGRkY.jpeg

Pleased with how it went together, I'd originally planned to fit an electronic module,.. but I've never had trouble from points... Even with a ducellior distributor, so that's something for another time I think.

Edited by Retro_10s, 22 July 2024 - 07:37 PM.


#347 Retro_10s

Retro_10s

    Moderator

  • Members
  • PipPipPipPipPipPipPipPipPipPipPip
  • 10,175 posts
  • Location: Worcs

Posted 23 July 2024 - 07:55 AM

Extension to my earlier moan about the quality of aftermarket parts, the red powermax rotor arm is grazing one of the contact posts inside the new distributor cap now.

I checked the new red arm against an original blue Lucas arm and the contact is 0.40mm more proud... But I feel this could simply be a reasonable/expected difference between old and new,.. since it's only grazing one of the contacts in the cap, and the dizzy shaft has little to know sideways play...What are my options? Shave a little bit of the contact down inside the cap? It's too old to return sadly and I don't have the receipt.

I think it may just be hitting some slight burring of the edge of the post due to a poor machine finish?

** Edit **
Lack of concentration on my part here I think, I realise I have no vacuum advance fitted, and this has a locating tab for the dizzy cap, without this tab there is just enough movement for the cap to shift sideways, and I believe this is the cause for the above issue, there is certainly a burred rough finish on the posts which I will smooth off, but I think the cap is probably ok

Moral of the story, coffee first... Tinker and moan later. Not the other way around!

Edited by Retro_10s, 23 July 2024 - 08:36 PM.


#348 Retro_10s

Retro_10s

    Moderator

  • Members
  • PipPipPipPipPipPipPipPipPipPipPip
  • 10,175 posts
  • Location: Worcs

Posted 12 April 2026 - 10:04 AM

Burst into action last week and Did some work on the old bugger, Spurred on by discovering that the paint has finally hardened off and can be flatted quite nicely, so.... The half that i didn't attack will be quite easy to prep up ready for re-paint, needing only a good flat back with a block


Boot lid just needed a little work with some knifing putty to get it looking good again, Wetflatted with 400-600grit I think i actually enjoyed doing this panel  :lol: I'll need to source a Boot badge for above the number plate lamp.

PXL-20260411-185136291.jpg


Bonnet is looking good with just a bit of knifing putty for some scratches,.. I'm having a little difficulty blending the ridge in the middle, many layers of paint here, but I'll get there.

PXL-20260412-093724469-2.jpg


I've also started tackling the roof - which I've flatted back about a 3rd of and identified some areas for more knifing putty, the N/S wing (ready for primer now), and N/S rear quarter which is almost there.


Edited by Retro_10s, 12 April 2026 - 06:32 PM.


#349 Retro_10s

Retro_10s

    Moderator

  • Members
  • PipPipPipPipPipPipPipPipPipPipPip
  • 10,175 posts
  • Location: Worcs

Posted 14 April 2026 - 12:45 PM

Bit of work on the roof yesterday,.. mostly flat, but quite a bit of work on the edges needed, banged some primer on it, all the different colour marks were beginning to send me crazy chasing areas that did/didn't need additional work. much easier to see what state it's in when it's all one colour!


PXL-20260413-172609181-2.jpg


#350 1984mini25

1984mini25

    Crazy About Mini's

  • Members
  • PipPipPipPipPipPipPipPipPipPip
  • 8,843 posts
  • Location: -

Posted 14 April 2026 - 06:58 PM


I'll need to source a Boot badge for above the number plate lamp.


Would this one be any good to you?

Attached File  IMG_20260414_111708_0.jpg   79.29K   0 downloads


#351 Retro_10s

Retro_10s

    Moderator

  • Members
  • PipPipPipPipPipPipPipPipPipPipPip
  • 10,175 posts
  • Location: Worcs

Posted 15 April 2026 - 11:09 AM


I'll need to source a Boot badge for above the number plate lamp.
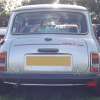
 

Would this one be any good to you?


Bahahah, YES, but unfortunately I've already sourced and ordered one, found on eBay for a Fiver. Perfect timing eh!

However I'll probably be looking swap it or replace it anyway (certainly not a priority right now), I know it doesn't really matter that it says mini 1000, but I'd got my heart set on the different insert that just has MINI with a black background. Seems hard to find.


For now they City E will masquerade as a Mini 1000.


#352 1984mini25

1984mini25

    Crazy About Mini's

  • Members
  • PipPipPipPipPipPipPipPipPipPip
  • 8,843 posts
  • Location: -

Posted 15 April 2026 - 12:01 PM


I'll need to source a Boot badge for above the number plate lamp.


Would this one be any good to you?

Bahahah, YES, but unfortunately I've already sourced and ordered one, found on eBay for a Fiver. Perfect timing eh!
However I'll probably be looking swap it or replace it anyway (certainly not a priority right now), I know it doesn't really matter that it says mini 1000, but I'd got my heart set on the different insert that just has MINI with a black background. Seems hard to find.

For now they City E will masquerade as a Mini 1000.

It's just one of a collection I've had sitting in one of the draws in my tool box.

Although wouldn't the city of had the stick on mini boot badge, and the bonnet badge without mini?

Attached Files


#353 Retro_10s

Retro_10s

    Moderator

  • Members
  • PipPipPipPipPipPipPipPipPipPipPip
  • 10,175 posts
  • Location: Worcs

Posted 15 April 2026 - 12:22 PM


I'll need to source a Boot badge for above the number plate lamp.


Would this one be any good to you?

Bahahah, YES, but unfortunately I've already sourced and ordered one, found on eBay for a Fiver. Perfect timing eh!
However I'll probably be looking swap it or replace it anyway (certainly not a priority right now), I know it doesn't really matter that it says mini 1000, but I'd got my heart set on the different insert that just has MINI with a black background. Seems hard to find.

For now they City E will masquerade as a Mini 1000.

It's just one of a collection I've had sitting in one of the draws in my tool box.

Although wouldn't the city of had the stick on mini boot badge, and the bonnet badge without mini?


Absolutely correct, I have the bonnet badge,.. but since I have the three holes in the bootlid (which didn't come from a city) I decided to use them for a badge. Couldn't be bothered to blank the holes to be honest, and I wasn't sure if they'd have been covered by the MINI text badge you have shown. 


#354 1984mini25

1984mini25

    Crazy About Mini's

  • Members
  • PipPipPipPipPipPipPipPipPipPip
  • 8,843 posts
  • Location: -

Posted 15 April 2026 - 04:43 PM


I'll need to source a Boot badge for above the number plate lamp.

Would this one be any good to you?
Bahahah, YES, but unfortunately I've already sourced and ordered one, found on eBay for a Fiver. Perfect timing eh!
However I'll probably be looking swap it or replace it anyway (certainly not a priority right now), I know it doesn't really matter that it says mini 1000, but I'd got my heart set on the different insert that just has MINI with a black background. Seems hard to find.

For now they City E will masquerade as a Mini 1000.
It's just one of a collection I've had sitting in one of the draws in my tool box.

Although wouldn't the city of had the stick on mini boot badge, and the bonnet badge without mini?

Absolutely correct, I have the bonnet badge,.. but since I have the three holes in the bootlid (which didn't come from a city) I decided to use them for a badge. Couldn't be bothered to blank the holes to be honest, and I wasn't sure if they'd have been covered by the MINI text badge you have shown.

Could always try Martin at sticky fingers to see if he could make up a badge insert
https://www.ebay.co....tm/277746938369

(as I personally wouldn't pay that for a badge)

#355 Retro_10s

Retro_10s

    Moderator

  • Members
  • PipPipPipPipPipPipPipPipPipPipPip
  • 10,175 posts
  • Location: Worcs

Posted 15 April 2026 - 05:16 PM


Could always try Martin at sticky fingers to see if he could make up a badge insert
https://www.ebay.co....tm/277746938369

(as I personally wouldn't pay that for a badge)


Yeah my thought was to get an insert, i saw some inserts available on eBay, but like you,.. i would absolutely not pay that price! I was glad to find this Mini 1000 badge and get it cheaply,.. 


Thanks for the Sticky fingers thought, I'd forgotten about them to be honest! cheers!


#356 Retro_10s

Retro_10s

    Moderator

  • Members
  • PipPipPipPipPipPipPipPipPipPipPip
  • 10,175 posts
  • Location: Worcs

Posted 24 May 2026 - 09:41 AM

I've been slowly working on what I can. I'd really like to be able to get the shell painted this summer and get the interior back in. I think it's possible,.. but It'll be done in fits and bursts.


Most recently I've been continuing my efforts towards getting the bonnet and boot lid done, since they're easily moved about and stored. 


Boot lid is primed now,.. and i think that's it as far as primer goes,.. i've kept on finding little stone chips so the knifing putty has been out,.. it's felt like endless flatting and priming. But now I think it's  probably good enough for colour.

PXL-20260522-164037003-2.jpg


Same goes for the bonnet,. It's good and straight, but had a lot of little niggly stone chips etc. with those sorted, i banged some primer on. 

PXL-20260522-183806376.jpg


The boot light housing should be black on the Mini City,.. but I prefer the colour coded look, so it was an ideal opportunity to have a little go with some colour. Same colour as it left the factory with, Rover Targa red BLVC641/CNE. It's a lovely rich red in the shade, more on the dark side,.. but brightens up in the sun. 

PXL-20260523-090717409-2.jpg


PXL-20260523-104331563-2.jpg

I did have to drill out one of the little self tappers that hold the clear plastic lenses in place,.. but i think I should be able to still get a new one in,.. I'll probably order the screws from Smiffys Bits, as he's local to me.


I'd recently been researching electrical fuel pumps, as my mechanical pump had seized through lack of use. I'd stripped it a few times and nothing appeared wrong, just a stiff diaphragm, but still flexible. It's thankfully since come back to life, and after checking the diaphragm incase it had actually split,.. all is well. It just needed reminding what to do! i think the warmer weather has helped, I'd left the pump in the sun all day to soften the diaphragm, and that's probably what convinced it to pump again.


All being well i should get some colour on the boot and bonnet soon. then I'll pull the passenger side door and get working on that. It's solid, but much easier to work on it in the garden, than in the garage.


#357 Retro_10s

Retro_10s

    Moderator

  • Members
  • PipPipPipPipPipPipPipPipPipPipPip
  • 10,175 posts
  • Location: Worcs

Posted Today, 05:21 PM

Recently I've had to put new tyres and tubes on my bike,.. and since i was in the garage tinkering I decided to fit the new waterpump and silicone bypass hose to the engine, I did have a kevlar re-inforced bypass hose from Minispares,.. unfortunatley it had perished, So silicone to the rescue! scraped the mounting surface with a craft knife, and put an smear of MP grease on both sides of the pump gasket.


PXL-20260531-101447840-2.jpg


PXL-20260531-102824773.jpg

The satin engine paint that was put on by the guys that refreshed the engine is flaking in some areas,.. so i'll probably end up re-painting it at some point before installation.


With some luck I'll soon have the bonnet and boot lid painted. Then I'll build them back up with their trims etc, and put them into storage while i work on the shell. I've now removed the Passenger side door, luckily the nuts came off without much persuasion. The gaps on the door are generally good but i think the Mini's had an A-panel at some point, as the gap gets very tight at the top,.. I think ill be able to use a file on the door skin and A-panel, and maybe if i add one small shim on the top hinge,.. I think that will give me a better gap without having to get too involved.


1 user(s) are reading this topic

0 members, 1 guests, 0 anonymous users
