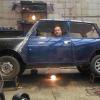
OK, I am new to classic minis and am just beginning the restoration project. I have the vehicle running, but the brakes are in need of service. I am rebuilding the front calipers right now, but I am having a big issue with the rear brakes.
I am trying to release the brake adjustment screw to allow my to access the interior of the rear brake so I can replace all the components... however the adjustment screw is seized on both sides. I realize this is a common issue, however I have tried virtually all suggestions on here without resolution. I have used multiple penetrating oils Kroil, WD40, liquid wrench... no go. Heat... nothing. I ordered per another thread a can of Loctite freeze spray, should be here this week, but I expect the same result.
Anyway, I understand as a last resort I can remove the entire backplate, and I guess that means all of the components with it except for the wheel bearing?. However, as I said I am new and cannot seem to find a write-up on the subject.
Can someone please help a newbie out of this and guide me, I spent the whole day today trying to get this apart, and I have come up with nothing.
Thanks in advance.


Back Plate Removal... How?
Started by
nate09565
, May 09 2009 09:17 PM
9 replies to this topic
#2

BLUE ITALIAN JOB
-

- Members
-

- 204 posts
Mini Mad
- Local Club: thames valley
Posted 10 May 2009 - 12:59 AM
with the car up on stands ect , wheel off , release hand brake cable to back plate pin , release brake pipe to back plate , remove brake drum , remove center cap and large nut / washer , remove the hub , now you should be able to see three bolts holding the back plate the the radious arm - nuts on the arm side .
sounds nice and easy does'nt it ....
brake pipe will lock onto the nut and twist the pipe till it snaps + drum has worn and it will need extrctors to remove
+ the slit pin for the handbrake cable has rusted in and snaps off .
unless you have stood in something smelly before you started and all parts come apart as is stated in the workshop manual !!!!!!
maybe worth finding out if you can find who has some of the spares that may be needed before you start ,
brake linnings - wheel cylinders - hub bearings - clevis pin and split pins , all of which could be in need of replacement when you get all the bits off .
#3
nate09565
-
- Noobies
-
- 26 posts
Passed Test
Posted 10 May 2009 - 01:14 AM
How do I get the drum off if the adjustment screw on the backside is seized though? That's essentially the problem I am having.
with the car up on stands ect , wheel off , release hand brake cable to back plate pin , release brake pipe to back plate , remove brake drum , remove center cap and large nut / washer , remove the hub , now you should be able to see three bolts holding the back plate the the radious arm - nuts on the arm side .
sounds nice and easy does'nt it ....
brake pipe will lock onto the nut and twist the pipe till it snaps + drum has worn and it will need extrctors to remove
+ the slit pin for the handbrake cable has rusted in and snaps off .
unless you have stood in something smelly before you started and all parts come apart as is stated in the workshop manual !!!!!!
maybe worth finding out if you can find who has some of the spares that may be needed before you start ,
brake linnings - wheel cylinders - hub bearings - clevis pin and split pins , all of which could be in need of replacement when you get all the bits off .
#4
BLUE ITALIAN JOB
-
- Members
-
- 204 posts
Mini Mad
- Local Club: thames valley
Posted 10 May 2009 - 01:46 AM
with the cable off and still not able to remove the drum , you will need to use extractors or brut force , if you still have some of the adjuster sticking out of the back plate but has rounded off you may be able to weld a nut to the remains of the adjuster and try to undo it that way .
also with the cable off does the arm that goes thru into the back plate have and slack/ movement - can sometimes rust solid and hold the brake linnings out and make the removal off the drum very hard .
also with the cable off does the arm that goes thru into the back plate have and slack/ movement - can sometimes rust solid and hold the brake linnings out and make the removal off the drum very hard .
#5
nate09565
-
- Noobies
-
- 26 posts
Passed Test
Posted 10 May 2009 - 02:06 AM
I still have the adjuster there, it's just seized. There is not a whole lot of movement with the arm through the back, but a little bit.
with the cable off and still not able to remove the drum , you will need to use extractors or brut force , if you still have some of the adjuster sticking out of the back plate but has rounded off you may be able to weld a nut to the remains of the adjuster and try to undo it that way .
also with the cable off does the arm that goes thru into the back plate have and slack/ movement - can sometimes rust solid and hold the brake linnings out and make the removal off the drum very hard .
#6
m1n1
-
- Members
-
- 769 posts
One Carb Or Two?
- Local Club: I'm unsociable
Posted 10 May 2009 - 08:58 AM
if your brake drum spins around ok with the handbrake off then the shoes may be far back enough - you should be able to pull it off with some strong flat headded screwdrivers either side working back and forth. Don't for get to remove the locking screw which secures the drum to the hub first
#7
nate09565
-
- Noobies
-
- 26 posts
Passed Test
Posted 10 May 2009 - 07:25 PM
I got the drum off at least. I still cannot get the adjustment screw out of the back plate though. I am going to wait for this Loctite freeze spray and give it a whirl. Otherwise I suspect that I will have no other option other that removing the whole backplate assembly... it really is annoying how I have been able to repair virtually all other components and to have two adjustment screws hold me back 
if your brake drum spins around ok with the handbrake off then the shoes may be far back enough - you should be able to pull it off with some strong flat headded screwdrivers either side working back and forth. Don't for get to remove the locking screw which secures the drum to the hub first
#8
nate09565
-
- Noobies
-
- 26 posts
Passed Test
Posted 27 May 2009 - 05:16 PM
I know this post is a couple weeks old, but FINALLY after much brute force and cursing I was able to get the adjustment scrwws on both sides unseized and removed.
I know that I am supposed to use some copper anti-sieze paste when putting the new adjustment screws back in, but is the copper type actually required? it is a tad hard to come by over here in the U.S., and when I did find it, it was priced quite high. I have purchased some other anti-seize paste but just want to confirm.
I know that I am supposed to use some copper anti-sieze paste when putting the new adjustment screws back in, but is the copper type actually required? it is a tad hard to come by over here in the U.S., and when I did find it, it was priced quite high. I have purchased some other anti-seize paste but just want to confirm.
#9
L400RAS
-

- Traders
-
- 2,479 posts
Up Into Fourth
- Local Club: Lincolnshire Mini Owners Club
Posted 27 May 2009 - 07:06 PM
but is the copper type actually required? it is a tad hard to come by over here in the U.S., and when I did find it, it was priced quite high. I have purchased some other anti-seize paste but just want to confirm.
Glad to hearthe drums/ adjusters are finally off mate. I have always sworn by Snap-On anti-seez, any chance you can catch your local dealer? I believe this is an aluminium based paste, and perhaps cheaper than copper, but works to much higher temperatures. Fords garages use gallons off it for everything including head studs etc.
Ryan.
#10
nate09565
-
- Noobies
-
- 26 posts
Passed Test
Posted 28 May 2009 - 12:51 AM
I actually had picked up some silver anti-seize so I guess I am good to go  )
)
off topic slightly... is the windscreen gasket the same for the front and rear of the vehicle? I can't seem to locate a different gasket if there is for the rear on minispares when searching.
)off topic slightly... is the windscreen gasket the same for the front and rear of the vehicle? I can't seem to locate a different gasket if there is for the rear on minispares when searching.
but is the copper type actually required? it is a tad hard to come by over here in the U.S., and when I did find it, it was priced quite high. I have purchased some other anti-seize paste but just want to confirm.
Glad to hearthe drums/ adjusters are finally off mate. I have always sworn by Snap-On anti-seez, any chance you can catch your local dealer? I believe this is an aluminium based paste, and perhaps cheaper than copper, but works to much higher temperatures. Fords garages use gallons off it for everything including head studs etc.
Ryan.


1 user(s) are reading this topic
0 members, 1 guests, 0 anonymous users


