Jump to content


Photo
- - - - -

Project Slowly But Surely


  • Please log in to reply
20 replies to this topic

#1 matty121

matty121

    Mini Mad

  • Members
  • PipPipPipPip
  • 296 posts

Posted 08 August 2009 - 02:32 PM

So this is what i started of with....

Posted Image

Posted Image

Posted Image

Posted Image

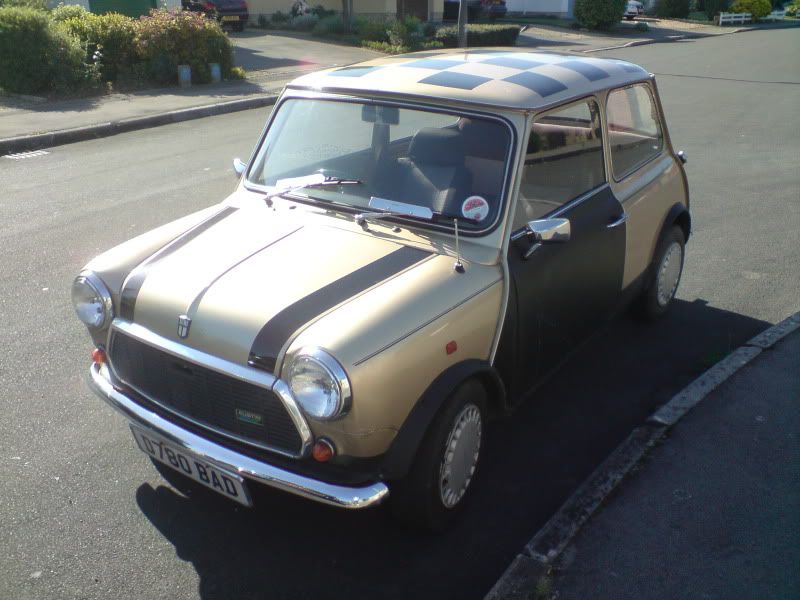
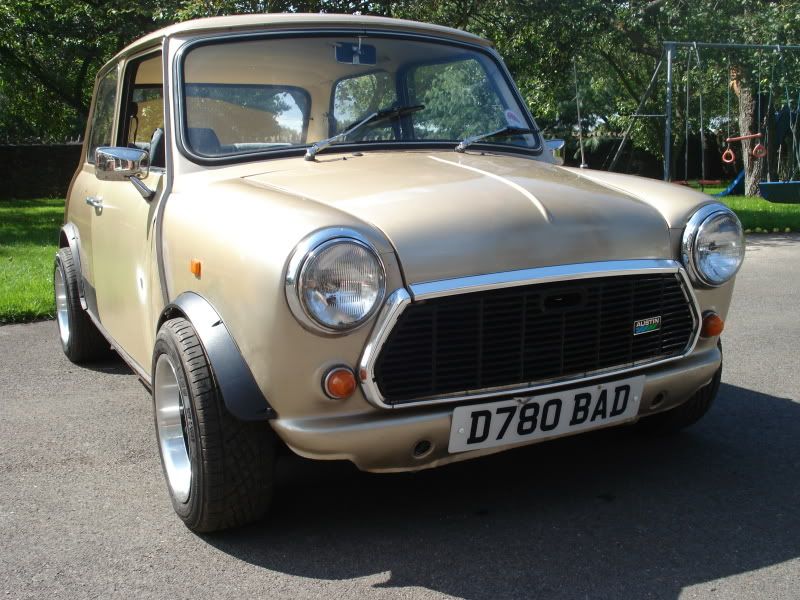
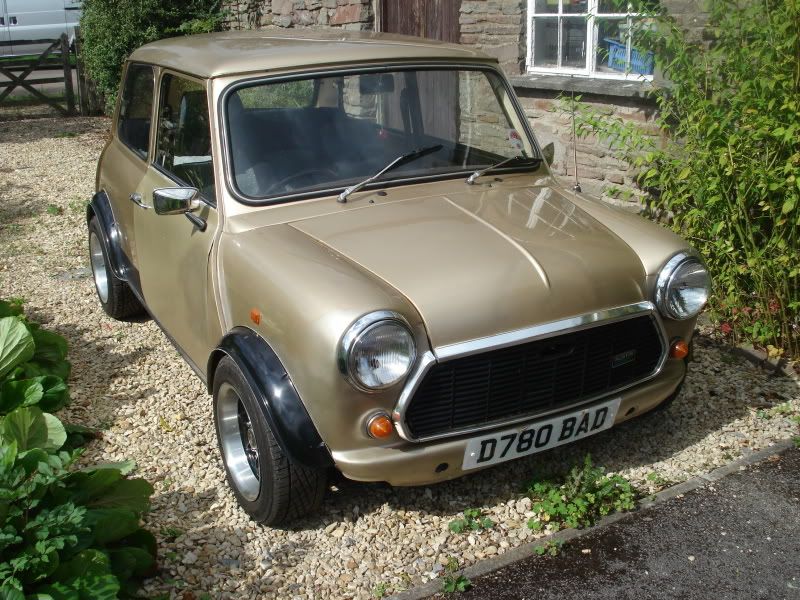
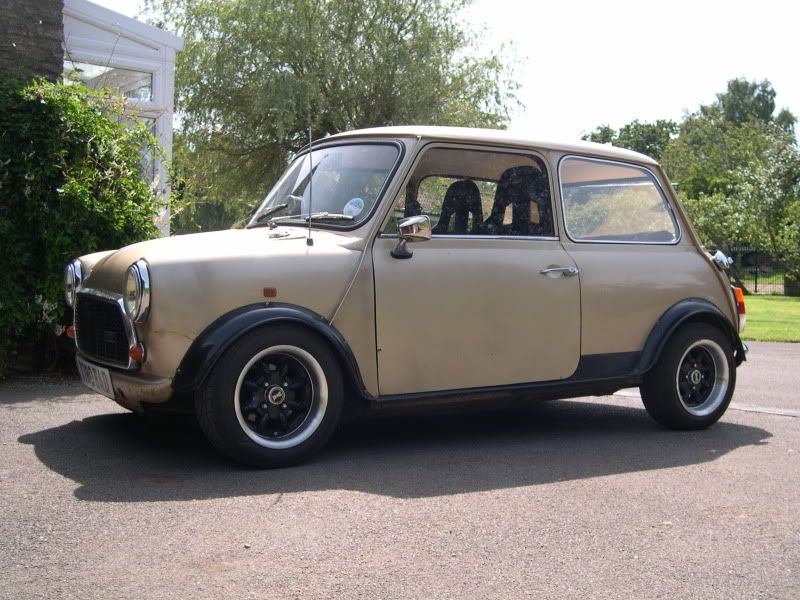
bought for 500 english pounds a year ago and as it was, the car wasnt in bad mechanical nick had 6 months MOT and a few days tax

Edited by matty121, 08 August 2009 - 04:08 PM.


#2 matty121

matty121

    Mini Mad

  • Members
  • PipPipPipPip
  • 296 posts

Posted 08 August 2009 - 02:39 PM

as i wanted to restore it to a reasonable condition i went about removing the rust at the front end (at the same time deciding to de-bumper the front) and spraying the doors and A pannels

at that moment in time i was expecting it to be re-sprayed soon so removed all stickers on the car

some pics of the work....

Posted Image

Posted Image

Posted Image

Posted Image

Posted Image

couldnt find enough of the same colour primer not that i think it makes a difference, but reflects the budget i have so i started spraying with aerasol cans.

Posted Image

then the gold..

Posted Image

and a few coats later the result for a first time paint job didnt seem bad considering!

Posted Image

if i had known what the seams that i filled would have looked like a year later i wouldnt have done it but there it goes

Edited by matty121, 08 August 2009 - 02:57 PM.


#3 Ouster

Ouster

    Up Into Fourth

  • TMF+ Member
  • PipPipPipPipPipPipPipPipPip
  • 2,986 posts
  • Local Club: Looking

Posted 08 August 2009 - 02:39 PM

I love that interior!

#4 matty121

matty121

    Mini Mad

  • Members
  • PipPipPipPip
  • 296 posts

Posted 08 August 2009 - 02:46 PM

thank you my man but it isnt what i was after

#5 matty121

matty121

    Mini Mad

  • Members
  • PipPipPipPip
  • 296 posts

Posted 08 August 2009 - 02:49 PM

as the interior was nasty, i made a new dashboard from diagrams found on google and here. made from MDF then covering in yellow viynl


pics....

Posted Image

Posted Image

Posted Image

and it was in and for less than £10 happy with that!


felt the need for a new set of shiny shoes so went and picked these 12 x 6 supalight alloys from london, on a bit of a road trip.


Posted Image

Posted Image

Posted Image

Posted Image

Posted Image


and a few days later some group 2 wide arches to cover my lovely tyres...

Posted Image

Posted Image

Posted Image

Posted Image

Posted Image

Edited by matty121, 08 August 2009 - 04:10 PM.


#6 matty121

matty121

    Mini Mad

  • Members
  • PipPipPipPip
  • 296 posts

Posted 08 August 2009 - 04:06 PM

next i replaced the door cards for some black leather ones front and back

Posted Image

made a rear speaker boars for my 6x9s and put it in place pending the speakers

Posted Image


changed the uncomfortable standard seats for some even more uncomfortable cobra monaco buckets haha which only just fitt but i think look cool and give more support

Posted Image

Posted Image

#7 matty121

matty121

    Mini Mad

  • Members
  • PipPipPipPip
  • 296 posts

Posted 08 August 2009 - 04:13 PM

fitted a new black carpet (very cheap, and is reflected in quality) replacing the mouldy brown one, and this is how the interior stands at the moment...

Posted Image

Posted Image

Posted Image


notice the small alpine speakers in the vent holes and new head unit

Posted Image

6x9s in

Posted Image

Edited by matty121, 08 August 2009 - 05:10 PM.


#8 matty121

matty121

    Mini Mad

  • Members
  • PipPipPipPip
  • 296 posts

Posted 08 August 2009 - 04:37 PM

the engine was running ok but was really lacking in power, so gave it a full service and realised while looking over the engine that the vacum advance pipe wasnt there this could cause problems so i fitted a stage 1 exhaust and inlet kit, and an electronic ignition module replacing points took it to a rr and got it set up nicely, the change was AMAZING the drive back home was so much fun!

Posted Image

Posted Image

Posted Image


after constantly hitting my head on the bonnet decided to solve the problem and fit bonnet pins (also angel eye headlights fitted here)

Posted Image

Posted Image

Posted Image

Posted Image

angel eyes

Posted Image

Posted Image

tachometer from halfords does the job perfectly

Posted Image

nice shiny petrol cap cover

Posted Image

Edited by matty121, 08 August 2009 - 05:12 PM.


#9 Down&Out

Down&Out

    The King Of Retro Cool

  • Traders
  • PipPipPipPipPipPipPipPipPip
  • 4,853 posts
  • Location: -

Posted 09 August 2009 - 01:40 PM

Love Piccadilly's. Dont change to much, theyre getting rare :dontgetit:.

Good luck mate.

#10 mrmoo

mrmoo

    Stage One Kit Fitted

  • Noobies
  • PipPipPip
  • 56 posts
  • Local Club: Causeway Coast Mini Club

Posted 09 August 2009 - 01:49 PM

Love Piccadilly's. Dont change to much, theyre getting rare :dontgetit:.

Good luck mate.


What a transformation, and all done by yourself, you should be proud....By the way, did you have to cut the front arches for the 6x12 rims...?

#11 matty121

matty121

    Mini Mad

  • Members
  • PipPipPipPip
  • 296 posts

Posted 17 August 2009 - 05:59 PM

thanks mrmoo yea i did have to cut the arches a fair bit actualy, just did it by sight didnt have any templates

#12 jinjrich

jinjrich

    Super Mini Mad

  • Members
  • PipPipPipPipPipPip
  • 543 posts
  • Location: York
  • Local Club: YMMOC

Posted 17 August 2009 - 06:53 PM

That looks great! I love cars that look cool without being 'perfect' (no offence!!). I agree keep it fairly standard. Its a 998 right?? They can be great fun

#13 matty121

matty121

    Mini Mad

  • Members
  • PipPipPipPip
  • 296 posts

Posted 21 August 2009 - 02:37 PM

no offence taken yea its a 998 and i love the size of engine gives alot of fun for the size!

#14 matty121

matty121

    Mini Mad

  • Members
  • PipPipPipPip
  • 296 posts

Posted 21 August 2009 - 02:45 PM

just a quick update as i have done nothing to the car lately apart from break down a few times on the way to wales (my fault for leaving the rad cap slightly loose)

latest pic

Posted Image

why is this all in one page by the way?

unsure as what to do next to make some progress the only things i have in mind are fg/cf flip front and bootlid..? any ideas/sugestions

#15 Mini-Mad-Craig

Mini-Mad-Craig

    Crazy About Metro's

  • Members
  • PipPipPipPipPipPipPipPipPipPip
  • 9,298 posts
  • Location: Travelling in a fried out Kombi

Posted 21 August 2009 - 04:33 PM

Aww, I love it. I just love piccadillys :P Yours has some real character to, love the progress :).


1 user(s) are reading this topic

0 members, 1 guests, 0 anonymous users