Jump to content


Photo

Stages In Painting A Complete Bare Shell.


  • Please log in to reply
4 replies to this topic

#1 mk=john

mk=john

    One Carb Or Two?

  • Members
  • PipPipPipPipPipPipPip
  • 1,167 posts
  • Local Club: Milton Keynes Mini Club, Mini Cooper Register

Posted 30 August 2009 - 07:34 PM

Hi
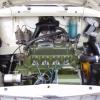
As from my previous posts, many will be aware that I will soon be spraying my 1960 mini bodyshell. It is a complete bare shell having undergone a full restoration. I currently have the shell restong on a wooden pallet (with wheels) so i can easily move it along the garage floor. I also have a 360 degree rollover spit, with the pole currently fitted to the car. (See Photo)

The paints I will use include Celly High build primer, and cellulose Cherry Red. All bare metal has already been etch primed, and the car has been keyed with a red scotchbrite pad

I plan to paint the car in the following stages, and I hope this is correct and welcome any advice or changes:

  • Put the car on the spit, and turn so it is on its side to filler prime the underneath (Cellulose).
  • Then, turn the shell so it is the correct way up, remove from spit, and put on pallet. Then filler prime engine bay, boot and interior.
  • Mask off interior, boot and engine bay, and prime exterior.
  • Rub down and prep the primer, in preparation for top coat.

When i do the colour coat, I plan to use the same order to paint the car.

Is this sequence correct for priming and top coat, or is there a better or faster sequence I could use? Also, for fiddly areas such as the boot where space is limited to move a full size spray gun, is it better to use a smaller touch up gun?

The photo shows the shell, the pallet, and spit.

Thanks
John

Edited by mk=john, 30 August 2009 - 07:36 PM.


#2 midridge2

midridge2

    Camshaft & Stage Two Head

  • Members
  • PipPipPipPipPipPipPipPip
  • 1,794 posts
  • Location: north east england

Posted 30 August 2009 - 08:57 PM

after you prime the inside there is no need to mask off before you prime the outside, any overspray primer going inside will be flatted down when you do the inside.

#3 Berty Wooster

Berty Wooster

    On The Road

  • Noobies
  • PipPip
  • 44 posts
  • Local Club: n/a

Posted 31 August 2009 - 09:42 AM

Dude - could you please load up another picture of your pallett as I would like to know how and what wheels you fitted to it as this is something I would like to do.

Cheers for your help and sorry to hijack your thread.

Ta once again

#4 Pauly

Pauly

    Up Into Fourth

  • Members
  • PipPipPipPipPipPipPipPipPip
  • 4,213 posts
  • Location: Wolverhampton
  • Local Club: Just 4 Fun Minis!

Posted 31 August 2009 - 09:59 AM

Theres a really good how to guide at the top of this section which takes you through all the stages you need to do.

Paul.

#5 mk=john

mk=john

    One Carb Or Two?

  • Members
  • PipPipPipPipPipPipPip
  • 1,167 posts
  • Local Club: Milton Keynes Mini Club, Mini Cooper Register

Posted 31 August 2009 - 11:33 AM

Dude - could you please load up another picture of your pallett as I would like to know how and what wheels you fitted to it as this is something I would like to do.

Cheers for your help and sorry to hijack your thread.

Ta once again

Hi Mate
I cant get a better pic of the pallet as its under the car, but for the wheels, you can get 4 castor wheels from B & Q. They are the 4" type castor on which the wheels swivel on a mounting plate. I screwed the plate into the corner of the pallet, 5 minute job. Once you see the wheels you will easily see what to do.

Cheers

Edited by mk=john, 31 August 2009 - 11:35 AM.


1 user(s) are reading this topic

0 members, 1 guests, 0 anonymous users