

i wont go into reasons on why to go through the IVA test, there are other threads on that subject.
General
Radius tools - i bought one from ebay for about £5-10
if its not there they cant fail it! so don't put unnecessary kit in the car to IVA it.
paperwork to back up pipes / seatbelts / seats / vehicle design weights / insurance...
Exterior
Everything needs to be blunted off down to a radius of 2.5mm
for a mini this meant that the gutters, sills, and body seams needed some rubber trim adding to them. the IVA tester saw them as being "permanent" which was what i wanted to hear. These where bought from CarBuilder Solutions for about £5 a meter, i think i used 14 meters in total!
Old MK1 style grills wont pass with the moustache as the grill slats are open ended on the bottom 3, they are too sharp.
All Glass needs to have an E rating logo. Not perspex or poly carb unless its E rated. Headlights need to be the later type flat lenses without the locating nipples sticking out of the glass.
Wiper blades are exempt from the radius rules but i had to file my ones down to get the 'sharp' edges off.
Wiper Jets, buy SVA approved platic ones from CarBuilder Solutions as the aftermarket mini ones are to sharp.
Remove and rubber plug the whole for a standard radio antenna. one less thing to pass hard edges.
Wheels
The top half of the wheel inc rim and tyre needs to be under the arch (when looked from above).
with the zcars kit its a matter of getting wide arches or adjusting the suspension so that its still 4 wheel-aligned but with them further into the car.
All tyres need to match and be in good nick, treed depth… speed rating etc.
Interior
Everything in the cabin space needs to be blunted off down to a radius of 2.5mm
Buy a couple of packs of nut / bolt caps and cap everything you can find!
Pad the underneath of any dash you have. anything that your leg might hit an an accident. crash cage pipe lagging from rally design did it for me.
Apart from there is an exempt area behind the steering wheel with about 10 cm extra from the steering wheels radius. So mount everything you can behind it! speedo, bonnet release handle, switches and dials. as long as they are secure and wont fall off they can be pig ugly.
the reason being is that you would hit the steering wheel before hitting them.
under the dash (from the lowest part of the steering wheel, level forwards to the floor) needs 2.5 radius but only forward facing. it does mean however that electric wires etc will need to be covered and don't worry about the pedal assemblies as they are usually exempt.
the internal Mirror needs to have an E rating on it. i found that my one didn't show it on the glass but was on the plastic backing which was enough. it was a standard late mini plastic suction version.
after market door handles and winders on a mini wont do very well as they are unforgiving hard lumps of metal. I used old school plastic handles, but i rounded off the edges with a file.
i left off the door handles / pullers as i just used the glass or the doors to shut the doors.
Seats need to have a headrest and be securely mounted to the floor. I used and passed this segment with Cobra Monaco Buckets.
Setbelts and mountings - Don't use Zcars's loop wholes on the subframe as they don't have a Metal rating on the steel. (or at least they don't have on my frame)
i bought 2 front seatbelts from carbuilder solutions which were static 3 point belts which were about £30 each, they were SVA approved with all the E ratings on them and the product box.
i used the Securicon Bolts which came in the pack which had the 8.8 grade steel needed. i secured them to the standard mini wholes on the door pillar sill and next to the hand brake. this passed the inspectors test.
The gear knob from zcars in my kit was a torpedo style billet alloy one glued to the gear stick. this is to sharp and was replaced by an aftermarket plastic / leather effort.
Exhaust
at the time of writing this i had to pass 99Db at 3/4 peak power of the engine, static.
The tail pipe needs to be beaded so its not sharp following the radius rules.
Has to have a Cat and at least one silencer.
Engine
Must be able to pass the emissions tests based on the engine year,
Tuned to pass an idle test and fast idle test, not to over heat during the tests static without a fan assistance on the rad or engine bay. it takes about 15 to 30 mins for this test.
Engine Bay
The engine bay of a zcars mini has bugger all ventilation due to where it is, my one started melting the boot lid paint during the emissions tests and was failed because of it. this needs vents in the boot and or a fan to help expel the very hot air. this is only a problem when the car is stationary.
Fuelling
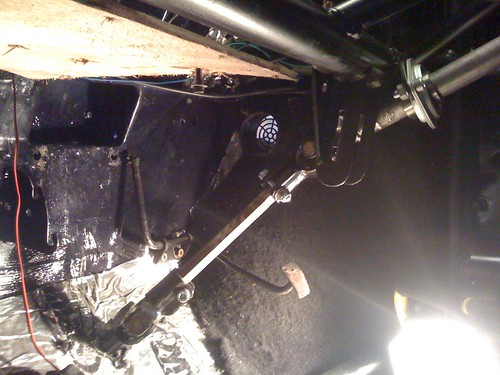
Every pump, tank, filter, Pipe and T-Piece needs bolting to the car every 10 - 15 cm.
The fuel pipes need to have manufacturer labels on them to guarantee that they are fit for purpose.
The tank needs to not leak and be securely mounted.
The fuel tank filler cap needs to be either tethered to the car (i used an old mini boot lid stay wire) or lockable where the key is stuck in the cap until its back on the car.
The Fuel tank needs to be mounted where if you were in a crash nothing sharp would puncture the tank. so the battery is not good under the radiator. equally the via man said that the heat from the radiator is enough of a problem and needs a shield / metal ducting securing to the front of the tank to act as a safety barrier from the heat of the radiator blowing on it.
every single whole on where a pipe passes through needs a grommet.
Electrics
Needs to have a working horn that stays the same tone for 30 secs or so.
Every wire needs bolting to the car every 10 - 15 cm.
Mount the battery in the cabin behind the drivers seat, not it the front with the fuel tank. (i failed on this)
Spiral wrap all wires and or use electrical loom tape to cover all wires.
Digidash have a free firmware upgrade for the Digidash lite which allows you to put the dash into "road" mode which complies with the new standard of always showing the speed rating from the moment you turn the key. i had the old firmware which warned about things like fuel level alert over the top of the speed. (you need to send it to them)
Protect the wires on the boot lid for the lit number plate and around the exhaust with protective heat wrap / sleeves.
every single whole on where a wire passes through needs a grommet.
Steering
Needs to have many safety features,
Lower half needs Sliding clamps with universal joints.
Upper have needs to collapse if you were to hit it. Zcars do a kit that you weld in that has sliding bearings in the upper segment which would work fantastic but you need to have a mechanical steering lock. I bought a ford fiesta column and stole the indicator stalks / key and steering lock mechanism from it which unfortunately stopped the sliding bearings working as the assembly needed bracing for the lock to function. This can be rectified (so im told by VOSA) with an aftermarket steering wheel boss with a collapsable element to it. i found that Momo did one for the fiesta column end.
The problem then is that the steering wheel itself needs to be safety. finding an aftermarket steering wheel that has a soft rounded centre and spokes is nearly impossible. remember you have to pass the radius rules with this.
i have bought some leather and am going to make a padded centre which is taught over the spokes and boss mounting screws to lessen the sharp edges.
i am going to use a Momo competition steering wheel as the grip is not solid and has a good radius.
Remember that the steering wheel, if enormous, can provide some good dash exempt areas.
needs to be very securely mounted to the car so that it wont even with human arm force move side to side or up and down.
Brakes
The pedals need to be covered in rubber or self adhesive grippy tape, again car builder solutions helped with this.
Needs to be a Front / back split system.
they prefer copper pipes with flexible points for the suspension parts.
Every Pipe and T-Piece needs bolting to the car every 10 - 15 cm.
The flexible pipes need to have manufacturer labels on them - like speedflow to guarantee that they are fit for purpose. This includes the reservoir to master cylinder pipes, they need to be able see what they are made from and if they are suitable for holding brake fluid.
must not leak.
Need to have a Brake Symbol on the reservoirs so that numpties don't fill it with anything other than brake fluid.
Needs to have a brake line pressure driven brake light switch which operate with the engine off.
every single whole on where a pipe passes through needs a grommet.
The balance bar for the brakes needs the threads welding up along the bar so it can never be adjusted.
Lights
Every light needs to adhere to the min / max height of the regulations. for a mini this was all ok if you jack the suspension as high as it will go so thats its on tip toes.
the Fog light location needs moving above the bumper line even with the suspension high. the fog light needs to be mounted exactly vertical. (i failed on this)
All Lights and Lenses need to have 'E' rating on them.
Suspension
Jack it up as high as it will go!
secure every lock nut.
the setup must be able to self centre the steering when driving slowly.
IVA manuals etc
http://www.flickr.com/photos/al_reidy/
Edited by al_reidy, 04 August 2010 - 09:33 PM.