Jump to content


Photo
- - - - -

Alfred Rebuild 1 And 2


  • Please log in to reply
34 replies to this topic

#1 ianjobber87

ianjobber87

    Passed Test

  • Noobies
  • PipPip
  • 30 posts

Posted 27 November 2009 - 09:28 PM

This is what Alfred first looked like when i got him. He was a 1988 City E automatic. I got him in 2002 when i was 15.

Posted Image

This is him starting to be stripped down.

Posted Image

Me and dad building up the rear subframe.

Posted Image

Then we cut the front end off.

Posted Image

All new front end panels fitted

Posted Image

His first primer, this picture made me want to get him finished even more.

Posted Image

After lots of prep work the final coat was put on.

Posted Image

Then we dropped in the rebuilt 1100 engine.

Posted Image

Carried on fitting him up which seemed to take ages.

Posted Image

Final tune up and MOT.

Posted Image

Then it was on the road YAY!!!!!!

Posted Image

Drove him around like this for about 2 years.

#2 ianjobber87

ianjobber87

    Passed Test

  • Noobies
  • PipPip
  • 30 posts

Posted 27 November 2009 - 09:43 PM

It all looks so quick when I read through but in reality it has taken about 7 years of my life and a lot of my money to get it this far.

My dad and I did all of the rebuild ourselves (apart from some of the wiring which a mate did for a tenner!)

Unfortunately dad died about two years ago and to be honest I couldn't really face working on it or driving it without him around so I left it around the back of our house and went of to uni and neglected it really. Aside form a half hearted attempt to get him going again one summer (which was thwarted by a mysterious misfire!) He really was left to go rusty (which thankfully he hasn't).

But I've now decided to have a go at resurrecting him.

First off I saw the advert for this:

Posted Image

and had a great idea, so now the plan is to rebuild him back up to the standard he was before, but now I'm 22 and insurance is not quite as mad, a lot faster!

Edited by ianjobber87, 28 November 2009 - 12:05 PM.


#3 Alex_grease_monkey

Alex_grease_monkey

    Mini Mad

  • Members
  • PipPipPipPip
  • 185 posts

Posted 28 November 2009 - 01:06 AM

sounds great man really greaat job you have done!

sorry to hear about your dad, hopefully a fast monster mini will help memories of working on it going!

#4 briain

briain

    On The Road

  • Noobies
  • PipPip
  • 40 posts

Posted 28 November 2009 - 08:18 AM

Posted Image


What engine is that. Looks like a supercharger on it?

#5 Lot

Lot

    On The Road

  • Noobies
  • PipPip
  • 42 posts

Posted 28 November 2009 - 08:35 AM

It's a BMW 'K' motorcycle cylinder head.

#6 briain

briain

    On The Road

  • Noobies
  • PipPip
  • 40 posts

Posted 28 November 2009 - 09:21 AM

It's a BMW 'K' motorcycle cylinder head.


Oh right didn't realize the conversion meant switching to timing belts

#7 LuckyThe1275

LuckyThe1275

    Mini Mad

  • Members
  • PipPipPipPip
  • 258 posts
  • Location: Berkshire/Oxfordshire
  • Local Club: Not yet part of one!

Posted 29 November 2009 - 01:24 AM

I'm sorry to hear about your Dad. I hope you get it back to it's former glory, and better! It was gorgeous, love the all black, and deep dish alloys!

Good luck with it, that's a lovely engine too! :)

Edited by Baines93, 29 November 2009 - 01:25 AM.


#8 ianjobber87

ianjobber87

    Passed Test

  • Noobies
  • PipPip
  • 30 posts

Posted 29 November 2009 - 02:43 PM

Thanks for all the encouragement guys! I'm hoping it shouldn't take too much time for some progress to be made and I can go to a few shows in it in the summer- but we shall see!


Thanks,

Ian

#9 LuckyThe1275

LuckyThe1275

    Mini Mad

  • Members
  • PipPipPipPip
  • 258 posts
  • Location: Berkshire/Oxfordshire
  • Local Club: Not yet part of one!

Posted 21 December 2009 - 12:58 PM

Much progress in the cold weather?

#10 ianjobber87

ianjobber87

    Passed Test

  • Noobies
  • PipPip
  • 30 posts

Posted 21 December 2009 - 08:53 PM

Hi ya,

I managed to brave it today! But you know your fighting a losing battle when the paint wont dry!

Just cleaned up the engine bay a bit and painted inside the boot. Did lots of tidying and sorting out....trying to move around to keep warm!

Gotta go and get some lifting straps for the engine hoist tomorrow (due to the lack of lifting points on the new engine) and ill hopefully have it in soon.

Also my minisport alloy four pot kit turned up today! Which I wasnt expecting to after christmas. so its all good.

I'll try and get some pictures up soon too.

Thanks for looking


Ian

#11 george91

george91

    One Carb Or Two?

  • Members
  • PipPipPipPipPipPipPip
  • 883 posts
  • Location: Devon

Posted 22 December 2009 - 12:46 AM

Great car you and your dad built, the end result was really nice, and that new engine will be sweet. Also glad you decided to keep it and look after it, no doubt it brings back some good memories, good luck with it, and post some new pictures for us please. George :lol:

#12 ianjobber87

ianjobber87

    Passed Test

  • Noobies
  • PipPip
  • 30 posts

Posted 22 December 2009 - 07:05 PM

Hi all,

So.... last weekend I decided that the engine needed to come out..... this is how it started

Posted Image

And by the end of sat....

Posted Image

Posted Image

Posted Image

Maybe silver wasn't the best idea to paint the engine!... the subframe looks rusty in this picture too but its just from the cooling system when i drained it and its cleaned up well today.

Also today my parcels turned up from both minispares...

Posted Image

(My nice and shiny alloy rad and a few rubber grommets etc)

And from minisport....

Posted Image

(minisport alloy four pot kit, new master cylinder, grille buttons and a free hoody)

This was the biggest surprise as I had been told not to expect it untill the new year!

So thats it for now. I did a bit of painting and cleaning today but i don't think it will come out that well due to the fact its taken two days to dry!!

I'm gonna try and get the engine in at some point this week, but it depends on how long my helper has to work tomorrow...lol

Forgot to mention that the engine came with all the extra bits, so really its a kit! But it does mean I need to run another fuel line for the fuel injection and fit up the all the other bits once the engine is in.

Thanks for looking,

Ian

#13 LuckyThe1275

LuckyThe1275

    Mini Mad

  • Members
  • PipPipPipPip
  • 258 posts
  • Location: Berkshire/Oxfordshire
  • Local Club: Not yet part of one!

Posted 22 December 2009 - 07:50 PM

Looks similar to my next order!

What discs are those? 8.4's? I need 8.4's, that my drive flanges will fit onto if possible. Saw some vented and grooved ones on there, about £70-80 for the pair IIRC, but if my drive flanges don't fit, ones that fit will be another £60 a pair... No idea what my disc setup is though... Metro or aftermarket.

Also need pads, but for AP calipers that came on mine...

Matt

#14 ianjobber87

ianjobber87

    Passed Test

  • Noobies
  • PipPip
  • 30 posts

Posted 22 December 2009 - 08:41 PM

hi ya,

Yes there 8.4" vented discs and I'm assured that they should fit as it had standard (non vented 8.4"s) on before.

I've got a mate who has the standard solid discs on with grooved discs and and mintex pads and he reckons I've gone over the top with my brakes!

What have you got at the min then drums or discs?

Time will tell if they fit or not!


Thanks,

Ian

#15 ianjobber87

ianjobber87

    Passed Test

  • Noobies
  • PipPip
  • 30 posts

Posted 29 December 2009 - 04:05 PM

hi,

So time for a another update...

Once I got the engine out I spent a bit of time cleaning up the engine bay, undersealing the passenger side floorpan, stripping down the old engine to move it about of the way and generally tidying up, all very boring jobs but they needed to be done!

Once I'd done that I got my mate adam to come round and help me lift the engine in. I was particularly nervous about this bit!! As the head is of a different design I had to think of a new way to lift it into the engine bay, in the end we used a tow rope and a ratchet strap as back up! after alot of swearing and wiggling we ended up with this:

Posted Image

I was just relieved to get in without dropping it to be honest and we left it at that for the night.

The next day I went out and fitted the exhaust manifold, which meant taking out the pot joint to get enough room for the big bore pipes, but atleast now its on!

Posted Image

Posted Image

Once we had that done it was just a case of painting up the hubs and cleaning the driveshafts up, as I wanted to get it back on four wheels so I could move it about. Didn't go too bad and the only problems were waiting for the paint to dry and two top baljoints needing renewing before it goes back on the road. :thumbsup:

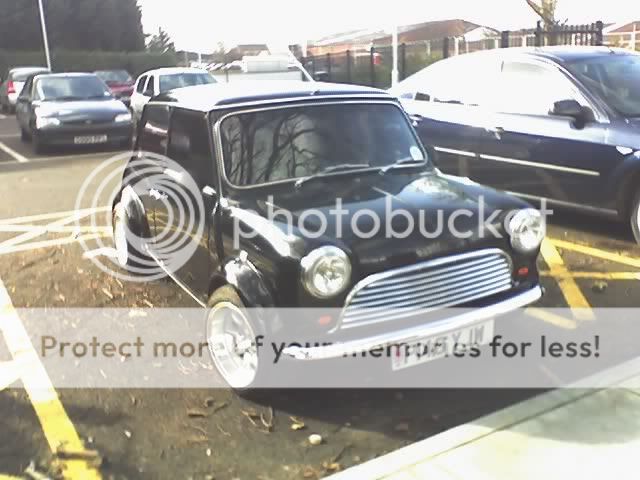
A few pictures of how it looks back on its wheels:

Posted Image

Posted Image

As you can see from the pictures I've now fitted the starter motor (not wired up yet as I've gotta convert it), the throttle bodies, the coil pack and a few other bits and bobs.

Today I started messing about with the radiator and cooling system. Before I started building the car a decided on a nice shiny alloy rad. And so far its being a complete pain in the backside! I've had to cut a bit of the car off to get it in and the bracket I had to replace the top rad bracket (the one that bolts to the head as standard) doesn't fit over the new rad as its bigger, so I'm gonna have to make a new one of those now! >_< However it does look great! :thumbsup:

Posted Image

A few more pictures that I've taken...

Shiny throttle bodies and ram pipes

Posted Image

Cambelt and bottom hose

Posted Image

Trigger wheel and rad clearance

Posted Image


Thanks for looking,

Ian

Edited by ianjobber87, 29 December 2009 - 04:07 PM.


1 user(s) are reading this topic

0 members, 1 guests, 0 anonymous users