Jump to content


Photo
- - - - -

Project - 1380gt


  • Please log in to reply
29 replies to this topic

#1 dangregory007

dangregory007

    Stage One Kit Fitted

  • Noobies
  • PipPipPip
  • 64 posts

Posted 04 December 2009 - 10:12 PM

HI!
Posted Image
(I don't really have one big freaky eye!)


So I thought its finally time I started a project thread.
I've been working on my Clubman for the last year or so, but didn't really have a lot to show for it up until now.

Firstly, heres my planned finished spec:

Body
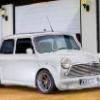
Clubman with Zeemax bodykit (the old style one), painted Spectra Blue Mica
Angel eye headlights
Clear rear lenses
13x7 Superlites
Shaved door handles
Some kind of keyless entry system
Silver grill (with the GT badge)

Engine
1380 A+, built very similar to the one in the Minifilms 1380 engine builder DVD
Worked Cooper head
Standard gearbox

Suspension/brakes etc
New brake lines + braided lines
Drilled/slotted front discs with greenstuff pads
Maybe twin tanks (if I can find a right hand tank for a reasonable price!)
Powdercoated subframes
Fully rebuilt suspension with mostly new parts
Minitastic fast road spring kit with hi-los
GAZ adjustable dampers
Solid front subframe mounts
Standard rear mounts

Interior
Leather front seats
Originaly fibreglass dash, not a standard aftermarket one
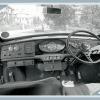
'New' gauges, classic Smiths set with the dual temp/pres gauge

ICE/Security
SMS paging alarm
Optima battery
Uprated alternator
Fully redesigned wiring system
Aircraft circuit breakers and aircraft annunciator system to replace fuses and dash lights (I'm a pilot, hence the aircraft bits!)
Alpine headunit - one of the ones made for the iPhone
Alpine MRD605 amp - 675WRMS
Alpine FRV-545 (I think thats the model from memory) 175WRMSx4 - seriously, thats from the test card!
2xAlpine 10" DVC Type R subs
Alpine 6x9 Type R in the rear sides
Alpine 6" Type R in the doors
This is a 2 seater ICE mobile! The subs and amps will be built into the rear seat area

Probably heaps of other things, but those are the main bits that come to mind at the mo


So anyway, on with the progress.....

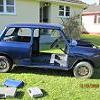
I originally bought a non running 1978 1275GT for NZ$1000 (I'm in New Zealand by the way!)

Posted Image

I wasn't too concerned that it wasn't running, as I was planning to rebuild it all from scratch anyway, I just needed a basic starting point. As a bonus is came with a DHLA40 Dellorto carb which is worth a few hundred bucks by itself, sweet!

The body was advertised as being 'rust free and fully prepped ready to paint'. But as with most things this wasn't completely true. It had rust in the passenger side floor and around the bonnet sill. The engine bay had a bit of rust as well, and the primer looked a bit shady.

I started by stripping it back to a bare shell which took a fair amount of time and garage space. I sent the subframes off the get sandblasted and powdercoated, the front was in good nick but the rear one had some rust which wasn't ideal. Managed to get a few more rear frames and came across a good one eventually - back to the powdercoaters!

Posted Image
Posted Image

I hadn't started on the body repairs yet, which was lucky, as I came across a mint shell on TradeMe (like Ebay, but way more popular over here) for only $400. The owner had spent 4 years working on it, had primered it all, and said it had absolutely no rust at all - he just didn't have time to finish it. So I grabbed a mates ute and headed across country to pick it up. Much to my surprise it was perfect! Not a single speck of rust, and a bargain price.

So that shell came home with me, and the old one was sold off on TradeMe, saving me a lot of work! Heres the shell as I bought it - complete with doors, bonnet, and a bonnet scoop! He'd sprayed a 'guidecoat' to sand the thing smooth, but it was a pretty damn thick guide coat! Also the roof and a few bits were an ugly crimson color, so that had to come off. Unfortunately I'll be using Acrylic Lacquer, and these bits were Enamel so I couldn't just spray over the top (the 2 types aren't compatible)

Posted Image

I put the shell on a small trolley, made it nice n easy to move around!

Posted Image

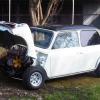
Those seats are from an MR2 which I'd planned on using, until I got some muuuch better ones, as I'll show in a later post.
Thats all for now, I'll get some more photos on later with more info on what I've done so far

#2 zbc

zbc

    On The Road

  • Noobies
  • PipPip
  • 40 posts

Posted 05 December 2009 - 09:28 PM

Looks like its going to be a great little project. Where are you sourcing your parts from? I also live in NZ and so far have been getting parts from the US and GB.

With the NZ dollar being so high its really cost effecitve to get parts from overseas rather than buy from NZ, even with postage.

#3 dangregory007

dangregory007

    Stage One Kit Fitted

  • Noobies
  • PipPipPip
  • 64 posts

Posted 06 December 2009 - 06:45 AM

Looks like its going to be a great little project. Where are you sourcing your parts from? I also live in NZ and so far have been getting parts from the US and GB.

With the NZ dollar being so high its really cost effecitve to get parts from overseas rather than buy from NZ, even with postage.


Oh true, wherebouts in NZ? I'm down in Ohakea (Palmy area). Yeah I get the majority of my bits from Minisport and Minispares in the UK. The only thing I've really bought from here in NZ (other than TradeMe stuff) is my bodykit which I got from Minibitz in Auckland. Yeah shipping is a killer but isn't too bad if you do big orders (although Customs ring you to get GST sometimes!)

#4 zbc

zbc

    On The Road

  • Noobies
  • PipPip
  • 40 posts

Posted 06 December 2009 - 07:48 AM

I am in Rotorua. I restored a vespa earlier on the year and I got stung a couple of times for GST so I try and keep my orders under 5 hundee. Anyway, I dont want to hijack your rebuild thread!

#5 monster_mini

monster_mini

    One Carb Or Two?

  • Traders
  • PipPipPipPipPipPipPip
  • 981 posts
  • Location: Nottingham

Posted 06 December 2009 - 01:51 PM

looks like a good prodject:) hope it goes well:)

#6 carboy001

carboy001

    One Carb Or Two?

  • TMF+ Member
  • PipPipPipPipPipPipPip
  • 1,065 posts

Posted 06 December 2009 - 02:23 PM

Sounds like a good rebuild, can't beat getting a mint shell to work on :xxx:

Look forward to the other posts, how long ago was the work you've posted so far?

#7 captainjack15

captainjack15

    Up Into Fourth

  • Banned
  • PipPipPipPipPipPipPipPipPip
  • 3,925 posts
  • Local Club: Somerset Rusteez

Posted 06 December 2009 - 02:39 PM

Looks good mate!!

First picture was a tad scary!! :xxx:

#8 Mini-Mad-Craig

Mini-Mad-Craig

    Crazy About Metro's

  • Members
  • PipPipPipPipPipPipPipPipPipPip
  • 9,298 posts
  • Location: Travelling in a fried out Kombi

Posted 06 December 2009 - 02:41 PM

Excellent :xxx:

#9 dangregory007

dangregory007

    Stage One Kit Fitted

  • Noobies
  • PipPipPip
  • 64 posts

Posted 23 December 2009 - 08:48 AM

Well I was planning on writing about all the stuff I've done in the past up to this point, but I never find the time, so I'll just post where I'm at now and what I've done in the last few days/weeks!

So my shell is fully painted now! All done in Spectra Blue Mica which is a Lexus/Toyota color. Looks awesome in the sun, it took me ages to decide on a color I liked, so after much Google-ing and looking around town and in car yards I settled on this color and I'm stoked with it. It looks pretty good in the photos, but will look amazing when I've sanded it flat and buffed it up. I'm kinda putting that job off because its time consuming and boring, but I really need to get on with it so I can put the doors on, windows in etc to keep the weather out of the inside!

Posted Image

Posted Image

Posted Image

Posted Image

Posted Image

I'm planning a big sound install in the back with no seats, so I've cut out the door bins and the overhang of the rear seats to make a little more space as these bits aren't structural

Posted Image

Plasma cutter - awesome :D

Posted Image

For the doors I'm doing the shaved handles deal, where they're opened by solenoids, activated by an infrared transceiver system. I cut out the part of the door where it dips in for the handle, then cut a piece of scrap metal to fit the hole. Welded that in then used body filler over the top.

Posted Image

Posted Image

I don't have a picture of it all sanded smooth unfortunately, but as you can see in this picture of the door painted, it worked well :thumbsup:

Posted Image

Front suspension bits all ready to go on!

Posted Image

So, list of what I've got here:
Sandblasted/powder coated subframe
Top suspension arms cleaned up, painted, new shafts
New lower suspension pins
New balljoints
New rebound rubbers, bump stops
New lower suspension arm pins
Poly tie rod bushes
New lower suspension arm bushes
Solid front subframe mounting kit (front, rear, tower)
Heavy duty adjustable tie rods
Heavy duty adjustable camber arms
Braided brake hoses
Minitastic fast road spring kit
Gaz adjustable shocks
Driveshafts cleaned up, painted
CVs cleaned, regreased
New drilled, slotted discs
New brake pistons
Greenstuff brake pads
New wheel bearings
Nice red painted brake calipers :)
And of course all the nuts, bolts etc are new.

Cost - no freak'n idea! I had originally planned to record every cent I spent on this project for interests sake, but gave up after a week, probably better not to know :lol:

Heres one side all put together

Posted Image

The rear suspension was a bit of a mission, mainly because I've never put one together before, and disassembled this one over a year ago and took limited photos! Wasn't helped by the fact that the Minisport adjustable camber/tracking brackets don't seem to fit with the larger front trunnion mounts as used on later cars. So in the end I swapped them with the smaller ones on the back and they seem to fit fine. I'm assuming that since older models had these smaller mounts on the front then it should be ok (although I guess theres a reason they changed them!)
Everything is either new or refurbished as per the front suspension

Posted Image

So then it was time to actually fit the subframes. This was made especially hard by the fact that the body shell is sitting on a little trolley, which I needed to move onto 4 axle stands, then manoeuvre the subframes underneath, lower the body onto them, the bolt them on.....by myself :thumbsup:
Took a good 2 days on and off to get it fully sorted. The front wasn't *too* hard to do, just a lot of work raising and lowering axle stands one by one, while boosting the car up with my shoulder in the wheel arch etc. Forgot to put the front teardrop mounts in so had an interesting time getting those in!

The rear took a long time, as the holes didn't *quite* line up on the front mounts, but with a few hours of messing around I managed to get there in the end, although I had to pull one side of the suspension apart to get at a bolt I hadn't tightened!

Posted Image

But I got there in the end!!!

Posted Image

Don't have the 13x7 Minilites yet so it looks a little plain, probably get them in a month or so, no real rush :)

My current job (other than slowly sanding everything smooth) is making some brackets to fit my seats. I got a pair of *heated* leather seats out of a Peugeot to go in :) They look awesome and are real comfy, although they're quite big. A few bits of stitching have come apart but no rips, so I'll get them fixed up, also dyed black. Heres a picture of them I took when I first got them. Doesn't show the fit very well, but you get the idea

Posted Image

I spent today making these hugely over-engineered seat subframes, but didn't take a picture, doh! Took quite a while getting them so the seats were in just the right place, as I want to conserve as much of the rear space as possible, but obviously they have to be comfortable! I've found out that the steering column is really long...seems strange! I'm gonna take it to an engineering place and see if I can get it cut down by 15cm, which will give me a bit more room. I'm rebuilding the whole dash from scratch so won't be using the column shroud etc.

I got a sweet Mountney 4 spoke steering wheel off Ebay, so can't wait for that to arrive! Been looking everywhere and no one sells them new anymore, so was stoked to find a good one :)

So thats where I'm up to as of today! I've done various other bits and pieces, but I'll write about them when they go on the car. Hopefully now I'm caught up I'll keep this thread up to date :)

I'm off on holiday tomorrow, so will post more in the new year

Merry Christmas, and Happy New Year!

Edited by dangregory007, 23 December 2009 - 09:02 AM.


#10 zbc

zbc

    On The Road

  • Noobies
  • PipPip
  • 40 posts

Posted 26 December 2009 - 01:04 AM

Looking good, that colour is great.

I like the use of the guitar amp when fitting the radius arms. lol

Oh by the way - did you buy a lot of mini bits from a guy in Waiouru a few years ago? He mentioned that he sold a few bits to a person who was a pilot is all.

#11 dangregory007

dangregory007

    Stage One Kit Fitted

  • Noobies
  • PipPipPip
  • 64 posts

Posted 26 December 2009 - 03:06 AM

Looking good, that colour is great.

I like the use of the guitar amp when fitting the radius arms. lol

Oh by the way - did you buy a lot of mini bits from a guy in Waiouru a few years ago? He mentioned that he sold a few bits to a person who was a pilot is all.


Haha yeah that amp gets a hard time - its usually my stool, but has been pretty useful as a slightly lower axle stand lately! No wasn't me, but a mate of mine was into mini's a few years ago (pilot also) so may have been him.

#12 tcw_lk

tcw_lk

    Passed Test

  • Noobies
  • PipPip
  • 33 posts
  • Local Club: Mighty Mini Club of Sri Lanka

Posted 17 April 2010 - 07:01 PM

good start
great stuff
pls keep us updated :)

#13 zbc

zbc

    On The Road

  • Noobies
  • PipPip
  • 40 posts

Posted 25 April 2010 - 07:36 AM

I didn't actually know Dangregory007, but today I believe he was killed in a helicopter crash as he was flying to an ANZAC ceremony here in New Zealand.

http://www.nzherald....jectid=10640806

I don't know if it is my place to inform anyone here, my thoughts are with his family for the loss of their son/husband/friend.

Edited by zbc, 25 April 2010 - 07:36 AM.


#14 Pitcrew6464

Pitcrew6464

    Camshaft & Stage Two Head

  • Members
  • PipPipPipPipPipPipPipPip
  • 1,673 posts
  • Location: uk
  • Local Club: mini 7 racing club

Posted 25 April 2010 - 08:12 AM

My thoughts his family and friends, RIP Daniel.

#15 Paul Wiginton

Paul Wiginton

    Camshaft & Stage Two Head

  • Members
  • PipPipPipPipPipPipPipPip
  • 1,585 posts
  • Location: at home

Posted 25 April 2010 - 09:09 AM

What aweful news RIP


1 user(s) are reading this topic

0 members, 1 guests, 0 anonymous users