Jump to content


Photo
- - - - -

My Project Mini Mayfair (pearl)


  • Please log in to reply
58 replies to this topic

#1 mini_mad_andy

mini_mad_andy

    Stage One Kit Fitted

  • Noobies
  • PipPipPip
  • 56 posts

Posted 02 January 2010 - 10:01 PM

Hey all,

I've been watching alot of your projects on here just lately, and has inspired me to crack o with my mini that I've had locked away in my garage where I done much less then I had originally planned.

Posted Image


I have owned my mini since I was 17, so five years now. I brought it as a very solid standard mini with only two previous owners, and only 21000 miles on th clock. I spent the first two weeks after passing my driving test finishing off the respray in my neigbours garage. Due to my lack of funding I had to use filler and fiberglass to plug the holes the infamous rust had created.

The car ran really well for a year untill I blew the 998 up. That prompted me to finish the 1330 engine off I had started, and get it in. The engine from the build seemed a bit tight at the start, but soon freeded up, and gave alot of cars a good run for their money. It was running so well that it destroyed an unltimate engine steady, and in turn the standard steady.

Posted Image

It was at this point I decided to take the car off the road and attend to all the rust, replacing it with fresh metal rather than fibreglass! This was a year ago, and have got as far as stipping it down to a shell in a year! I've been intending to do alot more than I have, but unfortunatly things don't always work out to the plan.

So as my new years resolution I have decided to make sure I do much more to the mini, and hopefully back on the road as soon as possible.

So heres the work I 've done over the past year.

The boot, which has a small patch in the corner, this needs adressing, plus rust along the back.
Posted Image

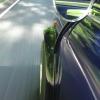
Hole from rust on the rear.
Posted Image

The front cut off because of the rust, to be replaced with an all steel flip front. I forgot to take photos of before.
Posted Image

Loom ripped out.
Posted Image

Scuttle off. Engie out
Posted Image

Front end mocked up.
Posted Image

Drivers floor, again with an MOT patch, and passengers with small hole.
Posted ImagePosted Image

Rotten Flitch panel.
Posted Image

Subframe off and stripped.
Posted Image

Front suspension stripped and cleaned.
Posted Image

Rust on sill.
Posted Image

So thats all i managed to do, up untill about two months ago.

As you can tell fro the photos, all in all, its a decent shell, but I want to do everything right, so I can get manymore years driving out of it.

I'll update more later on what I've been doing over the past month.

Andy.

#2 mini_mad_andy

mini_mad_andy

    Stage One Kit Fitted

  • Noobies
  • PipPipPip
  • 56 posts

Posted 04 January 2010 - 12:42 PM

I found some photos of before I attacked the car with the angle grinder!


Attached File  P2190396.JPG   49.77K   11 downloads

Attached File  P2190395.JPG   38.55K   11 downloads

#3 mini_mad_andy

mini_mad_andy

    Stage One Kit Fitted

  • Noobies
  • PipPipPip
  • 56 posts

Posted 04 January 2010 - 12:49 PM

Front End rust and Scuttle rust

Attached File  P2190397.JPG   39.48K   6 downloadsAttached File  P2190398.JPG   36.07K   5 downloads


3/4 panel rust and back end

Attached File  P2190399.JPG   34.68K   7 downloadsAttached File  P2190400.JPG   35.34K   8 downloads


The damage caused by the engine ripping the Ultimate engine steady.

Attached File  P2190405.JPG   40.06K   17 downloads

#4 ross k

ross k

    Speeding Along Now

  • Traders
  • PipPipPipPipPip
  • 498 posts

Posted 04 January 2010 - 04:26 PM

heya mate for the front did you use genuine panels and did you find the panels were ok with good shuts etc thanks ross

#5 mini_mad_andy

mini_mad_andy

    Stage One Kit Fitted

  • Noobies
  • PipPipPip
  • 56 posts

Posted 04 January 2010 - 04:34 PM

heya mate for the front did you use genuine panels and did you find the panels were ok with good shuts etc thanks ross


Hi Ross,

Yeh I'm using geniune panels, but will be using them as a flip front, so I wanted the thicker panels to keep it stiff.

The panels fit a treat, fits perfectly evrywhere. I would definetly spend the extra cause its well worth it! I brought spurious A panels, but the shape and size was all wrong, so I ended up buying genuines, and the quality difference is amazing!
Any.

#6 minimuff

minimuff

    Stage One Kit Fitted

  • Noobies
  • PipPipPip
  • 70 posts

Posted 04 January 2010 - 05:16 PM

Great photos. Nice work. Looking forward to more pictures.

Not a bad project car.

#7 mini_mad_andy

mini_mad_andy

    Stage One Kit Fitted

  • Noobies
  • PipPipPip
  • 56 posts

Posted 04 January 2010 - 06:01 PM

Ok, so as promissed an update on what I've been doing recently,

I've repaired the wiring loom, and added a socket to connect the lights up on the flip front.

I've stripped the subframe down so I can repair the rust on it.
Posted Image

The bits I've cut out.
Posted ImagePosted Image
Posted Image

I'm just waiting for some resh metal to weld into it.

Next was the radius arms.
Posted Image

I was hoping the radius arms were gonna be ok as I've had no trouble wit them so far, but sods law,
Posted Image

SO with the help from another engineer from work, we replaced the radius pivots,
Posted Image
The nackered needle bearing
Posted ImagePosted Image

Thats it for now, I'll update more later.
Andy.

#8 mini_mad_andy

mini_mad_andy

    Stage One Kit Fitted

  • Noobies
  • PipPipPip
  • 56 posts

Posted 10 January 2010 - 01:41 PM

Hey all,

I was hopng to get more done since creating this thread, but sods law, I pulled my back playing rugby!

This is some other stuff of what I've done to the mini.

This caused some real bother, more then I was expecting, and hoping.
Posted Image

Its the steering column bracket, with shear bolts, it was hard to get any tool in to cut them out, but managed it finally with my cut off tool, and a fair bit of patience.
Posted Image

I've also got the flip front hinges on, aswell as the brace bars.
Posted Image

Also been cleaning the pedal box, and other ancillaries ready for paint.
Posted Image
Posted Image
Posted Image


Does any one know where I can get spray hammerite from? I've been to halfords, but they havent got any!

Cheers, Andy.

#9 Mini-Mad-Craig

Mini-Mad-Craig

    Crazy About Metro's

  • Members
  • PipPipPipPipPipPipPipPipPipPip
  • 9,298 posts
  • Location: Travelling in a fried out Kombi

Posted 10 January 2010 - 02:12 PM

Excellent work :-

#10 mini_mad_andy

mini_mad_andy

    Stage One Kit Fitted

  • Noobies
  • PipPipPip
  • 56 posts

Posted 10 January 2010 - 05:37 PM

Cheers mate, I wish I could get some more done, but most of the jobs I want to will involve paint in some way, and its just way too cold to be painting. I don't want bloomed paint all over the show.

I suppose I should let you all know what my plan is for the mini.

Well, my elder brother keeps givin me stick about keeping my mini rather than gettin a quicker car, so firstly, I want to be competitive with his car, only trouble is, his is a Ford Focus RS, so I'm gonna have to have a good spec engine, and suspension.

So for the engine I'm keeping the 1330, but will be running at higher pressure,
duplex timing gear,
hif 44 carb,
polished 12g940 head, later upgraded to stage 3/4
and lightened and balanced flywheel

For the suspension, I'm planning,
1.5-2 degree negative camber
lowered all round
stiffened with gaz adjustables.

Hopefully with the above spec, I should be competitive with him around a track. What do you all think about my, perhapse over ambitious, plans?

Cheers all, Andy.

#11 mini_mad_andy

mini_mad_andy

    Stage One Kit Fitted

  • Noobies
  • PipPipPip
  • 56 posts

Posted 08 February 2010 - 01:21 PM

Wow, only page 7. I was expecting worse.

Just a quick update, I haven't really done much cause of various reasons, but I have managed to get the original inner wing/flitch panel off, repaired the shock mounting area, and have started on the drivers side repair.

Attached File  Image0372.jpg   508.9K   9 downloadsAttached File  Image0373.jpg   362.56K   5 downloads
Attached File  Image0374.jpg   277.07K   8 downloadsAttached File  Image0375.jpg   302.45K   7 downloads
Attached File  Image0376.jpg   298.06K   5 downloads

#12 mini_mad_andy

mini_mad_andy

    Stage One Kit Fitted

  • Noobies
  • PipPipPip
  • 56 posts

Posted 15 October 2010 - 05:51 AM

Hey all,

Finally pulled my finger out and got to the garage at last!!!

I have finished repairing the driver side floor pan, and welded in the inner wing/flitch panel.

Attached File  IMG_0244.jpg   1.33MB   7 downloadsAttached File  IMG_0246.jpg   1.32MB   6 downloads

Also got round to tidying up the bulk head and got it into primer.

Attached File  IMG_0268.jpg   1.23MB   14 downloadsAttached File  IMG_0272.jpg   1.24MB   13 downloads

Feels good to have things moving again, its been doin my head in knowing its sitting there not doing anything!

I've got a date to get it all finished by now, which is June 11th 2011, as this is when i get married, and really want it in the photos!

Thanks for looking, Andy.

Edited by mini_mad_andy, 15 October 2010 - 07:15 AM.


#13 mini_mad_andy

mini_mad_andy

    Stage One Kit Fitted

  • Noobies
  • PipPipPip
  • 56 posts

Posted 23 October 2010 - 09:16 AM

Hey all,

Bit more progress. I have cleaned up, prepped, and primered the bottom half of the bulk head.

Sorry about the rubbish quality of pics;

Posted Image
Posted Image

Thanks for looking,

Andy.

#14 mini_mad_andy

mini_mad_andy

    Stage One Kit Fitted

  • Noobies
  • PipPipPip
  • 56 posts

Posted 27 October 2010 - 03:25 PM

Another update,

I have repaired two of three patches on the drivers side doorstep, and welded the inner scuttle (drives side).

I've also cleaned, and checked the steering rack ready for painting.

Pics;
Posted Image
Posted Image
Posted Image
Posted Image
Posted Image
Posted Image

Thanks for looking.

#15 Ash-g800

Ash-g800

    Mini Mad

  • Noobies
  • PipPipPipPip
  • 153 posts

Posted 27 October 2010 - 04:37 PM

look good mate keep up the good workk !!! how come its took u 5 years to make a start on it? keep me posted with the progress matey


1 user(s) are reading this topic

0 members, 1 guests, 0 anonymous users