Would you not be better removing the centre caps before painting?
When you have tyres fitted they will remove them, so if they have been painted on it could ruin the paint when they knock them off.
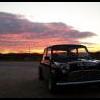

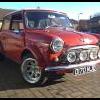
Maroon '70 Retro Rally Rep
Started by
Tim1970
, Jan 16 2010 12:46 AM
188 replies to this topic
#61

GraemeC
-

- TMF+ Member
-

- 7,467 posts
Crazy About Mini's
- Location: Carnforth
Posted 29 January 2010 - 09:48 AM
#62
Tim1970
-
- Members
-
- 394 posts
Speeding Along Now
Posted 29 January 2010 - 03:44 PM
Yep you're right
Only thought about it when i started priming them, Doh.
Been a bit slow lately i'm afraid.
Cheers Graeme
Only thought about it when i started priming them, Doh.
Been a bit slow lately i'm afraid.
Cheers Graeme
Edited by Tim1970, 30 January 2010 - 06:16 PM.
#63
RsSpyder
-
- Members
-
- 374 posts
Speeding Along Now
Posted 10 February 2010 - 07:52 AM
Any news? I'm interested to see what you do with the wheel arches - im in the exact same position with mine - the original arches have been cut to fit sportspacks, and now im trying to fit gp2s and need to reconstruct the arch. Any news on that would be interesting!
#64
Tim1970
-
- Members
-
- 394 posts
Speeding Along Now
Posted 10 February 2010 - 02:41 PM
Sorry for the lack of progress reports.
Past couple of weeks haven't really gone to plan.
Need my dad to help me out with the welding but he's been ill so i've been doing other jobs.
Mainly finishing fitting all of the front suspension driveshafts hubs and all that jazz.
As some of you may have seen the passenger side pot joint was being particularly subborn but after about a month of relentless trying it's now off and replaced so i now have all of the front components replaced.
Hub nuts need to be tightened then i can fit the pads and bleed the brakes.
Not much painting been happening due to the weather either to cold or wet.
However i've come up with a solution i'll get soe pictures of it in a bit.
So wheels are nearly ready for top coat which i'm pretty excited about.
Mixed up the OEW the other day it's going to look gorgeous.
Bonnet lip has been removed bit of filler to smooth ond old badge holes filled.
Need to pick up some drill bits for the new badge holes which i will pick up today as somehow all of the bits i had have gone walkabout.
Boot lid is marked up ready for drilling also waiting on drill bits
Just remembered i haven't even posted pictures up of that.
Will try and get some later
Now the arches i'm worrying about quite a bit i've got the steel cut for the fronts almost entirely ready to go.
The way i got the shaping was by drawing round the group 2 initially then drew round inside that line giving about 1 1/4" to give the face that the arch would mount on and room to form a new lip. I did this in two sections so an A panel repair and a wing repair, luckily the group 2 just about makes it onto the front panel nicely on mine so don't need any work there and still got clearance at the front. doing the repairs seperately means you can still have a seam in the usual place it also makes it a bit easier to get the shape of the arch. It is important to mark where the gap n the arch should be on your template so when you've cut it you know where the seam lip needs to be. I cut well wide of this first tomake sure that i had enough room even if i got the angle the seam heads off at wrong.
I left enough room to have at least the largest gap i could see between bodywork and where the group 2 needed to fit then sut these pieces out.
With them cut to the correct inside profile i then took the group 2 and placed it where it should fit on the body. It helps if you have three hands now as you need to to mark the A panel repair and the wing repair where they will meet te existing bodywork.
Best to do this after removing the lip on the body work. This should also give the line that the seam needs to followi left about 1/2" extra to the side of the line for the lip to give some extra incase i messed up this can be ground back after anyway.
Thats about where i am at now hopefully this weekend i'll get the repairs welded in place.
I will be taking it very slow doing small bits at a time to try and keep the heat down and minimize any warping.
That's the plan anyway. If i hadn't spent all of my money already i would have bought new panels that way the result would be a lot neater and actually less work in the long run but more painting. I'm hoping this will come out ok but expecting it to take a ton of work to get it looking right.
Hope that helps a bit would have been a lot better if i'd just taken pictures.
Will try to get you all some pictures to look at later.
Past couple of weeks haven't really gone to plan.
Need my dad to help me out with the welding but he's been ill so i've been doing other jobs.
Mainly finishing fitting all of the front suspension driveshafts hubs and all that jazz.
As some of you may have seen the passenger side pot joint was being particularly subborn but after about a month of relentless trying it's now off and replaced so i now have all of the front components replaced.
Hub nuts need to be tightened then i can fit the pads and bleed the brakes.
Not much painting been happening due to the weather either to cold or wet.
However i've come up with a solution i'll get soe pictures of it in a bit.
So wheels are nearly ready for top coat which i'm pretty excited about.
Mixed up the OEW the other day it's going to look gorgeous.
Bonnet lip has been removed bit of filler to smooth ond old badge holes filled.
Need to pick up some drill bits for the new badge holes which i will pick up today as somehow all of the bits i had have gone walkabout.
Boot lid is marked up ready for drilling also waiting on drill bits
Just remembered i haven't even posted pictures up of that.
Will try and get some later
Now the arches i'm worrying about quite a bit i've got the steel cut for the fronts almost entirely ready to go.
The way i got the shaping was by drawing round the group 2 initially then drew round inside that line giving about 1 1/4" to give the face that the arch would mount on and room to form a new lip. I did this in two sections so an A panel repair and a wing repair, luckily the group 2 just about makes it onto the front panel nicely on mine so don't need any work there and still got clearance at the front
. doing the repairs seperately means you can still have a seam in the usual place it also makes it a bit easier to get the shape of the arch. It is important to mark where the gap n the arch should be on your template so when you've cut it you know where the seam lip needs to be. I cut well wide of this first tomake sure that i had enough room even if i got the angle the seam heads off at wrong.I left enough room to have at least the largest gap i could see between bodywork and where the group 2 needed to fit then sut these pieces out.
With them cut to the correct inside profile i then took the group 2 and placed it where it should fit on the body. It helps if you have three hands now as you need to to mark the A panel repair and the wing repair where they will meet te existing bodywork.
Best to do this after removing the lip on the body work. This should also give the line that the seam needs to followi left about 1/2" extra to the side of the line for the lip to give some extra incase i messed up this can be ground back after anyway.
Thats about where i am at now hopefully this weekend i'll get the repairs welded in place.
I will be taking it very slow doing small bits at a time to try and keep the heat down and minimize any warping.
That's the plan anyway. If i hadn't spent all of my money already i would have bought new panels that way the result would be a lot neater and actually less work in the long run but more painting. I'm hoping this will come out ok but expecting it to take a ton of work to get it looking right.
Hope that helps a bit would have been a lot better if i'd just taken pictures.
Will try to get you all some pictures to look at later.
#65
Tim1970
-
- Members
-
- 394 posts
Speeding Along Now
Posted 12 February 2010 - 11:08 PM
Well a bit of progress on this, wheels are getting there did the backs of the wheels in top coat and am now very excited about getting them finished. Tomorrow morning i'm hoping to get the fronts completely in top coat then i can laquer them sunday
Here's a couple of pictures of my solution to the cold weather and a little taster of the wheels camera died after that.


It's a walk in growhouse, aluminium frame with PVC covering with a heater placed in side to get the temperature more suitable for painting

Hoping to get the front arches fully prepared ready for welding sunday too and managed to find some drill bits so can drill my boot too which i'll probably do tomorrow evening, happy days
Here's a couple of pictures of my solution to the cold weather and a little taster of the wheels camera died after that.
It's a walk in growhouse, aluminium frame with PVC covering with a heater placed in side to get the temperature more suitable for painting
Hoping to get the front arches fully prepared ready for welding sunday too and managed to find some drill bits so can drill my boot too which i'll probably do tomorrow evening, happy days
#66
gregh55
-
- Banned
-
- 1,706 posts
Camshaft & Stage Two Head
- Local Club: naaa
Posted 12 February 2010 - 11:36 PM
looking good tim
havnt spoken to you for a while lmao
greg
havnt spoken to you for a while lmao
greg
#67
Tim1970
-
- Members
-
- 394 posts
Speeding Along Now
Posted 12 February 2010 - 11:41 PM
Cheers mate.
Haha yeah was thinking that the other day
How's the shell and cage coming along?
And what's the plan at the moment?
Haha yeah was thinking that the other day
How's the shell and cage coming along?
And what's the plan at the moment?
#68
camp freddy
-

- TMF+ Member
-
- 3,696 posts
Definitely Not Camp Or A Freddy
- Local Club: Wreake Mini Wanderers
Posted 13 February 2010 - 10:20 AM
I managed to get some pictures of the parts i've got still to go on.
I've probably missed a few bits but you get the idea.
Front suspension parts (rear now fitted)
Front geometry parts (rear camber and tracking brackets now fitted)
Front hubs, Monte shafts, and CV's
Front brake bits
Couple more of the calipers
And of the grooved 7.5" discs
Arches (not a very good picture i'm afraid)
Hopefully have a bit more progress tomorrow.


nice looking shocks where are they from???
great looking car ..
Carl
#69
tedmcedd
-

- Traders
-
- 2,751 posts
Up Into Fourth
- Location: Huddersfield
Posted 13 February 2010 - 06:32 PM
looking good!! liking the greenhouse spraybooth!! where did you get those grooved S discs from? they look swish!
#70
Tim1970
-
- Members
-
- 394 posts
Speeding Along Now
Posted 13 February 2010 - 07:39 PM
nice looking shocks where are they from???
great looking car ..
Carl
Cheers mate, Means a lot your work on Ratty is incredible.
The shocks are AGX evolutions by KYB got them from minispares HERE. and HERE.
They look very good quality unfortunately haven't had the car back on the road since fitting them to see how they perform.
looking good!! liking the greenhouse spraybooth!! where did you get those grooved S discs from? they look swish!
Thanks ed. Really glad i got the greenhouse, means i can get things done despite the rubbish weather and is surprisingly large inside.
The grooved discs are from minispares HERE, Hopefully be able to comment on how they perform soon
#71
rob#155
-

- Members
-
- 268 posts
Mini Mad
- Location: North Yorkshire
- Local Club: none
Posted 14 February 2010 - 12:16 PM
Wicked spray booth! He He He.
where there's a will there's a way eh?
Nice one mate.
where there's a will there's a way eh?
Nice one mate.
#72
Tim1970
-
- Members
-
- 394 posts
Speeding Along Now
Posted 14 February 2010 - 01:54 PM
Wicked spray booth! He He He.
where there's a will there's a way eh?
Nice one mate.
Cheers mate.
Hopefully have some more progress today thanks to it
Welding isn't going ahead today due to the rain.
#73
george91
-

- Members
-
- 883 posts
One Carb Or Two?
- Location: Devon
Posted 14 February 2010 - 04:11 PM
Nice new shiney stuff looks good mate, good luck fitting everthing. 
#74
Mini-Mad-Craig
-

- Members
-
- 9,298 posts
Crazy About Metro's
- Location: Travelling in a fried out Kombi
Posted 14 February 2010 - 04:22 PM
Brilliant mate!
#75
RsSpyder
-
- Members
-
- 374 posts
Speeding Along Now
Posted 14 February 2010 - 04:32 PM
Looking good mate, still following this with interest!


1 user(s) are reading this topic
0 members, 1 guests, 0 anonymous users


