hi all
I’m about to start replacing all the front end of my mini, where should I start?
Thanks
Mark

Front End Replacement
Started by
mark watson
, Mar 01 2010 06:31 PM
3 replies to this topic
#2

sonikk4
-

- Admin
-

- 16,042 posts
Twisted Paint Polisher!!!
- Name: Neil
- Location: Oxfordshire
Posted 01 March 2010 - 10:49 PM
hi all
I’m about to start replacing all the front end of my mini, where should I start?
Thanks
Mark
Are you replacing all the front end panels including the A panels then if so try this.
Remove doors as this will give you access to removing the A panels.
Cut down the flange where the A panel meets the wing. Grind down the outer flange edge of the A panel (closest to the door) until you can see a split, there maybe 3 spot welds tucked behind then at the very top of the A panel there will be a tack there as well so grind that off. You should be able to take off the A panel now.
Remove the bonnet, headlights, side repeaters, indicators and front grill.
Looking down on the wing to inner wing flange drill out all the spot welds along this edge. Where the wing joins the front panel cut along the gap to seperate the two. Remove the wing.
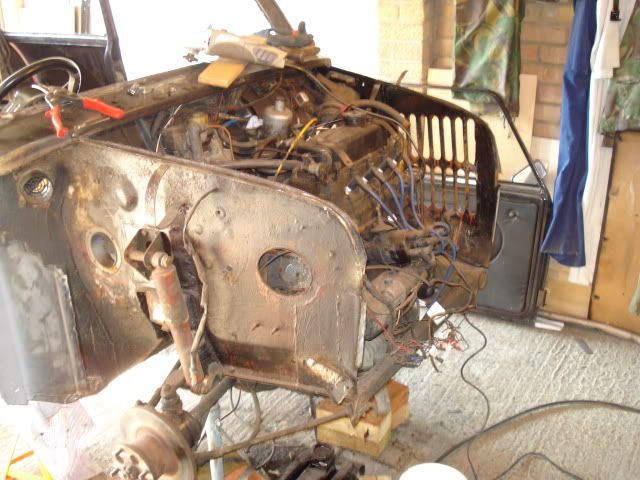
You should see something like this now, if you look at the picture right at the front of the inner wing there maybe a vertical flange that is spot welded to the front panel, if so drill these out.
Again looking at the picture you will see where i have cut off the other flange that is part of the front panel and is spot welded to the inner wing, dont worry about this as your new front panel will have this fitted to it (see next picture looking at the bottom r/h section of the inner wing.)

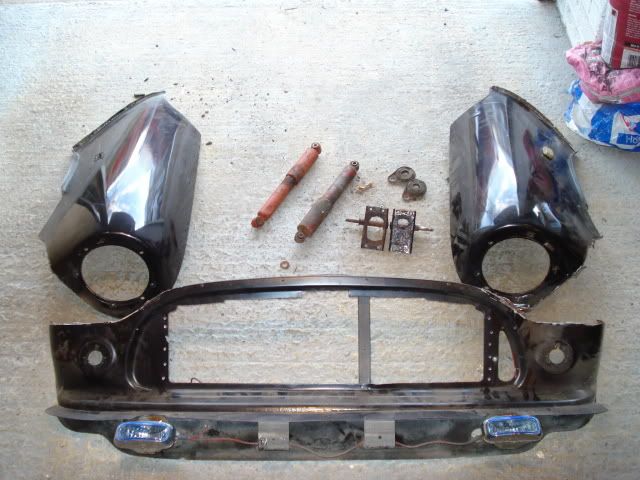
Where the inner wing meets the front panel at the corners of the bonnet cutout there maybe tack welds there but these will become apparent when you try to take the front off. Hopefully by now you should have a nice pile of panels like this
Once its like this you will be able to see if any remedial work needs to be done prior to welding on your new panels. Try and clamp everything on first to see how it all lines up, etch prime, prime and paint the inside of all the panels before fitting to help them last that much longer. On all the joints,flanges to be welded use a Zinc based weldable primer. Once you have welded it all together seam seal all the joints and spray a good coating of stonechip before adding a final topcoat of paint.
Hope this helps.
#3
mark watson
-
- Noobies
-
- 13 posts
Learner Driver
Posted 02 March 2010 - 06:15 PM
that great, thanks for you help
mark
mark
#4
sonikk4
-
- Admin
-
- 16,042 posts
Twisted Paint Polisher!!!
- Name: Neil
- Location: Oxfordshire
Posted 02 March 2010 - 09:37 PM
Also if you have a look in the how to do section for fitting A panels this will give you good info on how to do this task without having to buy the specialised tooling.


1 user(s) are reading this topic
0 members, 1 guests, 0 anonymous users


