~~~~~Please delete this text before posting the topic~~~~~~
Please give your topic a title that quickly describes your problem. Just putting 'Help my Mini doesn't work' is useless to anyone trying to help.
~~~~~~~~~~~~~~~~~~~~~~~~~~~~~~~~~~~~~~~~~~~~~~~~~~~~~~~~~~~
Model:
Year:
Description of problem (please be as in depth as possible):
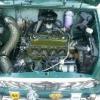
i have a project mini 998cc 1974 austin mini which has had new starter solinoid, coil, dis cap, points, condenser, rotor arm, ht leads, spark plugs, oil change and filter new fuel. the car came with no carb fitted so i fitted 1 that i had in my garage im not sure its the right 1 though the car turns over on the key but it dont fire as i only have a weak spark when opening the points with the ignition on and no spark from the main lead from the new coil when grounded to the earth of the engine. the points aint set up correctly i dont think as i dont have the correct tool to do so and knowledge.??? can anyone shed some light.???
Any non-standard parts that might be involved with the problem?

Engine Wont Start! Help
Started by
rhys-89
, Apr 07 2010 10:03 PM
2 replies to this topic
#1

rhys-89
-
- Members
-

- 1,549 posts
Camshaft & Stage Two Head
- Location: Lancing, West Sussex
- Local Club: minifreekz
Posted 07 April 2010 - 10:03 PM
#2
dklawson
-

- TMF+ Member
-
- 10,923 posts
Moved Into The Garage
- Name: Doug
- Location: Durham, NC - USA
- Local Club: none
Posted 08 April 2010 - 12:04 AM
You have just about every new part imaginable installed. This is not the end of the world, but changing many things at once leads to a huge number of variables so you need to work through several areas as if you were building the car from scratch. If you do not have a Haynes manual, you need one now. While it's fine to ask for help here, reading through the Haynes will help you understand the answers and give you a better understanding of what is supposed to happen.
My advice would be to start like you were doing a complete tune up.
1) Set the valves so each has 0.012" clearance (cold).
2) Set the points gap to 0.015"
3) Set the car's static timing to about 8 degrees BTDC.
You said you have a carb but aren't sure if it is correct. Assume it is not adjusted and may be gummed up from years of sitting on the shelf.
a) Remove the screws securing the vacuum housing from the top of the carb. Use spray carb cleaner and clean paper towels to clean any gum and deposits off the carb needle. Do the same to the inside of the vacuum chamber and piston. The piston must be able to move freely up and down without drag. The tiniest amount of oil is permissible on the CENTER of the carb piston. No oil should be put on the grooved outer ring of the piston.
b) Remove the lid from the float bowl (assuming this is an HS series carb) and clean out any and all gum from inside the float bowl. Use the spray wand on the can of carb cleaner to flush out the inside of the jet tube in the carb. Fluid must be able to flow freely from the jet tube into the float bowl.
c) Remove the float valve from the carb and clean it thoroughly. Adjust the float level properly when you put the carb back together.
d) Follow the instructions in Haynes or an SU manual for the basic jet adjustments and idle screw adjustments you need. For most HS carbs this means bringing the jet flush with the inside of the carb then lowering it by turning the adjusting nut "out" 2 full turns. The initial idle speed will be set by bringing the idle screw against its stop, then 1 to 1-1/2 full turns.
Hook everything up and try to start the car. Make sure to use a bit of choke. If it refuses to start, dribble a thimble of gasoline into the carb throat and try again. If it fails to start, look first for problems in the ignition system. If it starts and immediately dies, look for fuel delivery problems.
Again, work through the whole system from start to finish as if doing a complete tune up. Save your fuel/carb adjustments for last once you know that the engine will start and the ignition system is sorted out.
That will give you the basics.
#3
rhys-89
-
- Members
-
- 1,549 posts
Camshaft & Stage Two Head
- Location: Lancing, West Sussex
- Local Club: minifreekz
Posted 09 April 2010 - 10:06 PM
You have just about every new part imaginable installed. This is not the end of the world, but changing many things at once leads to a huge number of variables so you need to work through several areas as if you were building the car from scratch. If you do not have a Haynes manual, you need one now. While it's fine to ask for help here, reading through the Haynes will help you understand the answers and give you a better understanding of what is supposed to happen.
My advice would be to start like you were doing a complete tune up.
1) Set the valves so each has 0.012" clearance (cold).
2) Set the points gap to 0.015"
3) Set the car's static timing to about 8 degrees BTDC.
You said you have a carb but aren't sure if it is correct. Assume it is not adjusted and may be gummed up from years of sitting on the shelf.
a) Remove the screws securing the vacuum housing from the top of the carb. Use spray carb cleaner and clean paper towels to clean any gum and deposits off the carb needle. Do the same to the inside of the vacuum chamber and piston. The piston must be able to move freely up and down without drag. The tiniest amount of oil is permissible on the CENTER of the carb piston. No oil should be put on the grooved outer ring of the piston.
b) Remove the lid from the float bowl (assuming this is an HS series carb) and clean out any and all gum from inside the float bowl. Use the spray wand on the can of carb cleaner to flush out the inside of the jet tube in the carb. Fluid must be able to flow freely from the jet tube into the float bowl.
c) Remove the float valve from the carb and clean it thoroughly. Adjust the float level properly when you put the carb back together.
d) Follow the instructions in Haynes or an SU manual for the basic jet adjustments and idle screw adjustments you need. For most HS carbs this means bringing the jet flush with the inside of the carb then lowering it by turning the adjusting nut "out" 2 full turns. The initial idle speed will be set by bringing the idle screw against its stop, then 1 to 1-1/2 full turns.
Hook everything up and try to start the car. Make sure to use a bit of choke. If it refuses to start, dribble a thimble of gasoline into the carb throat and try again. If it fails to start, look first for problems in the ignition system. If it starts and immediately dies, look for fuel delivery problems.
Again, work through the whole system from start to finish as if doing a complete tune up. Save your fuel/carb adjustments for last once you know that the engine will start and the ignition system is sorted out.
That will give you the basics.
hi thanks for that great in depth description it will help im sure, tonight i bought a feeler gage and set the gap correctly and it actually starts now but its a bit lumpy has it hasnt run for 21 years. tomorrow im going to run the engine for a bit. the carb i have is running the car but still not sure its the right 1. i am taking the engine out for a re-spray. once again thanks again for the info. rhys


1 user(s) are reading this topic
0 members, 1 guests, 0 anonymous users


