Fitting New Engine Mounts
#1

Posted 12 June 2010 - 07:45 PM
Year:1964
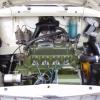
I'm trying to fit new engine mounts without removing the engine, got it jacked up, any special techniques? or do I have to lift the whole thing?
Cheers, Cater Racer.
#2

Posted 12 June 2010 - 08:40 PM
#3

Posted 13 June 2010 - 06:30 AM
Just do one end at a time - i suggest do the clutch end first. Then if having problems at the rad end - you can pop the rad out for easier access.
Thanks bmcecosse, I've taken your advice, got the old one out and nearly got the new one in, it's attached to the clutch housing, but I'm having problems getting it to sit down low enough to get the two sub frame bolts in. Guess I'll have to find a fat friend to sit on the engine, while i fiddle with the bolts.
#4

Posted 13 June 2010 - 07:28 AM
After a lot of swearing etc I got them in, but as I said it took a very long time.........................
Good luck
#5

Posted 13 June 2010 - 09:43 AM
hth
dave
#6

Posted 13 June 2010 - 02:58 PM
I also tried the UES from minisport, and it won't fit!! it fouls the heater hose and the tappet cover breather. So it's back to the drawing board.
Edited by Cater_Racer, 13 June 2010 - 03:03 PM.
#7

Posted 13 June 2010 - 03:04 PM
HiJust do one end at a time - i suggest do the clutch end first. Then if having problems at the rad end - you can pop the rad out for easier access.
Thanks bmcecosse, I've taken your advice, got the old one out and nearly got the new one in, it's attached to the clutch housing, but I'm having problems getting it to sit down low enough to get the two sub frame bolts in. Guess I'll have to find a fat friend to sit on the engine, while i fiddle with the bolts.
Everyone who has ever replaced an engine or engine mounts has this problem! Anyway, the problem is the lower end of the mounts lining up with the subframe...am i right?
Anyway, what i did was to stick a flat bladed screwdriver into one of the fixing holes, and twist it so it sort of lines up.
Just enough so I could tap the bolt into the adjacent hole with a hammer. I know thats not good engineering practice, but if threads arent damaged I cant see an issue!
Thats just what i did however and it seemed to work for each side.
John
#8

Posted 13 June 2010 - 06:03 PM
#9

Posted 13 June 2010 - 06:06 PM
HiThanks John, I've got a screwdriver into one of the holes now. The other one is off line, and if I take the screwdriver out it all moves. So I'll sleep on it with the screwdriver in place, and fight on tomorrow.
If you have got them to sort of align with the screwdriver in, try and force the bolt through the adjacent hole at an angle by tapping with a hammer. These adjacent holes will likely not be quite in line either, but enought to allow you to force the bolt through at an angle. The rubber should give enough before any damage occurs to the threads.
Bye the way, keep the screwdriver in position in the hole, while you try and force the bolt in the other hole....don't let go!! I think you said that's what you did.
I would try again tonight....then you can rest easy!
Edited by mk=john, 13 June 2010 - 06:12 PM.
#10

Posted 13 June 2010 - 08:14 PM
I'm through tonight, but I'll have go in the morning.....................
One of the advantages of being retired.
Cater
#11

Posted 15 June 2010 - 03:41 PM
I undid both sides, and the top stabiliser bar, then with sub-frame supported by axle stands, jacked up the engine about 2 inches.
Then put the new mounts on the engine, lowered it and it was half and inch out on one side or the other, depending upon which way you lowered it.
So I pushed the clutch side down and put the two bolts in but not fully tightened up, then I put a a strap round the lower part of the gearbox where the radiator and engine mount are located at the front of the engine.
Then slipped the trolly jack through the strap and pumped the jack up against the sub-frame.
This effectively pulled the engine down into the subframe, and bingo! the two bolts slipped in without effort!
So I'm now all bolted up with new engine mounts. Next I need to engineer the UES to avoid the tappet chest breather.......
#12

Posted 15 June 2010 - 03:54 PM
#13

Posted 13 July 2011 - 07:49 PM
#14

Posted 13 July 2011 - 08:03 PM
But...I was amazed to read you hadn't released the engine steady on the first go! Would have been the very first thing I'd have done.
1 user(s) are reading this topic
0 members, 1 guests, 0 anonymous users


