Jump to content


Photo
- - - - -

Lee's Vtec


  • Please log in to reply
27 replies to this topic

#1 Bad_Boy_Mini

Bad_Boy_Mini

    Passed Test

  • Noobies
  • PipPip
  • 32 posts

Posted 19 June 2010 - 10:01 PM

Hi people, i had a build thread over on the complete mini rebuilds page but i have now sorted myself out and doin it properly...and im doin it with a VTEC!

Ill give you a bit of a catch up to where i am now and ill try to keep it updated as much as i can and im sure ill be needing some help and support along the way because im sure its not goin to be easy!

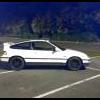
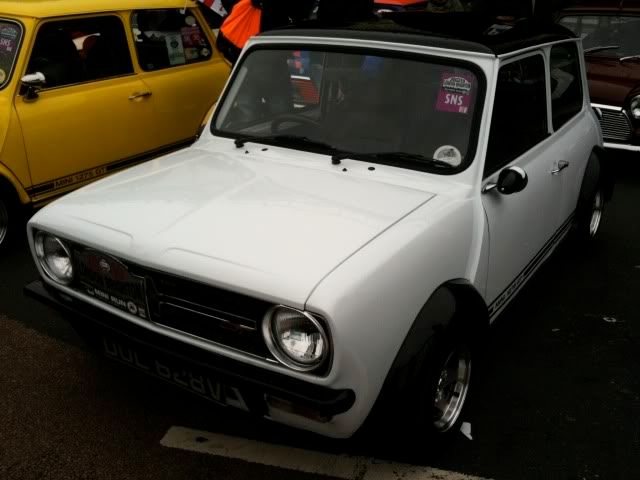
Right, i bought this little bad boy back in Feb 2009 for the tidy sum of £500, thought it was a right BARGAIN!

Posted Image


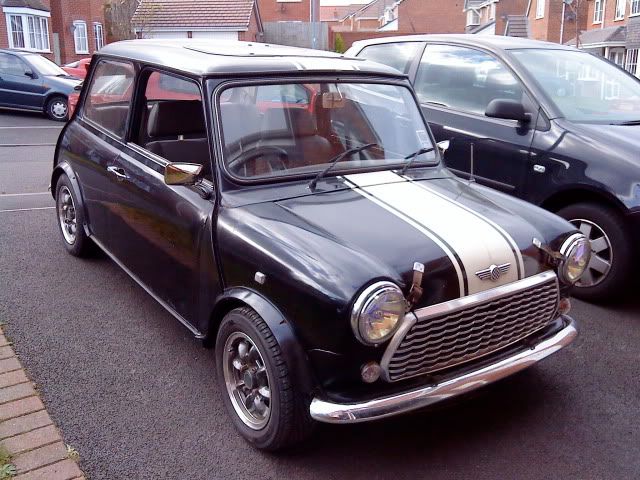
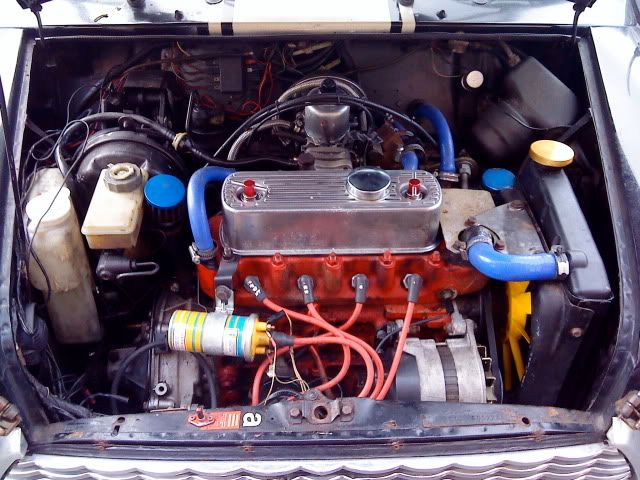
It was in really good condition and had had a few quid already spent on it, mainly on the engine...it had a 1330 race spec engine, not my cup of tea but it went well!

Posted Image


First job was to strip the thing down, right down to a bare shell!

Posted Image


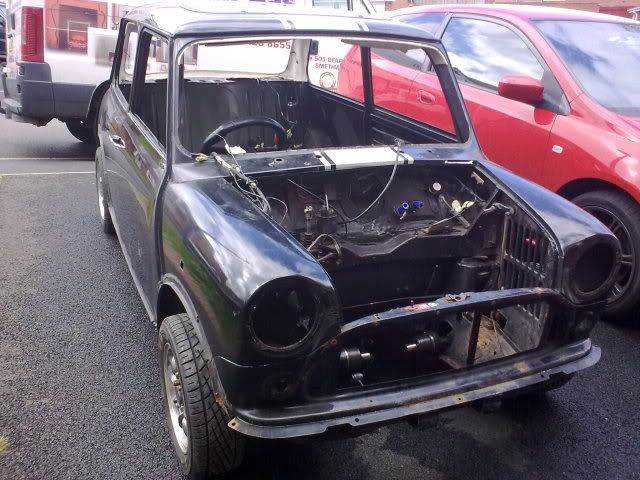
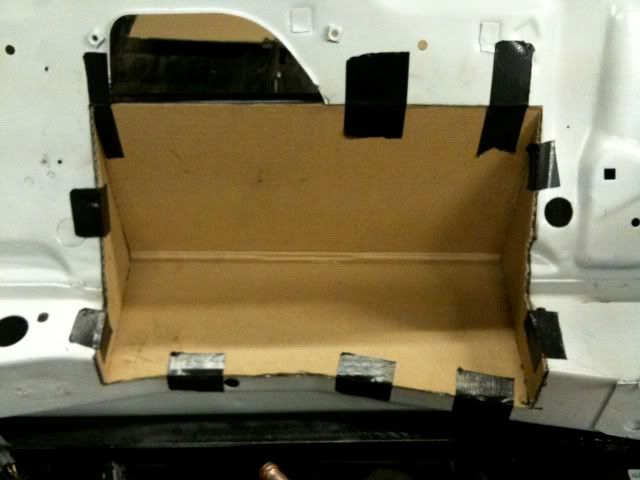
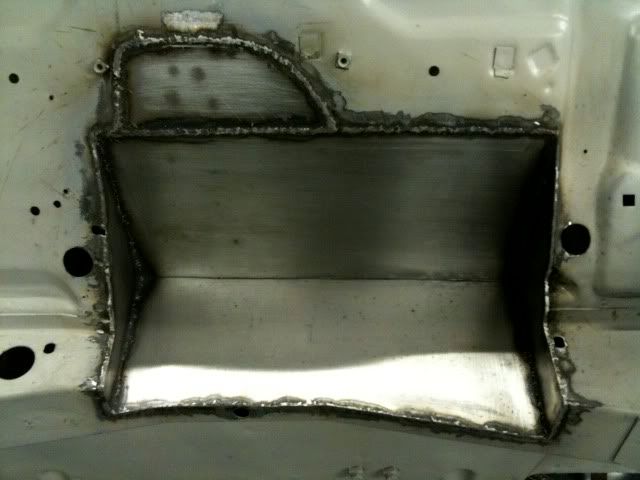
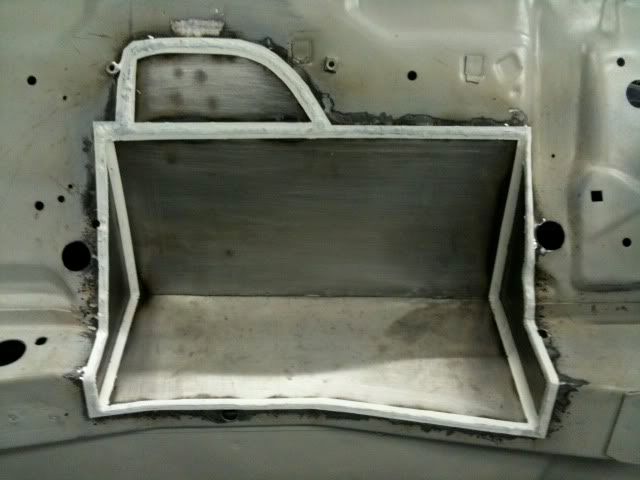
After a long six months of welding in my garage, including two new front floorpans, two new sills, repair panels to the boot floor and rear valance the decision was made to go for the 16v route! I wasted no time and got the front end chopped off before i changed my mind!

Posted Image


Had a little break for a few months over christmas and moved house to an apartment with no garage so it slowed me down a bit, and the hunt for a unit began. Luckily in March we managed to find a unit and time came for the Mini to be moved to its new home...you wouldnt believe what we transported it in!!!

Posted Image


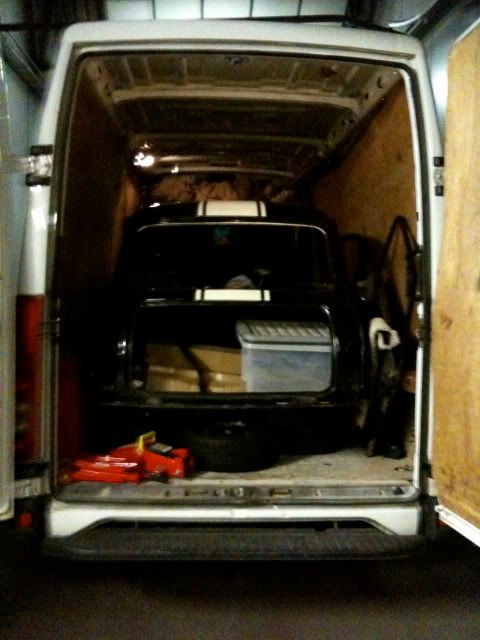
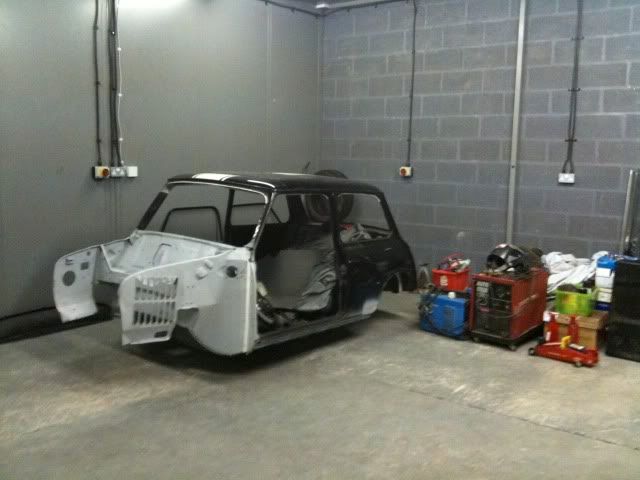
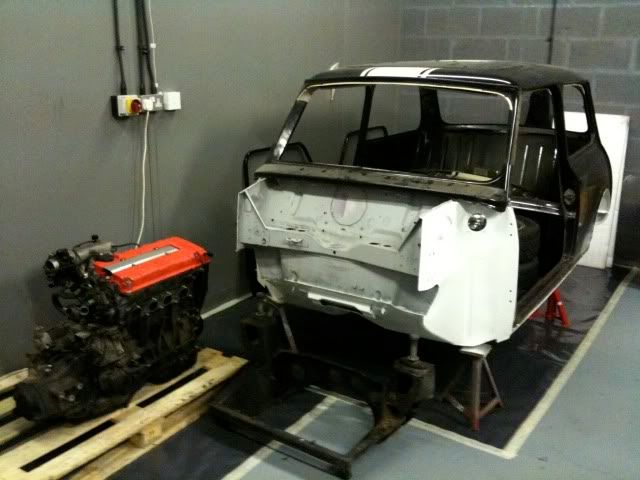
Yep, up stepped my mate and his BIG van! Couldnt believe it when he suggested it and it actually worked, it fitted perfectly! Here's the bad boy now sat in the unit ready for the work to begin...

Posted Image


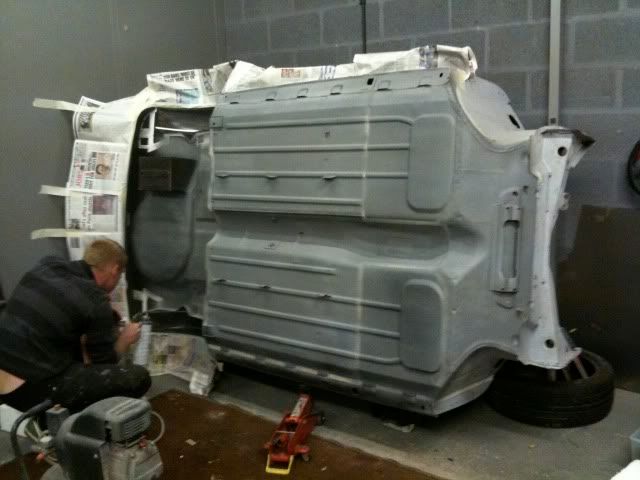
Next step was to get it up on its side, always good to see a mini on its side, and the only way to do it properly i think. Got my mate round with the compressor and got a good coating of stonechip on there! Really good to see it like this, feels like your gettin somewhere and looks mint...

Posted Image


Had another break from mine for a few weeks because we had my mates 1275 GT back from the bodyshop and had 2 weeks to put it back together before London - Brighton. Really didnt think it was gin to happen but it did, and it looked the dogs even if i do say so myself! Check his build out at

http://www.theminifo...howtopic=120525

Posted Image


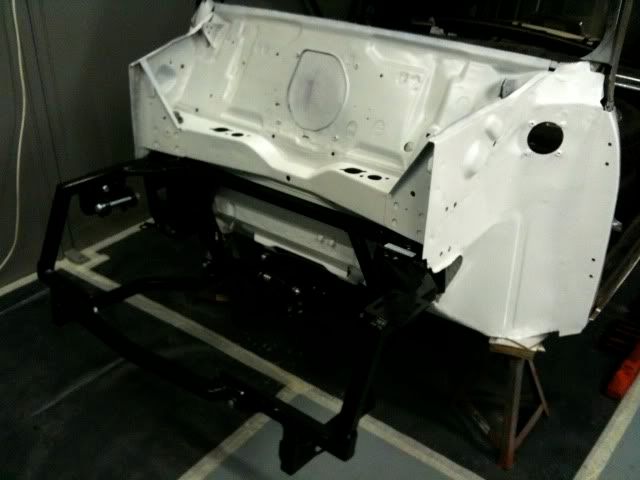
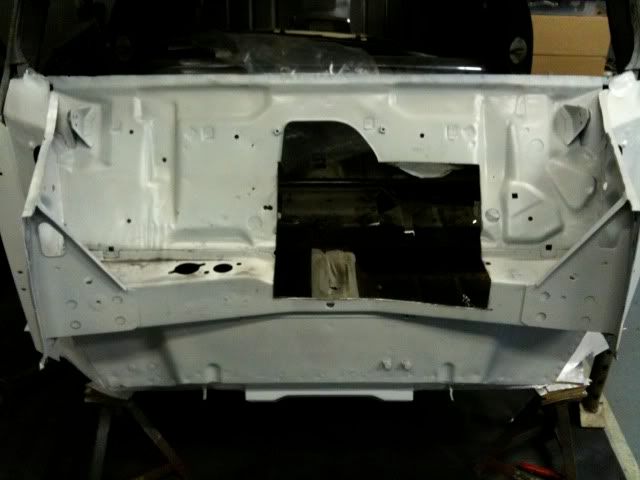
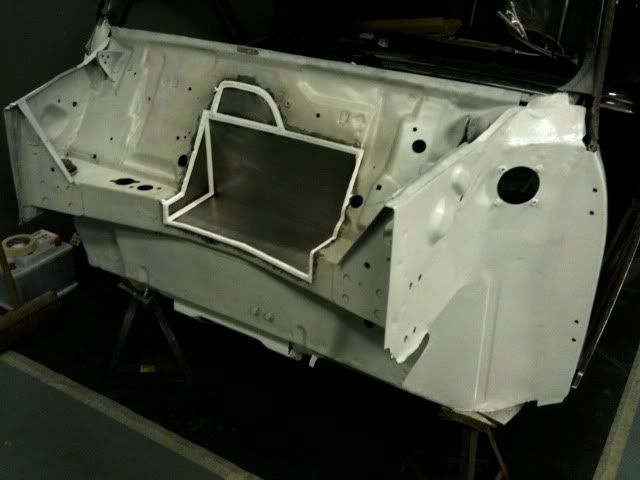
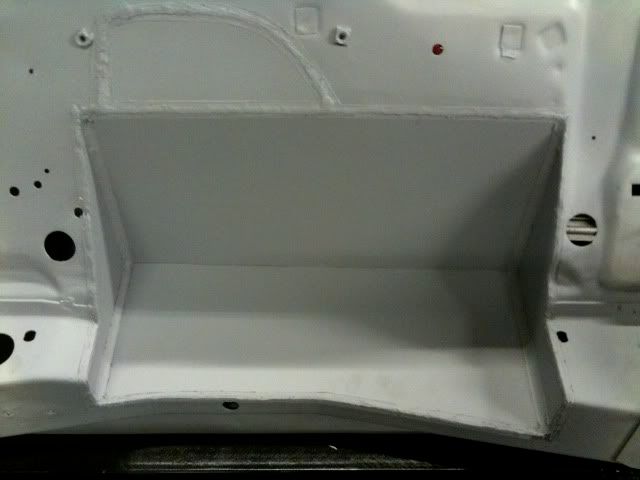
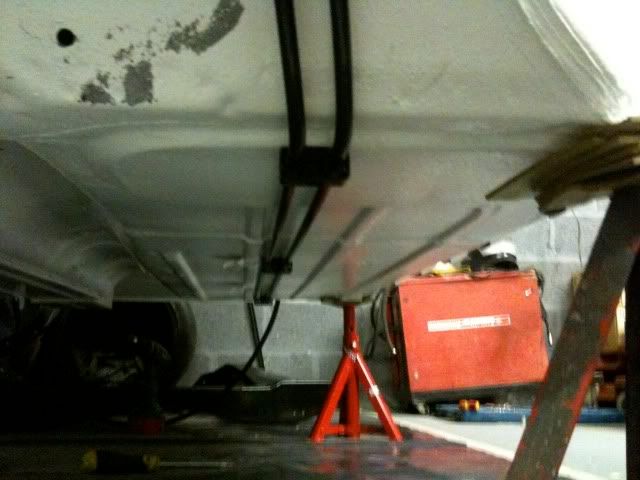
Right back to mine and it was time to give the underside a bit of colour, went for gloss white as i think im goin for BMW Alpine White as my final colour choice. Lookin good!!!

Posted Image


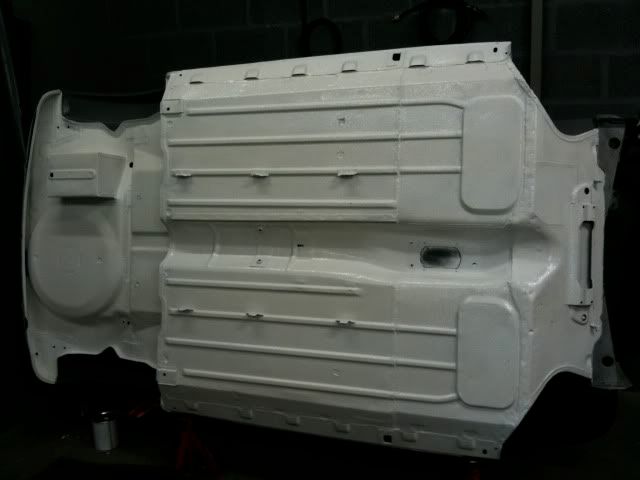
To be fair thats pretty much where i am, i know it doesnt look much but trust me, so much time and effort is goin into this. Im hoping to have this done for next years London - Brighton so lets get moving...

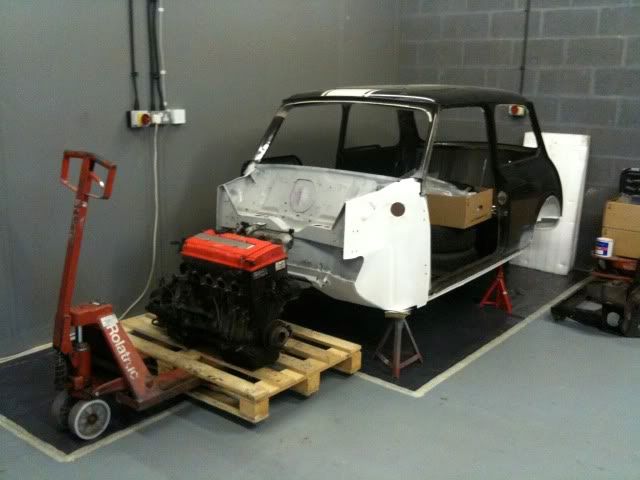
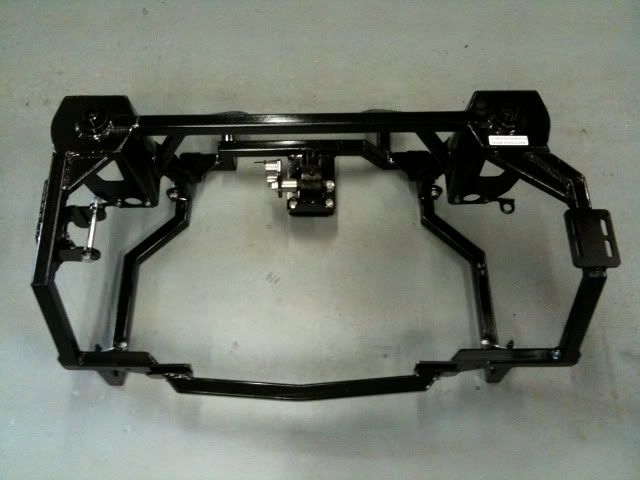
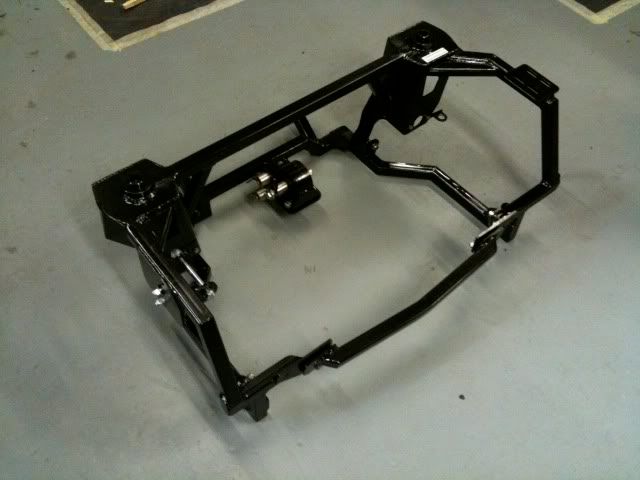
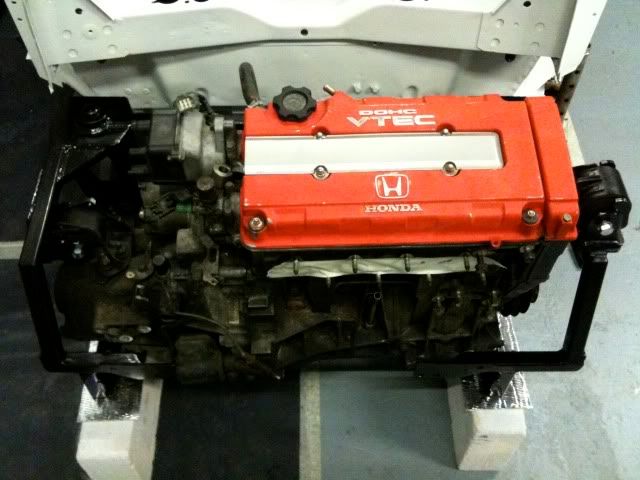
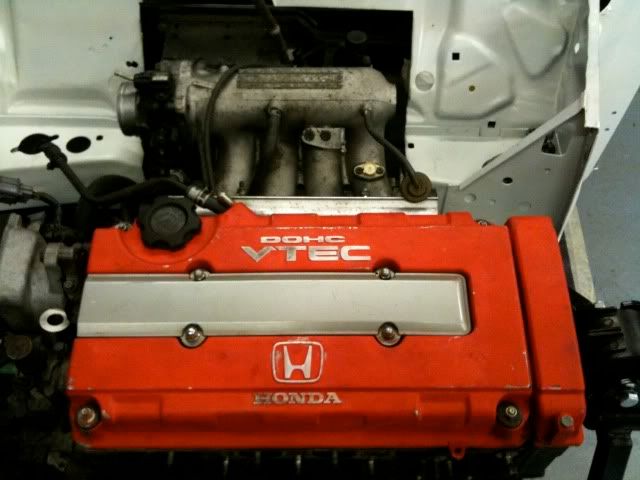
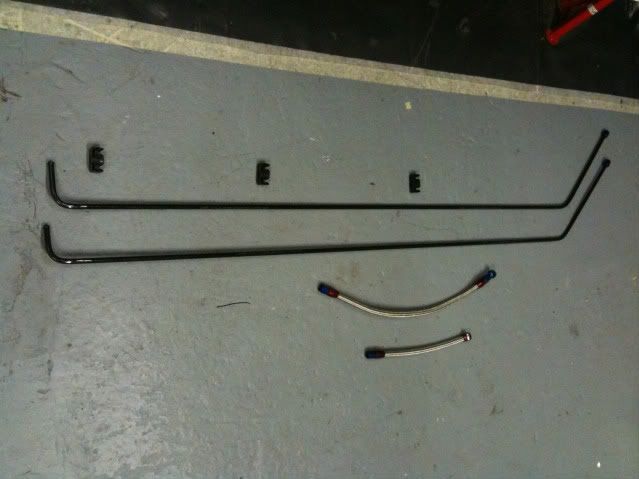
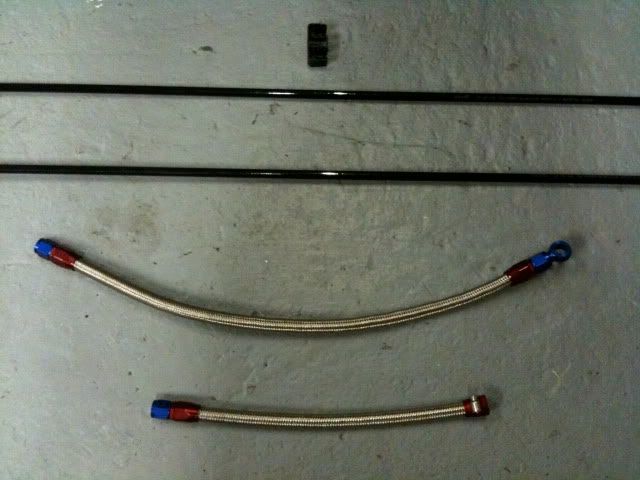
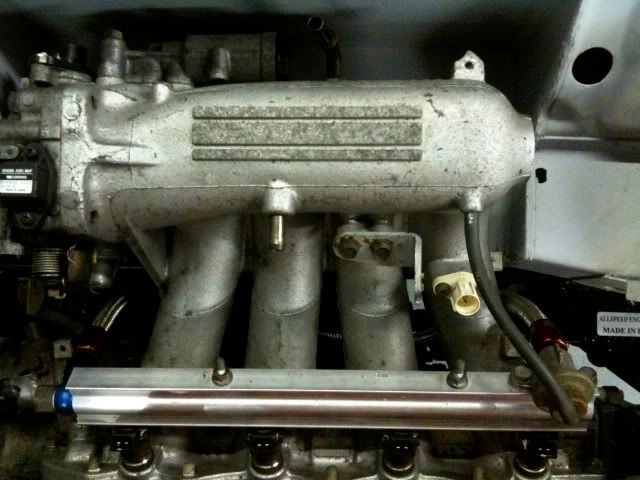
I have been out buying the last couple of weeks, much to the mrs disgust! I ordered myself an Allspeed VTEC frame last tuesday so should be here on the 15th. I got a bit impatient waitin for the frame so i went and got myself this beast ready to drop in...

Posted Image

Posted Image


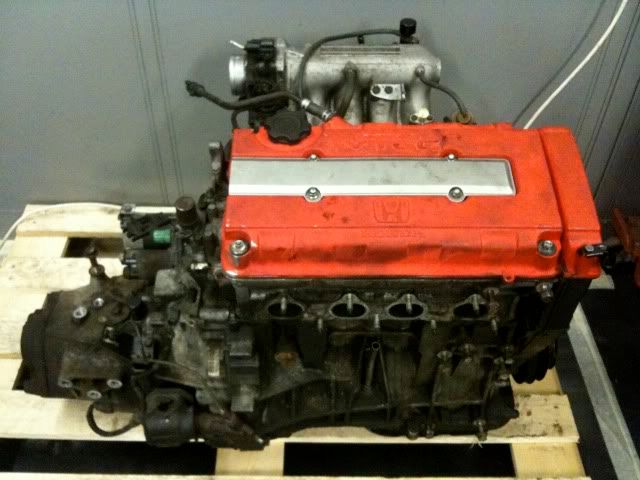
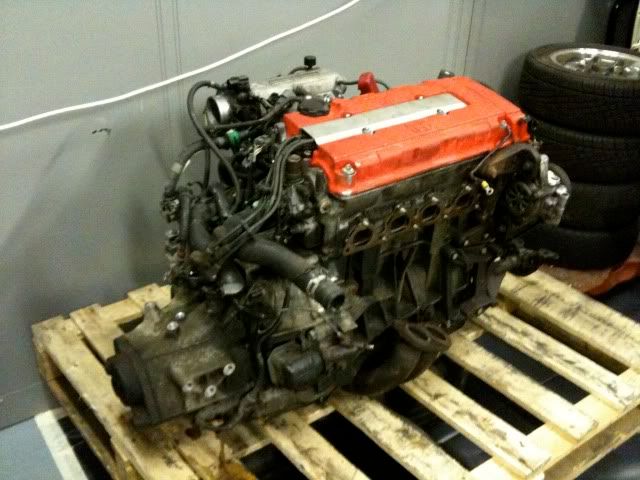
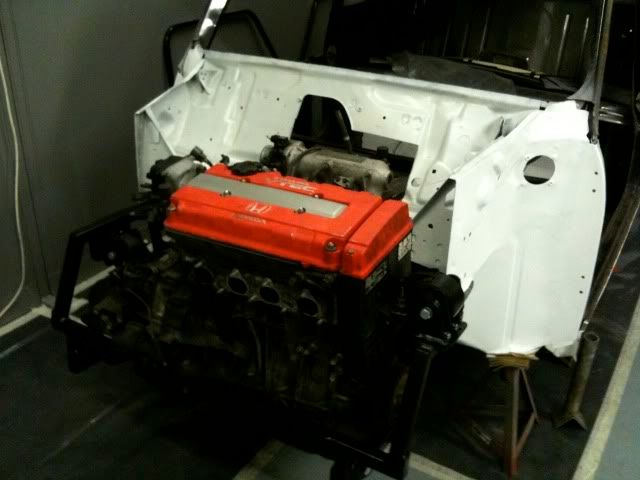
God it looks SEXY! Goin to be sooooo good! Here it is as it is now, back down on its belly and ready for the frame and engine to be trial fitted next week.

Posted Image


And thats it for now, let me know what you think, ill try and keep it updated as much as i can, so check back for progress...

Hope you like...

#2 Kam

Kam

    Straight to the Point

  • TMF+ Member
  • PipPipPipPipPipPipPipPipPip
  • 4,140 posts
  • Location: Hampshire
  • Local Club: 16vMini club

Posted 20 June 2010 - 12:36 AM

Looks familiar?

Very nice work so far, wheres the pallet in front of the mini shot? :D

Keep up the good work :)

#3 Sam14

Sam14

    TMF Mug

  • Members
  • PipPipPipPipPipPipPip
  • 1,221 posts
  • Location: Mark, Somerset

Posted 20 June 2010 - 12:45 AM

Looks good

Dont mean to be rude or cheeky but how did thr VTEC cost?

#4 Bad_Boy_Mini

Bad_Boy_Mini

    Passed Test

  • Noobies
  • PipPip
  • 32 posts

Posted 20 June 2010 - 12:43 PM

Right, just a little bit of an update...

Had a little play while I was waiting for my subframe to arrive this week and rolled the engine in front of the mini, how it fits in the front of there must some sort of magic!

Posted Image


And then finally on Tuesday morning, this beauty turned up...

Posted Image

I must say that when I was payin for this over the phone I was thinkin to myself "what the f**k am I doin payin £800 for a subframe" but now I have it here, you can see why it costs the money. It really is a good piece of kit...

Posted Image


Its been a long week this week, waitin for the chance to get the frame bolted up and gettin the engine lifted in to see it comin together, was hoping to get the baulkhead marked up where I need to cut too...

But as usual all good plans never work out and only got the frame bolted up. Was meant to borrow an engine crane but time just wasnt on my side so now its a waiting game again...

Posted Image


So this is it for now, I know its not much but it feels like a milestone just gettin the frame here and bolted up.

Just a quick question...

Does anybody have an engine crane for sale or lying about not needed any more? Or know of anybody selling one? Or the cheapest place to get one from? Im goin to need one a fair bit if im in and out with this engine a few times.

Will keep you updated...

#5 matthew25

matthew25

    Stage One Kit Fitted

  • Noobies
  • PipPipPip
  • 57 posts
  • Location: chesterfield

Posted 22 June 2010 - 01:35 PM

looking well looks like you've had a good start what are you doing with the fuel system are you going to be running injection or carbs? i'm doing a similar project on bike carbs.

#6 Bad_Boy_Mini

Bad_Boy_Mini

    Passed Test

  • Noobies
  • PipPip
  • 32 posts

Posted 27 June 2010 - 09:48 AM

Right another little update for this week...

Firstly it took me about an hour of just lookin at the frame thinkin that aint fittin in there! But after sortin myself out and some effin about, I decided to put the frame onto the engine rather than drop the engine into the frame...if that makes sense!

Posted Image


I took the inlet manifold off and offered the engine up to the front of the mini, DAMN its goin to be tight! When I read that you have mm of clearance, it was right!

I thought I best get on with it and get the baulkhead marked up for choppin! I used some of the pictures on here to get the rough area that needed takin out and then just kept offering the manifold up and checkin. Probably about 100 times before I plucked up the courage to chop it!

Before...

Posted Image


After...

Posted Image


Wasn't too bad to be fair, think the thought of choppin up your mini is always a worry, but I was more concerned about these IVA tests sayin you can't modify the baulkhead, but think I should be ok.

I bolted the frame back up to the front of the mini to see how its all lookin, got the inlet roughly bolted into place, but still need to cut the bracket off the bottom of the inlet to get it to sit perfectly. But for the first cut, it aint bad at all! Was really pleased...

Posted Image


And thats about it really for this week, goin to get the inlet fitted properly this week and get the baulkhead box made up and welded in place. Goin to use 2mm sheet steel to make the box, don't know if its goin to give it any strength but thats what im goin for anyway...

Posted Image


Its slow but its gettin there, its nice to see it bolted up to the front of the mini, feels like its comin together..

Question time!!!

My engine looks like it is higher on the cambelt end than the gearbox end, sort of tilting? Do i need to shim the mount on the cambelt end to sort this out or is that just how it sits in the frame? Just worried its goin to be very close to my passenger wing when the front end is fitted?

Thanks lads...

#7 twiglett

twiglett

    Mini Mad

  • Members
  • PipPipPipPip
  • 211 posts

Posted 04 July 2010 - 03:32 PM

instead of shimming the gearbox end you could remove the studs from the timing belt end and grind a few mm off the mounting face i think if you shim it up the rocker cover will touch the bonnet.
is it a b16 or b18?

#8 Kam

Kam

    Straight to the Point

  • TMF+ Member
  • PipPipPipPipPipPipPipPipPip
  • 4,140 posts
  • Location: Hampshire
  • Local Club: 16vMini club

Posted 04 July 2010 - 10:09 PM

Question time!!!

My engine looks like it is higher on the cambelt end than the gearbox end, sort of tilting? Do i need to shim the mount on the cambelt end to sort this out or is that just how it sits in the frame? Just worried its goin to be very close to my passenger wing when the front end is fitted?


instead of shimming the gearbox end you could remove the studs from the timing belt end and grind a few mm off the mounting face i think if you shim it up the rocker cover will touch the bonnet


The gearbox mount is slotted to achieve the right height. The cambelt side always sits higher in these frames and isn't slotted so you need to shim UNDER the cambelt mount to lower it down, might need a few washers aswell, when you find the right amount you could cut up a rectangle steel plate of the same thickness if you want and use that, but washers will be fine.

Make sure you got some inner cv's pots on there so you dont drop too far, the clearance wont be much anyway, 5mm if your lucky! :D

You've got some nice progress, the 2mm for the bulkhead box is more than adequate, when you offer up the inlet make sure you have got plenty of room around it, you'll be surprised how close it will end up even when you think you got enough now.

Trim the underside of the inlet as much as you can, theres a few bits and bob down there that get in the way, post up a picture of the underside if your unsure what needs to be cut off

Take a look at Gingermonkeys build (page 34) as he made an access panel for the bulkhead box, if you want to know how difficult it is working around there without one then ask me :cry: I would say its not that bad really....but it seriously is :P

Keep up the good work

#9 ginger_monkey

ginger_monkey

    One Carb Or Two?

  • Members
  • PipPipPipPipPipPipPip
  • 1,080 posts

Posted 08 July 2010 - 08:33 PM

Take a look at Gingermonkeys build (page 34) as he made an access panel for the bulkhead box,

Keep up the good work


PATENT PENDING :withstupid:

#10 Bad_Boy_Mini

Bad_Boy_Mini

    Passed Test

  • Noobies
  • PipPip
  • 32 posts

Posted 12 July 2010 - 10:15 PM

Thanks for all the advice Kam, keep it comin mate, its good to have the advice from people followin me helpin me out as I go along...

#11 Bad_Boy_Mini

Bad_Boy_Mini

    Passed Test

  • Noobies
  • PipPip
  • 32 posts

Posted 12 July 2010 - 10:20 PM

Right, been messin about a lot over the past couple of weeks, doin this and that, and mainly just lookin at it hopin it will do itself! But heres a bit of an update...

Spent most of last weekend sortin the baulkhead out, makin the box for the inlet manifold. Started by makin it out of cardboard to get the general idea and make sure all the clearances are goin to be ok...

Posted Image


Looks a bit messy to be honest but all the clearances looked good with only about 5mm around some parts but im learnin thats plenty in the world of VTEC conversions!

A long day last Saturday ended up with the box all made and welded in and looking pretty solid if I do say so myself!

Posted Image


Then spent Sunday givin it a bit of a tidy up around my welds, as they aint the nicest! Gave it a good linish, rub down and then masked and seam sealed it up, and it ended like this...

Posted Image

Posted Image


Looked pretty tidy and everythin still cleared all ok on the inlet manifold so I was feelin quite happy, just need a good coat of etch primer...

Posted Image


And thats a full weekends work really! Dont really seem much to look at but anybody who has done this can tell you how much these things take time to get right!

Its another pretty big job done tho and I can move on to the fuel lines now, been workin on them this week and they are gettin there, Ill update you with progress later on in the week...

Cheers boys...

#12 Kam

Kam

    Straight to the Point

  • TMF+ Member
  • PipPipPipPipPipPipPipPipPip
  • 4,140 posts
  • Location: Hampshire
  • Local Club: 16vMini club

Posted 13 July 2010 - 05:47 PM

Access panel access panel access panel!!!!! :thumbsup: Bulkhead box is very neat and tidy, nice job :thumbsup:

As your doing the fuel lines next whats your setup gonna be? What tank, pump etc

And are you running a standard engine or tuned?

#13 Bad_Boy_Mini

Bad_Boy_Mini

    Passed Test

  • Noobies
  • PipPip
  • 32 posts

Posted 13 July 2010 - 08:08 PM

Kam, goin to be runnin standard engine to start with but im doin everythin with future ideas in mind...

Iv done most of the fuel lines already to be honest just not took many pictures yet to put on here. Its lookin good tho, im really pleased with them so far. Im using a standard Mini MPI tank with pump, which I believe runs at 3 Bar or there abouts so should be good for my standard ECU injection. Then running 10mm rubber hose with in-line filter in the boot to -6 hardline running under the car (black plastic coated aluminium) and then Aeroquip braided hose to the rail and also for the return.

Sounds like a load of waffle but its all proper and looks the business too! Hopefully it will all work as it should and its another job done. Will have to let you know how it runs when i get that far.

Need some suggestions for in-line fuel filters tho if you got any advice, got some ideas but any advice is always good...

Will get some pictures up when im down the unit next...

#14 Kam

Kam

    Straight to the Point

  • TMF+ Member
  • PipPipPipPipPipPipPipPipPip
  • 4,140 posts
  • Location: Hampshire
  • Local Club: 16vMini club

Posted 13 July 2010 - 09:37 PM

Need some suggestions for in-line fuel filters tho if you got any advice, got some ideas but any advice is always good..


I was just about to ask as I wanted to know if you had one already?

MPI tank and pump is fine, alot use the original honda fuel filter (from the bulkhead) buts its a bit to large really? I know your using a standard engine so get anything thats rated upto 200bhp, not hard to find, popular ones are from the ford focus, Im using a renault laguna 3.0 V6 one, rated at 200hp which is more than I'll ever need, if I need more I can swap it to something more, not exactly a hard job

Pop into your local halfords and have a flip through there err flip charts and check the power ratings on most filters

Not that I've done that myself :w00t:

#15 Bad_Boy_Mini

Bad_Boy_Mini

    Passed Test

  • Noobies
  • PipPip
  • 32 posts

Posted 15 July 2010 - 09:31 PM

Right been puttin a few hours in again this week and things are lookin good! Been mainly workin on the fuel lines and gettin them lookin perfect...

I decided on usin -6 AN hardline for the main fuel lines runnin the length of the body, usin black plastic coated aluminium hardline. Then using -6 AN braided hose and Aeroquip aluminium fittings for the under bonnet lines, keep it lookin pretty!

Anyways enough waffle, heres the pictures...

Posted Image

Posted Image


Dont look much just sat there on the floor, but it looks better on the car...

Posted Image

Posted Image


Believe me when I say they were a BI*CH to get right, its easy enough to bend but gettin the bends in the right place and at the right angle takes time and patience! Then the ends had to be flaired for the fittings and then all cliped into place. I used some clips I found on a vauxhall, they worked great and look mint under there!

It looks better when the braided shiny bits get fitted...

Posted Image

Posted Image


These brainded lines came as a 1.5m length of the braided hose and then all the fittins separately, I had to make these up to my lengths, or if you know the lengths they can be made for you.

Looks good when the inlet manifold is on and they are connected to the rail...

Posted Image


I know your probably thinkin you can hardly see it anyway but I know its there and its nice to know its done properly! Well thats what I keep tellin myself (and me mrs!) anyway! lol!

Iv got my standard Mini MPI tank to go in the boot runnin the MPI in-tank pump and goin to be runnin a BMW M3 in-line fuel filter. I work for BMW so its on hand! lol!

Will keep you updated with the progress, hope your likin it so far, keep the good words comin, it helps when your gettin PI**ED off with the whole thing...


0 user(s) are reading this topic

0 members, 0 guests, 0 anonymous users