
a bit of background
i bought a set of wellers from 1275sprite on here who no longer had a use for them.
i decided to have a go at these myself for a couple of reasons, the first is the cost. dispite the fact i can get them sandblasted and powercoated any colour for £15 a wheel i worked out that if i add up the price the initially cost + the price to be stripped and painted + the cost of new tyres (aiming for yokos) they would be right in the range of a brand new wheel package.
the second reason, is down to my sometimes poor parking if i do them myself and kerb them i wont shed a tear!
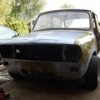
the wheels in questions area set of 5, 12x5 and were in decent nick, they still had the original weller wheels stickers and even the tyre fitting instructions stuck inside.
 100_0559.JPG 1.13MB
20 downloads
100_0559.JPG 1.13MB
20 downloadsanyway heres how they looked when i got them,
100_0556.JPG 1.09MB
26 downloadsthe one on the bottom left the previous owner gave a quick going over, hence why it looks far more decent than the rest.
i gave them a scrub in some hot soapy water to remove the road grime and brake pad dust,
100_0562.JPG 1.06MB
39 downloadsplease note the E marked safety shoes

heres a closer look of them and the real condition,
100_0563.JPG 1.06MB
25 downloadsas you can see theres some serious patches missing particularly in the receses further in towards the spokes.
the next step was a trip to homebase to buy a shed load of accessories,
namely, some nitromors.
i picked up the severely dented tin and got it half price, which was quality considering im doing this as cheaply as possible.
so to the garage and on with the nitromors very thickly.
100_0564.JPG 971.79K
17 downloads
100_0565.JPG 914.8K
13 downloadssome of the wheels were in a much better state than others and the nitromors dispite being very strong seemed to struggle to get through the top layer. what ever top coat the folks at weller used it work damn well.
anyway after many hours spent on 1 wheel because of the above i found that if a "scored" the top layer slightly just to allow the nitromors to get down into the various layers of paint it worked much better and quicker.
the above was found out after a few hours of seeming to not progress very far.
at first i tried a wire brush which was about a useful as i chocolate teapot, then i tried a wire brush attachment on a drill again didnt work great, both just seemed to skim across the surface without having too much impact
the perfect method i found was a wall paper stripper, if i used the corner along with some force make slits in the paint the nitromors worked perfectly.
(you can see it on the spokes of the next pic)
once the paint was weakened and the metal could be seen the wire brush on the drill made easy work of the paint removal for the best part.
100_0566.JPG 1.15MB
27 downloads this is how the first wheel looked pretty much finished (on sunday),
100_0568.JPG 985.04K
47 downloadsi do really like this colour but dont think ill be going with it.
dont be fooled by the picture the front of all the wheels are in much much better condition than the backs.
i put up this post asking people to photoshop some colours onto these so i could get some ideas for colours when i reach the painting stage.
have a look and see what you think put your ideas in there if you like and please excuse my means of getting the rim at the correct height
http://www.theminifo...p;#entry2028849
so i got back on it this morning and spent the day doing the other 4. so after what seemed like a never ending process of scrub (ruff up) the wheel, coating very generously in nitromors then using a wire brush in the drill which works very well once the initial top coat is removed the rest looked like this when i finished for today,
100_0573.JPG 901.82K
45 downloadstheres still along way to go, getting in some of the nucks and cranies is proving to be time consuming and doing inbetween te spoke without the drill trying to send me across the garage has taken some mastering.
for the most part the paint is off theres just the odd spec here and there, and inbetween some of the spokes. but all will be removed.
so the next step will be grinding down the rust and dependent on how pitted the wheel is after whether ill have to use some filler.
luckily the few patches i have had a go at havent really been too bad at all.
so thats it for now folks, im hoping to pop back in and do some more tomorrow so ill keep this updated.
hope you like what you see (whit whoo) and keep following the progress.
cheers,
john.
Oh and remember no likely no lighty!