Jump to content


Photo
- - - - -

Slug


  • Please log in to reply
43 replies to this topic

#1 M1n1c00per

M1n1c00per

    Stage One Kit Fitted

  • Noobies
  • PipPipPip
  • 75 posts
  • Location: Calgary AB

Posted 23 March 2011 - 05:09 AM

Hello, a few of you out there may know me as the Crazy Canuck A.K.A. King of Canada.. :)

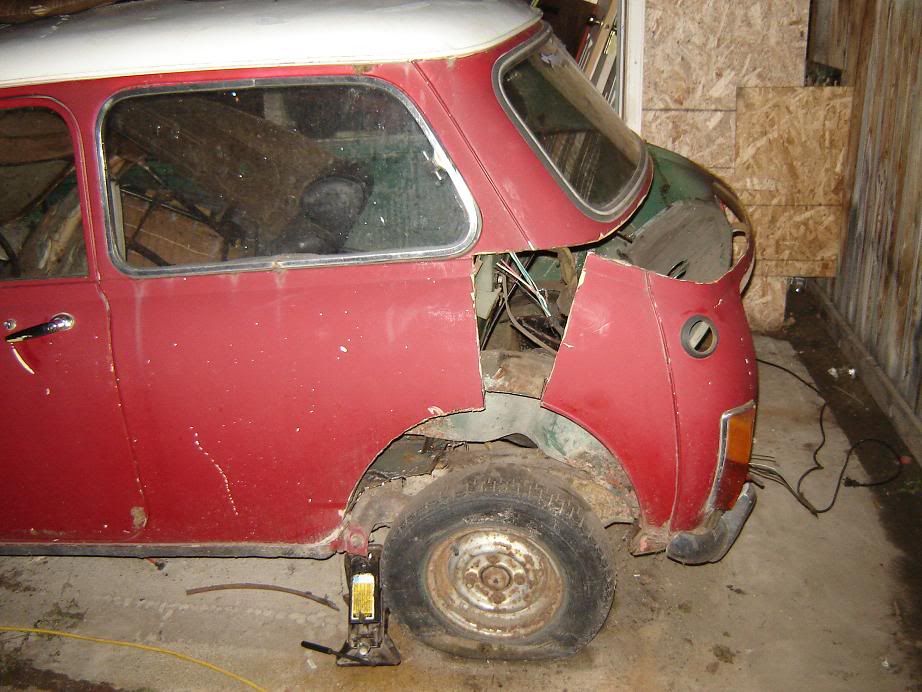
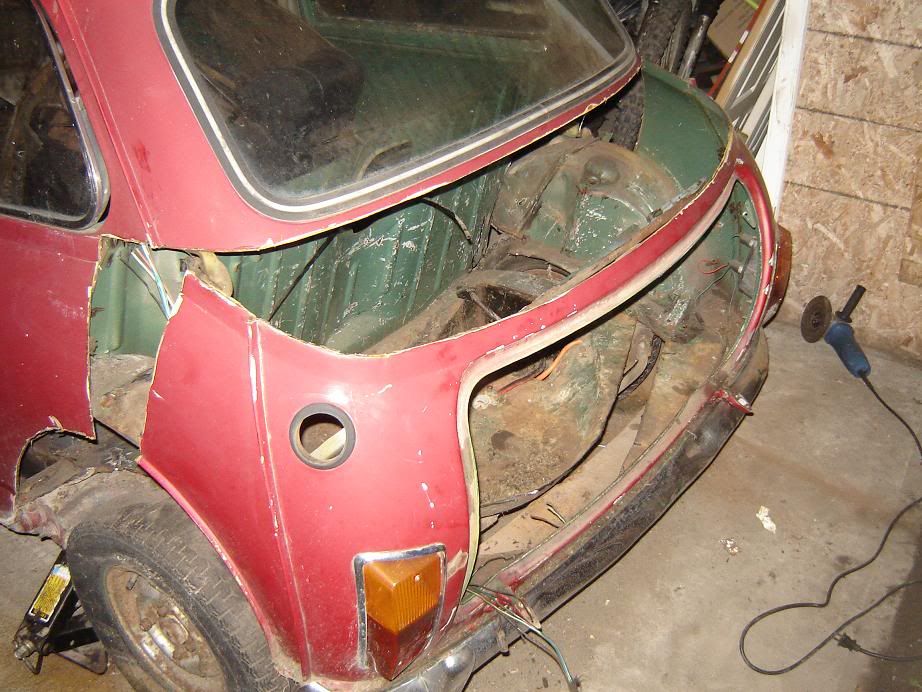
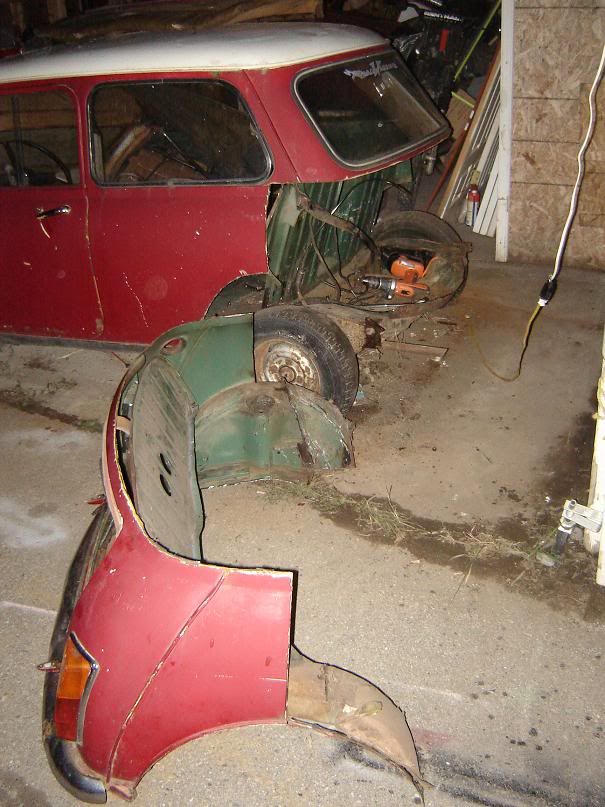
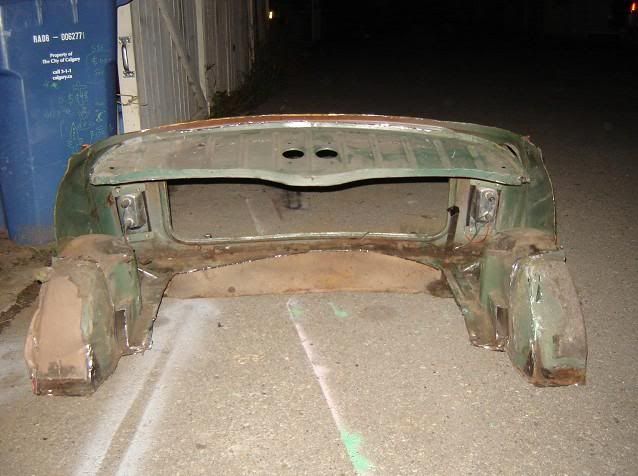
Now in this thread things get a bit crazy....
Some pictures are quite graphic and disturbing in nature, and may not be suitable for kittens, non Z-Car fans and some Mini enthusiasts... discretion is strongly advised.

So with that out'a the way, On with the build....
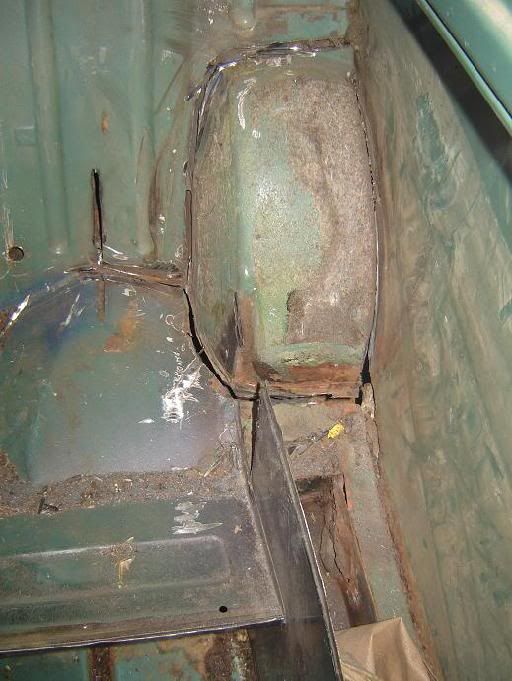
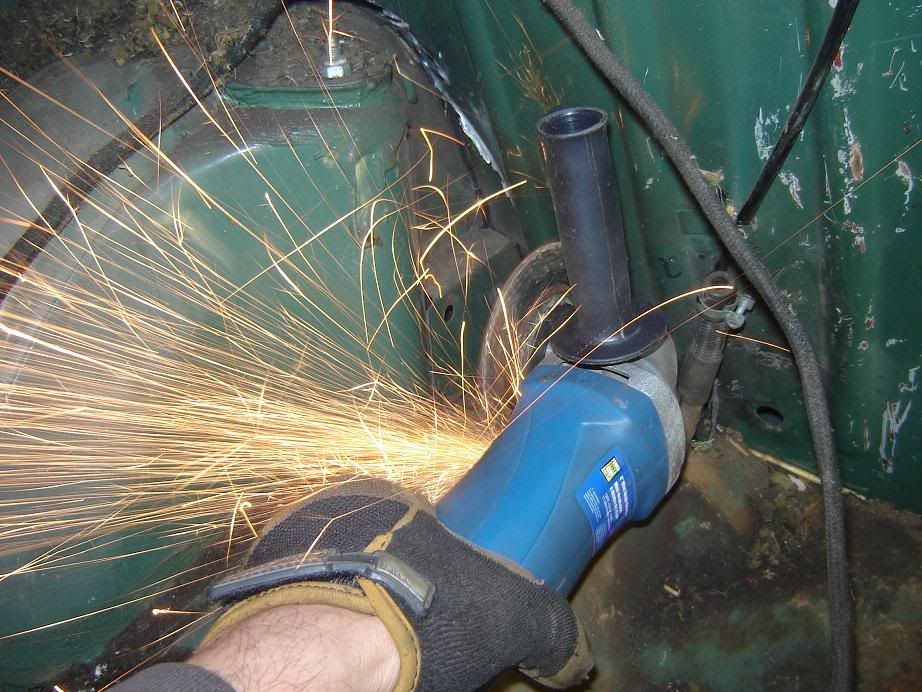
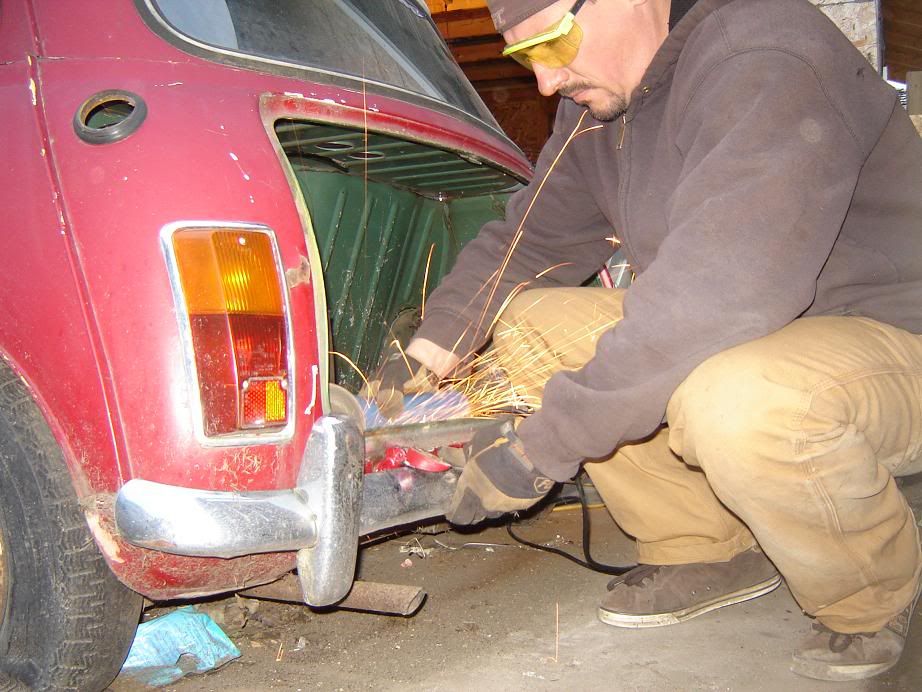
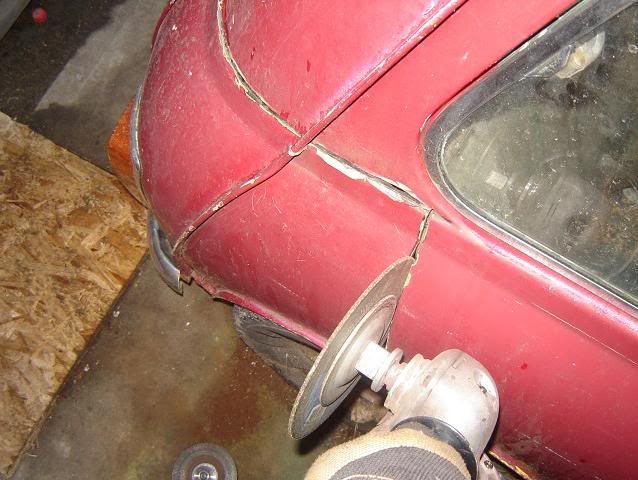
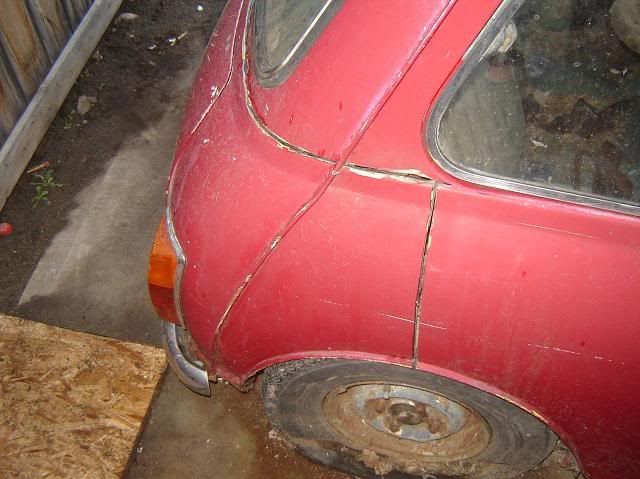
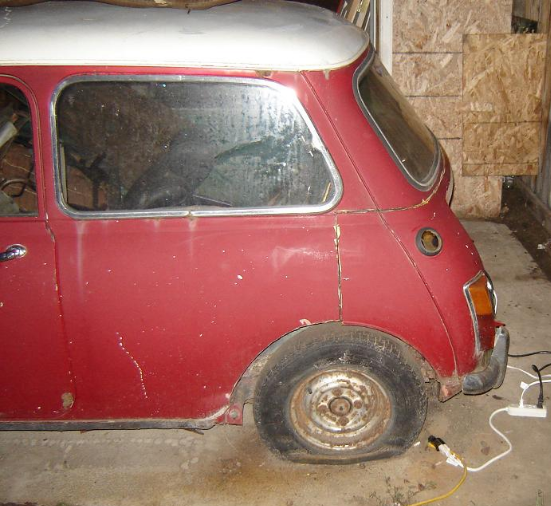
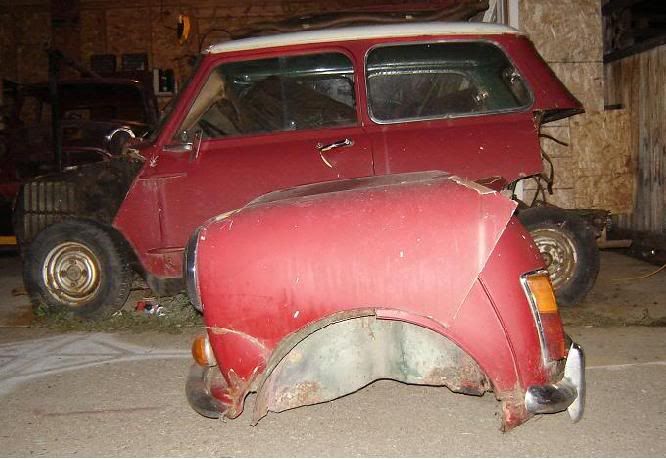
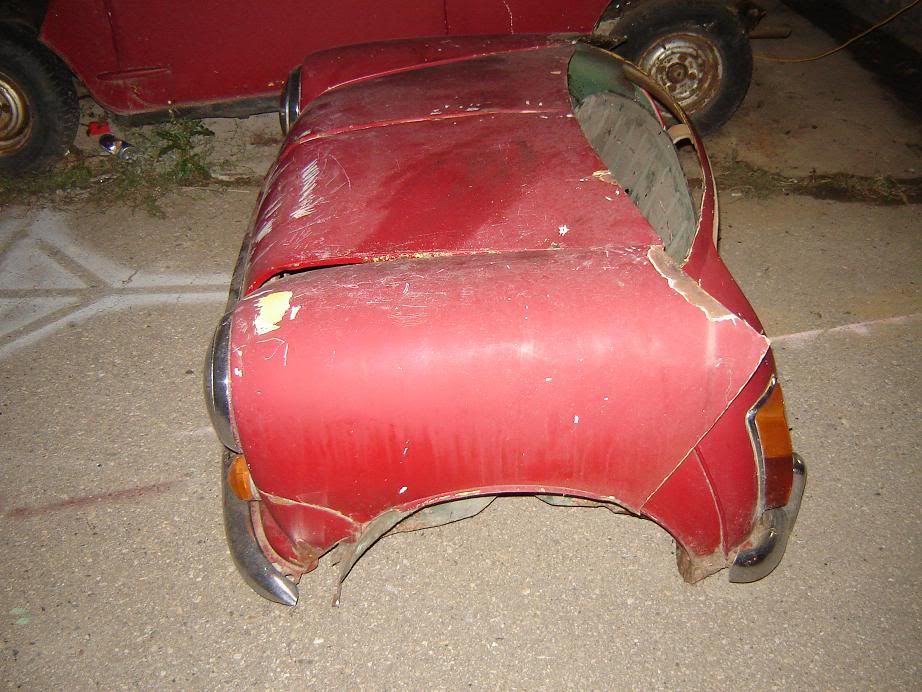
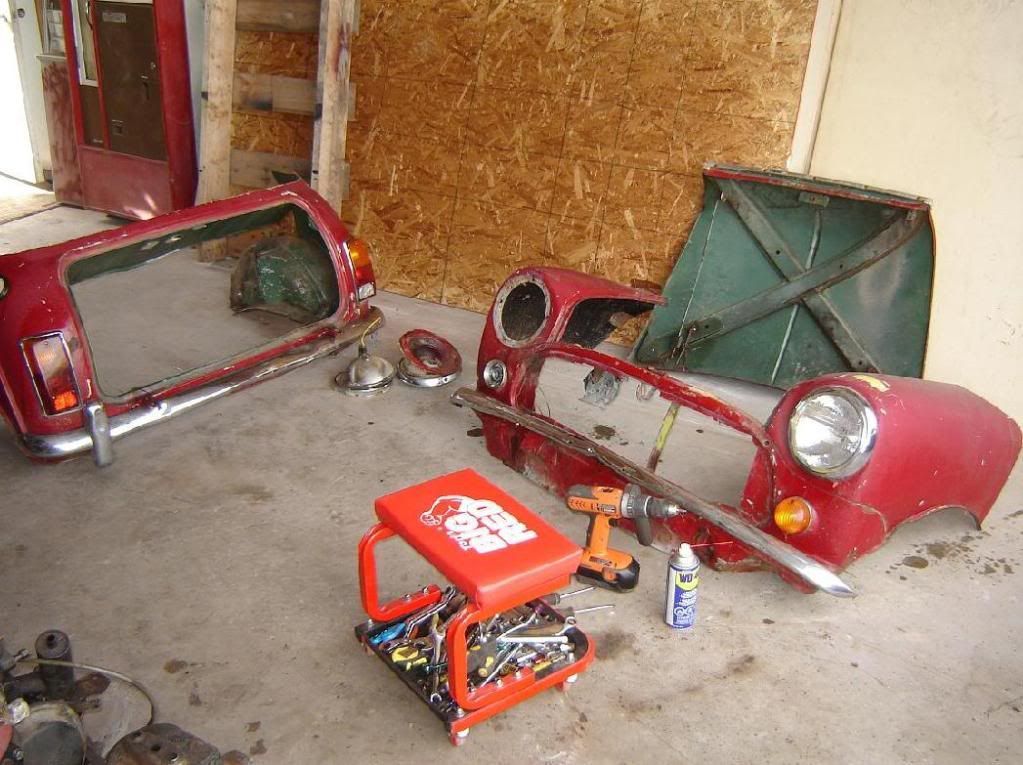
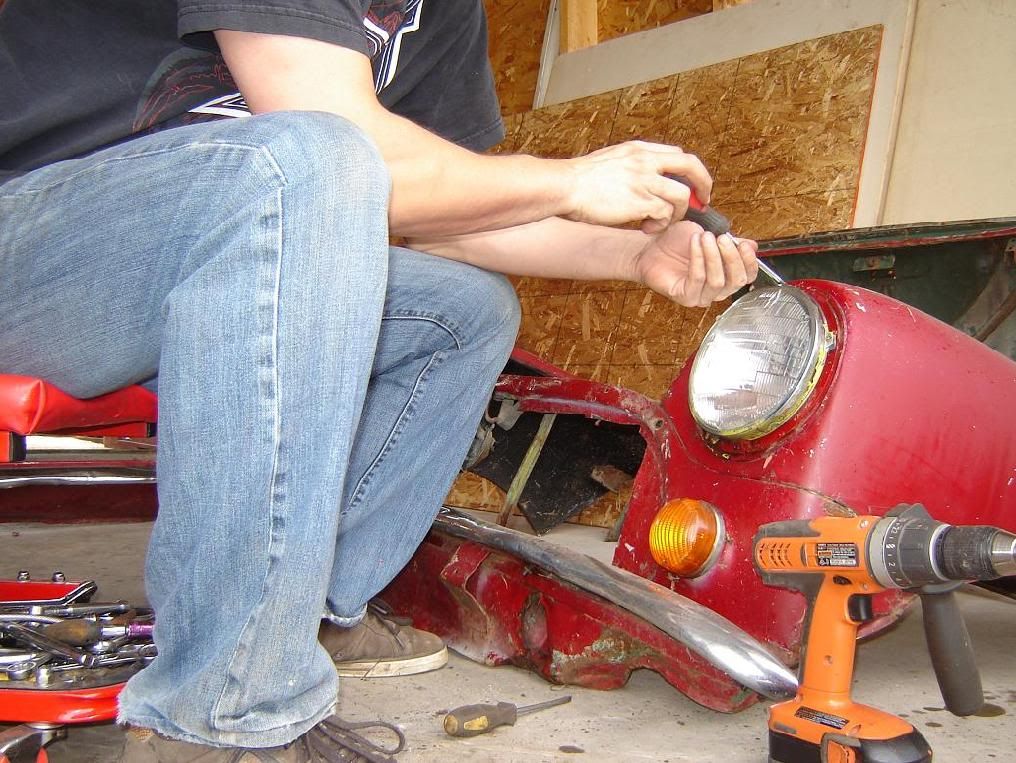
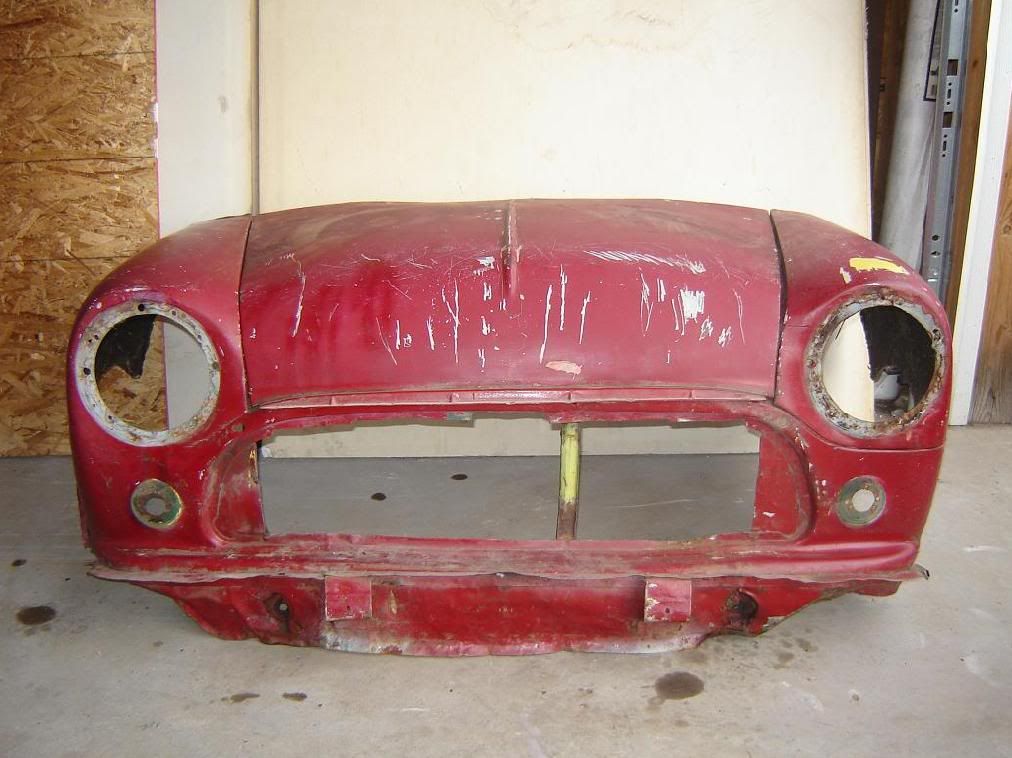
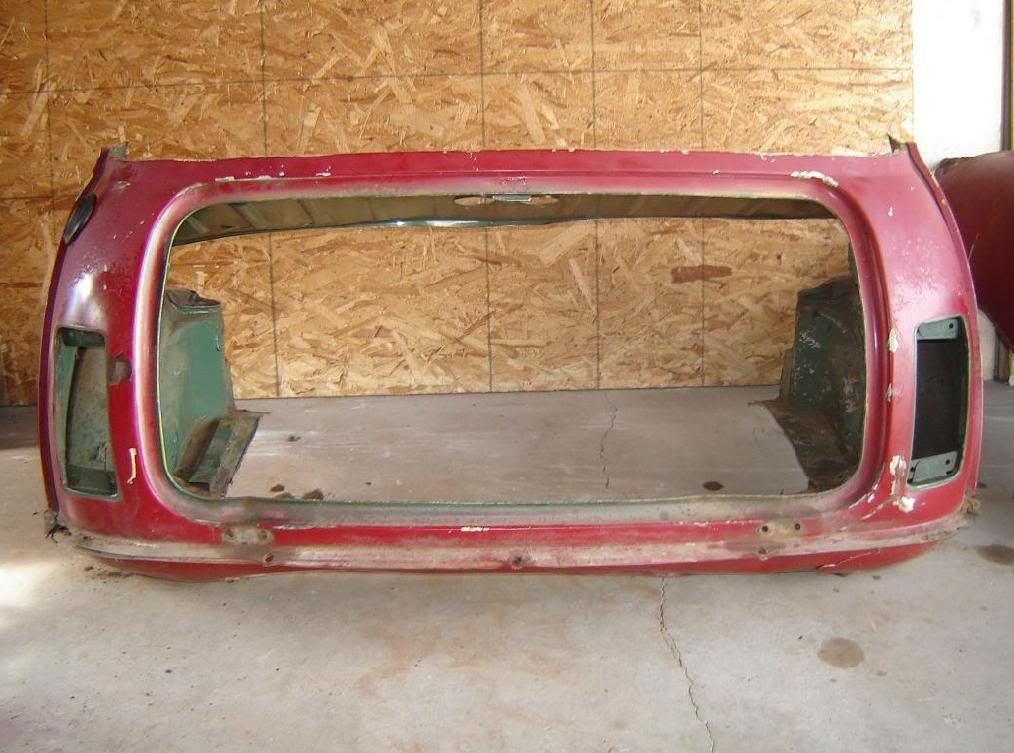
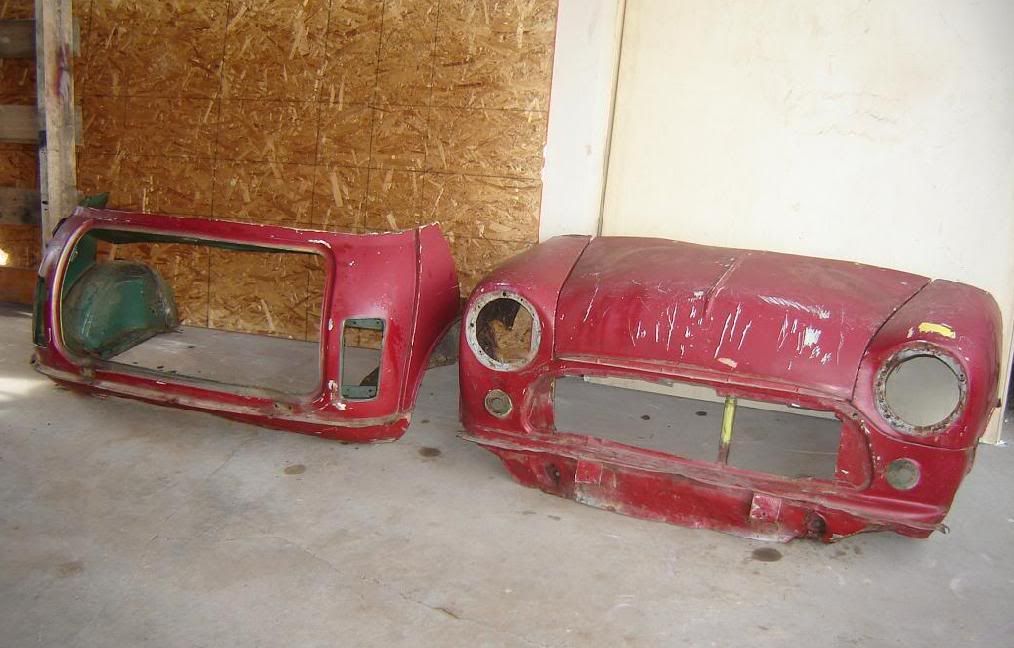
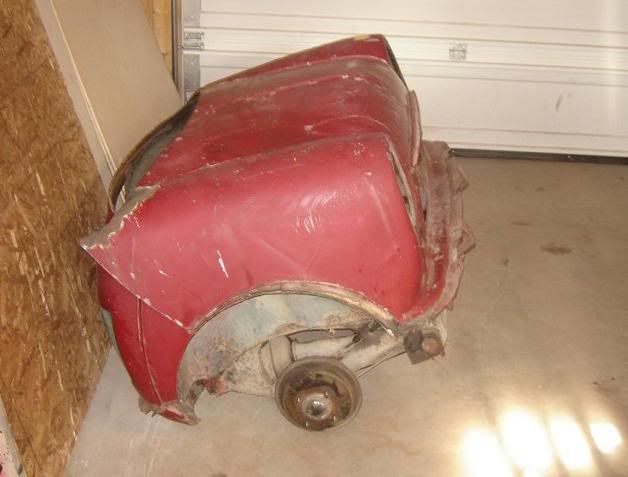
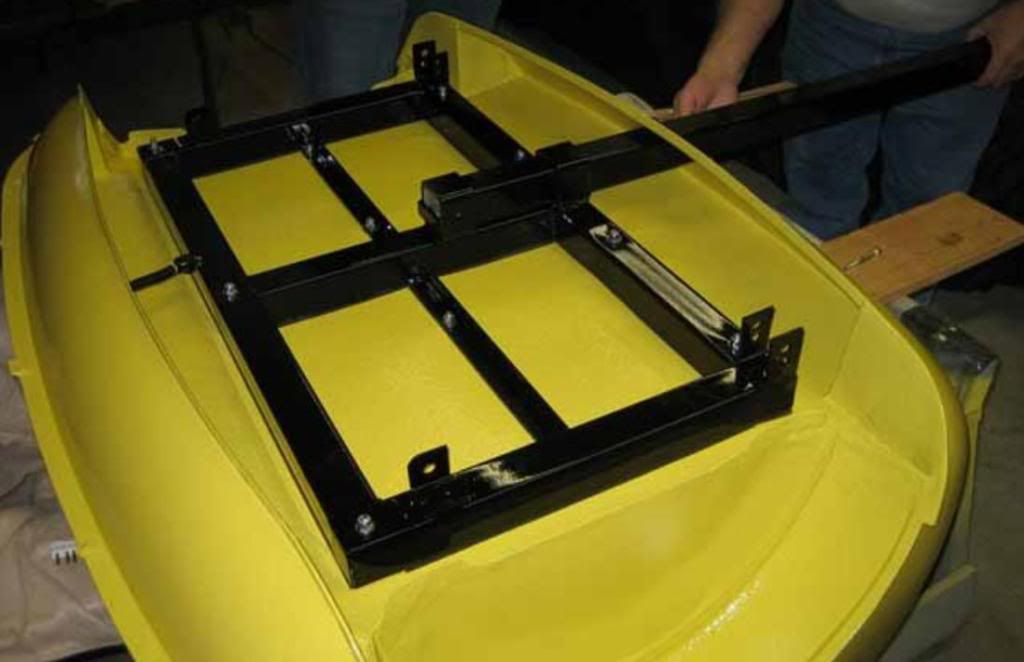
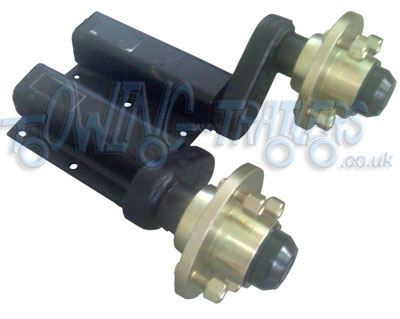
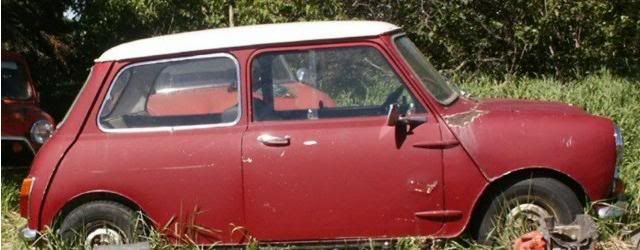
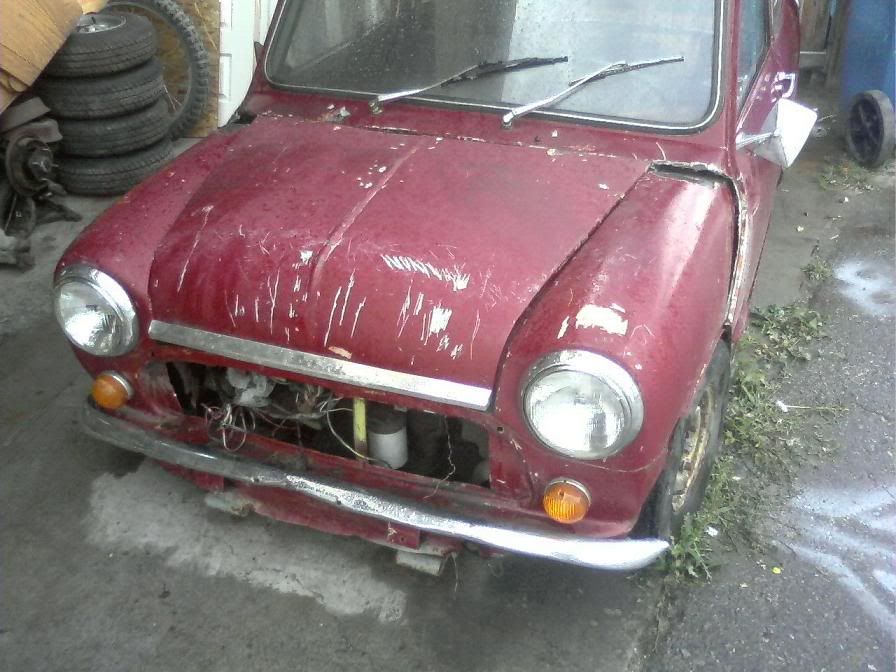
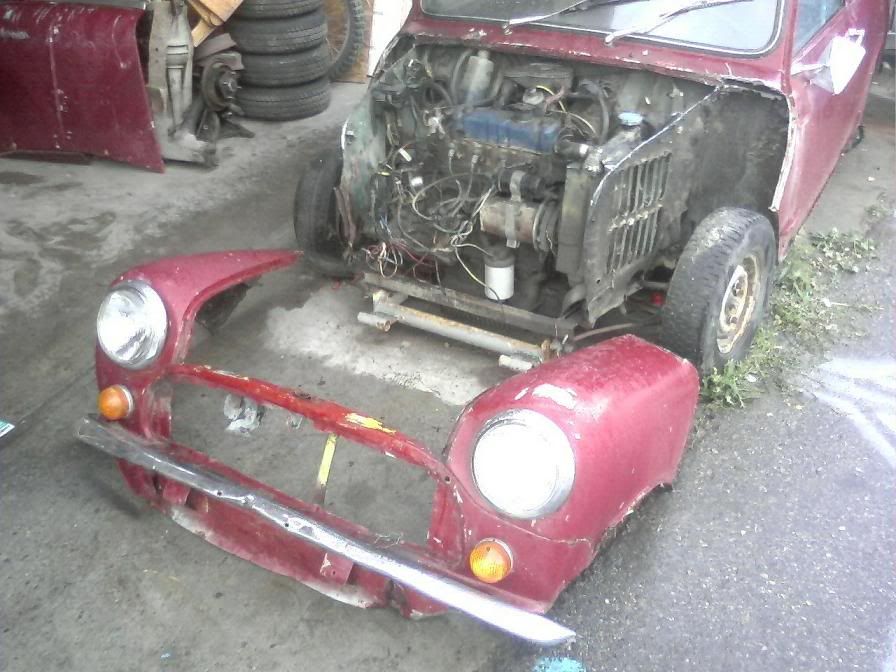
I'll be going through the do's and don'ts on how to make a "Mini Trailer"... Keep in mind I have no instructions, plans or any idea as to what or how this is going to turn out, but here we go......


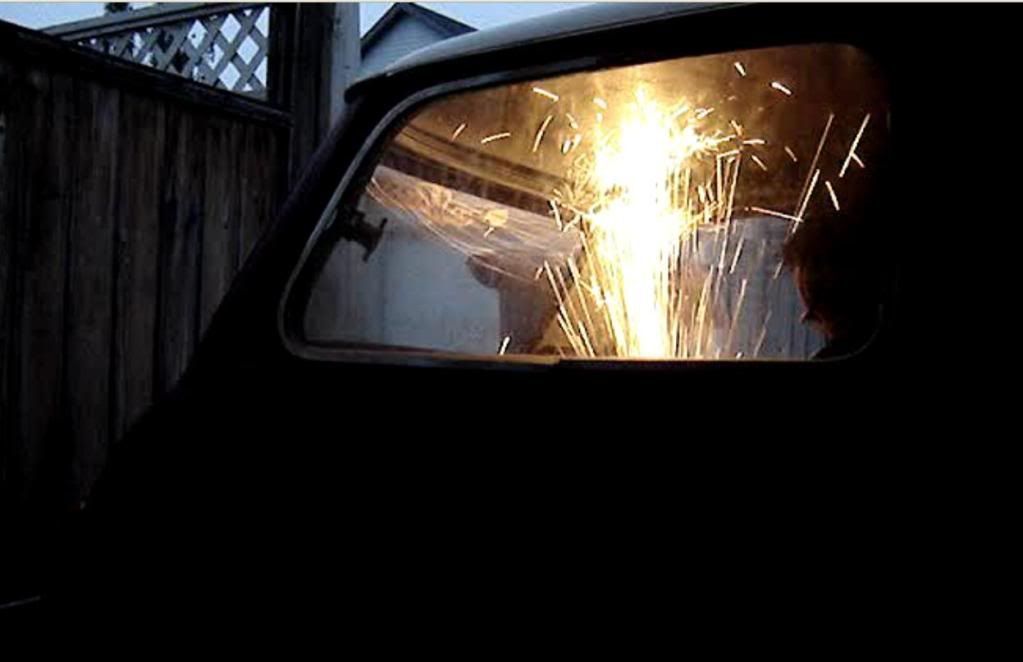
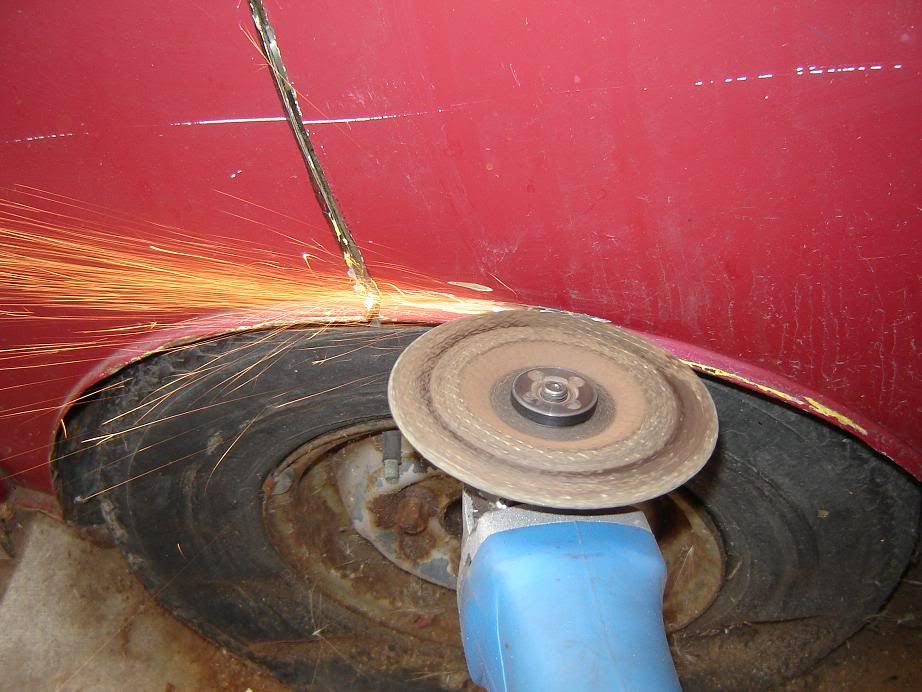
You take one 69' mini, a grinder and let the sparks fly....

Posted Image
Posted Image
Posted Image
Posted Image

Edited by M1n1c00per, 28 March 2011 - 11:39 PM.


#2 olds_kool_lews

olds_kool_lews

    Up Into Fourth

  • Traders
  • PipPipPipPipPipPipPipPipPip
  • 3,601 posts

Posted 23 March 2011 - 07:44 AM

whats the white metal bar at the front of the front subframe?

nice mini though, hope its not that mini being turned into a trailer lol

#3 M1n1c00per

M1n1c00per

    Stage One Kit Fitted

  • Noobies
  • PipPipPip
  • 75 posts
  • Location: Calgary AB

Posted 23 March 2011 - 03:36 PM

The white metal bar was one half of a custom trailer hitch.. The couple I bought the car from had it welded to the frame to pull the Mini behind their Camper.

Sorry to say but yes it is the same Mini in all photo’s, but the body was more fiberglass, filler and rust and the paint’n botchy welding were all that was holding this little car together.

I was going to restore it but after looking at it closer it was a lost cause…. But if you are in North America and need 69’ MKII Mini parts or 73’ MKIII parts I’m your guy.
I started building a Z-Car K20A2 Type-S Mini last summer with my 73’ Mini, and the Trailer is the side-kick to the project Mini. I had a great start to both builds and now that it’s spring I’m gear’n up to get the trailer and Mini shell to the paint booth and start putting the trim back on this build season.

Edited by M1n1c00per, 31 March 2011 - 04:35 AM.


#4 onlymelloyd

onlymelloyd

    Mini Mad

  • Members
  • PipPipPipPip
  • 276 posts
  • Local Club: looking...

Posted 24 March 2011 - 08:58 PM

looks like a good starting point, past saving in my opinion so its good that it will be turned into something useful instead of being scrapped.

What are your plans?

If you need any help give me a shout, having built a trailer i may be able to offer advice here and there.

Good Luck!

#5 M1n1c00per

M1n1c00per

    Stage One Kit Fitted

  • Noobies
  • PipPipPip
  • 75 posts
  • Location: Calgary AB

Posted 24 March 2011 - 10:33 PM

What are your plans?


Well I plan on taking the front end, (grill, lights and fenders up to and including the end of the bonnet).. And “blending” the Boot, (wheel-wells and rear sub frame) together to make a Boot-2-Bonnet trailer.
I’ll only have one wheel arch set as I’m cutting both the front and back down the middle of the arch’s and welding the two ends together. The Boot will be kept as the main storage compartment.
The bonnet lid will be welded shut at this point in the build, andunlike your traler Lloyd there will be no BB-Q…
In short where you welded the 2 ends together on your trailer, that is where the head-light on my trailer will be.
Then I will make a new floor/base that the sub frame will bolt to and make for a flat storage surface...

I will be posting my latest chop-shop work’s this weekend and then things should become a bit clearer. stay tuned... :thumbsup:

Just a hint, the Boot of the 69’ Mini meets the grinder….. should be fun.

Edited by M1n1c00per, 29 March 2011 - 02:59 PM.


#6 M1n1c00per

M1n1c00per

    Stage One Kit Fitted

  • Noobies
  • PipPipPip
  • 75 posts
  • Location: Calgary AB

Posted 27 March 2011 - 05:32 PM

Boot extraction.......

I took out the fuel tank, shocks and unbolted the back frame mounts. I will be using the existing sub-frame mounting holes in the floor of the boot if they can be saved from rust, then I hope to use the old sub frame on the trailer.
I planned to keep the wheel wells also, so it took a bit of strategically placed cutting.

Making sparks in the back-seat
Posted Image

Posted Image

In the Boot
Posted Image

Posted Image

Edited by M1n1c00per, 29 March 2011 - 03:34 PM.


#7 M1n1c00per

M1n1c00per

    Stage One Kit Fitted

  • Noobies
  • PipPipPip
  • 75 posts
  • Location: Calgary AB

Posted 27 March 2011 - 06:49 PM

Now for the outside of the Boot..

I cut down the center of the outer shell above the rear arch and then along the arch just through the shell and not through the wheel well.
Then from inside the cab I cut the rear dash from the shell just under and around the window. then I cut the back-rest from the shell, dash and wells.
the back seat side-pockets had to be removed also to free the wheel wells.

Posted Image

Posted Image

Posted Image

Found a bit of rust in the boot, so it looks like I might have to build up new frame mounting holes in the new trailer floor...

Edited by M1n1c00per, 29 March 2011 - 03:35 PM.


#8 M1n1c00per

M1n1c00per

    Stage One Kit Fitted

  • Noobies
  • PipPipPip
  • 75 posts
  • Location: Calgary AB

Posted 28 March 2011 - 12:19 AM

Boot continued...

again I must warn in this insert some pic's are quite graphic and disturbing in nature, and may not be suitable for some Mini enthusiasts....

With a few good tugs and maybe a couple of extra hits with the grinder, Bingo!!!


Posted Image

Posted Image

Posted Image

Posted Image

Posted Image

Posted Image

You can see the trailer concept coming to a reality in these pic's....... as it better because there's no turning back now.

Posted Image

Posted Image

Well that's all the Chop-Shop action for one weekend.

Edited by M1n1c00per, 15 April 2011 - 06:49 PM.


#9 Brams96

Brams96

    Up Into Fourth

  • TMF+ Member
  • PipPipPipPipPipPipPipPipPip
  • 2,308 posts
  • Local Club: Kentish Mini Club

Posted 01 April 2011 - 03:46 PM

Looks good so far, I like the idea too it's a different approach for a trailer than normal. I'll be keeping an eye on this :genius:

#10 M1n1c00per

M1n1c00per

    Stage One Kit Fitted

  • Noobies
  • PipPipPip
  • 75 posts
  • Location: Calgary AB

Posted 03 April 2011 - 10:56 PM

Thanx Brams and plz do check back on the progress.....

This week in the Chop-Shop I stripped the Trim, Lights, Chrome and any nuts'n bolts. Then Mocked the 2 half's up to the old rear sub-frame just to see what options I have.

Posted Image

Posted Image

Posted Image

Posted Image

Posted Image

Posted Image


Next to cut the 2 pieces and blend/fit them up together.
:)

Edited by M1n1c00per, 15 April 2011 - 06:50 PM.


#11 kitroxin

kitroxin

    Speeding Along Now

  • Traders
  • PipPipPipPipPip
  • 494 posts
  • Local Club: Celtic Minis

Posted 03 April 2011 - 11:46 PM

Why hasnt this been done before?

Fantastic idea!!

#12 Bungle

Bungle

    Original Spamster

  • Members
  • PipPipPipPipPipPipPipPipPipPipPip
  • 28,971 posts
  • Location: Cornwall
  • Local Club: cornish mini club

Posted 04 April 2011 - 12:11 AM

it has in fibreglass ABS make them

if you ditched the mini subframe and ran trailer suspension you could save a lot of weight

#13 M1n1c00per

M1n1c00per

    Stage One Kit Fitted

  • Noobies
  • PipPipPip
  • 75 posts
  • Location: Calgary AB

Posted 04 April 2011 - 04:22 PM

Why hasnt this been done before?

Fantastic idea!!


Thanx and ya I was thinking the same thing, I’ve been planning this now for 10 years and was hoping to see more of these so I could get some advice/direction and information as to how to go about the build…

I've been on the fence with the custom trailer frame Vs. the original sub frame and even have a custom frame looked out, (see attached photo). Weight is a big reason for the change I see that but I like the Shock Vs leaf-spring set-up, and I would like to incorporate as much of the Mini into the build as possible, just dono where to go at this point.


Posted Image


I have some time to think about what I’ll do in this regard, but I would like to hear from others on what they think/ have done.

Thanks again for your comments..

Edited by M1n1c00per, 31 August 2011 - 04:40 PM.


#14 Brams96

Brams96

    Up Into Fourth

  • TMF+ Member
  • PipPipPipPipPipPipPipPipPip
  • 2,308 posts
  • Local Club: Kentish Mini Club

Posted 04 April 2011 - 10:49 PM

Not sure of your budget but one of the weight saving ideas I've come accross is

Trailer Suspension Units
Posted Image

They can handle 350kg (not that you'll actually ever get that much weight in the trailer) and have the same PCD as a mini wheel. All you would have to do is weld strengthening plates to the bottom of the trailer bodywork then bolt them on. Simples!

Edited by Brams96, 04 April 2011 - 10:52 PM.


#15 M1n1c00per

M1n1c00per

    Stage One Kit Fitted

  • Noobies
  • PipPipPip
  • 75 posts
  • Location: Calgary AB

Posted 10 April 2011 - 01:44 AM

Not sure of your budget but one of the weight saving ideas I've come across is

Trailer Suspension Units
Posted Image

They can handle 350kg (not that you'll actually ever get that much weight in the trailer) and have the same PCD as a mini wheel. All you would have to do is weld strengthening plates to the bottom of the trailer bodywork then bolt them on. Simples!


Hay Ya I like these, I'm going to look into these as I can get them here in my neighborhood auto parts shop.
Thanx for the help Brams.


1 user(s) are reading this topic

0 members, 1 guests, 0 anonymous users