
Hi,
If the speed limit of the road you're parked on is higher than 30mph then yes. Thats the way i read it.
Cheers 



One Carb Or Two?


Posted 16 July 2018 - 08:02 AM
Hi,
If the speed limit of the road you're parked on is higher than 30mph then yes. Thats the way i read it.
Cheers
Up Into Fourth
Posted 03 January 2022 - 09:36 PM
I've been doing a few searches on this and found people asking for a pinout on the relay, no real response seen
some say just pull the resistor, one says cut the green at the relay, one says cross over the blue/brown to blue/red
I've spent the afternoon with a voltmeter and traced out on my loom on the garage floor and plotted it all out

Edited by stuart bowes, 04 May 2024 - 06:41 PM.
Up Into Fourth
Posted 03 January 2022 - 09:49 PM
therefore I believe my modified wiring would be:

Edited by stuart bowes, 04 January 2022 - 11:07 PM.
Moved Into The Garage
Posted 03 January 2022 - 10:58 PM
The green goes to many more things that a lamp on the dash.
the info is in your Haynes manual or if you don’t have one in the redrawn wiring diagrams thread above.
Up Into Fourth
Posted 03 January 2022 - 11:06 PM
the only snag is, there are about 8 different wiring diagrams in the haynes and none seem specific to my year / model, also the dim/dip part of it is not clearly obvious unless you spend an age tracing all the lines from one place to another
I just figured my version is far simpler and will be handy to anyone who has asked the question I keep coming across that hasn't yet had a direct answer, specifically anyone who searches dim/dip bypass and jumps straight to this thread
==removed misleading comments about green wire==
Edited by stuart bowes, 04 January 2022 - 08:23 PM.
Up Into Fourth
Posted 04 January 2022 - 01:46 PM
Up Into Fourth

Posted 04 January 2022 - 05:59 PM
Up Into Fourth
Posted 04 January 2022 - 08:09 PM
I've always a firm believer in 'simple is less likely to go wrong' and if I cut it out, there's zero chance I'll ever need to source a new relay, less chance the lights will fail, and it tidies up the loom a bit
I have corrected a couple of errors on the diagram above for future reference.
all it was really, I saw a couple of comments that asked for the same as what I was looking for, a diagram that showed what the relay outputs were and what all the colours mean, and no-one seemed to answer it other than 'go look at a wiring diagram' which isn't really all that helpful for others who might be flummoxed by diagrams and just wants an easy quick answer. I don't just want to cut something out, I want to understand what it does as well while I'm doing it
so the answer is now here for anyone who needs it
--
that aside, I can confirm that connecting blue/red to blue/brown as per the red line (showing which pins in case colours vary) does effectively wire out the relay as advised previously and you can cut the green without worrying about it affecting anything else or needing to patch it back in somewhere else
you can cut or disconnect the resistor, you don't need to bridge the connection. in fact when I re-wrap my loom with new sticky cloth wrap I'll follow the two resistor wires back all the way and just remove them from whence they came, same for the relay wiring.
Edited by stuart bowes, 04 January 2022 - 11:14 PM.
Stage One Kit Fitted
Posted 07 October 2026 - 01:28 PM
Hi all, I'm in the process of rewiring so have come up with this, I'd appreciate your comments.
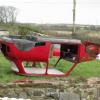
1989 mini Mayfair, Dim/Dip Relay, (DDU) removal
I have a shell and the rear lights installed on my current rebuild project. Having read all the posts regarding the Dim/Dip relay, I decided the best option would be to remove it, and slim down the wiring at the back of the dash. So I have rigged and connected the front loom to the car to test. Stage one was to see if it did what it was supposed to do, it didn’t. My light rocker switch gives me small sides at 1st position and dipped at 2nd position, whilst the stalk gives main beam. So I removed the DDU relay and put a loop in the wiring block, between BL/B and BL/R and it still worded just like tiger said.
Note it is important to look at the pre, dim dip wiring drawings to understand changes, as BL just added to existing looms rather than redesign. I have a 1981 mini also, so I compared 1979 mini special verses the 1988 carb onwards models as per Haynes manuals. Note in particular the thin blue from the DDU is not accurate, see below. There is a minimum of 50cm for most of the 7 wires to the DDU alone, so it is defiantly worth removing if you have a project IMO.
I have not made the final cuts yet as I seek your comments and advice first, in case there is anything incorrect with the following:
DDU Wires – Note this is my car loom, yours may differ.
Earth BK
BK to joint of 9 wires behind dash. Can be cut at this point or make into a separate earth block for auxiliaries. Medium sized wire from DDU to joint, then goes to main earth engine block LHS face on.
Green G
Goes to a joint of 5 wires behind dash, similar position to earth. Leads to the fuse box position 2, pos 1 is white. Can cut out at the joint behind dash.
Brown & Orange resistor wire
Start at relay, goes to resistor, to in line fuse, switches to brown. 1st wire BR goes to a 4 wire joint, near main earth point engine bay LHS, before starter relay. 2nd large BR wire, live source starter/solenoid. 3rd BR goes to 2nd inline fuse PU/O for hazards, int light. 4th BR, fuse box, position 3 – 4 PU Horn, Brake test, light flash at stalk.
So I can re purpose the inline fuse and remove resistor wires or cut all out to the joint.
Red & Rocker light switch
Brown BR - Off position - permanent live to battery/solenoid
Red -1st R goes to position 7 on fuse box. Position 8, Red/ green, sides, dash, number plate.
2nd Red at position 7 goes direct to DDU, this can be cut out but make sure you have the right one.
Blue at Rocker light switch
1st large blue BL wire goes direct to the, “flash/ switch” in the column stalk via the 7 wire connector block. (not shown in1988 Haynes)
2nd thin blue wire from DDU, joins (joint) to the 1st blue wire (above), about 10” from the light switch. Can cut out to this Joint.
3rd thin blue/orange from the same joint above, goes to inline fuse, to fog light switch and light. (shown different in 1988 Haynes)
Relay BL/B & BL/R
Note - BL/W goes direct to main beam via column stalk and 7 pin connector.
From relay BL/BR goes direct to the 7 wire female connector at the column stalk, which then connects to the BL/R wire on the male side. Note - It was showing BL/W on the male side, but when I unwrapped the stalk wires, I noticed the red had been rubbed off and 6” up it was BL/R to the switch.
So, from the relay, BL/R goes direct to lights. So I can trim and connect this wire to the BL/B wire at the female side of the 7 pin connector. Thus the blue wire in the rocker, powers the column switch and sends to BL/W or BL/R.
Hope this makes sense
Steve I
..is NOT a girl!

Posted 07 October 2026 - 03:00 PM
Not on a Mini but I've pinched the feed to the dim-dip resistor (usually the failure point) and used it for daytime running lights.


0 members, 1 guests, 0 anonymous users


