my kit is from gateros_plating and its pretty good, comes out quite bright after passivating aswell.
good luck with the project ash, its a shame the later minis rust out so soon.
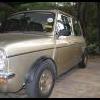
Wow, I like it. Hard to believe how rusty a 12 year old mini can actually be. Anyway, some great engineering skills used, I shall be using some of your ideas when I come to do my sills.
Thanks for sharing.
Thanks for the reply's, they give me motivation to keep going

Here’s the progress from the last couple of days, i decided to take this week off work and had planned to go on holiday but i had the new boot floor sat in the conservatory waiting to be fitted so i took the cheaper option and stayed at home

I’ve cut the floor out so there’s no turning back now

I planned to salvage the closing brackets but this has proven to be very time consuming, removing them without destroying them was a rite pain.


I’ve still got to finish stripping the closing brackets then i’ll shot blast them.

In order to get the closing brackets out in one piece i had to cut a section out of the wheel arch, i then welded a new piece in, i’ve still got to finishing dressing the weld on the N/S and i haven’t started the O/S yet.


I cut the boot floor down to size a bit, and just before packing up for the day yesterday i couldn’t resist offering it up to see how it fits

The overall fit is good, i marked the floor where to join is so all i’ve got to do is trim is back a bit.
The two outer bumper bolt hole line up almost spot on but the middle one need to be pulled into alignment, when all three are lined up the right hand side of the hinge panel still seems to be out a bit. It will pull into alignment though, before i weld anything up i’m going to fit the boot lid and bumper to see how it all looks.


So all i’ve got to do is cut the boot floor down a bit, repair the O/S wheel arch where i’ve cut the closing bracket out, make a couple of minor repairs to the bumper lip, strip down and shot blast the closing brackets and get them spot welded on to the new boot floor, then it ready to start welding the floor in.
Cleaning up the closing brackets is going to take the most time so i might just stop being tight

and take a trip to Mini Spares to get a new pair, although mine have a extra strengthening plate sat on top of them, i think this i normal but when you look at pictures of the new closing brackets they don’t seem to have it, and i can’t find that part listed separately???
So anyway if i pull my finger out i should be able to get to new floor welded in and the rear valance fitted by the end of the week which will mean all the welding on the car is finished.
Edited by v21ash, 03 June 2011 - 07:49 AM.