
How Do People Get Good Night Photos ?
Started by
oliver122
, Feb 02 2012 10:38 PM
40 replies to this topic
#1

oliver122
-
- TMF+ Member
-

- 1,007 posts
One Carb Or Two?
- Location: Stoke-on-Trent
Posted 02 February 2012 - 10:38 PM
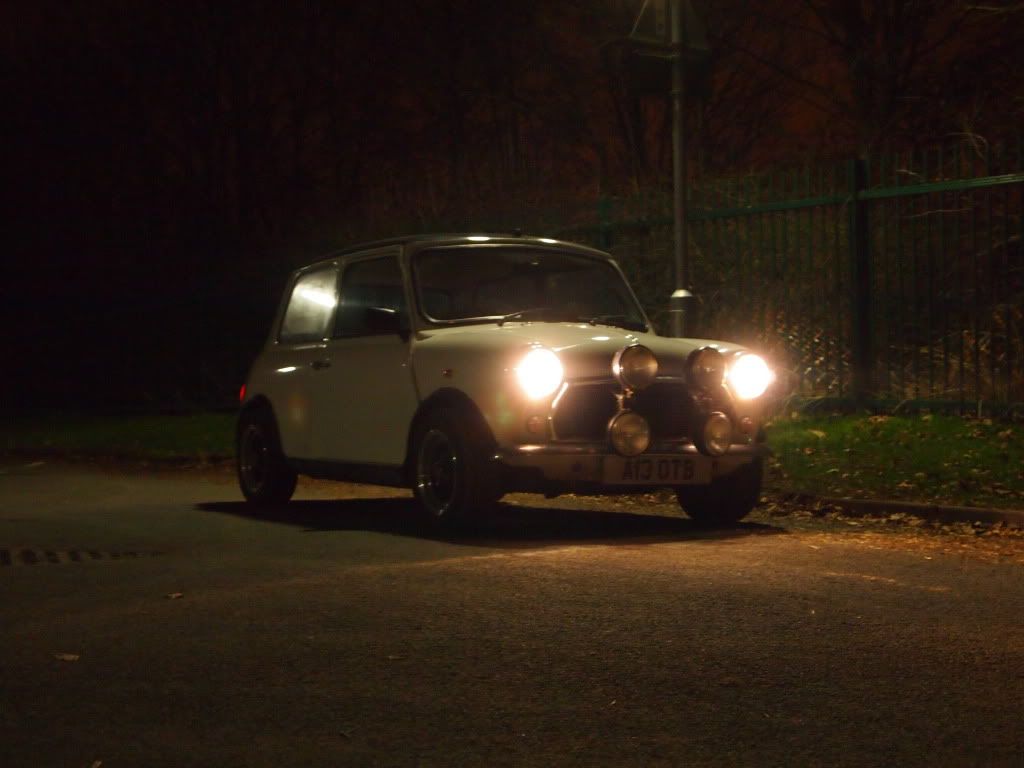
hi guys well ive got a olympus e-pl1 its my first proper camera as such (all the others have been point and shoot) anyway, ive been trying get some good photos and been messing about , ive managed to get one half decent shot really at night , but was a fluke , ive also been taking over images : http://s1230.photobu...y/new%20camera/ ( there's a link if you want take a look )
#2
RossKnight
-

- Members
-
- 2,539 posts
One heck of a member
- Location: Hampshire or Surrey
- Local Club: JKSA MOC
Posted 02 February 2012 - 11:02 PM
Tripod or somewhere strudy for the camera
Set your camera to manual (M)
Set the shutter speed to something long, like 5 seconds for example, and then just experiment. If it's too dark, use a longer shutter speed, too bright, turn the aperture down (higher f number) or turn the shutter speed down
Set your camera to manual (M)
Set the shutter speed to something long, like 5 seconds for example, and then just experiment. If it's too dark, use a longer shutter speed, too bright, turn the aperture down (higher f number) or turn the shutter speed down
#3
oliver122
-
- TMF+ Member
-
- 1,007 posts
One Carb Or Two?
- Location: Stoke-on-Trent
Posted 02 February 2012 - 11:23 PM
thankyoouuu , will have a go soon :)
#4
GTIAlex06
-

- Members
-
- 1,562 posts
Camshaft & Stage Two Head
Posted 02 February 2012 - 11:33 PM
Need a tripod or someone solid for the camera like a wall, use a low iso with a slow shutter speed and just mess around
#5
Dan
-

- TMF+ Member
-
- 21,354 posts
On Sabbatical
Posted 03 February 2012 - 12:01 AM
To take wet film photos at night you use faster film, film that is more sensitive to light. Digital is just the same. You dial up the sensitivity, there will be a setting called ISO in your camera. This is the equivalent of ASA in film speed. Find out the native speed of your camera, that is the sensitivity its chip has naturally. This will probably be whatever it defaults to and you should try to use that setting whenever possible. If you are in a situation where there isn't enough light for that setting with the speed of your lenses or your subject's movement forces a short exposure then you need to turn it up. At night try using 400, is the shots are too grainy and noisy when properly exposed then dial back down to 200. If they still look dingy at 400 dial up to 800 and see if you can get away with that without undue noise in the image. Your camera should have modes that allow it to control either the aperture or exposure while you control the other one. With it in aperture priority you can set the aperture as wide as possible (low numbers on the F stop) and it will work out the proper exposure time to expose the image at that aperture with the sensitivity you have set. It will warn you if the exposure is going to be very long, and if it's longer than around 1/60th you should be fixing the camera rather than holding it. Or at least breath out first, spread your feet out and hold it cradled in the palm of one open hand (that's how I find it most stable at least). If you can't get a short enough exposure at the widest aperture, you may need to turn the speed up another notch. You also need to consider depth of field though, but that might be a bit technical for now. Just know that the wider the aperture (the lower the stop number) the less you can have in focus.
The detail you can get into dark shots is all about your camera's latitude, that's how many stops (different levels of lighting basically) it can handle between the lightest and darkest parts of the properly exposed image. If it can only handle 4 stops or so of contrast then you should think about some sort of fill lighting if you want some detail in the foreground of a dark image. Fill lighting can come from anything, street lights or headlights or anything reflective. Although if the colours of the lights in the foreground and background are different you will get some odd effects. You would be amazed at the fill you can get from a white coat or cloth picking up moonlight for example. Consider if the foreground details will be lit better if you just move a few feet either way and get a different angle. Many digital cameras now have a setting that takes a bracket of three images at different aperture settings when you press the shutter, then it selects the best exposed parts of each image and combines them together. It's called HD..... something or other (hey I forget, I don't really do digital we still get through thousands of feet of film each day at work). This is essentially a way of faking a deeper latitude than the camera actually has. It's not great for taking pictures of stuff that moves fast because the three images in the bracket will each be different. You can get some amazingly detailed shots with this method though, it's a unique look. If the camera doesn't do this it will usually let you shoot a bracket anyway, and you can pick the one you like best. This is when it takes 3 photos in sequence, one each side of the exposuse setting you have set. So you can see if it looks better a little brighter or darker.
So in brief, turn the speed up. Set the camera to aperture priority. If you are new to using cameras properly I wouldn't use manual or bulb settings yet, the camera will be better at working out the exposure than you will for now. Choose a wide aperture. See if the camera has any modes that can help you like HD whatever-it-is or bracketing. And as said above, experiment and practice. Once you understand what the camera is doing, the settings and all the technical bits will become second nature and you can get back to just worrying about the image. And most of the time you will know what to do to fix an image that is not coming out the way you imagined.
#6
Black.Ghost
-

- TMF+ Member
-
- 2,567 posts
Formerly known as TneMini.
- Location: Bedfordshire
Posted 03 February 2012 - 02:20 AM

Dan, after that he has probably run away.
I think there are different aims at night if you want a picture that captures the darkness of night as well, see above. I'm not very talented and did only a very brief course in it, but we were taught the benefits of a really slow shutter speed, and talking about keeping it open for long periods of time, allowing as much light in as possible. This would mean a smaller aperture (higher f number) and can keep the ISP a bit lower. We were taking pics of wood lines at night and getting daylight quality pics. This is good if you want the detail
But can only take the pic at night.
We also tried an infra-red flash. Personally I had very little success with it but a couple of the lads had some great shots. Our pics were all about the detail though, not the night time aspect of it.
#7
Dan
-
- TMF+ Member
-
- 21,354 posts
On Sabbatical
Posted 03 February 2012 - 10:50 AM
Yes good point, probably a bit technical. And as you say long exposures are great, but only really for stuff that doesn't move or for effects. Do you have a better camera than the people who were able to make use of the infra-red flash? Good cameras are designed to take photos of light you can see, but digital chips are not very selective and can naturally see a bit of infra-red and a bit of ultra-violet. So some good cameras have an optical low pass filter directly over the chip. It's a filter pack that rejects high frequency images to prevent the chip getting confused by images that have more detail than it can capture and also rejects the infra-red and ultra-violet. So a camera that has one won't be any use with infra-red lighting.
#8
The Matt
-

- Admin
-
- 17,232 posts
You don't escape that easily.....
- Name: Matt
- Location: Overton, North Wales
- Local Club: Welsh Border Minis
Posted 03 February 2012 - 11:15 AM
I think the biggest secret for "tack-sharp" night photos is tripods personally. Hand-holding for anything other than daylight snapshots just doesn't work for me.
Aperture as wide as it can go
Tripod (or a bean bag is handy as it's easy to carry around and you can carry them around easy)
ISO setting higher allow lower exposure times to help reduce noise in the photo
Learn your camera's manual modes (Aperture priority, exposure priority etc)
Experiment, that's the main thing. I take a notepad out with me and make a quick note of the settings I've used and the ones that give you the best results
I desperately want to take some good night photos, so I'm trying to learn too!
#9
TA2DMAC
-

- Members
-
- 755 posts
One Carb Or Two?
- Location: Detroit
- Local Club: Michigan MINI Motorin Club
Posted 03 February 2012 - 11:32 AM
Another good tip. Bring a lantern style flashlight and turn it on hi and put behind the car. It will give you a bit of a backlight. If you can find a good portable spotlight you can create some cool effects with tinfoil and colored plastic wrap as a lens filters. For good shots you want to have some backlight and more light up front. It highlights the subject. I like having 3 light sources that at least 2 can be moved around.
Edited by TA2DMAC, 03 February 2012 - 11:33 AM.
#10
RossKnight
-
- Members
-
- 2,539 posts
One heck of a member
- Location: Hampshire or Surrey
- Local Club: JKSA MOC
Posted 03 February 2012 - 12:04 PM
I take a notepad out with me and make a quick note of the settings I've used and the ones that give you the best results
If you go look through your pictures on your camera and press something like 'disp' or one of the arrow keys or something, it usually brings up all the settings you used for the shot :)
#11
The Matt
-
- Admin
-
- 17,232 posts
You don't escape that easily.....
- Name: Matt
- Location: Overton, North Wales
- Local Club: Welsh Border Minis
Posted 03 February 2012 - 12:08 PM
Yer, I know, but I find it a handy reference when setting up anorl.
#12
the_r_sole
-

- Members
-
- 831 posts
One Carb Or Two?
Posted 03 February 2012 - 12:39 PM
i think the best thing to do is to just try out some different things, a tripod is usually needed, and you can play with iso - mucking about with a torch can be fun too!
I did this on a pitch dark night with a torch and a 15 secs exposure

shiny wheels by barireid, on Flickr
also i think it was the first recon mission in the show and shine section which was night time shots, might be worth having a look at that and even asking folk with pics you like what their settings were
I did this on a pitch dark night with a torch and a 15 secs exposure
shiny wheels by barireid, on Flickr
also i think it was the first recon mission in the show and shine section which was night time shots, might be worth having a look at that and even asking folk with pics you like what their settings were
Edited by the_r_sole, 03 February 2012 - 12:40 PM.
#13
Black.Ghost
-
- TMF+ Member
-
- 2,567 posts
Formerly known as TneMini.
- Location: Bedfordshire
Posted 03 February 2012 - 01:04 PM
Dan yeah the long exposure stuff was for still objects.
As for the infra-red, we all had a Nikon D200 and the same lenses. Only a couple managed to get really good shots, the rest of us were not particularly good. I think I had one half decent one. But when I did this, I wasn't really into photography much, it was a case of needing it. I wish I had followed it up a lot more now.
But the best way to improve anything is practice. Set the camera up, and then just change one setting at a time. Keep doing this and take hundreds of pics. Then look at them all and see the differences, then in your own mind it should give you a better idea of what everything does Nd the effects you can achieve.
#14
Dan
-
- TMF+ Member
-
- 21,354 posts
On Sabbatical
Posted 03 February 2012 - 01:34 PM
If you go look through your pictures on your camera and press something like 'disp' or one of the arrow keys or something, it usually brings up all the settings you used for the shot :)
Not all cameras record anything very useful in the metadata when in manual mode, or even in some automatic modes though. Especially if you are using a manual lens or one from a different manufacturer becuase it might not be equipped to even sense the settings. If I use my 500 for example it can't record anything because it's purely manual, although the fact it has a fixed aperture of 8 narrows down the options! Taking notes is a good idea if you want to learn from either your mistakes or successes.
Long exposures don't normally occur to me since at work (which obviously is where I am normally surrounded by discussions of stops and speeds and it gets under your skin a bit) our exposure time is usually physically limited to no more than 1/50. But when I do end up playing with a still camera I'm amazed at some of the shots you can get if you just leave it open a little longer.
#15
The Matt
-
- Admin
-
- 17,232 posts
You don't escape that easily.....
- Name: Matt
- Location: Overton, North Wales
- Local Club: Welsh Border Minis
Posted 03 February 2012 - 01:42 PM
I'm absolutely desperate to do a long exposure shot outside the Nurburgring this year at night. It's actually what I've bought the camera for.
I want to do some photos of the run, with the my Mini under the Nurburgring logo in the background and light trails of the other runners going past!
I love those kind of photos, ones like this:

I guess the trick is not to overexpose the bright stuff whilst still getting enough detail on the dark stuff. Lighting is key as said above.
I want to do some photos of the run, with the my Mini under the Nurburgring logo in the background and light trails of the other runners going past!
I love those kind of photos, ones like this:
I guess the trick is not to overexpose the bright stuff whilst still getting enough detail on the dark stuff. Lighting is key as said above.


1 user(s) are reading this topic
0 members, 1 guests, 0 anonymous users


