Jump to content


Photo

Rsp Mini Cooper - 2-Way Sq Build


  • Please log in to reply
70 replies to this topic

#1 freshairmini

freshairmini

    Camshaft & Stage Two Head

  • Members
  • PipPipPipPipPipPipPipPip
  • 1,718 posts
  • Location: Alresford, Hampshire
  • Local Club: Winchester Area Mini Owners

Posted 26 February 2012 - 06:03 PM

HI,


Thought I better start my self a build thread.

Been slowly building up some kit for a nice, mid-high end (i would say :D ) build.

Kit so far consists of:

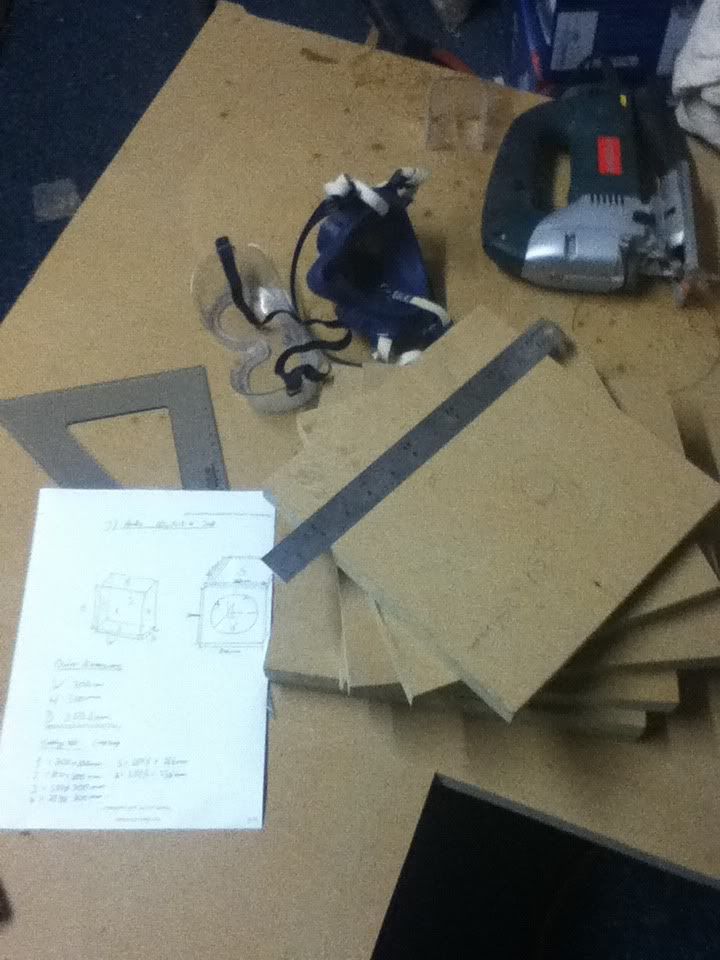
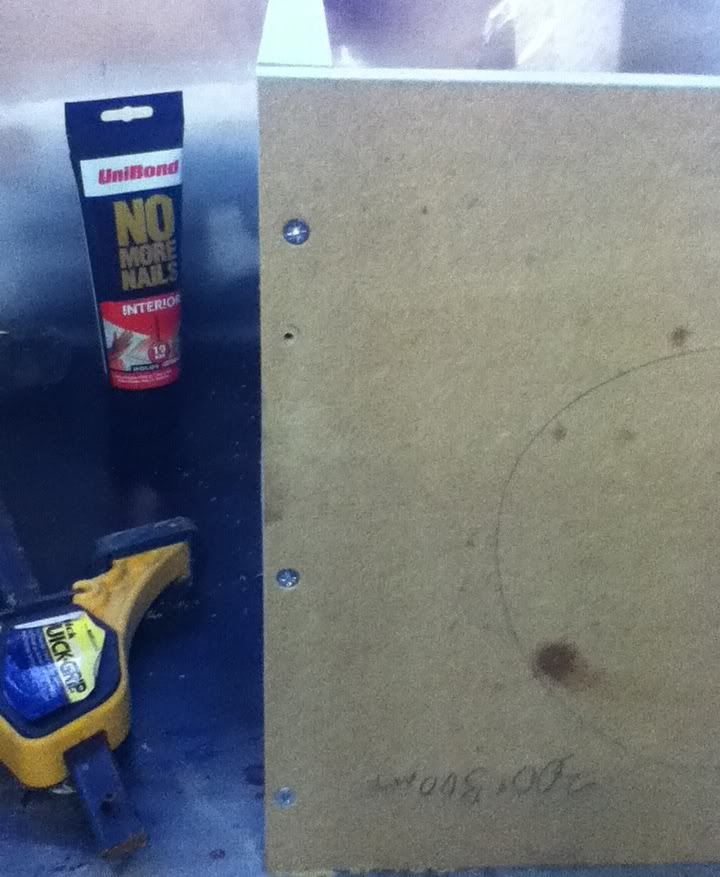
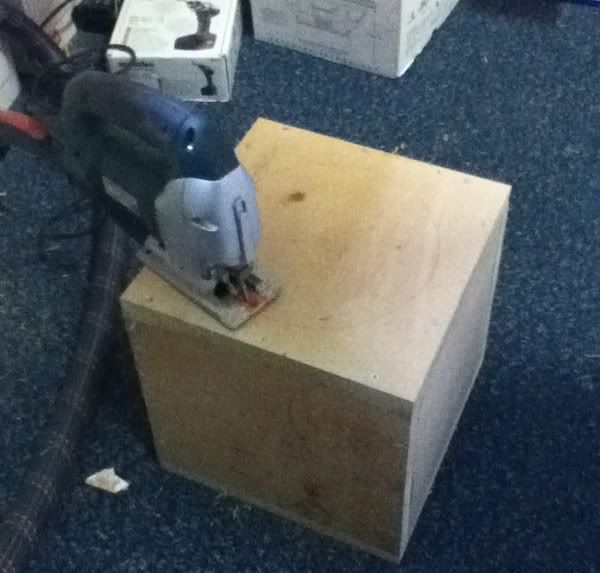
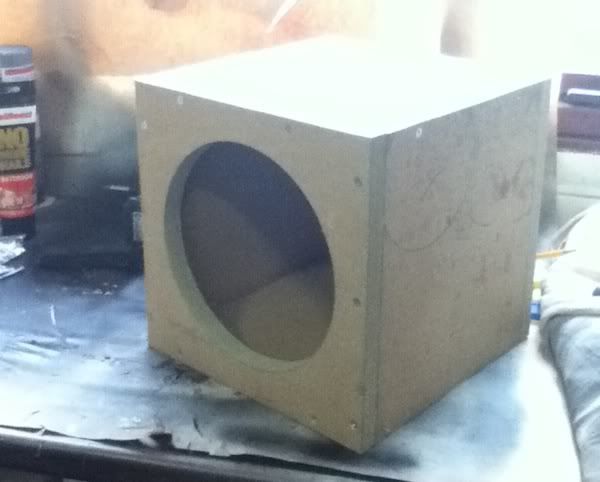
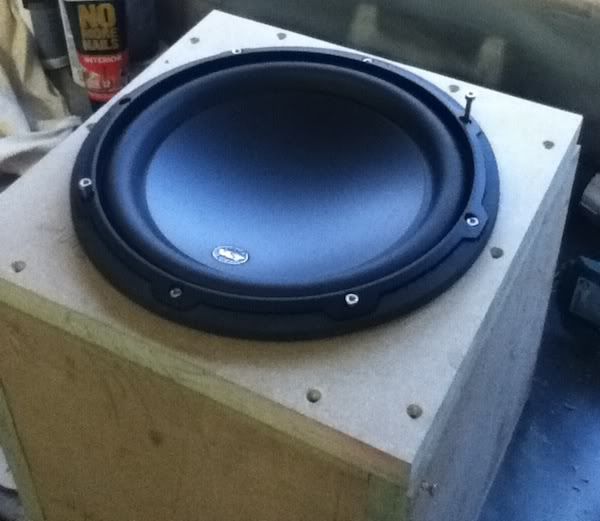
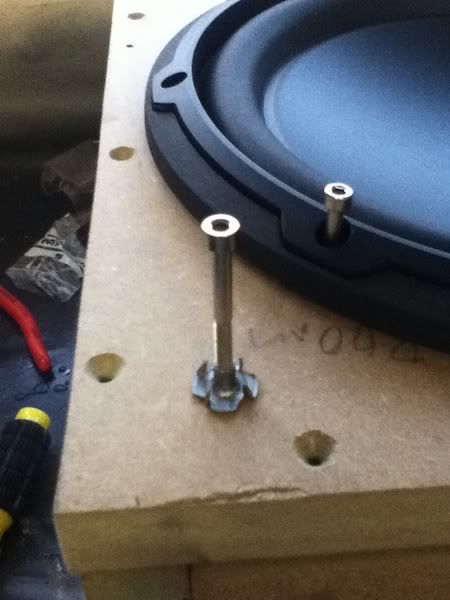
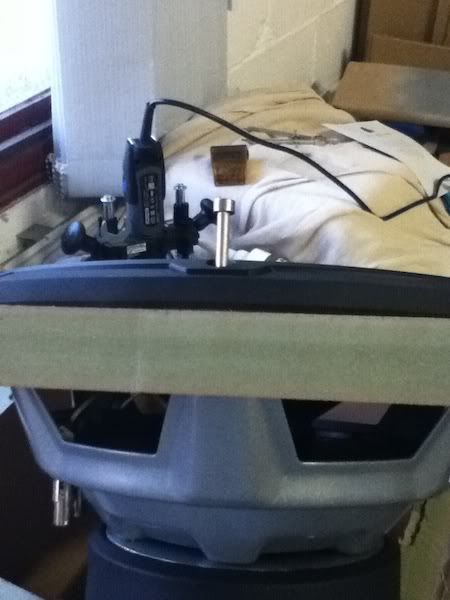
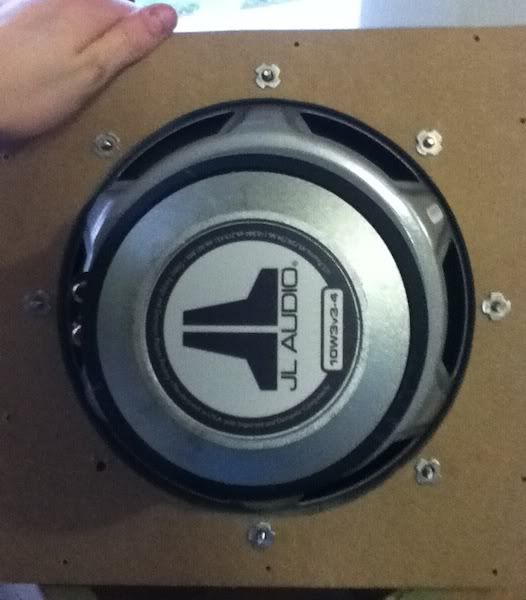
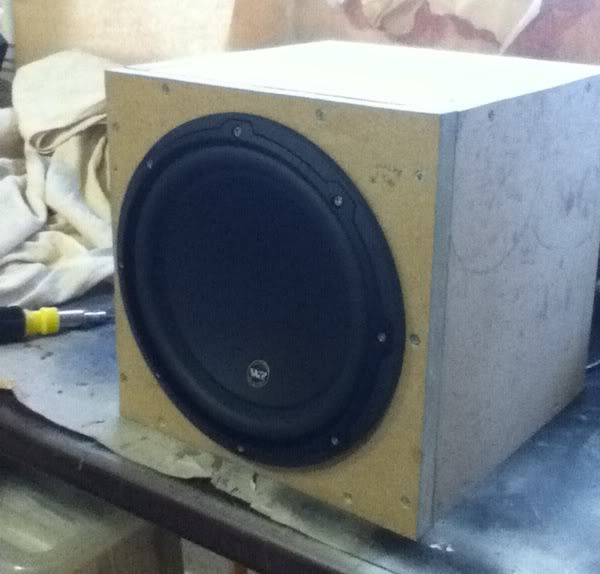
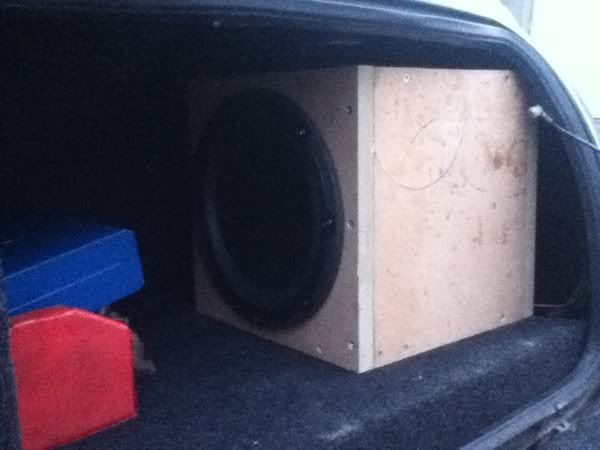
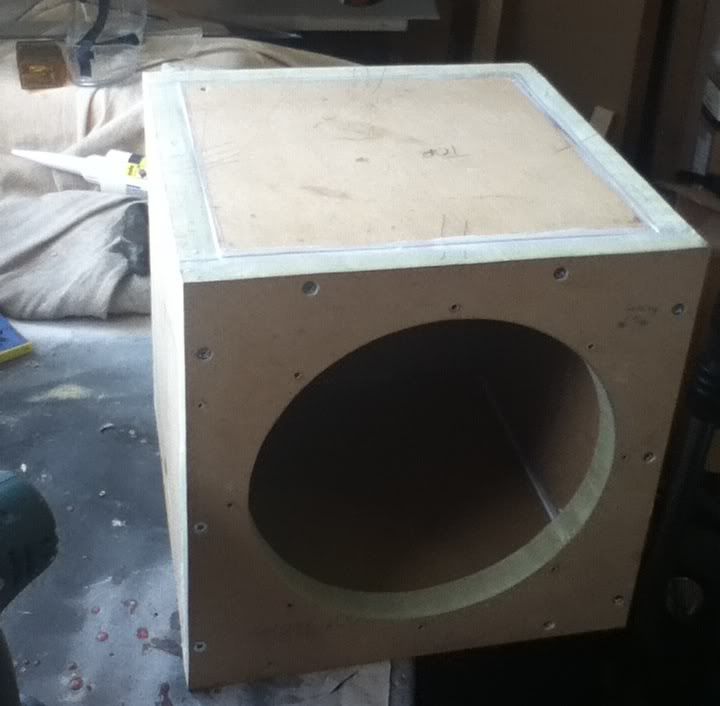
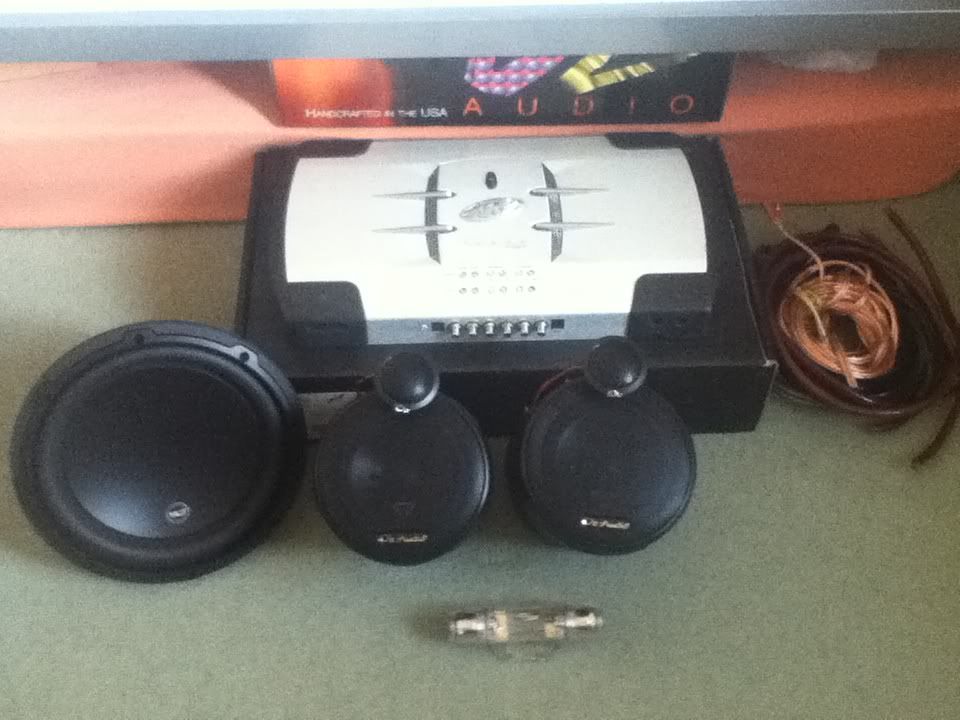
Sub: JL Audio 10w3v3-4 10" sub. Going in a sealed 17ltr enclosure. Should be about 300mm3, bought second hand, nearly new condition from talk audio forum.

2-Way components: Oz Audio CS130's. Also bought second hand, in nearly new condition from talk audio forum. Supposed to be a nice speaker set, tweeters in the kit are supposed to be pretty special for the price band they where in (mid to high end).

Amp: Phoenix Gold Xenon 100.4, 4 channel amp, 100wat rms per channel, can take anywhere from 1ohm to 8ohm, due to special circuitry, so pretty versatile.

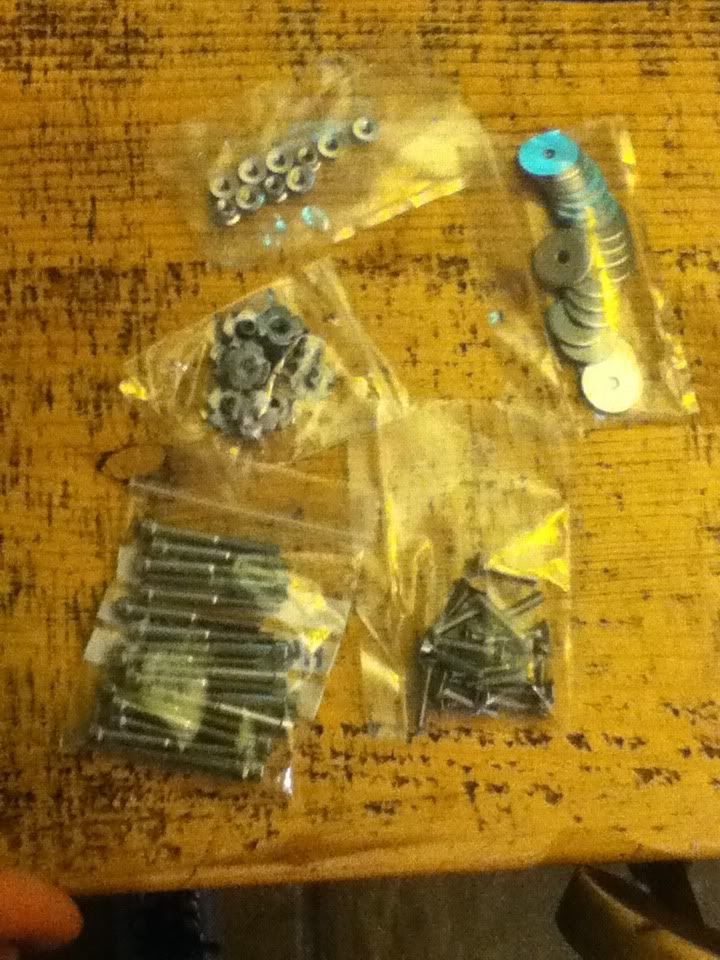
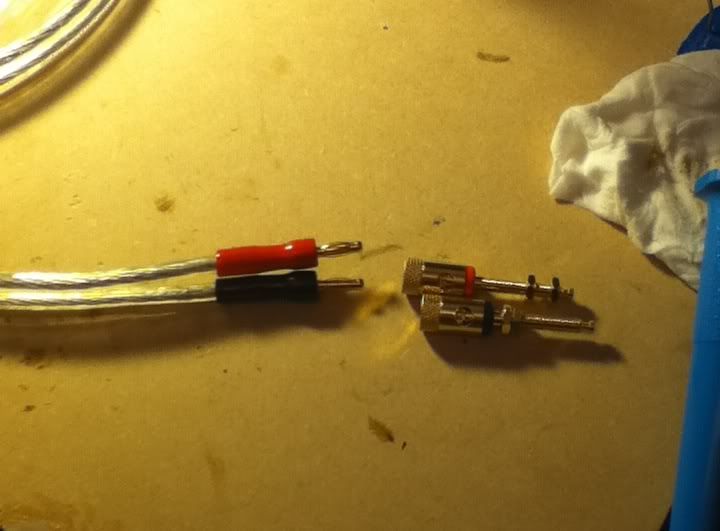
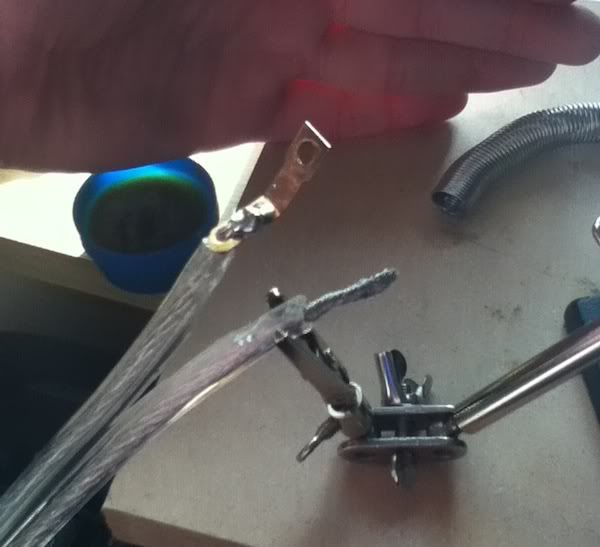
Cables consist of a mix of phoenix gold, soundstream and stinger.

The Oz Audio components will be housed in some little Aperiodic Enclosures I made, from instructions from Ruckus, on a thread about fibreglassing, found here if anyones interested: http://bit.ly/xxj4U2
(post number 3)

And said pods look like this!
Posted Image


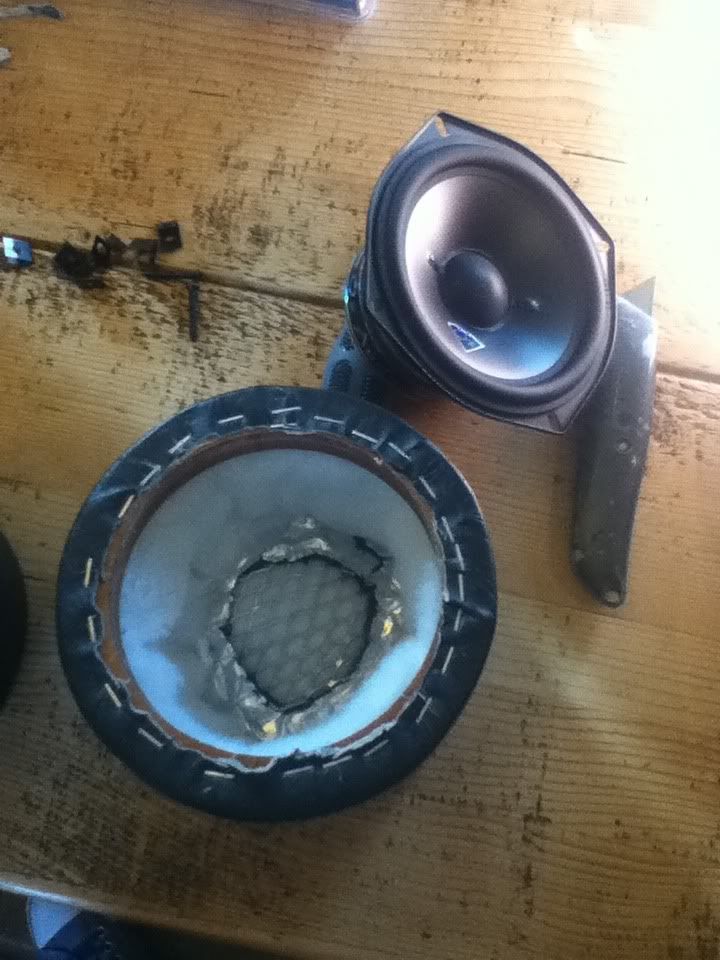
If anybody wants to see how they where made I've got loads of pics that I will post, just ask...

anyway the compete kit looks like this:

Posted Image

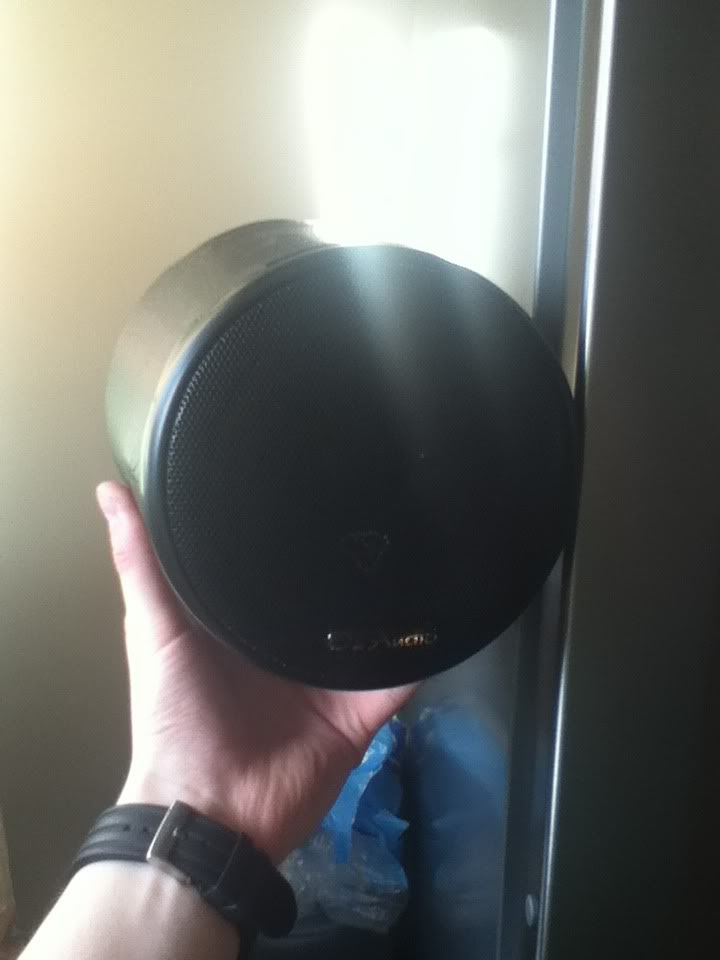
and one speaker in its enclosure, I weighed just one pod and speaker, came to about 2Kg's, so pretty hefty for a little 5.25" component!:

Posted Image

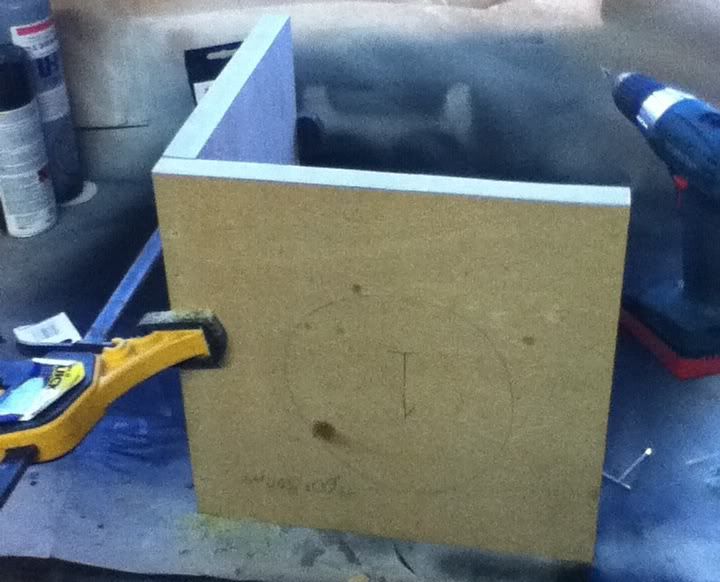
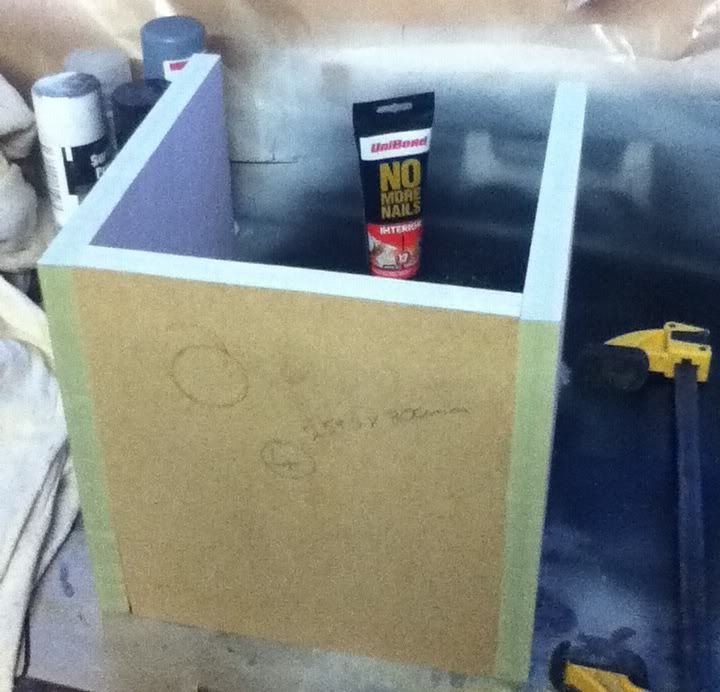
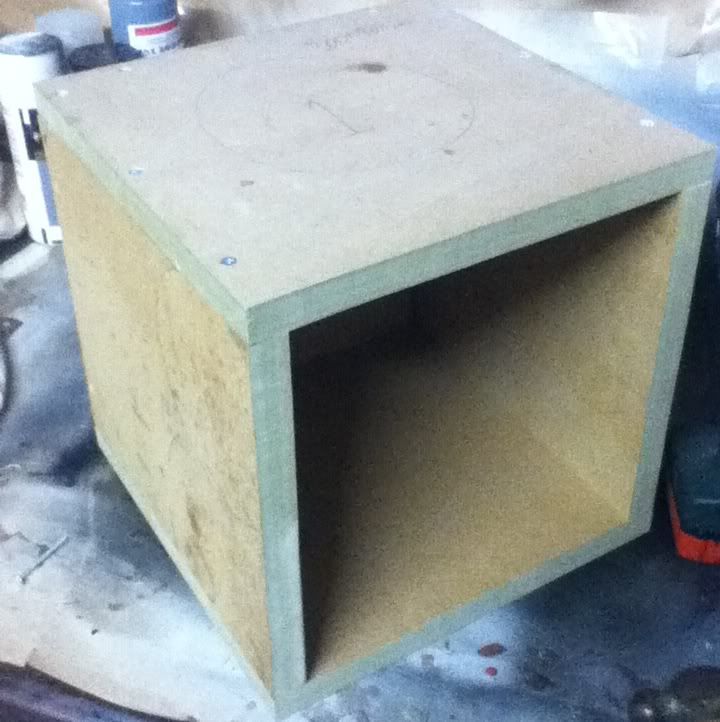
So thats about it for the moment, This week should consist of making the sub box. Luckily my dad had a huge sheet of 22mm MDF left over at work, so thats what the box is gonna be made of! Yay for free MDF :D

Edited by freshairmini, 26 February 2012 - 06:08 PM.


#2 A362 TTU

A362 TTU

    Super Mini Mad

  • Members
  • PipPipPipPipPipPip
  • 525 posts
  • Location: Manchester

Posted 28 February 2012 - 05:35 PM

Nice looking stuff!.

Would be interested in details of the sub box build :) - as i may have to do that when i bite the bullet and get the bass!

#3 freshairmini

freshairmini

    Camshaft & Stage Two Head

  • Members
  • PipPipPipPipPipPipPipPip
  • 1,718 posts
  • Location: Alresford, Hampshire
  • Local Club: Winchester Area Mini Owners

Posted 29 February 2012 - 11:12 AM

Nice looking stuff!.

Would be interested in details of the sub box build :) - as i may have to do that when i bite the bullet and get the bass!


Its well worth doing, Because mines only got 5.25" speakers up front and there in a small enclosure anyway I wouldn't of had much bass. Check out the Talk Audio classifieds, you get some absolute deals on subs. I got mine for I £75 (usually about £190!).

Started on the sub box yesterday tho, got my first section cut out!

But turned out that the rivets on my tri-square have come loose so it wasn't giving me 90o, lame!

But i got a big set square now so I should have the rest cut out later!

I'll post pictures when I'm done.


Forgot to add on my spec list the head unit.

Its an Alpine iDA-x305s 'Made for iPod' HU. Looks pretty cool and you can navigate the iPod through the head unit. Plus its got 3 pre-outs one of which is a sub one, so you can control all the sub levels up front. So when I get the amp (4 channel, two sets of RCA inputs, front and back) in I will be running two RCA cables, one for the 2-way's up front and the other for the sub so I can have maximum control of it all. Looks like this:

Posted Image

Also the Alpine is good because I have the option to put in an imprint module, which means I could improve the sound stage through time alignment and potentially Auto EQ but that may happen at a later date as its quite expensive.

Edited by freshairmini, 29 February 2012 - 11:22 AM.


#4 freshairmini

freshairmini

    Camshaft & Stage Two Head

  • Members
  • PipPipPipPipPipPipPipPip
  • 1,718 posts
  • Location: Alresford, Hampshire
  • Local Club: Winchester Area Mini Owners

Posted 29 February 2012 - 07:45 PM

made a little progress today, started cutting out the pieces for the sub box.

Posted Image
so started with ma cutting list... pretty good if i don't say so myself!

Posted Image
and ended up with a stack of sides.

All i need to do is get some glue. Ive been told that PU glue is good for things like these as it expands instead of shrinks when it dries, so should fill in any gaps.

Also got a couple of bits in the post today...

Posted Image
a selection of fastners for the speaker pods and fixing the sub in the sub box.

also got these bad boys...

Posted Image
Gold plated battery posts. extra conductivity, plus they look pretty bling :D

so thats all for today.

#5 freshairmini

freshairmini

    Camshaft & Stage Two Head

  • Members
  • PipPipPipPipPipPipPipPip
  • 1,718 posts
  • Location: Alresford, Hampshire
  • Local Club: Winchester Area Mini Owners

Posted 01 March 2012 - 08:32 PM

update time.

Today after work I started on assembling the sub box. I'm fixing it together with screws and glue, more specifically PU glue so it fills any holes/gaps when it drys. The reason I decided to screw and glue is really because i had to free hand cut the mdf with my jig saw, so its straightish but not straight enough to keep all the air in! :D.

Also I screwed it because it pulls the box together as again the mdf isn't straight enough.

Anyhu heres a couple of pictures of the process.

Posted Image
so here, starting off, i clamped the two sides together and proceeded to drill some pilot holes fo the screws, and also counter sink each hole so the screws sit flush.

Posted Image
see... nice and flush.

Posted Image

Posted Image
and there you go neeearly finished but i ran out of screws. so I'll scrounge some from home n' finish it off tomorrow!

So when i got home i was greeted by some new banana plugs and binding posts for the sub box. The banana plugs will be used for easy removal of the sub if i need to get to the battery, spare wheel etc..

so next on the list is connect was connect the new banana plugs to the sub cable, the cable was is a thicker gauge than fo the speakers. the Banana plugs came with a grub screw fixing but I decided to solder them for a strong joint.

so here they are finished looking pretty good:
Posted Image

I was prtty pleased with the quality of the plugs, they really grip the cable insulation with the rubber sheathing so less chance of them stressing the cable and breaking way from the actual plug part. also less chance of them vibrating out of the sub, so winiwin!

Also will be ordering some matching dark grey carpet for the sub box so it ties in with the boot lining kit from optimise automotive. Luckily andy was able to sell me a roll of the carpet so it'll be an exact match. what luck!

so thats about it really, hopefully more progress tomorrow, and a proper fit on the weekend.

Edited by freshairmini, 01 March 2012 - 08:34 PM.


#6 A362 TTU

A362 TTU

    Super Mini Mad

  • Members
  • PipPipPipPipPipPip
  • 525 posts
  • Location: Manchester

Posted 01 March 2012 - 10:18 PM

Looking gurddd...

Where are you placing the sub box in the boot?

#7 freshairmini

freshairmini

    Camshaft & Stage Two Head

  • Members
  • PipPipPipPipPipPipPipPip
  • 1,718 posts
  • Location: Alresford, Hampshire
  • Local Club: Winchester Area Mini Owners

Posted 01 March 2012 - 10:22 PM

Opposite side to the fuel tank. I was originally going to create a fibre glass one that was moulded over the wheel arch but in the end it was a little complicated. Plus I didn't really have anywhere to do it properly. Not sure how I'm going to fix the sub box down tho. ATM its just going to sit on the boot lining.

(null)

#8 blueturbomini

blueturbomini

    Mini Mad

  • Members
  • PipPipPipPip
  • 290 posts
  • Location: folkestone
  • Local Club: LSMOC

Posted 02 March 2012 - 08:12 PM

If your sub box is just going to sit on your boot liner, how are you going to stop it moving when you drive the car?


#9 freshairmini

freshairmini

    Camshaft & Stage Two Head

  • Members
  • PipPipPipPipPipPipPipPip
  • 1,718 posts
  • Location: Alresford, Hampshire
  • Local Club: Winchester Area Mini Owners

Posted 02 March 2012 - 11:34 PM

lol, not figured that out yet. im kinda hoping its heavy enough that i'll sit still.

I showed it to my brother, he picked it up, because i was like, its quite heavy. He thought it was as heavy as his twin 12"'s in there box. (cheapy vibe halfords ones).

But the guy i bought my speakers/sub from recommended Velcro for holding things down/up. He had a friend that put a genesis amp in his glovebox only held up by velcro, the wide stuff not thin strips.

so i was thinking maybe a couple of wide velcro strips to hold it down. Its quite strong so i'll give that a go.

#10 blueturbomini

blueturbomini

    Mini Mad

  • Members
  • PipPipPipPip
  • 290 posts
  • Location: folkestone
  • Local Club: LSMOC

Posted 03 March 2012 - 09:46 AM

Velcro may be an option but i think your sub box might be a tad heavier than an amp. You may need to stop it tipping aswell

#11 RawlinsGTR

RawlinsGTR

    Formally known as Dog

  • Members
  • PipPipPipPipPipPipPip
  • 1,046 posts
  • Location: Sevenoaks, Kent

Posted 03 March 2012 - 12:46 PM

That headunit you've got there is goood..

I've had use of one before, an older model but it's pretty much the same.

I've got a Pioneer digi media reciever now, and it's quite a lot harder to use.

Anyways, whole setup looks pretty good mate :)

#12 freshairmini

freshairmini

    Camshaft & Stage Two Head

  • Members
  • PipPipPipPipPipPipPipPip
  • 1,718 posts
  • Location: Alresford, Hampshire
  • Local Club: Winchester Area Mini Owners

Posted 03 March 2012 - 01:38 PM

That headunit you've got there is goood..

I've had use of one before, an older model but it's pretty much the same.

I've got a Pioneer digi media reciever now, and it's quite a lot harder to use.

Anyways, whole setup looks pretty good mate :)


I was going to get one of the similar priced pioneer ones as they do look alot nicer, but they didn't seem to have a rear usb port for iPod, only front. bit silly but never mind, I'm still pretty please with the alpine.

#13 RawlinsGTR

RawlinsGTR

    Formally known as Dog

  • Members
  • PipPipPipPipPipPipPip
  • 1,046 posts
  • Location: Sevenoaks, Kent

Posted 03 March 2012 - 01:41 PM

Actually yeah that's another thing I forgot to say, that is a problem.

I just much prefer the look of the Pioneers, and all my music is on a SD card, so I didn't mind about that :)

#14 freshairmini

freshairmini

    Camshaft & Stage Two Head

  • Members
  • PipPipPipPipPipPipPipPip
  • 1,718 posts
  • Location: Alresford, Hampshire
  • Local Club: Winchester Area Mini Owners

Posted 04 March 2012 - 06:39 PM

Right bit of a chunky update.

So far I have not completed my sub box! all sealed and the sub now mounted. I bought some nice stainless steel cap head socket bolts and some t nuts to fix it into the box. Worked quite well bit you have to really make sure you drill the holes really straight as they can cross thread quite easily if they screw in crooked.

anyhu lets have the pictures do the talking.


Posted Image
so after finishing screwing the box together I cut out the hole that the sub fits in

Posted Image
done...

Posted Image
with sub in I started on preparing to screw it down, using the nice SS cap head socket bolts.

Posted Image
they look like this. You can see the t-nuts and how they will grip into the underside of the baffle.

Posted Image
Like this...

Posted Image
And this.

Posted Image
So thats sub dry assembled. I needed to glue it together next.

Posted Image
Gives you an idea of how it will be in the boot. with the amp mounted to the side. I ordered a roll of carpet from Andy @ Optimise Automotive. It will be the same Dark Grey as the rest of the boot lining kit, and live have loads left over to do my centre console and eventually a proper parcel shelf.

Posted Image
This was my £25 little toy for the dremel, a router attachment. Kinda cool and works surprisingly well for a dremel.

Posted Image
It was used to create a little routed indent for the Binding Posts to sit in, and looks nice too.

Posted Image
Done.

Posted Image
Next was gluing the box. I had to disassemble it and used no more nails. Its a PU glue so it should expand a little when it dries to create an air tight seal for all the wiggly bits :P

Posted Image
Net was sorting the Binding posts and fly leads inside the box. This I used some little tabs I got when I fixed my home speakers. Lucky I didn't throw them away as I didn't need them for that!

Posted Image
Posts attached...

Posted Image
Fly leads attached. So when the sub goes in the box its air tight, and the leads will just go in the sub terminal clamps, unfortunately i didn't get any pictures of the wires attached to the sub.

#15 blueturbomini

blueturbomini

    Mini Mad

  • Members
  • PipPipPipPip
  • 290 posts
  • Location: folkestone
  • Local Club: LSMOC

Posted 04 March 2012 - 06:56 PM

Very impressive so far, keep the updates coming


1 user(s) are reading this topic

0 members, 1 guests, 0 anonymous users