Jump to content


Photo

Strengthening Shell To Replace The Floor


  • Please log in to reply
10 replies to this topic

#1 V8again

V8again

    Starting My Mini Up

  • Noobies
  • Pip
  • 4 posts
  • Location: EG

Posted 14 March 2012 - 08:37 PM

Hi

I am new to this forum but not to mini's or restoration, built them in the 70's and just sold my classic rally car to restore a MK3S.

Could never afford one then but now have a genuine car but need some advice on welding please.

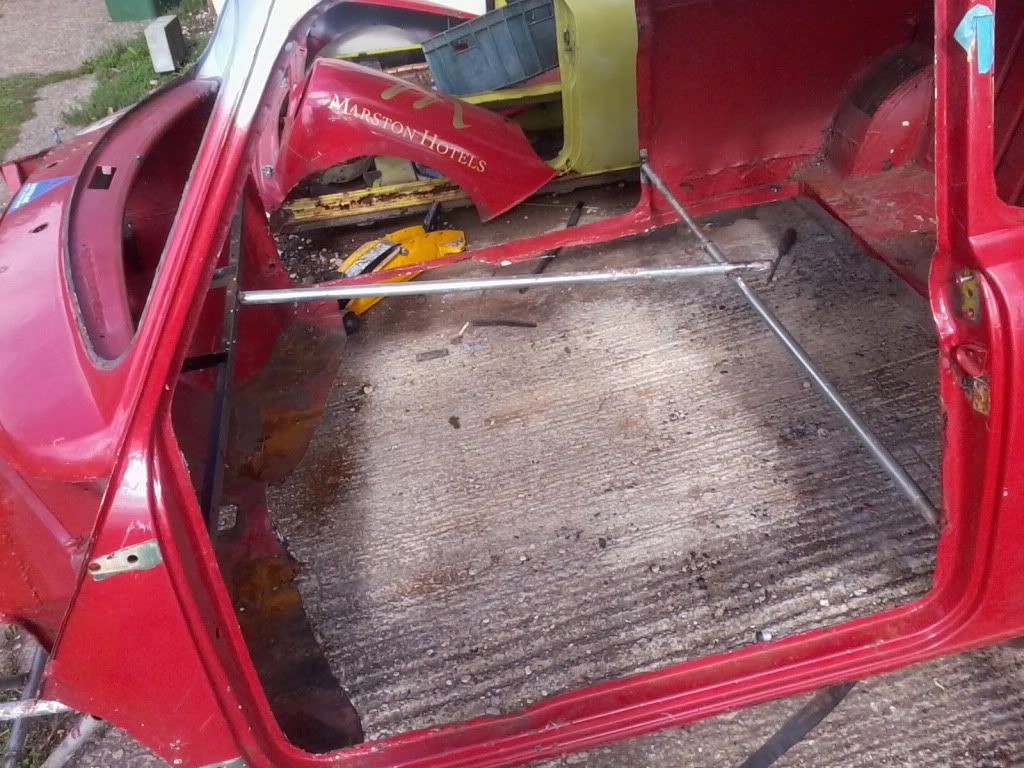
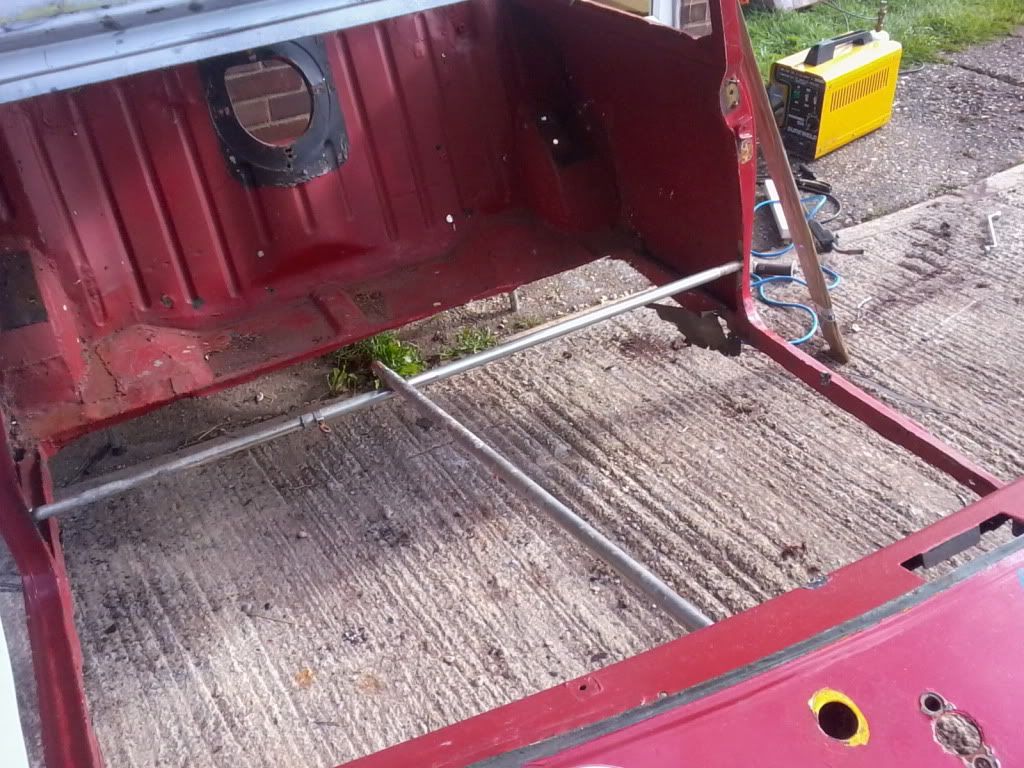
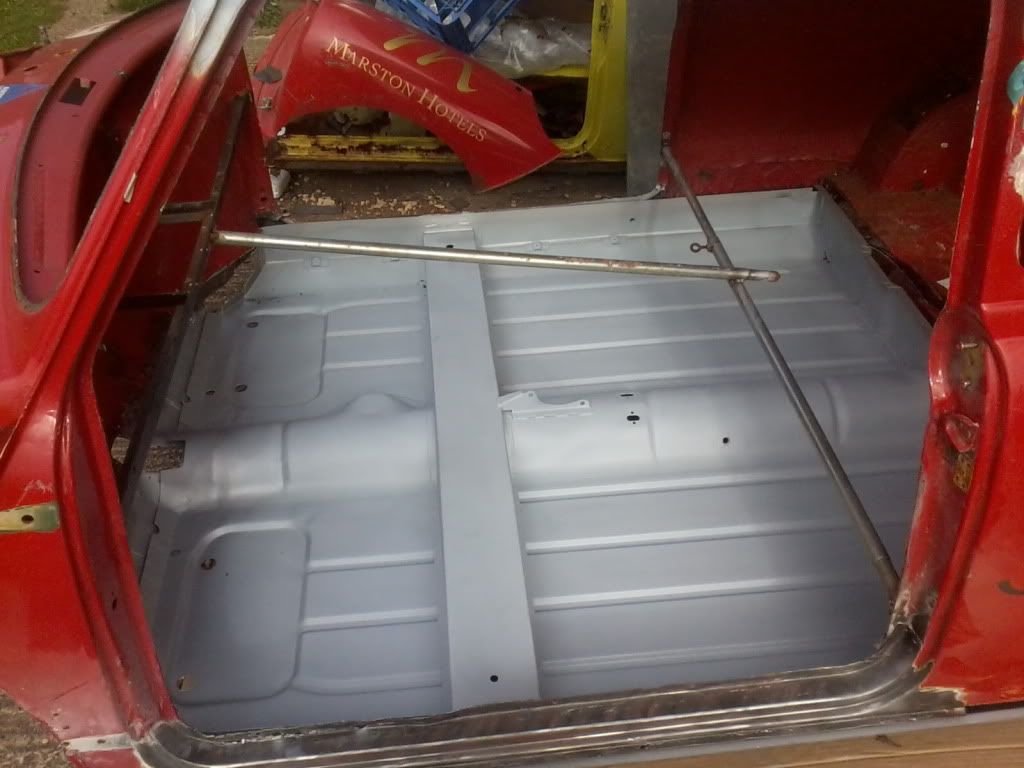
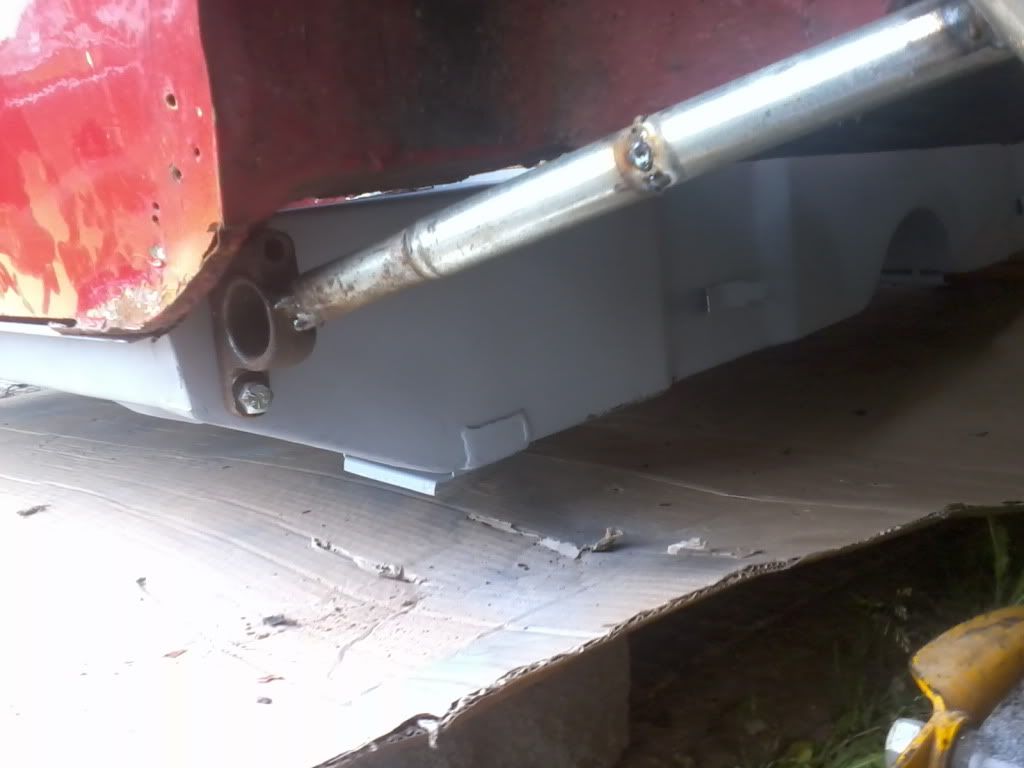
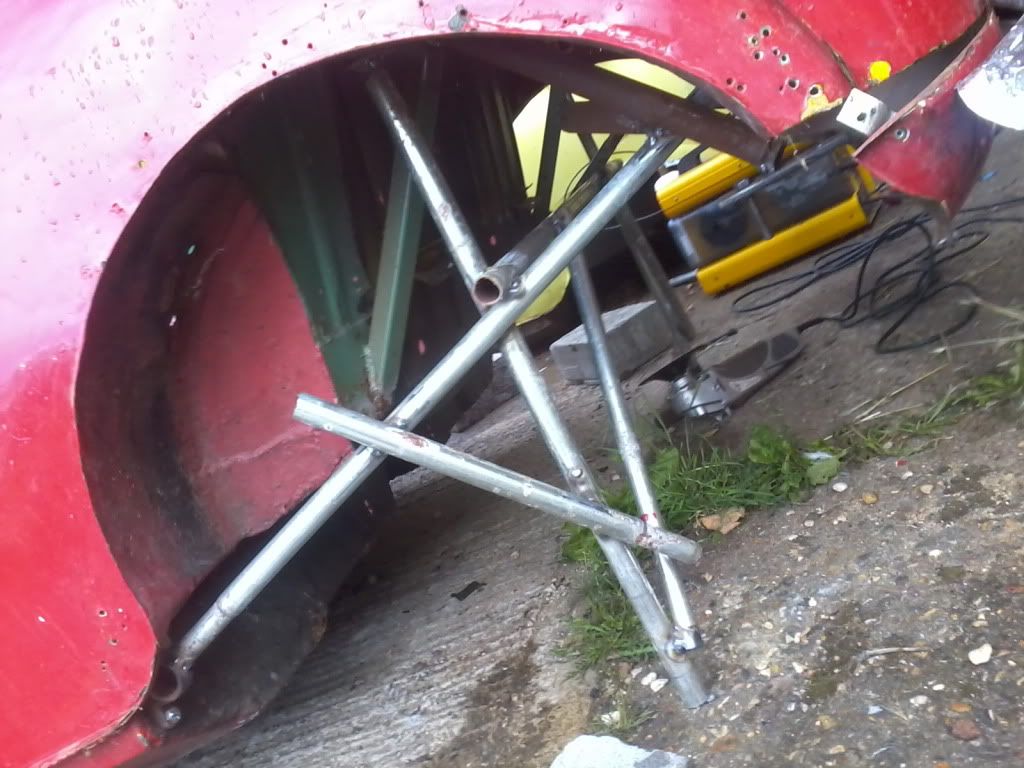
I am replacing the floor, in total from the top of the toe board to the rear bumper including the lower door openings. I have enough box section to build a cage but would be grateful for any advice on strengthening before I cut the floor out.

Obvoiulsy across the door openings and across plus a diaganal but I do not wish to end up with a crabber so which points to secure ?

Regards
Chris

Edited by V8again, 14 March 2012 - 08:43 PM.


#2 Tupers

Tupers

    Up Into Fourth

  • Members
  • PipPipPipPipPipPipPipPipPip
  • 4,148 posts
  • Location: Devon

Posted 14 March 2012 - 09:51 PM

My preferred method would be to brace the door frame and replace the step sills before you cut anything else out. Obviously you'd only weld the new step at each end and not to the floor or old sill.

Once the sills are done I would add one brace about a 3rd of the way up the B pillar and a cross between the A & B pillars at the same height as the first brace. With those in place you should be able to remove the floor without fear of the shell twisting.

You shouldn't need to add any bracing to the boot area as you're left with a good strong frame there even without the floor.

#3 matty...

matty...

    Super Mini Mad

  • Traders
  • PipPipPipPipPipPip
  • 605 posts
  • Location: Oxfordshire
  • Local Club: Turbominis

Posted 14 March 2012 - 10:50 PM

This is how I did mine. I also made a jig up that bolts to the heel board where the rear subframe mounts, it helped alot to line things back up.

http://i245.photobuc...pg?t=1284052816

http://i245.photobuc...pg?t=1284052858

http://i245.photobuc...pg?t=1285095619

http://i245.photobuc...pg?t=1285095686

http://i245.photobuc...pg?t=1284052648

#4 V8again

V8again

    Starting My Mini Up

  • Noobies
  • Pip
  • 4 posts
  • Location: EG

Posted 15 March 2012 - 08:45 AM

This is how I did mine. I also made a jig up that bolts to the heel board where the rear subframe mounts, it helped alot to line things back up.

http://i245.photobuc...pg?t=1284052816

http://i245.photobuc...pg?t=1284052858

http://i245.photobuc...pg?t=1285095619

http://i245.photobuc...pg?t=1285095686

http://i245.photobuc...pg?t=1284052648


Many thanks to you both of you, grateful for the help.

by the way the last image from Matty, is that the famous tin worm that nobody ever catches at work ?

Chris

#5 MintecMiniSpares

MintecMiniSpares

    Mini Mad

  • Members
  • PipPipPipPip
  • 125 posts

Posted 15 March 2012 - 08:59 AM

Have a clinky on this link. http://www.theminifo...ld/page__st__30

Scroll through the pictures and you'll se a framework I made up to do some extensive metal removal on my girlfriends mini pickup.

#6 V8again

V8again

    Starting My Mini Up

  • Noobies
  • Pip
  • 4 posts
  • Location: EG

Posted 15 March 2012 - 06:07 PM

Thanks, a very nice jig, I wish I had the time to make one.

I am sure you did not cut out the lower door shut panel and the floor at the same time or the whole thing would collapse !

A small point, The integrity of the subframe alignment is from front to rear mounting points, did you link them to the front subframe mounts or simply use the shock absorber mounts, if so the rear subframe may not be true.

Chris

#7 skoughi

skoughi

    One Carb Or Two?

  • Members
  • PipPipPipPipPipPipPip
  • 1,199 posts
  • Location: Lerwick
  • Local Club: Shetland classic car club

Posted 15 March 2012 - 06:23 PM

When i replaced my floor I got the two subframes as close to parallel as i could then welded them together with two lengths of box section. I then supported the box section on timbers and leveled the shell across the shock mounts, door appetures and front sub mounts. Doing it this way meant I had the subframe mounts in place for reference and I only cut out one half of the floor at a time, the floor panels I used were ones from mini sport that had half the tunnel on each panel.

#8 V8again

V8again

    Starting My Mini Up

  • Noobies
  • Pip
  • 4 posts
  • Location: EG

Posted 15 March 2012 - 07:08 PM

Perfect, could be a good idea for someone to document this, I have found so many random topics over the last few days half covering the subject. you have supported my thoughts but most images online make it look less simple, the integrity of the shell is not quite so important as the subframe alignment, I cannot tell you how many "crabbing" minis I saw in the 70's/80,s

Chris

#9 skoughi

skoughi

    One Carb Or Two?

  • Members
  • PipPipPipPipPipPipPip
  • 1,199 posts
  • Location: Lerwick
  • Local Club: Shetland classic car club

Posted 15 March 2012 - 09:55 PM

I expect my mini to crab, if I ever get to the stage of finishing it, if I just bolt the rear sub back into the repaired heel board as it is just now. I will be taking the time to install, if it needs it, lots of shims to the heel board to get the rear trailing arm mounts and the front upper arm mounts as parrallel as possible. I think that every mini that has extensive repair work done to the floor will need that done to them.

#10 matty...

matty...

    Super Mini Mad

  • Traders
  • PipPipPipPipPipPip
  • 605 posts
  • Location: Oxfordshire
  • Local Club: Turbominis

Posted 15 March 2012 - 10:45 PM

You're obviously doing it wrong then. :P

If you use the original datum points and it didn't crab before, then it has to be right. My shell has had 37 new panels (I think it was) and drives as straight as an arrow, and that was working from years of bodged repairs. The important part is getting the heel board in the same place, hence making up brackets/jigs from the old one. If you work from the rear subframe mounts on the boot floor, there is too much play in the subframe bushes to get it acurately aligned.

I bought my complete floor from M-Machine and it was a superb fit.

#11 skoughi

skoughi

    One Carb Or Two?

  • Members
  • PipPipPipPipPipPipPip
  • 1,199 posts
  • Location: Lerwick
  • Local Club: Shetland classic car club

Posted 16 March 2012 - 05:42 PM

LOL! There's every chance most of the things I do is wrong! I'm hoping that I can refit my rear sub, with new bushes, and it'll line up with my front sub suspension mounts but there's a good chance I'll need to shim something. Was it was complete floor as in the heel board was already joined to the floor? This would be a great help and make things a lot easier but I'm on a budget and I decided to make my own end repairs for my heel board. Looking back now I wished I'd bought a new complete panel instead. On the subject of M machine, I've used them a lot and find the quality of the panels and their service excellent!


1 user(s) are reading this topic

0 members, 1 guests, 0 anonymous users