

My name is Jack and this is my first post, so I would like to make it special by giving you all a gift. A gift of knowledge. But first, a bit of background:
I’ve been a car detailer for many years, correcting paintwork and giving cars a new lease of life. My business model has always had a clear path: Provide a service and educate the people. I feel it’s important that everyone understands how to properly care for their cars, even to a minimalist standard without raiding your wallet.
So, as Mini’s have always been a big part of my life, I would like to begin my time here by providing advice and care tips on this forum to the people who know what the best cars are (the mini obviously!) and ensuring that the remaining minis on the road get the care they deserve by their owners J
Before I start. I accept no responsibility for any damage you may inflict on your car. Whilst I am a professional, I am offering advice through years of testing and experience. What you do to your car is up to you. All images were taken and belong to me. I also do not work for any car care manufacturer and I will try to remain as unbiased as possible, although being human I have my favourites! So, to the fun stuff!
Part 1 – Basics and understanding
In my mind, there are different types of ways of cleaning your car, here’s the most common.
I like it sparkly (at home) – Regular visitor to auto stores and buys some semi-decent cleaning products. The car gets relatively well looked after.
Sunday nice weather washers (at home) – Supermarkets own brand products used. One bucket, One sponge. Job done. Only due to lack of education, the owner potentially and unknowingly damages the car
Car park cleaners – Do an OK job, but most do more damage to your paintwork than good
Automated car washes – If you don’t care about the finish or quality of your car, then this is for you. Be warned, these automated car washes can really damage your paintwork and inflict marring/swirls.
Professional detailing – Done by an enthusiast at home, or by a professional, this is the best and ultimate kind of car care. The type of care a show cars would get. It’s the treatment that restores it to ‘better than new’ and makes the car stand out.
In case you haven’t caught on yet, I’m going to show you guys how to care for your mini’s at a detailing level.
Now, there are different types of treatment levels I will talk you through, through a series of threads/posts.
- Paintwork decontamination (clay baring, iron removal etc)
- Paintwork protection (How to prep for and apply wax and polishes, the best way)
- Paintwork enhancement (single stage machine polishing)
- Paintwork correction (multi-stage machine polishing)
- Alloy wheel protection (including wheel waxes and decontamination)
- Tyre care
- Interior care
- Plastic trim restoration (interior and exterior)
- Metal treatments
- Engine bay cleaning
- Paint touch-ups
Two techniques to make your car look amazing:
- Temporary fix
- Permanent fix
Temporary fix – If you use the right methods and prep your mini during cleaning correctly, you can ‘temporarily’ give a near finish to what you could expect from a day or so of machine polishing. In order to achieve this you have to apply quality products in the right way and use a polish that contains long lasting ‘fillers’ (don’t worry, it’s not decorators filler). I have some favourites which work very, very well on classics. But we will cover this later! After a month or so, this will need to be reapplied as any fillers may have been washed out
Permanent fix – This is done by carefully machine polishing and correcting the paintwork. Permanently removing swirls, marring and other defects. Followed by the right protection and follow up wash techniques, your paintwork will be flawless for a very long time.
A ‘classic’ car behaves differently
Classic car paint can be more fragile than everyday/modern cars. So extra care should be taken, especially if you are attempting paint correction with a machine polisher. Mini’s are well known for patch up jobs and re-sprays so you never truly know what lurks beneath. I will cover this thoroughly when we come to that section but I thought its best I mention it in case anyone jumps the gun and ruins their loved one (mini or your partner, you decide. Ha!).
I do not want to patronise anybody, but as I said, I will be starting from the basics, working through to the more complicated methods. Of course, I’ll be more than happy to offer advice to anyone who needs it, this thread or another, my goal is to educate.
Simplest and safest way of cleaning.
It’s likely that your mini already has some swirls and damage. Don’t worry, we are going to fix that, but prevention is better than cure they say. So education starts with how to wash your car properly.
The theory is: The less you touch the car, the better.
~~ By the way, I'll mention the step on cleaning the wheels but wheels are an entirely separate entity so I will cover how to clean and protect them in a separate post. ~~
The below list is what you should have as standard.
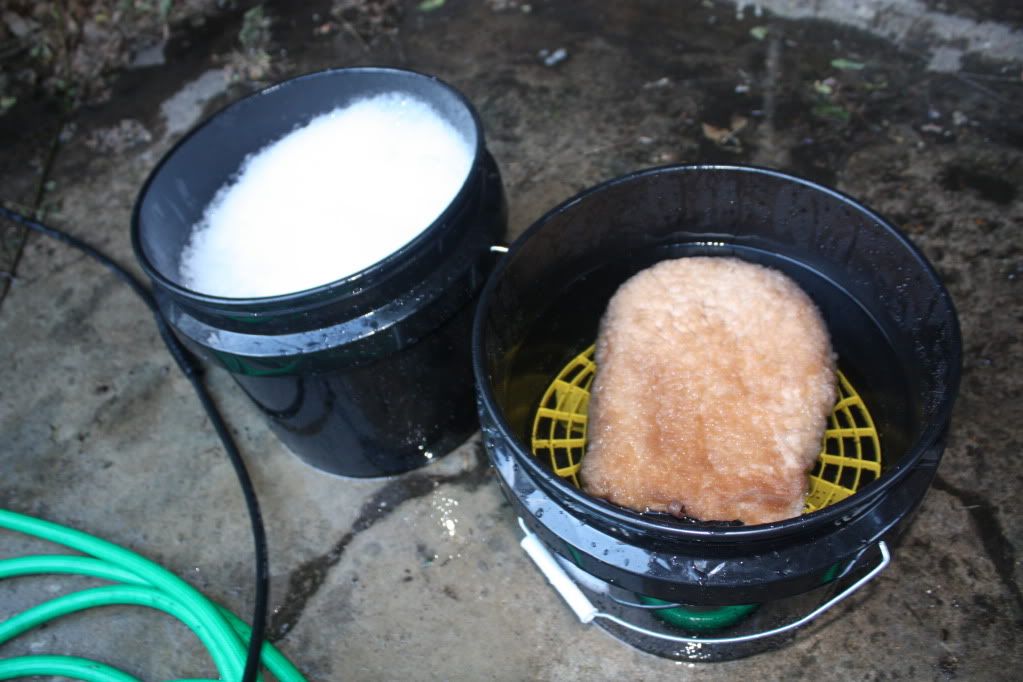
- 2 buckets
- 2 grit guards
- 1 wash mitt
- Good car shampoo
- Pressure washer or a good strong hose
- Plush drying towel
The ‘science’ behind it and why do I need this stuff?!
Let’s go into a microscopic view of the paintwork. Heres a graph I quickly knocked up.
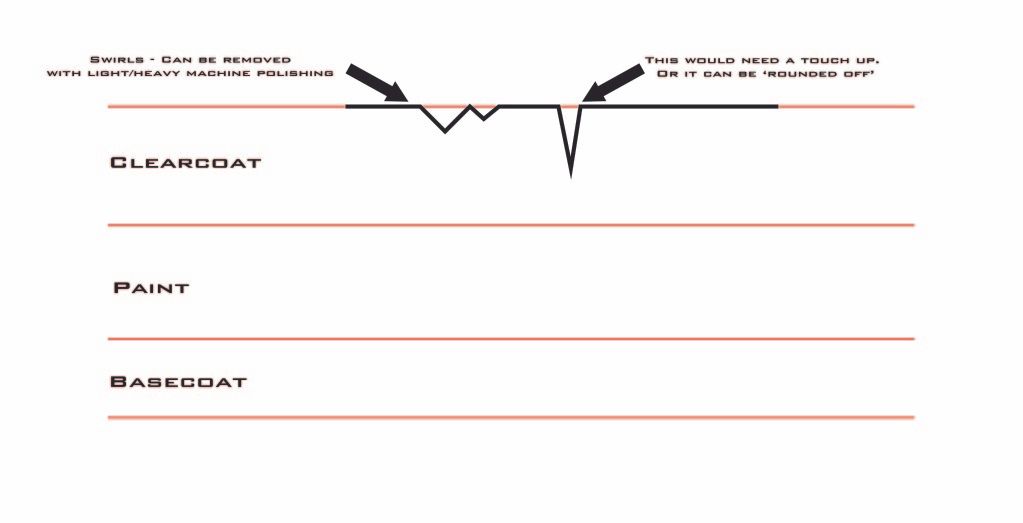
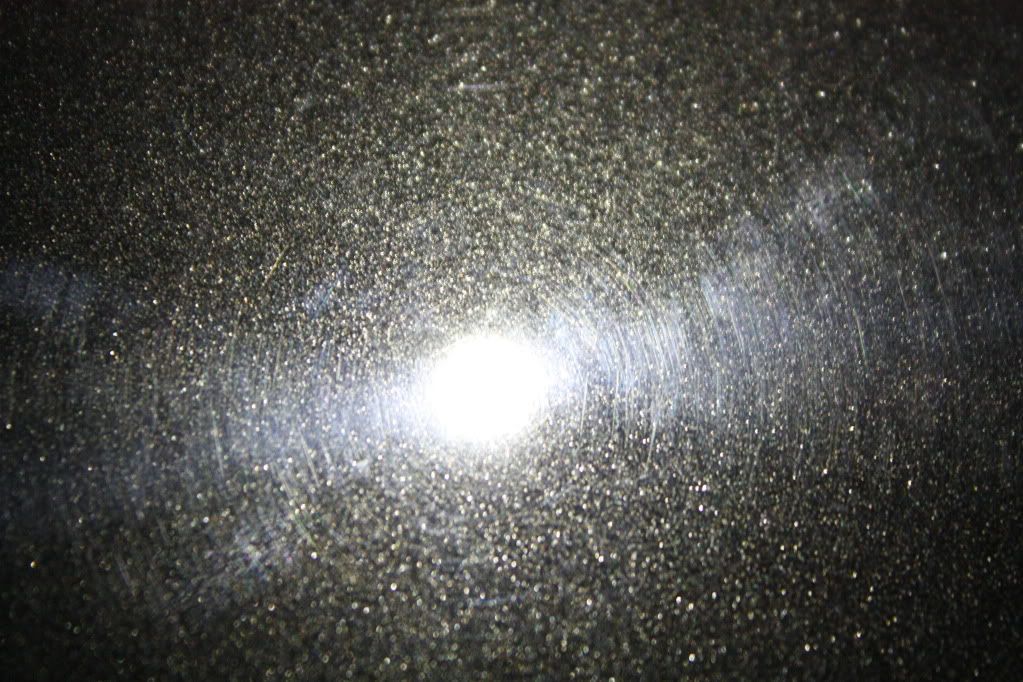
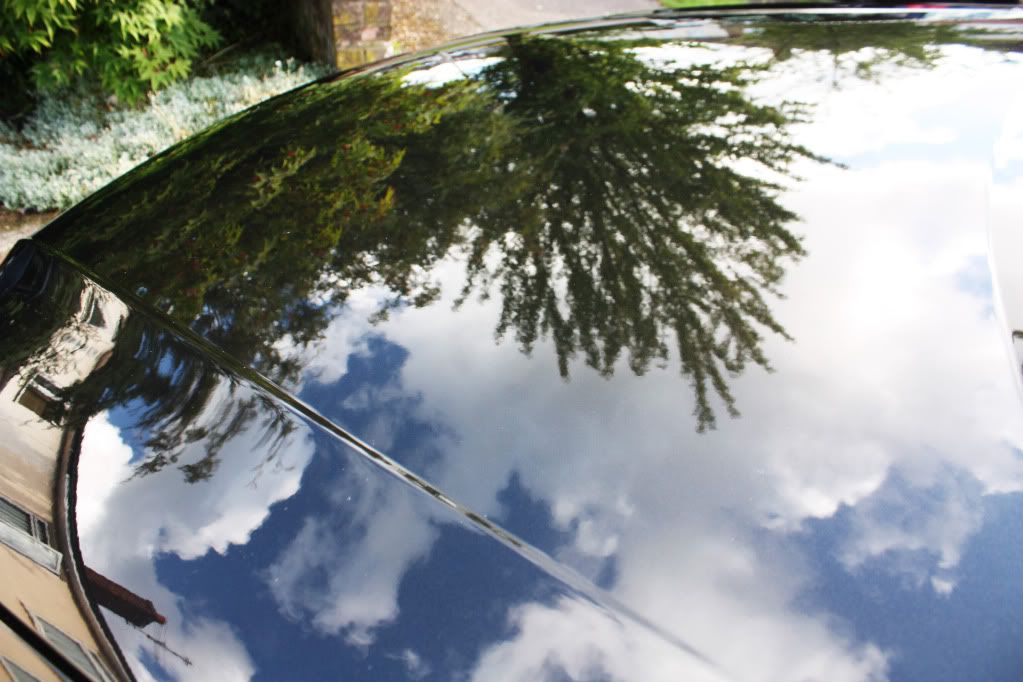
This is why water, rain and dirt can sit on your paintwork. You want it to fall off naturally and leave no trace of it being there. Having flawless paintwork (no swirls and marring) will achieve this so you want to make sure that your washing properly, especially if you have taken the time to correct it. Light machine polishing can usually remove all of these swirls.
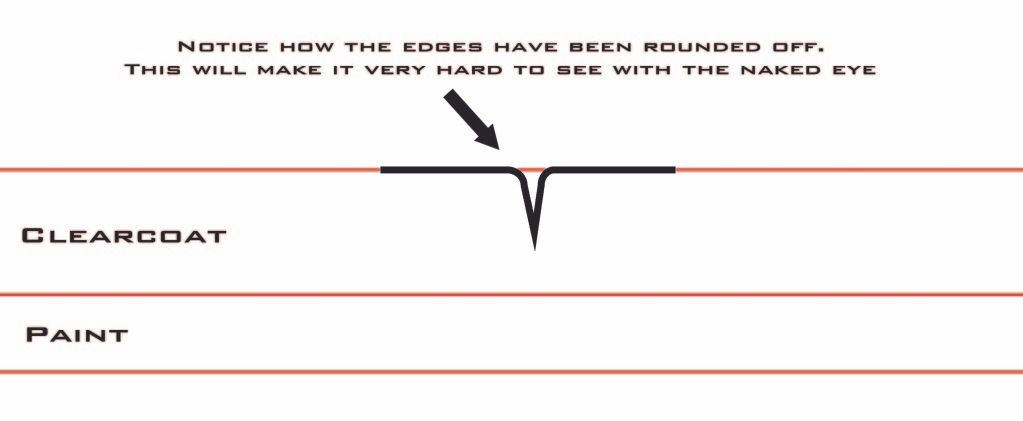
Note the deep scratch, this can be improved without touch up paint by heavy machine polishing, making it nearly invisible (see below).
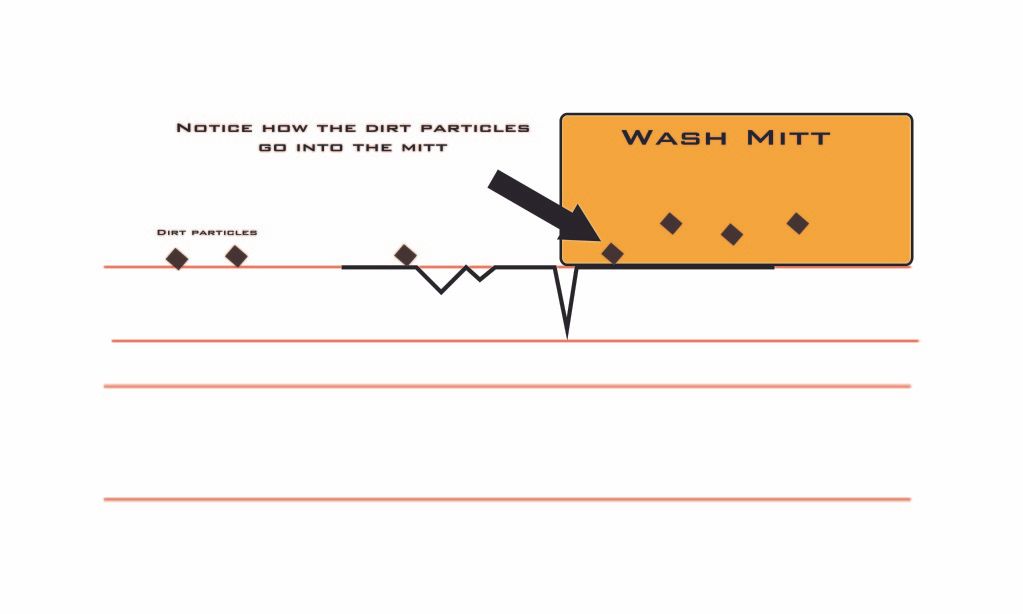
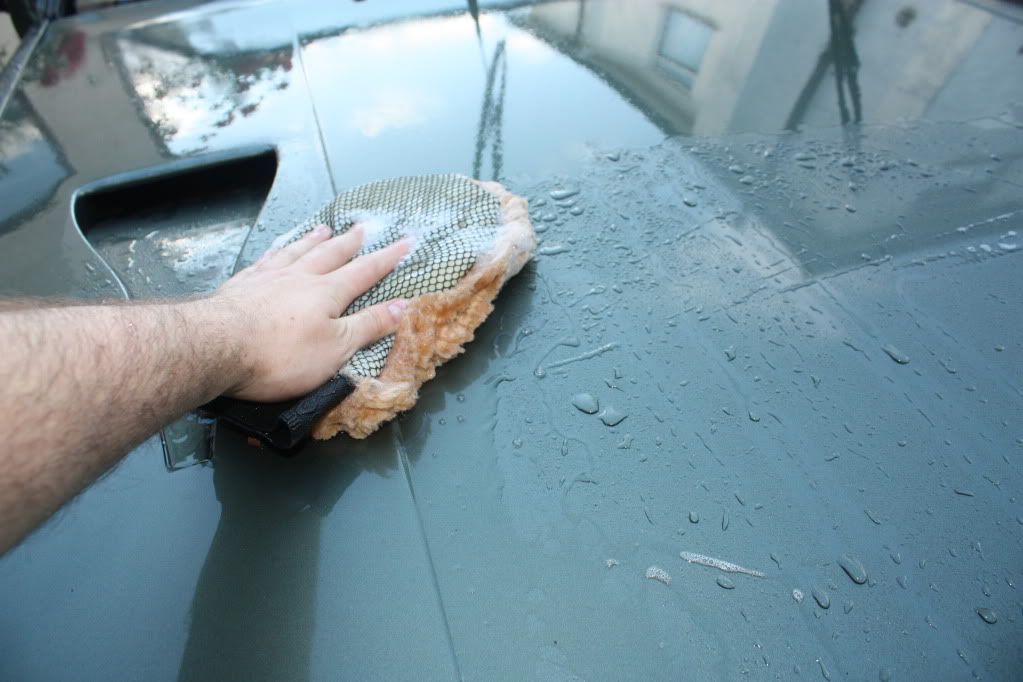
A mitt will grab dirt and push it inside itself, helping to prevent any dirt particles scraping across the paintwork and inflicting swirls. Unfortunately, that yellow sponge we all know so well causes swirls and damage

Here, see a an example of some correction I did on an old vauxhall. BEFORE AND AFTER.
So the technique on how to avoid swirls:
- Fill one of your buckets with clean water and the other with soapy water.
- Rinse the car with your PW (pressure washer) or hose
- Make sure you thoroughly rinse the arches too
- Clean the wheels first (we will cover this properly later)
- Grab your mitt and dunk it in the soapy water
- Begin cleaning the car with your mitt. IMPORTANT NOTE: Don’t move your hand in circular motions. Make sure you follow the straight lines of the bodywork and don’t press too hard. Also, work from the top of the car to the bottom. Start by doing the roof all round, then the top half of the sides, bonnet, boot and finally the bottom half of the sides. Typically, the lower half of the car is dirtier than the top. You don’t want your water or mitt getting filthy too quickly!
- Make sure you rinse your mitt in the rinse bucket first before you go for more soap in the soapy bucket. This will make sure that most of the dirt is trapped in the grit guard in the first bucket so when apply more soap, its unlikely that you will be rubbing grit and dirt back over the paintwork. The grit guard in the soap bucket also helps prevent this situation.
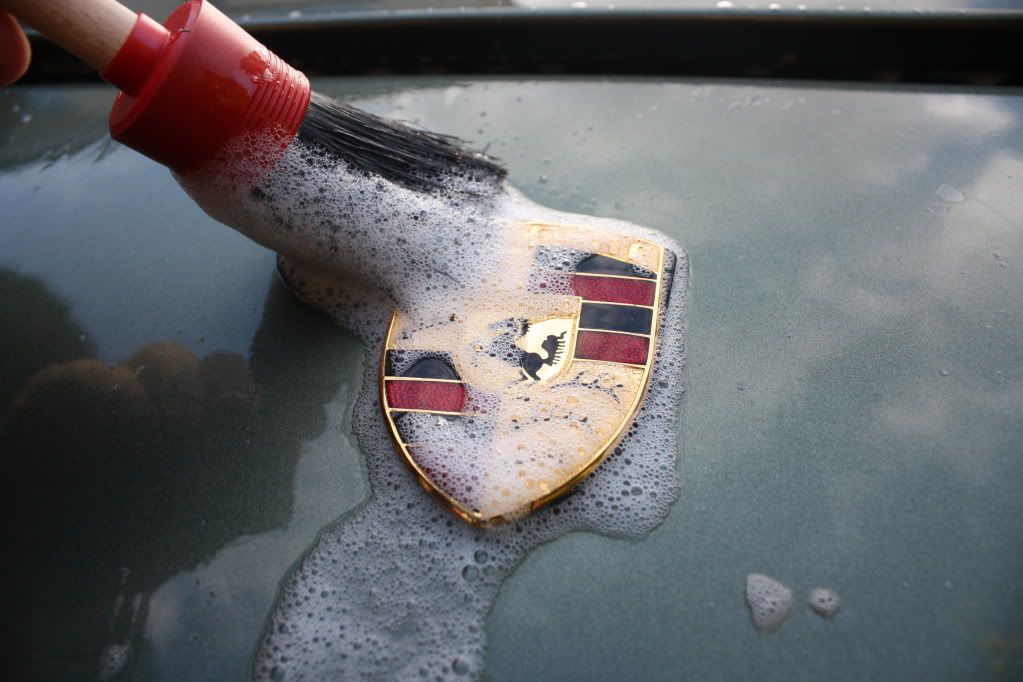
- Use a detail brush if you have one to clean around name badges and so on
- Thoroughly rinse the car with the PW/hose
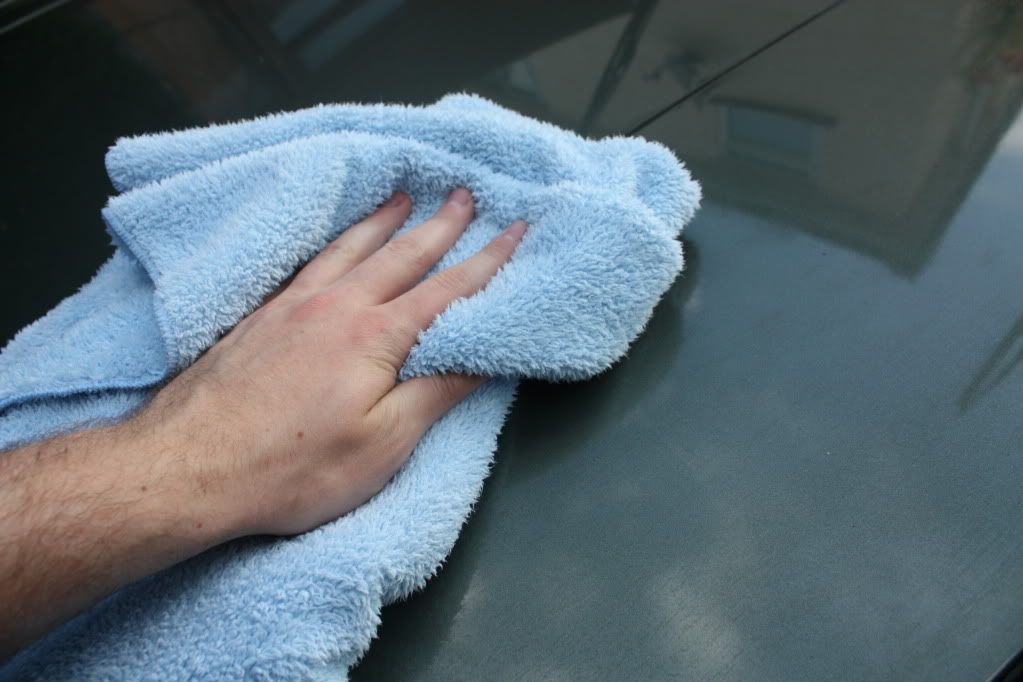
- Dry using a plush microfiber towel. Most detailers don’t use shammys. There’s no room for any potential dirt to get trapped and pulled up in them. With a towel it will get caught in the fibres and reduce the risk of damage. Remember, just like washing with your mitt, don’t dry your car in a circular motion, make sure you do it in straight lines and don’t press too hard!
- Apply your dressings and finishers (again, covered in detail later).
What shampoo do I use?
There are 3 main types (by the way, I only use non-acidic products)
Normal – Works like fairy liquid. Will remove all dirt, grease and oils. It will also remove any protection you have applied.
Wax Safe – This will do the above but it will make sure that your hard work of applying polish and waxes is not removed. Thus making it so that you don’t need to do a full detail every weekend.
Wash a wax – Not that bothered about cleaning? This is for you. Does a bit of cleaning and applies a very thin layer of liquid wax. (I don’t like these products. I find that they don’t work very well. By all means they can be great for your commuter, but not for a car you love – again this is my opinion)
I’m on a tight budget. What can I do?
If you’re on a tight budget you can buy 2 buckets without grit guards. Cheap buckets are available for 99p each from most discount stores. A top quality mitt is advisable, but I’ve recently seen some microfiber ones for cheap in supermarkets. These are good if you’re just starting out. As for soap, go for a brand like Meguiars, decent stuff that’s readily available. Drying…well….try and buy one, or a waffle weave towel which can be cheaper.
So, you can start caring for your car properly for less than £20. Woohoo!
The below list is what, if you’re really committed to car care, you might have for a basic wash.
- 2 buckets
- 2 grit guards
- 1 wash mitt
- Pressure washer with snow foam lance
- Snow foam
- Detail brush
- Plush drying towel
As it’s a bit of a luxury, I’ll show you how to use snow foam another time :)
Anyway, that’s the basics. If this gains some interest, I'll continue and make the next installment! Thanks for your time and I look forward to contributing more to TMF!
Jack


![=]](https://www.theminiforum.co.uk/forums/public/style_emoticons/default/sideways.gif)


