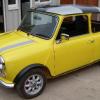
Well I've finally got to the point of fitting my new wings and after a quick trial fit the gaps down the sides of the bonnet are big enough to fall down. It looks as though the shape of the rear part of the wing where it meets the scuttle is a different shape to the scuttle itself. All the panels I've bought are pattern panels and all have fitted really well up until now and I'm not planning on scrapping them and buying heritage - they WILL fit!
What I wanted to know was how people have managed to clamp the rear part of the wings?
Thanks, Paul.

Wing Fitting
Started by
PaulColeman
, Apr 08 2012 01:22 PM
24 replies to this topic
#2

sonikk4
-

- Admin
-

- 16,080 posts
Twisted Paint Polisher!!!
- Name: Neil
- Location: Oxfordshire
Posted 08 April 2012 - 01:48 PM
If you have huge gaps then you need to trim some metal of the wing mounting flange and also have a look at the scuttle to scuttle closeout panel flange as well. This make be fouling on the underside of the wing. Either tap it down or fold the lip on the wing back further to clear it.
Some brute force may be needed along with the use of self tapping screws to hold things in place.
Some brute force may be needed along with the use of self tapping screws to hold things in place.
#3
PaulColeman
-
- Members
-
- 712 posts
One Carb Or Two?
- Location: Bedford
Posted 08 April 2012 - 02:49 PM
Thanks for the reply.
The gaps down the side of the bonnet are about 8 to 10mm which is about 4mm bigger than I was hoping for. The wing flanges are not fouling on the inner wing and the scuttle ends are original 1976 vintage as they didn't need replacing. I know you slit your bonnet down the sides and filled it with a bit of metal to make the bonnet wider but I'm not going down that route!!
What sort of gaps have others managed without widening the bonnet - anybody?
I'm not sure what I should be aiming for as the inner edge of the outer wings isn't a dead straight line so it's never going to be perfect.
Cheers, Paul.
#4
sonikk4
-
- Admin
-
- 16,080 posts
Twisted Paint Polisher!!!
- Name: Neil
- Location: Oxfordshire
Posted 08 April 2012 - 07:57 PM
Not expecting you to slit the bonnet but Shifty and many others have forced the wing over with quite a lot of force and then used self tappers to hold it in place before welding. It sounds drastic but a lot of members do this and it works well. I wish i had but that's a lesson learnt.
If you can get the gap down to about 5mm or so that would be spot on. The thing is i have seen show winning cars with large gaps on their bonnets so its up to you.
If you can get the gap down to about 5mm or so that would be spot on. The thing is i have seen show winning cars with large gaps on their bonnets so its up to you.
#5
R1mini
-

- Members
-
- 1,387 posts
One Carb Or Two?
Posted 08 April 2012 - 08:08 PM
You need to do a bit of panel beating on the return area of the wing to scuttle joint especially in the area nearest the vertical seam, this allows the wing to move across the required 3 or 4mm you need, you may need to do this on both the wing and the scuttle panel.
I found that I have needed to do this on almost every mini I have ever fitted wings to, aftermarket or genuine it doesn't seem to matter there is always a bit of panel beating and or brute force required. A couple of minutes work with a panel beating hammer or light hammer should get you very close to what you need
Cheers
David
Edited by R1mini, 08 April 2012 - 08:27 PM.
#6
Shifty
-

- Admin
-
- 13,147 posts
Sponsored by Fosters (tm)
- Name: Sean
- Location: Shropshire(sunny)
- Local Club: TMF
Posted 08 April 2012 - 08:15 PM
You need to do a bit of panel beating on the return area of the wing to scuttle joint especially in the area nearest the vertical seam, this allows the move to move across the required 3 or 4mm you need, you may need to do this on both the wing and the scuttle panel.
I found that I have needed to do this on almost every mini I have ever fitted wings to, aftermarket or genuine it doesn't seem to matter there is always a bit of panel beating and or brute force required. A couple of minutes work with a panel beating hammer or light hammer should get you very close to what you need
Cheers
David
Yup, he's right.
The return flange on the wing(where it sits on the inner wing) usually needs grinding. Also the return lip by the scuttle needs works as well.
Use self tappers to hold the wing in place before welding, pull the wing over so the bonnet gap is good and fix with a self tapper.
#7
Neildanks
-
- Members
-
- 889 posts
Captain Slow!!!
- Location: West Bromwich
Posted 08 April 2012 - 08:30 PM
I found That some copy panel wings fit better than others i bought a set from mini spares they where awful so never fitted them bought a set frommidlands lamps and panels same price and the fit was 10 times better.
But have not managed to find one yet that just goes into place without a bit of persasion.
But have not managed to find one yet that just goes into place without a bit of persasion.
#8
Shifty
-
- Admin
-
- 13,147 posts
Sponsored by Fosters (tm)
- Name: Sean
- Location: Shropshire(sunny)
- Local Club: TMF
Posted 08 April 2012 - 08:32 PM
By all accounts there's 2 sets of tools, one tool makes ok wings, the other utter crap1!
#9
The Matt
-

- Admin
-
- 17,232 posts
You don't escape that easily.....
- Name: Matt
- Location: Overton, North Wales
- Local Club: Welsh Border Minis
Posted 09 April 2012 - 03:23 PM
My wing gaps are massive, the panels I bought are from Minisport. Utter rubbish fit to be honest.
I'm taking the advice out of this thread and going to apply it to my wings to see how much I can close the gap. It's 12-15mm on the O/S. WIth hindsight, I really should have trimmed the flange on the wing down as that's what's caused the gaps. I pushed the wing as far onto the inner wing as I could as it hit the lip, then welded it in place thinking "Ah well, that's as close as I can get it" and stupidly rushed it. From what I understand there are a lot of poorly fitting wings out there, front panels are terrible from some places. The front panel on mine took some real molesting to get it to mate with the wing. It looks kinda OK now, but it's something else that I didn't have the patience to battle with!
I'm taking the advice out of this thread and going to apply it to my wings to see how much I can close the gap. It's 12-15mm on the O/S. WIth hindsight, I really should have trimmed the flange on the wing down as that's what's caused the gaps. I pushed the wing as far onto the inner wing as I could as it hit the lip, then welded it in place thinking "Ah well, that's as close as I can get it" and stupidly rushed it. From what I understand there are a lot of poorly fitting wings out there, front panels are terrible from some places. The front panel on mine took some real molesting to get it to mate with the wing. It looks kinda OK now, but it's something else that I didn't have the patience to battle with!
#10
PaulColeman
-
- Members
-
- 712 posts
One Carb Or Two?
- Location: Bedford
Posted 09 April 2012 - 05:28 PM
Thanks all for the replies and tips.
Okay, I've trimmed the inner edge of the outer wings and used self tappers to hold them in place. I've also reshaped the back edge of the wings where they meet the scuttle. These are the gaps I have at the moment with the wings just mocked up and clamped...


The nearside gap is pretty uniform down the length (about 4mm) but the offside is not as good as it seems to go out at the middle. However, I don't know how I can get the middle part of the wing over to tighten up the gap as I've trimmed the flange down to the point where if I do it any more I won't have enough to plug weld it. I can't see anything that's out so I may have to accept what I've got as the only way I can see to improve it is to weld a strip of metal to the inner edge of the offside wing in the middle area?
And these are the gaps at the scuttle which will be okay I think...


I've also fitted new A panels and reskinned both doors and the gaps around them are not that good...


I've shimmed both doors as best I can (although I ran out of time today) and they both open and shut without fouling but the gaps along the bottom are tight (particularly on the rounded lower back corner) whilst the gaps at the top are enormous. However, the horizontal crease line on the top of the door skin seems to match the lines on the rear quarter and the A panel so i don't see how I can lift them up. Anybody got any ideas what I can do about them?
Cheers, Paul.
Okay, I've trimmed the inner edge of the outer wings and used self tappers to hold them in place. I've also reshaped the back edge of the wings where they meet the scuttle. These are the gaps I have at the moment with the wings just mocked up and clamped...
The nearside gap is pretty uniform down the length (about 4mm) but the offside is not as good as it seems to go out at the middle. However, I don't know how I can get the middle part of the wing over to tighten up the gap as I've trimmed the flange down to the point where if I do it any more I won't have enough to plug weld it. I can't see anything that's out so I may have to accept what I've got as the only way I can see to improve it is to weld a strip of metal to the inner edge of the offside wing in the middle area?
And these are the gaps at the scuttle which will be okay I think...
I've also fitted new A panels and reskinned both doors and the gaps around them are not that good...
I've shimmed both doors as best I can (although I ran out of time today) and they both open and shut without fouling but the gaps along the bottom are tight (particularly on the rounded lower back corner) whilst the gaps at the top are enormous. However, the horizontal crease line on the top of the door skin seems to match the lines on the rear quarter and the A panel so i don't see how I can lift them up. Anybody got any ideas what I can do about them?
Cheers, Paul.
#11
sonikk4
-
- Admin
-
- 16,080 posts
Twisted Paint Polisher!!!
- Name: Neil
- Location: Oxfordshire
Posted 09 April 2012 - 05:34 PM
You could raise the door a little more. Are these the original doors for the car or some second hand ones?? You have basically got the same issue i had with Erm and the doors on him were not the originals and you know what i had to do to get them to fit right.
#12
Neildanks
-
- Members
-
- 889 posts
Captain Slow!!!
- Location: West Bromwich
Posted 09 April 2012 - 05:35 PM
The gaps on wings look good to me as for doors and a panels there are a few tricks.
1 slot holes in door posts to allow adjustment up and down.
2 you can actually put a run of weld up a pannel door gap and grind to shape and to lesson the gap. Time consuming but does the trick
1 slot holes in door posts to allow adjustment up and down.
2 you can actually put a run of weld up a pannel door gap and grind to shape and to lesson the gap. Time consuming but does the trick
#13
Shifty
-
- Admin
-
- 13,147 posts
Sponsored by Fosters (tm)
- Name: Sean
- Location: Shropshire(sunny)
- Local Club: TMF
Posted 09 April 2012 - 05:54 PM
On the left hand wing, where the gap is bigger in the middle of the wing...
Fit self tappers at the top and bottom of the inner flitch(where the gap is good)
Remove the bonnet and use a pair of very long handed welding clamps(through the headlamp) to push the gap closer, in the middle. As a rule of thumb the edge of the wing should sit flush with the edge of the inner wing( when you look in though the headlamp). Pull the wing into line in the centre and self tapper in place, fit the bonnet and check.
If its already flush, pack the clamps out so it pushes the wing further in.
I hope the above makes sense(well it does to me!!)
#14
Shifty
-
- Admin
-
- 13,147 posts
Sponsored by Fosters (tm)
- Name: Sean
- Location: Shropshire(sunny)
- Local Club: TMF
Posted 09 April 2012 - 05:59 PM
Welding the edge to make the door gap better, pattern skins always have a big gap at the top.

And after

And after
#15
PaulColeman
-
- Members
-
- 712 posts
One Carb Or Two?
- Location: Bedford
Posted 09 April 2012 - 06:47 PM
Yes they're the original doors but reskinned with pattern skins. I saw what you did to the frame of yours and I'm not planning on getting that drastic as this will be an every day car for my daughter. I owned a new Clubman in the late 70s (KVV640V if anybody knows of it) and back then nobody worried about the odd half inch door gap but now with modern cars having tight gaps I now look at these and cringe. I guess we've become spoilt!!You could raise the door a little more. Are these the original doors for the car or some second hand ones?? You have basically got the same issue i had with Erm and the doors on him were not the originals and you know what i had to do to get them to fit right.
Yes I think I'm going to have to lift it a bit as otherwise the rear lower corners are going to foul when it has the extra paint thickness.The gaps on wings look good to me as for doors and a panels there are a few tricks.
1 slot holes in door posts to allow adjustment up and down.
2 you can actually put a run of weld up a pannel door gap and grind to shape and to lesson the gap. Time consuming but does the trick
I don't think I can get any more out of it as I've already trimmed the flange on the outer wing to the point where I'm going to be running out of room to plug weld it if I go much more. The flange is up against the inner wing edge...On the left hand wing, where the gap is bigger in the middle of the wing...
Fit self tappers at the top and bottom of the inner flitch(where the gap is good)
Remove the bonnet and use a pair of very long handed welding clamps(through the headlamp) to push the gap closer, in the middle. As a rule of thumb the edge of the wing should sit flush with the edge of the inner wing( when you look in though the headlamp). Pull the wing into line in the centre and self tapper in place, fit the bonnet and check.
If its already flush, pack the clamps out so it pushes the wing further in.
I hope the above makes sense(well it does to me!!)

The other wing which is a better fit has a lot more adjustment which I don't need...

I'm confused as to why it's like this but the inner wings seem straight in relation to the bonnet so I don't think the front is out of square.
Cheers, Paul.
Edited by PaulColeman, 09 April 2012 - 06:55 PM.


1 user(s) are reading this topic
0 members, 1 guests, 0 anonymous users


