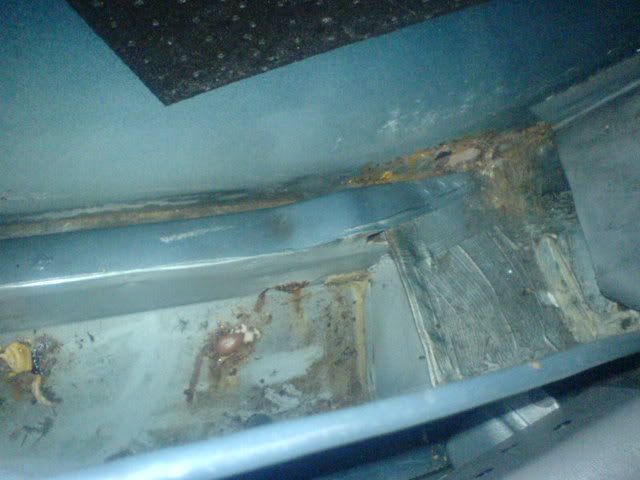
should the inner seal run under the rear bins ? would anyone have a pic
mine just goes to the outer sill/ OVERSILLLLL! just trying to get an image together for the resto

Bottom Of Rear Bins
Started by
tommypope
, May 12 2012 07:25 PM
8 replies to this topic
#1

tommypope
-
- Members
-

- 210 posts
Mini Mad
- Location: effingham , surrey
- Local Club: surrey hills
Posted 12 May 2012 - 07:25 PM
#2
sledgehammer
-

- TMF+ Member
-
- 3,102 posts
Up Into Fourth
- Location: I'm sittin here besides my self
Posted 12 May 2012 - 07:41 PM
Inner sill should go the full length to the heel board
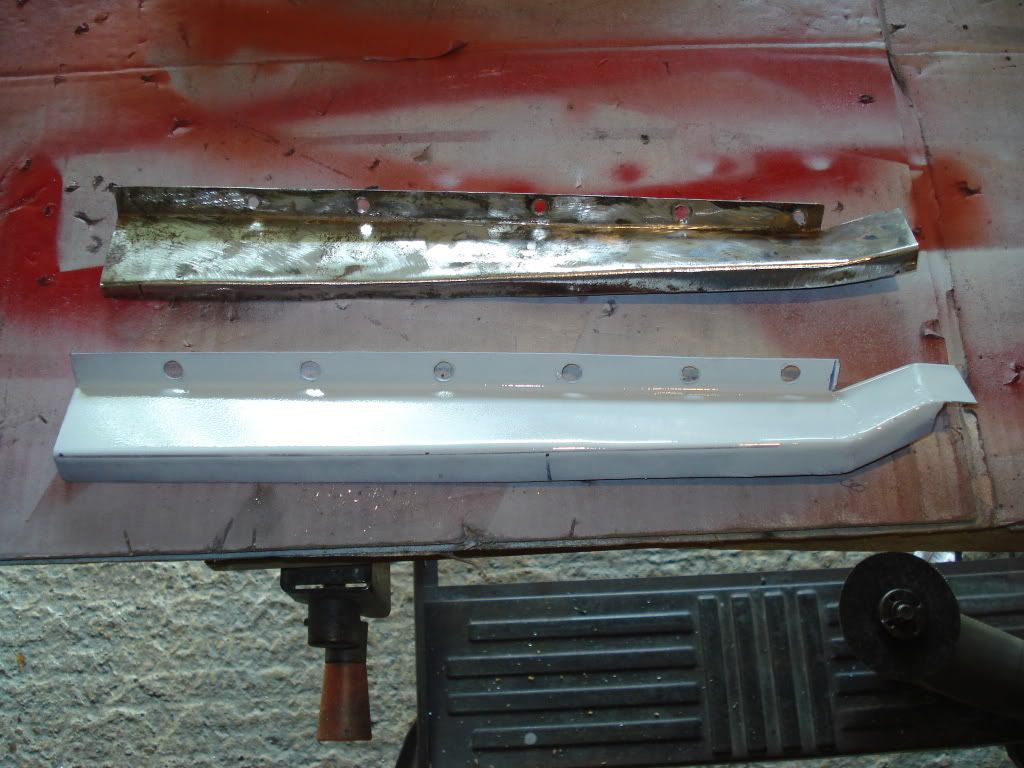
I have just welded the reinforcing beams to mine - so no point in a pic , as you cant see them
would be a bugger to weld in with the bin in place
I have just welded the reinforcing beams to mine - so no point in a pic , as you cant see them
would be a bugger to weld in with the bin in place
#3
tiger99
-

- Members
-
- 8,584 posts
Crazy About Mini's
- Location: Hemel Hempstead
Posted 12 May 2012 - 07:48 PM
Don't drive the car if it is like that. It is primary structure, and if it buckles you will have a complete nightmare fixing it.
The inner sill is part of the floorpan, and should be the same height, or very close to, all the way from the front of the door aperture to the heelboard. The vital subframe nut reinforcing plate is attached to the heelboard, and heavily spot welded to the inner sill, to attach the heelboard to the inner sill.
You will realise that the door step, which boxes the sill for strength, does not continue to the heelboard, however there is an upper member which does, item 11 on the Somerford diagram. It does not form a complete box, as it can't be welded to the outer sill/ rear quarter panel seam (too thick), but it does overlap and get welded to the closing panel (item 47).
http://www.somerford...&id=1&chapter=5
This is not the first time that I have known cowboy repairers (as must have been at your car at some time) to leave out vital parts of structure which were just too difficult to replace. It is less common now than it once was, fortunately.
#4
sledgehammer
-
- TMF+ Member
-
- 3,102 posts
Up Into Fourth
- Location: I'm sittin here besides my self
Posted 12 May 2012 - 07:52 PM
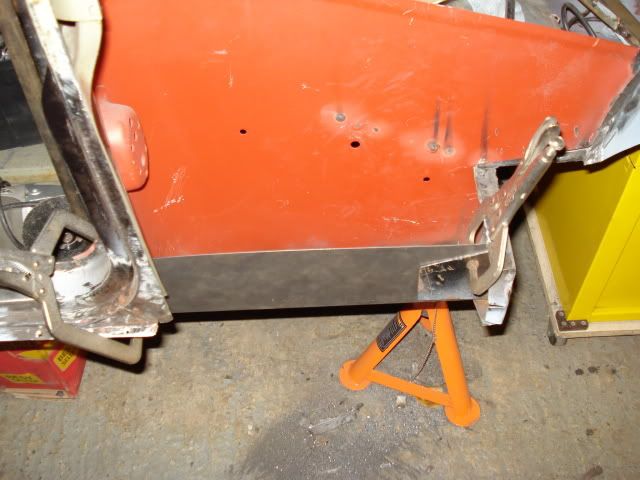
Disclamer (borrowed a pic - from somewhere else - If you own the pic - I will remove at your request)
as said above the rear subby has 2 bolts attaching to this area (captive nuts hidden)
with the pot holes around at the moment , it's important this is fixed ... (sorry for preaching)
It needs the heel board checking as well - as , if they bodged this - what else in the same area ?
as said above the rear subby has 2 bolts attaching to this area (captive nuts hidden)
with the pot holes around at the moment , it's important this is fixed ... (sorry for preaching)
It needs the heel board checking as well - as , if they bodged this - what else in the same area ?
Edited by sledgehammer, 12 May 2012 - 08:03 PM.
#5
tommypope
-
- Members
-
- 210 posts
Mini Mad
- Location: effingham , surrey
- Local Club: surrey hills
Posted 12 May 2012 - 07:55 PM
thanks alot guys i thought as much but the was thrown by looking at the rear floor panels online that have no inner sils there lol
its my first mini so its hard to say whats there when it isnt there lol
its my first mini so its hard to say whats there when it isnt there lol
#6
tommypope
-
- Members
-
- 210 posts
Mini Mad
- Location: effingham , surrey
- Local Club: surrey hills
Posted 12 May 2012 - 07:55 PM
exacly how i thought it should be thanks
#7
tommypope
-
- Members
-
- 210 posts
Mini Mad
- Location: effingham , surrey
- Local Club: surrey hills
Posted 12 May 2012 - 08:01 PM
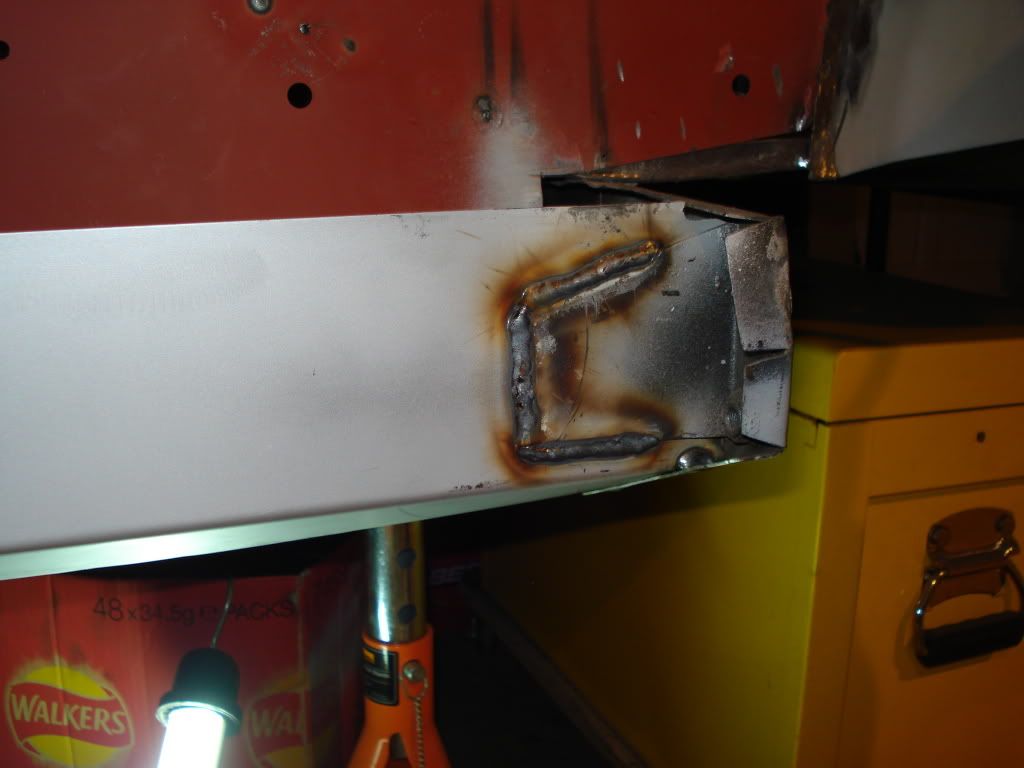
at a guess the part running along the quater is part 11 ? this is intack and the closing plate is the bit covered in stone chip? this part is pretty rotten lol looks like im taking the bins out thenDisclamer (borrowed a pic - from somewhere else - If you own the pic - I will remove at your request)
#8
tiger99
-
- Members
-
- 8,584 posts
Crazy About Mini's
- Location: Hemel Hempstead
Posted 13 May 2012 - 08:25 AM
Correct! You can clearly see part 11 on top of the inner sill, which as you see, is just the folded up edge of the floorpan. This is one of the few good pictures I have ever seen of the top of the closing panel, and it shows that the whole thing is actually rather simple to fit together.
You can see a slight crease in the inner sill where it has been "persuaded" to fit tightly to the subframe mount reinforcer when it was being welded.
I have never had to replace item 11, so can't be sure, but I suspect that its front end is spot or plug welded to the inside of the doorframe. It is also spotted to the top of the inner sill, but you can seam or plug weld it, of course.
There is nothing to prevent you from making a few minor improvements, such as seam welding the joint between heelboard and inner sill, as well as relying on the hidden subframe mount bracket. A stiffer shell tends to last longer, and behaves better in the event of an accident. And, but you will know this already, you will want lots of Waxoyl in there, especially in the gap between the outer, vertical part of the closing panel and the quarter panel.
I have seen the so-called inner sill panels which have a large piece cut out to avoid having to repair this area. They are as useless as those with the cut-out to fit over the seat crossmember. It is very disappointing that most of the Mini spares suppliers continue to sell trash like that which will result in dangerously bodged and weak, but outwardly presentable repairs. Repairing this area is not even all that hard, you just use your spot weld drill to remove the bin, weld in the new partial floor and whatever other bits are being replaced, and when you are finished, plug weld the bin through the holes made when removing it.
#9
sonikk4
-

- Admin
-
- 16,053 posts
Twisted Paint Polisher!!!
- Name: Neil
- Location: Oxfordshire
Posted 13 May 2012 - 03:10 PM
Here's some pictures of the area broken down a bit more
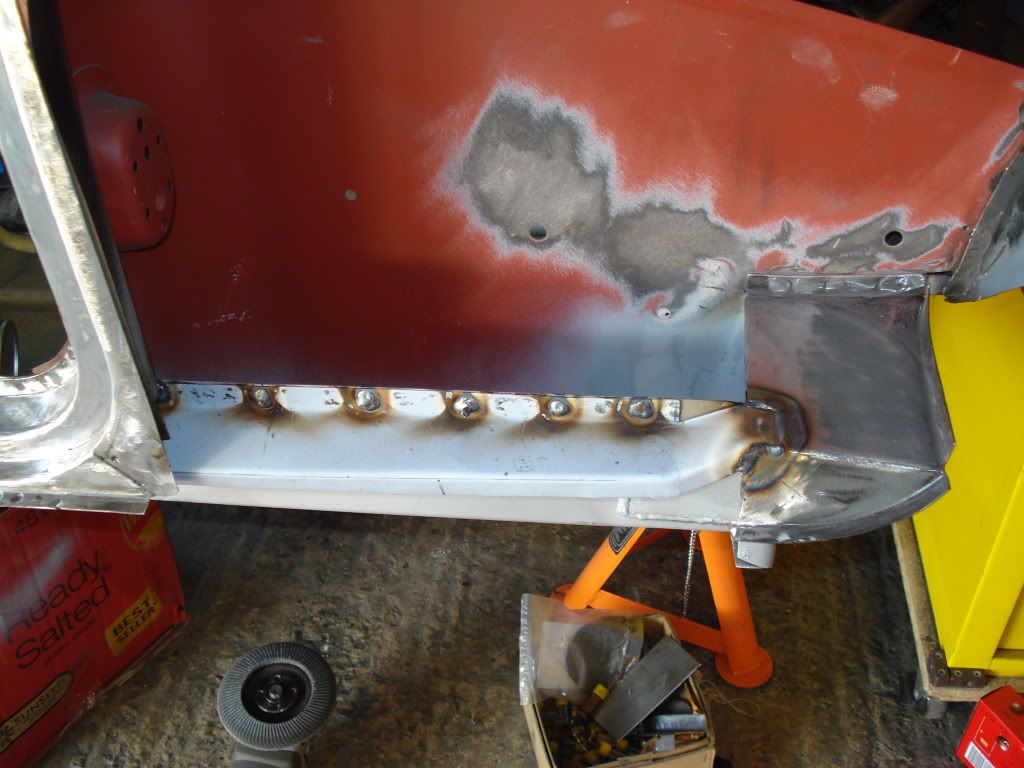
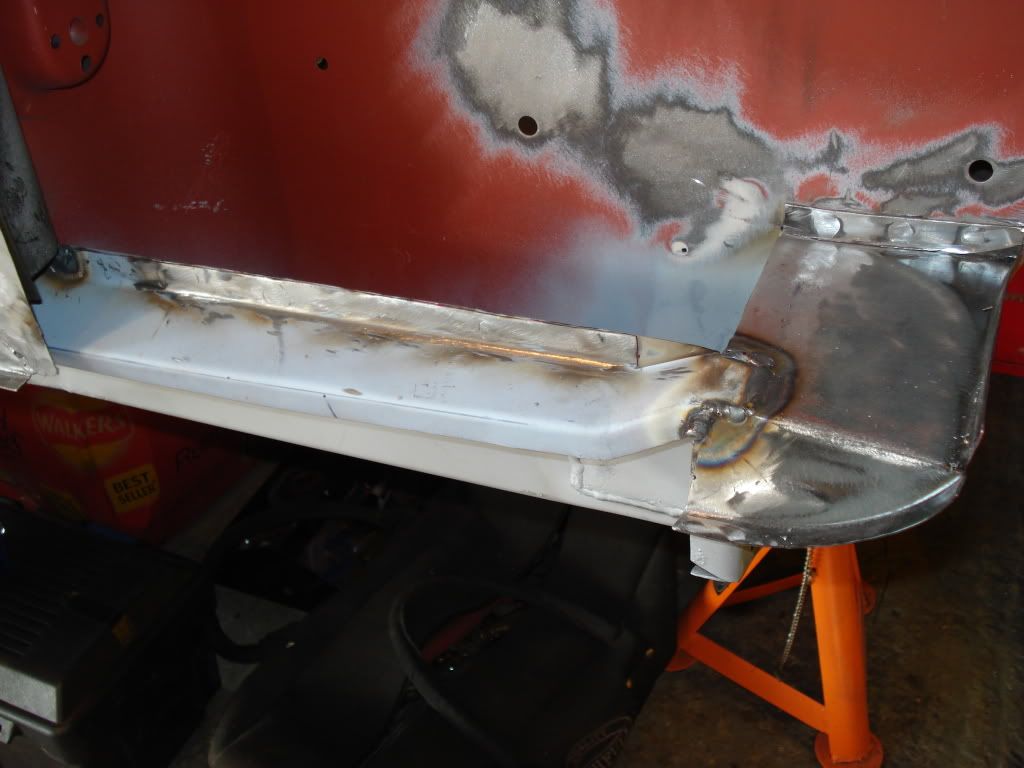
The heelboard bracket in this picture is partially seam welded but it was fully welded before i installed the rear quarter panel.
The heelboard bracket in this picture is partially seam welded but it was fully welded before i installed the rear quarter panel.


1 user(s) are reading this topic
0 members, 1 guests, 0 anonymous users


