Well during the raining season (most of the summer) I couldn't get any welding done so I was bored. So I though these Superlights could do with a refresh!!!.
Here is a step by step on how I did it........
Stage 1 cleaned all the wheels with Traffic Film Remover (wonder wheels to some of you!!) dried off and masked of the shiny part!! (or not so shiny in this case).

This is the better looking of the four but they are all pitted and scoured.

Starting to mask up all the wheels

After fully masked off started sanding down with a very course grit P80 then worked up to p320. This is for the rose of the wheel not for the rim, I will explain that later.

After finishing all of the wheels roses it was time to start with the rim, I started using P80 and working my way through the grades P80, P120, P180, P240, P320, P500 all dry sanding making sure all the swirl marks had gone.

Once at this stage it was time to start with the Wet and Dry, Using P800 first and again going through the grades. P800, P1500, P2000, P3000 I could have gone further upto P8000 but the paper is sooo expensive!!!


It is wise to wear some form of rubber glove when doing this as the aluminium turns ya hand black and it a bugger to get off. Plus I like wearing Marigolds!!!!
Once got to P3000 and all dried off should be ready to polish.

As you can see even with some elbow grease and good old fashioned sand paper the lustre was starting to come back.

All ready for the polishing up of the rim all the wheels got done at the same stage to help me from getting confused


All the rims got polished to the same standard that I wanted then the rim got masked up again ready for paint prep. I Red Scotched the roses again and the inner rim (behind the wheel) ready for painting and degreased the wheel with solvent panel wipe. Then took of the masking and redo masking (properly) for the true phase of painting. I used fine line tape for the lip, before the rose and then just plain old masking tape all around. For the cotton reel I used Craft paper (same as brown parcel paper) and masking tape.
I then degreased the wheels again and tack clothed them ready for etch primer.

Etched primed, this was a light dusting really no need for a heavy coat here.

Here I am using a wet on wet method of primer, this is the same high build primer with a ratio of 2:1 mix but with a 20% mix of thinners too so it looks like water nearly this was the 3/4 coat ready for the full coat.

As you can see the primer looks wet, after 10 min of flash of time this will be ready to take the base coat!


Apologies for the line in the picture my camera does that from time to time. Here you see the base coat Classic Rover White in 2pk form looks really nice I think.
So whilst the wheels are being baked I took the liberty to make some spray out cards to see what the colour scheme will look like for FYN.

The wheels are now out of the booth and whilst they are still warm I took the masking tape off (VERY CAREFULLY) as the paint is still very soft.
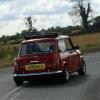
So here are finished results

The camera does not do the wheel any justice I am very pleased with the result. Not bad for about 2 weeks hard graft. I would like to add a Big Thanks to the guys at South Devon College (Automotive Section) for the use of their facilities. Thanks again guys.