Jump to content


Photo

Rokee Dash Installation?


  • Please log in to reply
6 replies to this topic

#1 seahuston

seahuston

    Learner Driver

  • Noobies
  • PipPip
  • 23 posts
  • Location: New Hampashire

Posted 27 August 2013 - 02:51 AM

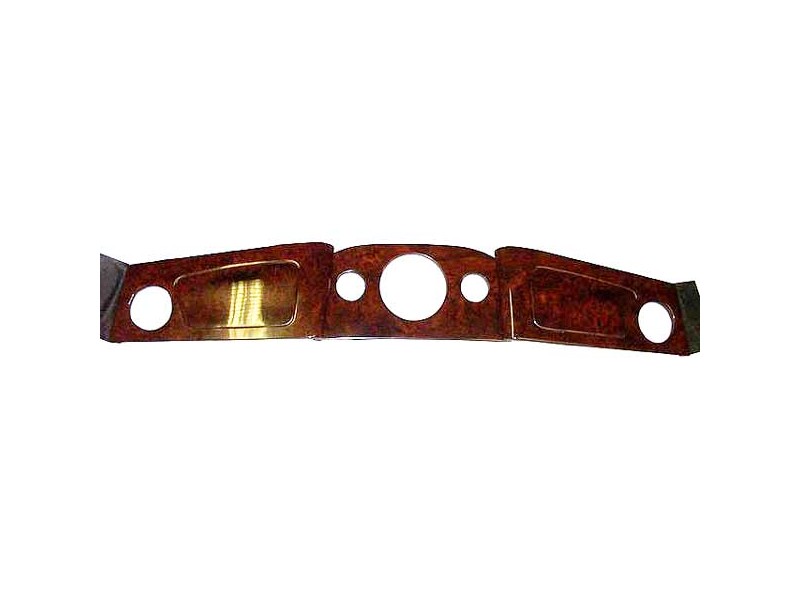
I recently purchased a 1978 Mini 1000 (with late 80s body) and the seller threw in a Rokee dash.


I'm finally getting around to installing it but can't figure out how to attach it.

I removed the top padded dash rail, do I need to remove the bottom as well? With the top removed it kind of gets wedged in place but I imagine there are some points to attach it to though there are not many brackets for attachment. Could anyone that has installed one provide a simple step by step?

Thank you!


#2 Dan

Dan

    On Sabbatical

  • TMF+ Member
  • PipPipPipPipPipPipPipPipPipPipPip
  • 21,354 posts

Posted 27 August 2013 - 10:00 AM

  There are a few Rokee dashes, got a photo of it?


#3 seahuston

seahuston

    Learner Driver

  • Noobies
  • PipPip
  • 23 posts
  • Location: New Hampashire

Posted 27 August 2013 - 11:43 AM

Thats a good point, I don't have an actual picture at the moment but it is very similar to this one:

http://www.minimania...er-Clock--Vents


3 pieces with the vent hole cut outs.

800600001dash301v_b.jpg


#4 Dan

Dan

    On Sabbatical

  • TMF+ Member
  • PipPipPipPipPipPipPipPipPipPipPip
  • 21,354 posts

Posted 27 August 2013 - 01:44 PM

 The middle panel is fixed over the instrument binnacle and the two side panels are fixed to this with wing nuts that are accessed through the gloveboxes.  The outside edges of the side panels are fixed to the door frames with small metal brackets and self tappers.  These are then covered with the strips of trim cloth that tuck under the door seal and neaten up the edges.  The top rail is not used with this dash.


#5 seahuston

seahuston

    Learner Driver

  • Noobies
  • PipPip
  • 23 posts
  • Location: New Hampashire

Posted 27 August 2013 - 02:30 PM

Since I don't have an orginial binnacle I'll need to get custom gauges for it (looking at Autometer) and make my own brackets then, huh?

Is the bottom padded rail generally used with this dash? It seems like a tight fit.


#6 Dan

Dan

    On Sabbatical

  • TMF+ Member
  • PipPipPipPipPipPipPipPipPipPipPip
  • 21,354 posts

Posted 27 August 2013 - 08:15 PM

  In the cars this was designed for the bottom rail would be either plain painted steel or vinyl wrapped but without the padding.  It should still fit though, the padding doesn't make it much bigger at the top or back.  Wrapping the upper dash rail in vinyl helps with the look.


  I believe the instrument holes are cut large enough that they will slip over the bezels of the original gauges so that you can fit the dash without dismantling the car.  This means that you might have trouble finding gauges that will fit into it directly as they will just drop through.  You might be best to get one of the replica binnacles that are available and using that to support everything.


#7 seahuston

seahuston

    Learner Driver

  • Noobies
  • PipPip
  • 23 posts
  • Location: New Hampashire

Posted 28 August 2013 - 12:10 PM

Interesting, I measured the openings and the holes are definitely larger that an gauge I can find. That said, I'm sure I can make some kind of adapter bezel to fit.

I'm most likely going to go with new gauges as I like the ability to reprogram/calibrate my speedometer when wheels/tires/etc change. Mine is way off at the moment. I'm look at the Autometer antique series if anyone is curious. Once I start getting into the project I'll post a short build log.


1 user(s) are reading this topic

0 members, 1 guests, 0 anonymous users