Jump to content


Photo

Major Rust Bubbles Around Rear Window


  • Please log in to reply
12 replies to this topic

#1 joeaustin

joeaustin

    Passed Test

  • Noobies
  • PipPip
  • 30 posts
  • Location: north east + manchester

Posted 29 August 2013 - 01:57 PM

my 1988 austin mini has some major rust bubbling going on around the rear window, one part is like a rust volcano now :ohno:


So I'm planning on taking the window and seal out, sanding down to bare metal then priming and painting properly, replacing the seal and just want some advice before i get started next week. read up on these forums and some have suggested a knotted wire wheel to completely get rid of the rust but it looks a bit aggressive and scary? here's the state of the rust at the moment


20130827_091926.jpg

that's the volcano at the bottom of the window ^

20130827_091901.jpg

rhs ^

20130827_091847.jpg

and lhs^


so yeah it needs doing really before winter and i want to do it properly. (but on a student budget :teehee: )

any tips?


#2 jaydee

jaydee

    Crazy About Mini's

  • Members
  • PipPipPipPipPipPipPipPipPipPip
  • 8,565 posts

Posted 29 August 2013 - 02:04 PM

You'll need a dremel to get rid of the rust, until you only have bare metal, dont forget the sand down the area around the repair .

Fill any remaning holes welding new metal.

Etch or zinc primer, then prep and paint.


#3 sonikk4

sonikk4

    Twisted Paint Polisher!!!

  • Admin
  • PipPipPipPipPipPipPipPipPipPipPip
  • 16,037 posts
  • Name: Neil
  • Location: Oxfordshire

Posted 29 August 2013 - 02:08 PM

They rust is quite advanced so knotted wire cup will strip the surface rust back but not the pitted metal. This will need to be cut out and judging by your pictures you will need to fabricate some new sections.


The biggest issue is the rust will have started from underneath and between the seams. so there will be more. 


#4 joeaustin

joeaustin

    Passed Test

  • Noobies
  • PipPip
  • 30 posts
  • Location: north east + manchester

Posted 29 August 2013 - 02:17 PM

if there isn't any pitting though then i wouldn't need to cut or weld anything right? slight snag in that I don't have a welder... and even if i did i wouldn't say i'm good enough at welding to do a decent enough job.


#5 Jmccrary

Jmccrary

    Mini Mad

  • Members
  • PipPipPipPip
  • 171 posts
  • Location: Mildenhall

Posted 29 August 2013 - 02:27 PM

looking at it there...im thinking break out the welder...post pix after the paints removed...it maybe not be that bad!


#6 jaydee

jaydee

    Crazy About Mini's

  • Members
  • PipPipPipPipPipPipPipPipPipPip
  • 8,565 posts

Posted 29 August 2013 - 02:44 PM

By the pics you'll need to weld fresh metal

Not the worst area to work though, its a pretty easy job to sort this out.


#7 mk1monster

mk1monster

    Mini Mad

  • Members
  • PipPipPipPip
  • 287 posts
  • Location: Lowestoft
  • Local Club: Lowestoft Mini Club

Posted 29 August 2013 - 02:45 PM

I'm thinking the volcano when disturbed will leave a crater... May need welderiser for that bit

#8 sonikk4

sonikk4

    Twisted Paint Polisher!!!

  • Admin
  • PipPipPipPipPipPipPipPipPipPipPip
  • 16,037 posts
  • Name: Neil
  • Location: Oxfordshire

Posted 29 August 2013 - 02:50 PM

I have to say speaking from experience here that will need welding. Sorry but the truth hurts sometimes and having had areas that don't look that bad and that have turned into larger repairs its mini ownership.


The metal is thin to start with, no point in grinding it back to clean metal as by then the area will be very thin. Pitting is a pain in the backside on thin metal. Thicker stuff you can get away with but when your skin is 0.9mm thick there is not a lot to contend with.


#9 joeaustin

joeaustin

    Passed Test

  • Noobies
  • PipPip
  • 30 posts
  • Location: north east + manchester

Posted 29 August 2013 - 02:55 PM

I'll be taking the window out this sunday (hopefully) and removing paint and hopefully all the rust, i'll update as it goes along, fingers crossed it's not too bad.


on another note, which is better, etch primer or zinc? or both?


and when you say it's an easy job, how easy for someone who is very new to this and has only ever welded small bits of metal at uni? also are there any guides on how to weld in new metal?


also if it is pitted should I cut the pitted sections out and replace with fresh metal? won't it look completely different and botched?


#10 sonikk4

sonikk4

    Twisted Paint Polisher!!!

  • Admin
  • PipPipPipPipPipPipPipPipPipPipPip
  • 16,037 posts
  • Name: Neil
  • Location: Oxfordshire

Posted 29 August 2013 - 03:00 PM

If its pitted then yes replace it. Make small sections at a time and tack weld them in place. keep doing that until you have built up the repair area.


Then you can pulse weld the repair in place. Then carefully clean up the welds. Don't worry if you find pin holes fill these with weld then grind back.


You may need a Dremel or something similar to get the contours correct.


#11 sonikk4

sonikk4

    Twisted Paint Polisher!!!

  • Admin
  • PipPipPipPipPipPipPipPipPipPipPip
  • 16,037 posts
  • Name: Neil
  • Location: Oxfordshire

Posted 29 August 2013 - 03:06 PM

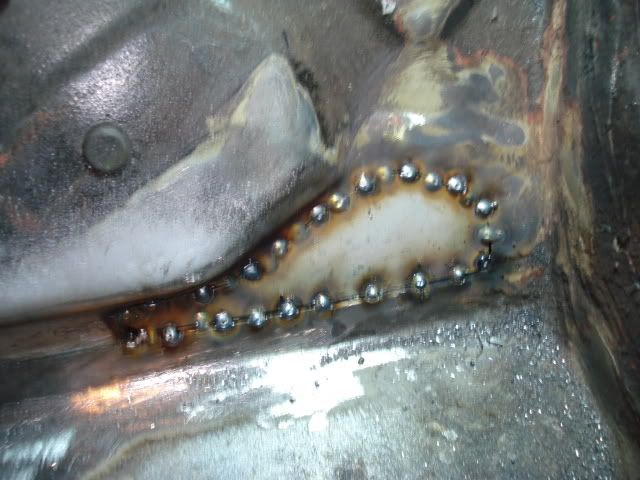
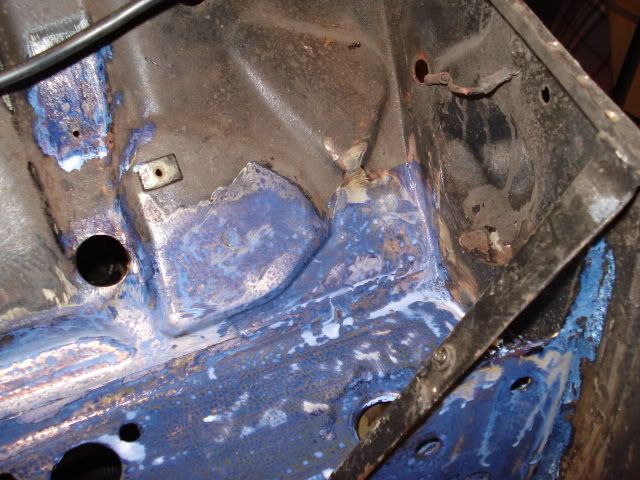
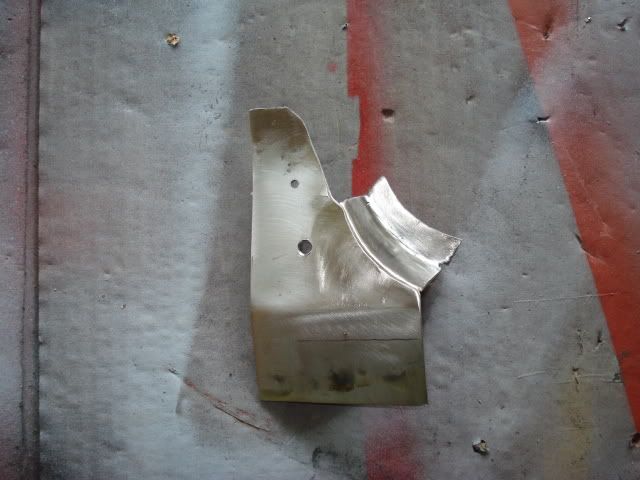
This is a repair i did on Project Erm. I know its flat but it gives you an idea of whats what

DSC02710.jpg


DSC02711.jpg


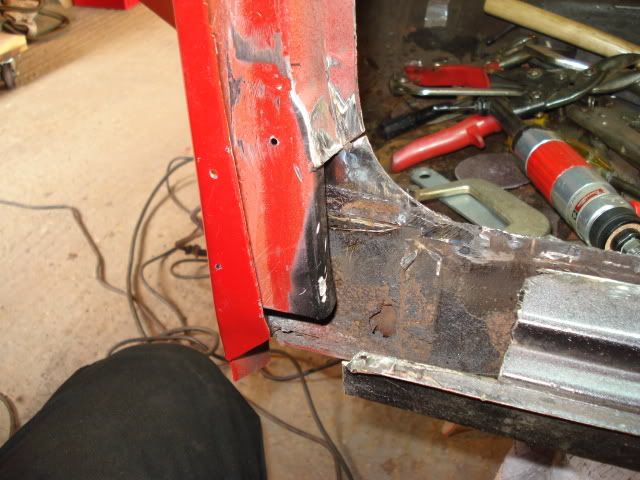
And this is one of the many repairs i did to make more complex sections.

DSC02859.jpg


DSC02858.jpg


#12 joeaustin

joeaustin

    Passed Test

  • Noobies
  • PipPip
  • 30 posts
  • Location: north east + manchester

Posted 29 August 2013 - 03:11 PM

ah yes I was having a look at project erm earlier, looks awesome!


but with mine being the edge of the window how would I tack it in place? on either side?

also thanks for everyone's help here, really appreciate it =]


#13 sonikk4

sonikk4

    Twisted Paint Polisher!!!

  • Admin
  • PipPipPipPipPipPipPipPipPipPipPip
  • 16,037 posts
  • Name: Neil
  • Location: Oxfordshire

Posted 29 August 2013 - 03:16 PM

Once you have got all of the grot out make each piece in turn. Get the contour right first if you have to make a more complicated piece. Once you are happy with the shape of the piece then if its flange to flange you need to drill some 3/16th minimum holes for plug welding the flanges together.

All of the other pieces tack weld together. If it all looks good, the shape is good then pulse weld together.

Don't seam weld as you will more than likely blow holes so use the pulse method.


Use zinc rich primer behind the flanges before welding together.


1 user(s) are reading this topic

0 members, 1 guests, 0 anonymous users