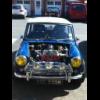
True shifty, the original engine needed a lot of work, just made more sense to buy this one. Might still use the 11 stud head though !


1976 British Leyland Mini Restoration "tiny"
Started by
Covert
, Jun 02 2014 07:42 PM
148 replies to this topic
#136

Covert
-
- Members
-

- 526 posts
Super Mini Mad
- Location: Northampton
Posted 23 October 2015 - 07:46 PM
#137
MrBounce
-

- TMF+ Member
-
- 2,661 posts
Up Into Fourth
- Location: The Manroom in Ipswich
Posted 23 October 2015 - 08:33 PM
I've just read the whole lot - some excellent work going on here! It's giving me the inspiration to do things with mine again after my paint debacle! 
#138
Covert
-
- Members
-
- 526 posts
Super Mini Mad
- Location: Northampton
Posted 24 October 2015 - 05:19 AM
.
Problem is with me i have OCD and no patience , so i want it perfect but straight away lol.
Thanks matey, dont give up hope on yours , your doing so well !I've just read the whole lot - some excellent work going on here! It's giving me the inspiration to do things with mine again after my paint debacle!
Problem is with me i have OCD and no patience , so i want it perfect but straight away lol.
#139
Covert
-
- Members
-
- 526 posts
Super Mini Mad
- Location: Northampton
Posted 24 October 2015 - 07:47 AM
picked up the front subframe from the blasters today , need to get some paint on it asap as its piddling it down here lots of moisture in the air!


#140
Covert
-
- Members
-
- 526 posts
Super Mini Mad
- Location: Northampton
Posted 25 October 2015 - 07:32 AM
so first thing on the subframe was to push some kurust into the joints, then x2 coats of acid etch primer and x2 coats of filler primer, then sealed all the joints with tigerseal, now it just needs x2 coats of chassis black, this should ensure it stays this was for a long time to come......


#141
jpw1275
-
- Noobies
-
- 2,803 posts
Up Into Fourth
- Location: Warrington
- Local Club: I'm a carb addict!!!!!!!
Posted 25 October 2015 - 08:11 AM
Good work mate.... I'm thinking of starting mine again from scratch lol
Cheers James
Cheers James
#142
Covert
-
- Members
-
- 526 posts
Super Mini Mad
- Location: Northampton
Posted 25 October 2015 - 08:19 AM
Good work mate.... I'm thinking of starting mine again from scratch lol
Cheers James
Noo your doing so well , what do you want to re-do?
#143
jpw1275
-
- Noobies
-
- 2,803 posts
Up Into Fourth
- Location: Warrington
- Local Club: I'm a carb addict!!!!!!!
Posted 25 October 2015 - 08:47 AM
With the amount of panels needed I'm thinking of a full strip down .... Just makes more sense and something I should of done at the beginning :0)
Cheers james
Cheers james
#144
Covert
-
- Members
-
- 526 posts
Super Mini Mad
- Location: Northampton
Posted 04 December 2015 - 05:08 PM
sorry for the lack of updates been working all the hours under the sun at the moment.
but here is what ive been up to.
got 3 coats of chassis black gloss on the front subframe


managed to make a brace for the engine stand and got it painted.

knocked up a few bits of steel to make an engine support frame.
its resting on the concrete floor , bolted to the walls , welded and bolted together, think it should be strong enough.....


de-rusted and painted my engine plate , i was going to get it plated , but you wont hardly see it when fitted.

took the guides out of my head, and made a start on cleaning it up.
3 guides were already cracked as you can see, and i had 7 cast iron guides and 1 brass/bronze no idea why though!
contemplating replacing with bronze guides as they are not much more expensive than the cast iron ones.


popped into david manners in oldbury and picked up these
new cam bearings

and an Evolution 01 cam.

This means in the new year i can take my block to be honed, decked, drilled for extra x2 studs (11 stud head)
install cam bearings , and hot dip the block, i can then start to rebuild the bottom end etc
Yay!
#145
jpw1275
-
- Noobies
-
- 2,803 posts
Up Into Fourth
- Location: Warrington
- Local Club: I'm a carb addict!!!!!!!
Posted 04 December 2015 - 05:12 PM
I have the very same idea regarding an engine ..... My problem being we are selling the house so there's no point at present fitting and building one ....
Subframe looks sweet mate
Cheers james
Subframe looks sweet mate
Cheers james
#146
James_eaton_thewholething
-

- Members
-
- 1,063 posts
One Carb Or Two?
- Location: Manchester
Posted 04 December 2015 - 05:47 PM
Subframe looks awesome I will need to get mine sorted at some point.
What did you use to get the valve guides out ?
What did you use to get the valve guides out ?
#147
Covert
-
- Members
-
- 526 posts
Super Mini Mad
- Location: Northampton
Posted 04 December 2015 - 05:57 PM
thanks mateyI have the very same idea regarding an engine ..... My problem being we are selling the house so there's no point at present fitting and building one ....
Subframe looks sweet mate
Cheers james
Subframe looks awesome I will need to get mine sorted at some point.
What did you use to get the valve guides out ?
I used this

Not ideal as you have to kinda straddle it , but it did the job , easier it you can borrow a hydraulic press.
#148
James_eaton_thewholething
-
- Members
-
- 1,063 posts
One Carb Or Two?
- Location: Manchester
Posted 04 December 2015 - 05:59 PM
Still beats the people removing them with a hammer and not getting them out at all.
I have access to neither things so the head will be going to have some work done when it comes time to take the engine apart and check what I messed up the first time I rebuilt it 😜
I have access to neither things so the head will be going to have some work done when it comes time to take the engine apart and check what I messed up the first time I rebuilt it 😜
#149
Twilton
-

- Noobies
-
- 57 posts
Stage One Kit Fitted
- Location: Up North
Posted 02 March 2016 - 12:22 PM
Just wanted to let you know you're frikin insane.
Such attention to detail and quality with your build! Any updates?
Such attention to detail and quality with your build! Any updates?
Edited by Twilton, 02 March 2016 - 12:22 PM.


3 user(s) are reading this topic
0 members, 3 guests, 0 anonymous users


