Jump to content


Photo

Door Step Replacement Advise


  • Please log in to reply
11 replies to this topic

#1 miniman92

miniman92

    One Carb Or Two?

  • Members
  • PipPipPipPipPipPipPip
  • 761 posts
  • Location: Winsford
  • Local Club: Crewes Missiles

Posted 01 November 2014 - 03:57 PM

Hi All


After some advise really before diving in to this and making a mess of things!


Bought myself a Clarke 151 en Turbo mig and I am going to be teaching myself to weld before having a go at replacing both my door steps.


Does anybody have a sort of step by step how to that is easy to follow? There seems to be a lot of stuff out there that covers sill replacement but not for door steps?


And which panels would you all recommend? I know some of these pattern panels that are out there don't have the correct profile and don't line up properly - is this still going to be the case if I were to replace the whole length of the door step?


See pics below...


IMAG0027_1.jpg


IMAG0026_1.jpg


Thanks


Ash


#2 minisprint

minisprint

    One Carb Or Two?

  • Members
  • PipPipPipPipPipPipPip
  • 1,036 posts
  • Local Club: GR8 minis

Posted 01 November 2014 - 04:30 PM

I'd use genuine if they are your first panels . Get yourself a jogglerhole punch and puddle weld them along sill and where seal fits and seam to the old panel where is solid hope this makes some sense.

#3 Covert

Covert

    Super Mini Mad

  • Members
  • PipPipPipPipPipPip
  • 526 posts
  • Location: Northampton

Posted 01 November 2014 - 04:32 PM

Buy the panels before you start cutting , you can see how big they are then

#4 miniman92

miniman92

    One Carb Or Two?

  • Members
  • PipPipPipPipPipPipPip
  • 761 posts
  • Location: Winsford
  • Local Club: Crewes Missiles

Posted 01 November 2014 - 04:46 PM

Minisprint have you got a link to the genuine panel? So I would need to hole punch along both seems of the new panel and then puddle weld them to the outer and inner door step and then finish off by seem welding the ends?


#5 Tommyboy12

Tommyboy12

    Up Into Fourth

  • Members
  • PipPipPipPipPipPipPipPipPip
  • 2,255 posts
  • Location: Peterborough

Posted 01 November 2014 - 04:50 PM

Ive just done one recently and this is how I tackled mine. I cut mine to suit rather than replaced the full length but the principals are the same. Unfortuntately I didnt take any pictures.


Firstly, most pattern door steps are awful. I got a magnum panel that actually fit and wasnt a bad press but ive heard others have a hell of a time with magnum door steps. That being said I still had to tighten up the folds and beat out a curve in the panel that stretched from one end to the other. I wouldnt recommend cutting before you have the panel in hand.


If youre only cutting the door step out and your inner and outer sill are solid you shouldnt need to brace the door frame but DO NOT jack the car up while it is missing the panel.


I started off by removing the door, rubbers and seals. I took out the carpet off the inner sill. I took the seat out and rolled over the carpet and felt too so I didnt damage it from welding spatter or grinding sparks.


Cutting out is fairly easy with a cutting disk. I cut the panel to suit along the edge of the seam. Youve then got a choice of either drilling the spot welds out of the lip or grinding them off. I ground mine off as I found it a bit easier. You also need to prepare the edges of the door step that is left. You can joggle as mentioned above but you can also butt weld, in which case you need to remove the paint for a clean surface to weld.


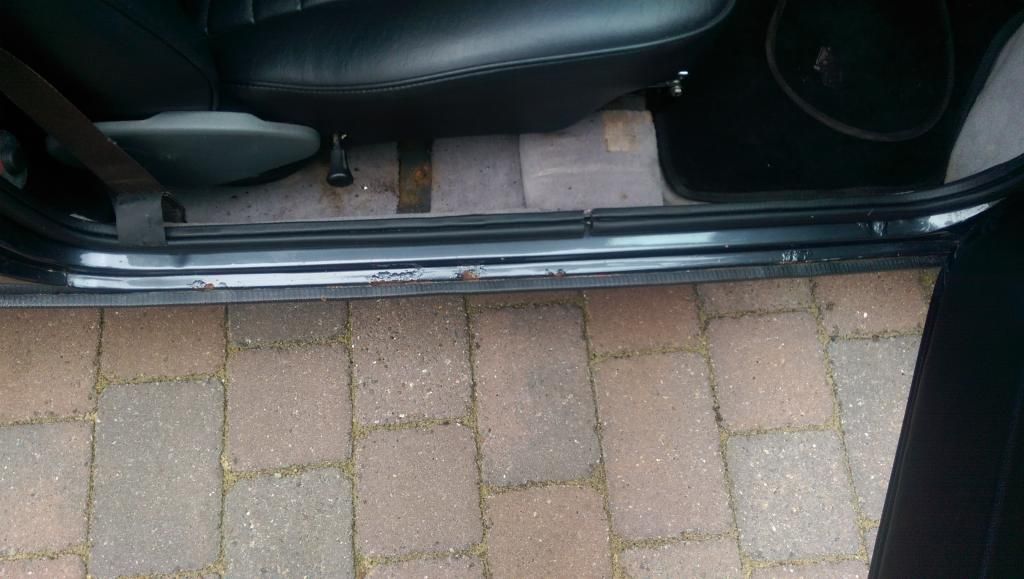
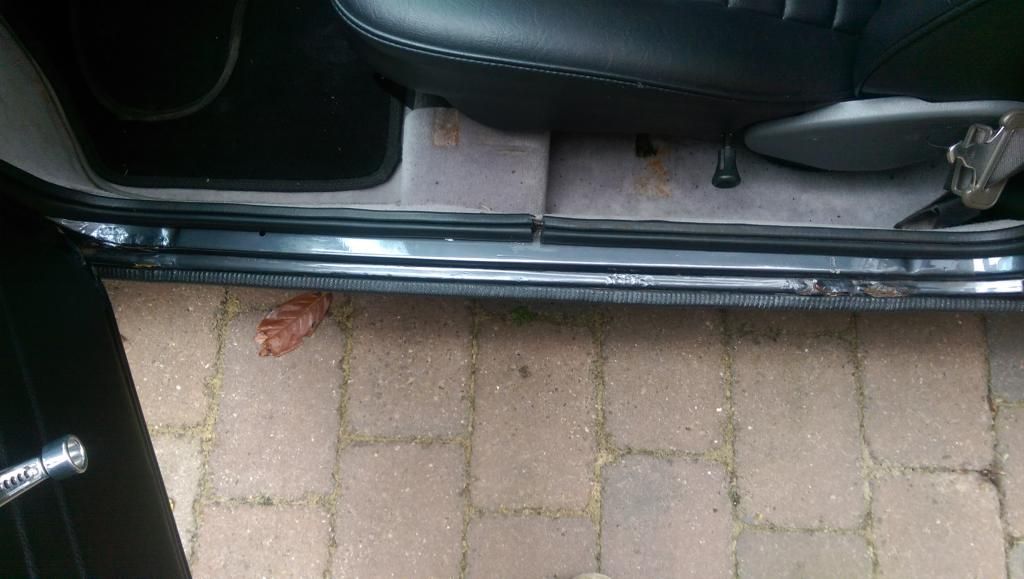
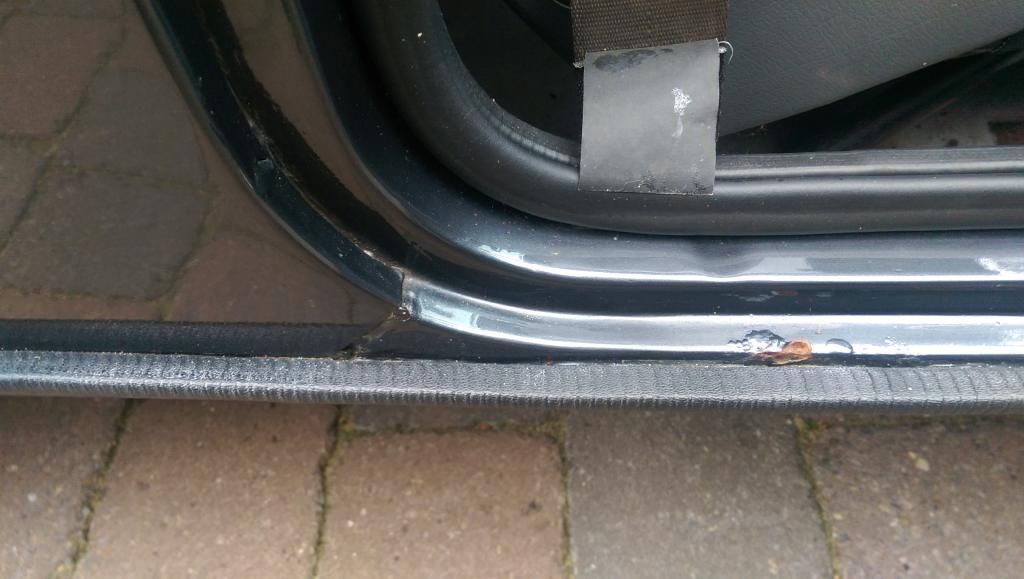
Now is a good chance to check the health of your inner and outer sill. Surface rust can be dressed and dealt with fairly easily. I had to repair a small section of the inner sill from a previous repair.


Now to prepare the new panel. If you havent got a spot welder you need to drill it out for puddle welding. I did my holes about 1 inch apart with a spot weld drill bit and then dressed. I made sure not to force the drill bit through so i didnt bend the panel. I also ground down the edges for clean metal for the seam weld.


Offer up the panel and make sure it fits. Having plenty of clamps/molegrips helps. Ive got 5 which did me ok. Once it sits nicely and it sits level then its time to weld. Tack it in and make sure its still square. Then you can start welding in. I have a spot weld clamp which clamps either side of the spot im about to weld. Means each spot is nice and tight. Id just say take it slow when welding. You dont want to overheat the panel and warp it and its a pain to cut back out a new panel if you mess it up.


I would say its one of the easiest panels to replace if you get a decent panel to start with.


#6 alex-95

alex-95

    I am THE CLAMP MAKER

  • TMF+ Member
  • PipPipPipPipPipPipPipPipPipPip
  • 6,042 posts
  • Location: l

Posted 01 November 2014 - 04:51 PM

+1 for genuine ones, although m-machine (I think) were surposed to be making there own good ones?


You'd need to drill/punch holes I find that the joggler punch holes are to small (4mm) I drill mine out to 6mm along the seam to plug weld if you don't have a spot welder,. and then weld along where the ends meet.


#7 Carlos W

Carlos W

    Mine is purple, but I have been told that's normal

  • TMF+ Member
  • PipPipPipPipPipPipPipPipPipPipPip
  • 10,114 posts
  • Location: Sittingbourne, Kent

Posted 01 November 2014 - 04:53 PM

What are the inner and outer sills like?


#8 miniman92

miniman92

    One Carb Or Two?

  • Members
  • PipPipPipPipPipPipPip
  • 761 posts
  • Location: Winsford
  • Local Club: Crewes Missiles

Posted 01 November 2014 - 06:03 PM

Great write up tommyboy.... thanks! 


Carlos - outer and inner sills should be ok as they weren't done too long ago. I'm just hoping that water hasn't made its way through the rust holes in the door step and started to rot the sills again but I guess I won't know until I take the door step off.


How much is a genuine door step guys?


#9 sonikk4

sonikk4

    Twisted Paint Polisher!!!

  • Admin
  • PipPipPipPipPipPipPipPipPipPipPip
  • 16,080 posts
  • Name: Neil
  • Location: Oxfordshire

Posted 01 November 2014 - 07:20 PM

Genuine doorstep also includes the A post as well

http://www.minispare...epair.aspx|Back to shop


Give M Machine a call to see if they have started to make their own yet. Dont get a Magnum they are rubbish. I went to the effort of getting some decent ones made. 


#10 Marco1972

Marco1972

    One Carb Or Two?

  • Members
  • PipPipPipPipPipPipPip
  • 822 posts
  • Location: Birmingham

Posted 02 November 2014 - 08:46 AM

As Sonic has stated

Don't bother with Magnum there very poor I'm not sure if M Machine are making there own yet but if they are they will be far better

I've had a set of Sonic which are top notch I haven't fitted them yet but there far superior to any aftermarket ones you can buy apart from the genuine heritage article

#11 miniman92

miniman92

    One Carb Or Two?

  • Members
  • PipPipPipPipPipPipPip
  • 761 posts
  • Location: Winsford
  • Local Club: Crewes Missiles

Posted 03 November 2014 - 07:55 PM

Thanks for all your help guys.


Another question for you..... how do I go about joining the door step to the rear quarter panel?


As in this pic?


IMAG0028.jpg


#12 Ben_O

Ben_O

    Mill Road Garage

  • Paint Doctor
  • PipPipPipPipPipPipPipPipPipPip
  • 9,794 posts
  • Location: Isle of Wight

Posted 03 November 2014 - 08:06 PM

The door step fits under the quater panel but there is no reason why you can't make your join forward of that join.


You don't need to use the whole step, you can cut it down and fit what of it you need.


the only way to fit a genuine door step is to remove the bottom section of the quarter panel because it is also part of the b post.


1 user(s) are reading this topic

0 members, 1 guests, 0 anonymous users